Add a Wait Action

The wait action pauses a robot for a specified period of time. Use the wait action sparingly, as it leads to a longer running time for a robot instance.

Use Case

Consider an application that updates its user interface after you select an option from a drop-down. In such cases, you might add a wait action to the robot to ensure that the user interface gets a chance to update before the robot tries to complete its next steps.

Alternatives

If you want a robot to wait only until a specific element is visible in the user interface, use the "wait until element is visible" action instead. See Add a Wait Until Element Is Visible Action.

Add a Wait Action

Note:

You must use the low-code capabilities to add this action to a robot. Keep reading for step-by-step instructions.
  1. Open the robot to edit.
  2. Add the action to the robot.
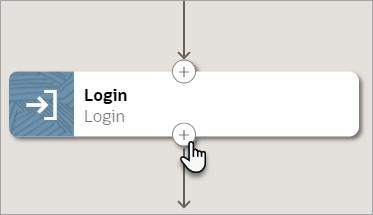
    1. On the canvas, point to an action, and click +.
      A mouse cursor points to an action in the canvas and hovers over the plus sign button, which appears at the bottom of the rectangle that represents the action. A plus sign button also appears at the top of the rectangle, for adding an action after the current action.

      A menu of available actions appears.

    2. Select Wait.

      A Wait action appears on the canvas, and the Wait panel appears.

  3. In the panel, enter a Name and Description for the action.

    The Name appears on the action in the canvas and should help you and others understand the goal of the action.

  4. On the Input tab, in the Timeout field, enter a hard-coded value, such as 3 for a three-second delay.

    Alternatively, you can specify a variable or input that defines the wait period. See Define the Fields of an Action.

  5. On the Input tab, specify whether to capture any screenshots as part of the action.
  6. On the Pre Validate and Post Validate tabs, specify whether to complete any validation before and after the action.
  7. Click OK.
  8. Above the canvas, select Save.