Install the JD Edwards EnterpriseOne E920 Deployment Server
Use this procedure to install the JD Edwards EnterpriseOne E920 Deployment Server.
- From the Deployment Server install directory previously created, run the
InstallManger.exeprogram.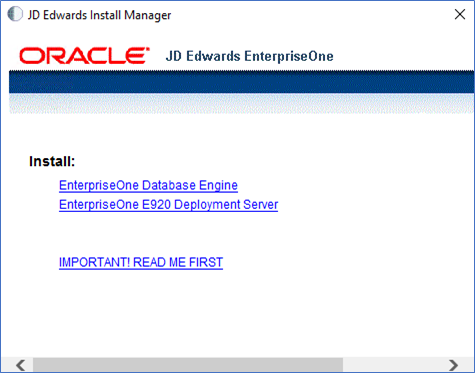
- In the Install section, select the link for EnterpriseOne E920 Deployment Server link to launch the Oracle Universal Installer (OUI) for the JD Edwards EnterpriseOne Deployment Server.
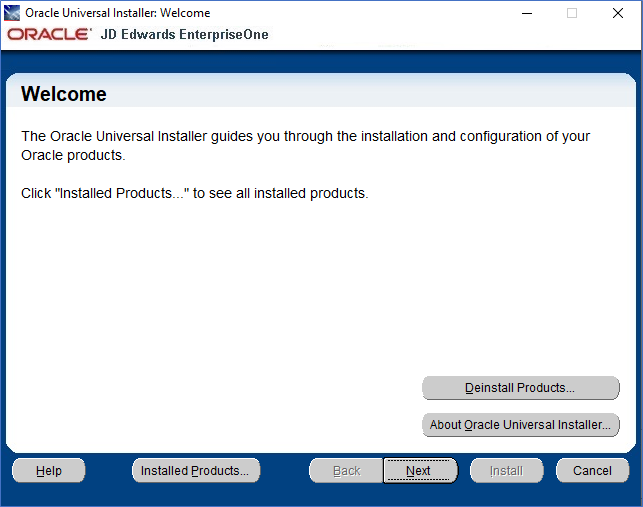
- On the Welcome window, click the Next button.
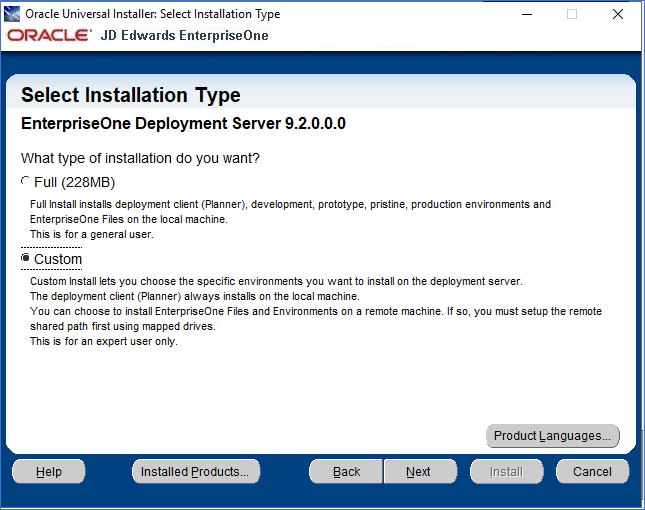
- Select an Installation Type of Full or Custom. A Custom
installation allows you to choose specific environments you want to install on the
deployment server. A Full installation will install the development,
production, prototype, and pristine environments.
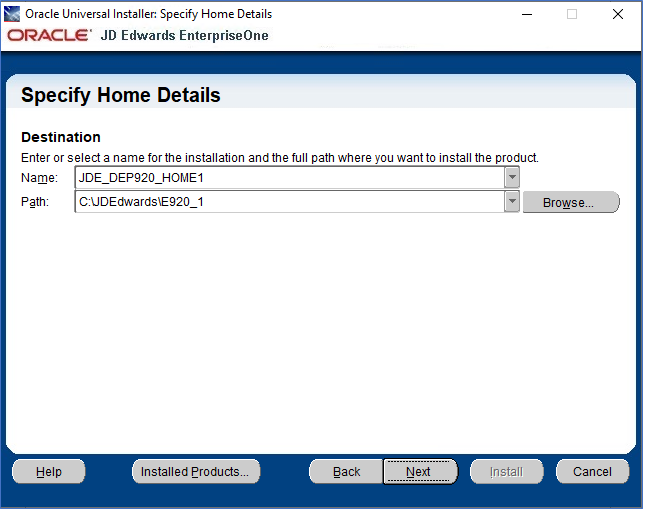
- Provide the home name for the deployment server and the home path for the deployment
server. Click Next to continue.
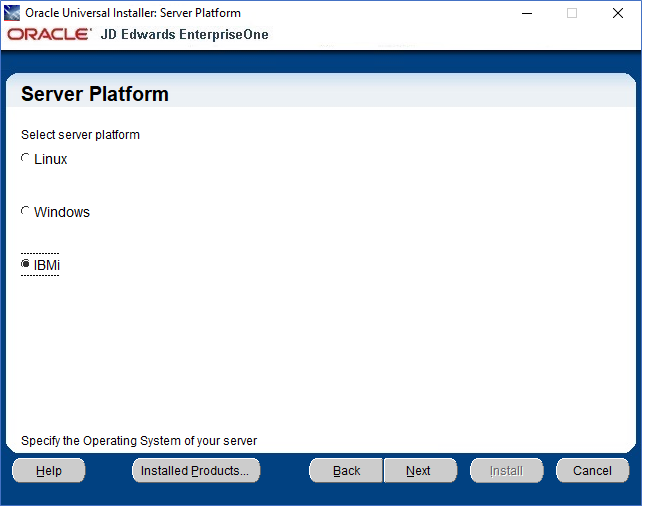
- On Server Platform, select the IBMi option and click the Next button
to continue.
- On Deployment Server for OVM, provide location name and machine names for your
environment. When providing these parameters, follow the naming conventions
described in the table below.
Field
Description
Location Name
Enter the location name for the Deployment Server. For example, enter:
CorporateDatabase Server
Enter the IBM i machine name where you want to install or have installed the JDE database components.
Enter the Database Server name in capital letters without the domain extension.
HTML Server
Machine name where want to or have installed the JDE HTML server components.
Enter the HTML Server name in capital letters without the domain extension if it is installed on the Windows machine. Enter the HTML Server name in small letters if it is installed on the Linux machine.
Enterprise Server
Enter the iSeries or IBM i machine name where you want to install or have installed the JDE ES components.
Enter the Enterprise Server name in capital letters without the domain extension.
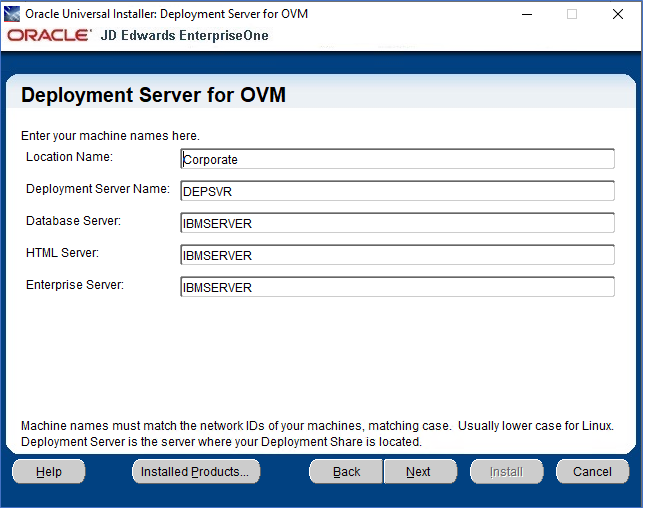
- After providing the machine names for your environment, click the Next button to continue.
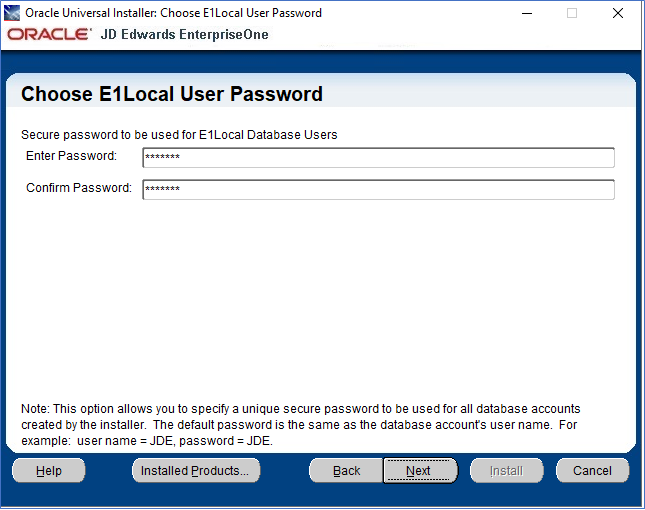
- Provide and confirm a secure password for the E1Local user; a default password is provided.
- Click the Next button to continue.
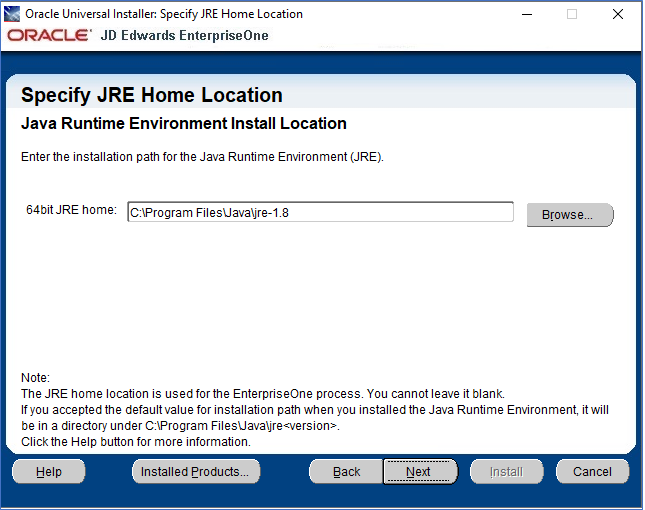
- As a prerequisite, you must have installed a 64-it Java Runtime. Provide the path to
that Java JRE and click the Next button to continue.
-
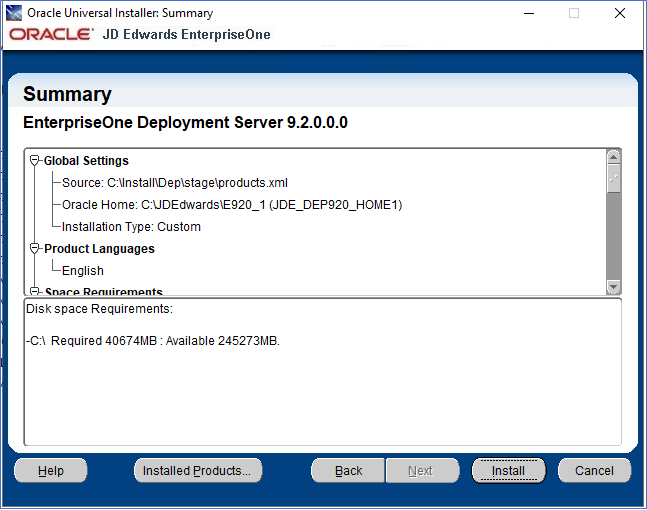
Verify the parameters for correctness on the Summary page and click the Install button to launch the deployment server installation process.
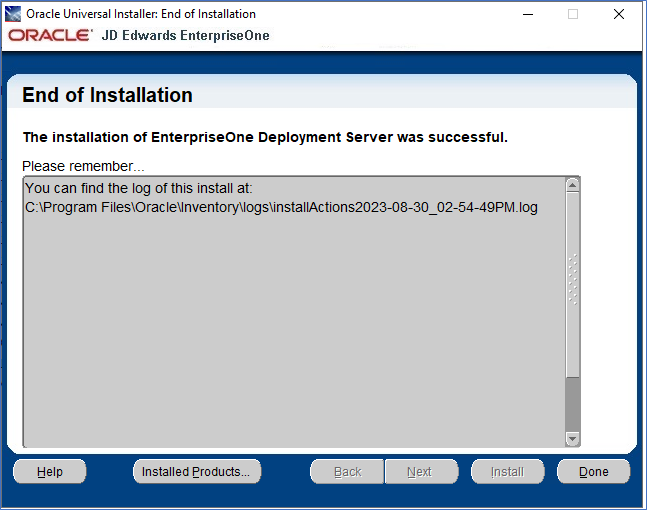
- The installation process copies and configures necessary database components and
deployment server application to your Windows server. Additional processing
information is found in the install logs in this directory:
C:\Program
                        Files\Oracle\Inventory\logs
Note: The log file name is displayed at the bottom of the Install window.
- At the end of the successful installation, you can review the installation log file at the location provided.
- Click the Done button to complete the installation process and exit the
Oracle Universal Installer application.