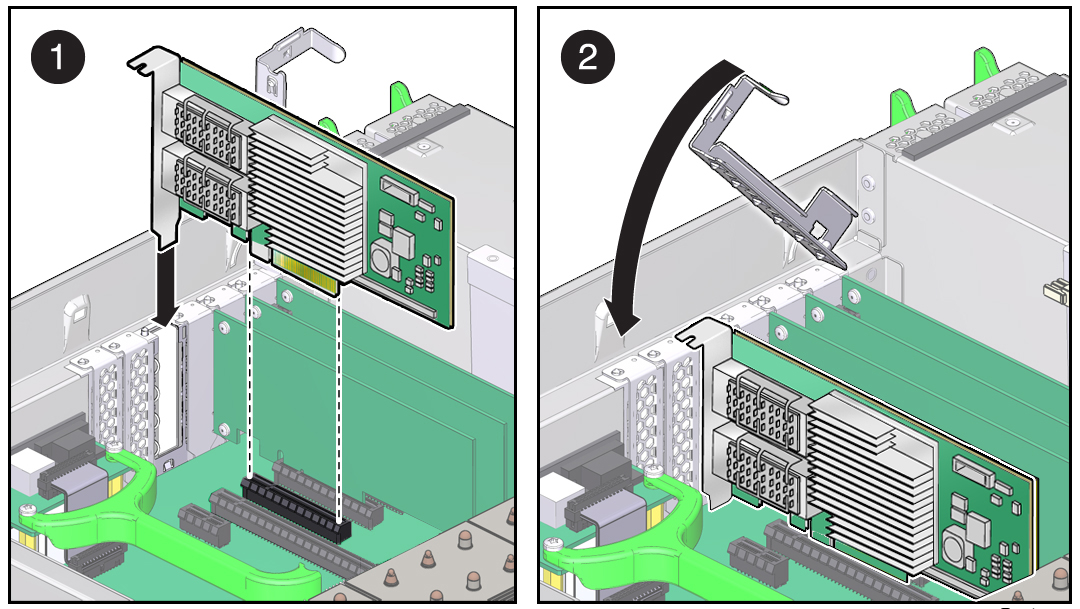
Install the Adapter
These instructions describe the basic tasks required to install the adapter. Refer to your server installation or service manual for specific PCIe installation instructions.
Note - The adapter is currently configured in the factory default 4x10 mode. There are two QSFP connector ports, port 0 and port 1. Only the top port, port 0 can be configured as a 4x10GbE port. By using a splitter cable, customers can get four 10GbE ports.
- Ensure that you have the appropriate additional hardware.
- Halt and power off your server.
- Power off all of the peripherals connected to your server.
- Open the server chassis.
- Attach an antistatic wrist strap to the server chassis.
- Remove the slot cover from the chassis.
- Holding the adapter by the edges,
align the card edge connector with the PCIe slot.

- Slide the adapter face plate into the small slot at the end of the PCIe opening.
- Applying even pressure at both
corners of the adapter, push the adapter until it is firmly seated
in the slot.

Caution - Do not use excessive force when installing the adapter into the PCIe slot. You might damage the adapter's PCIe connector. If the adapter does not seat properly when you apply even pressure, remove the adapter, and carefully reinstall it.
- If using optical cables, install the QSFP+ transceivers.
- Detach the wrist strap and close the server.
- Connect the appropriate cables to the ports.
- Verify the installation.
See Verify the Adapter Installation (Oracle SPARC).
See Verify the Adapter Installation (Oracle Solaris x86).