Web applications usually have more than one page in them. In this part of the tutorial you add another page - a Search page - to your application and use the ADF Task Flow Diagrammer to define the navigation rules between the two pages.
You then use features of the ADF Faces Framework to add extra functionality to the pages. Finally you create a reusable page fragment and add it to the DeptEmpPage page.
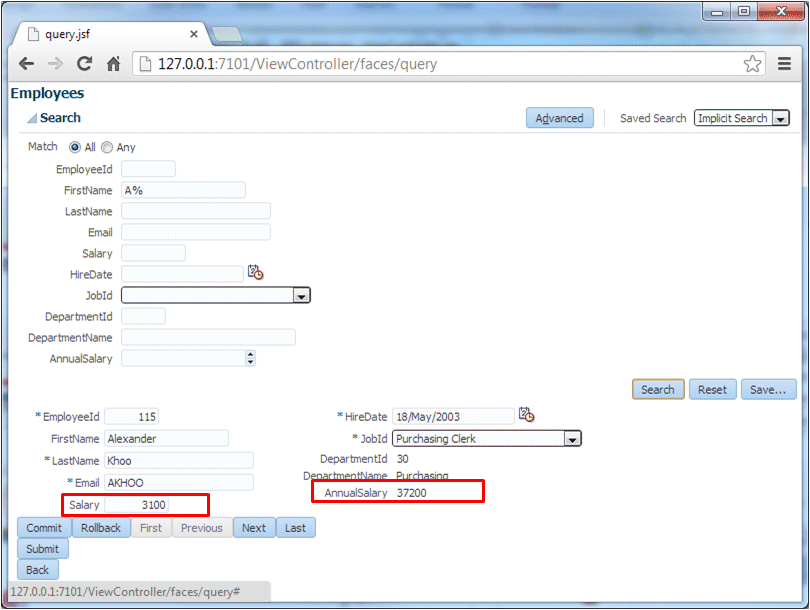
This is the Search page for the application. Notice the list of values for the JobId and the relationship between the Salary and Annual Salary fields. In this section you'll see how to coordinate the salary values and to add a auto suggest behavior to the jobId.
-
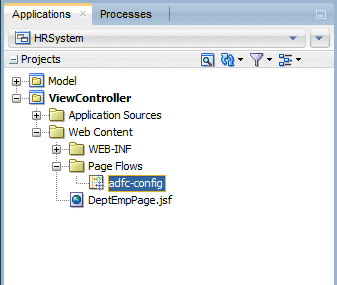
In the Applications window locate the adfc-config file under the Page Flows node in the ViewController project. Double-click it to open it in the editor. This is where you are going to define the application's navigation.
-
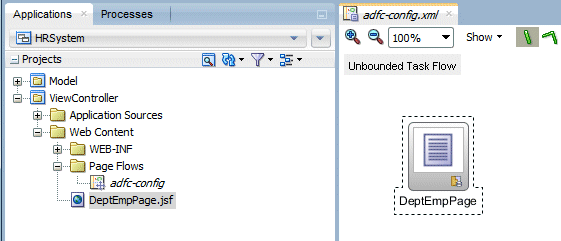
Drag the DeptEmpPage.jsf file from the Applications window into the empty adfc-config diagram.
-
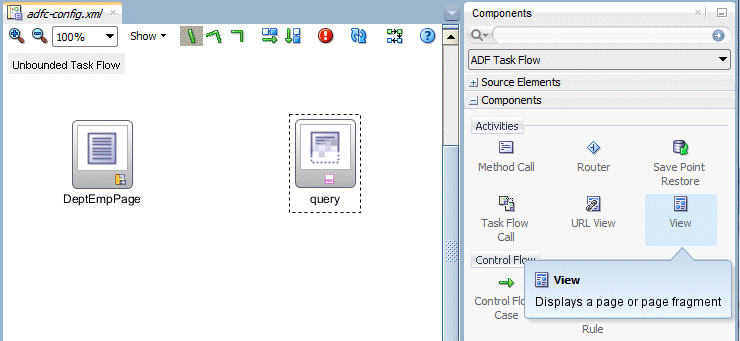
From the Components window drag and drop a View activity into the adfc-config diagram, and rename it query. This represents the new JSF page that you are about to create.
-
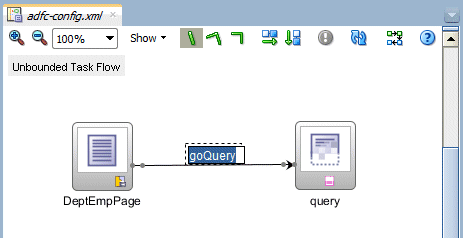
From the Components window click Control Flow Case and then click DeptEmpPage,and next click the query page.
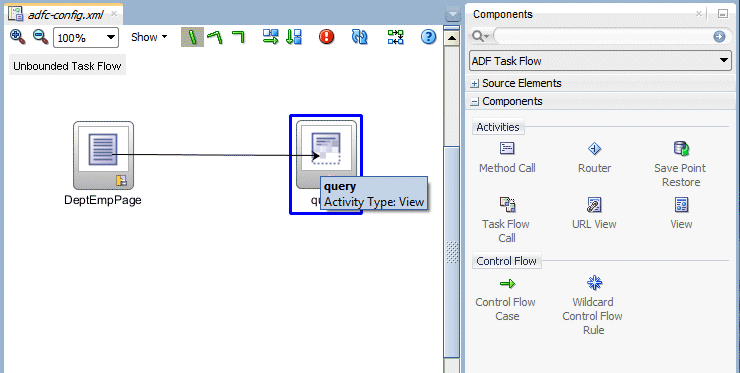
Name this line goQuery.
-
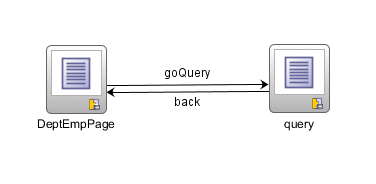
From the Components window select another Control Flow Case and then create an opposite flow from the query page to the DeptEmpPage. Name this flow back.
-
Double-click the query activity in the diagram to create the new page. In the Create JSF Page dialog accept the default Facelets radio button, and click the Quick Start Layout radio button.
Select the default One Column Category, Type and Layout, then click OK.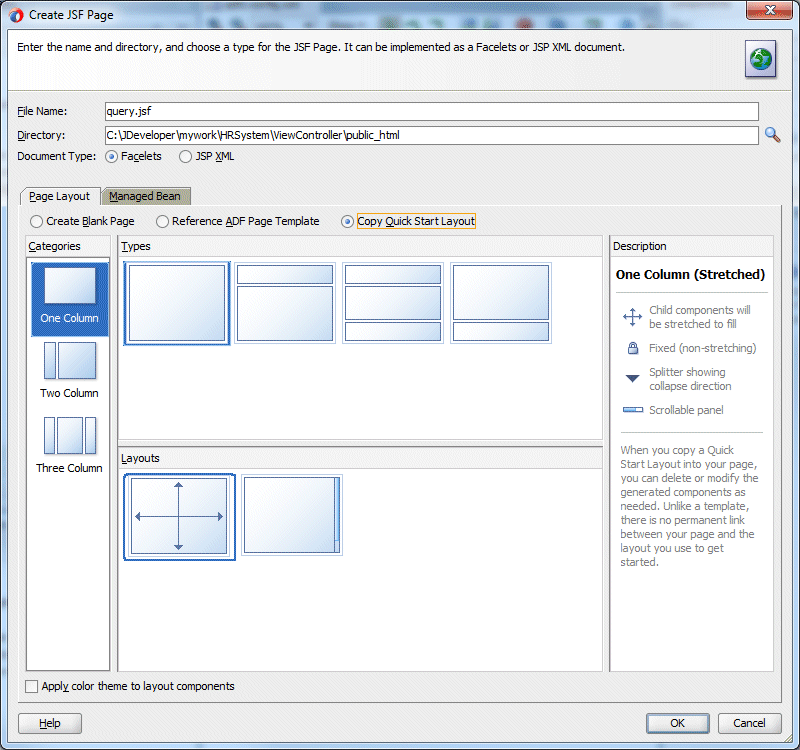
-
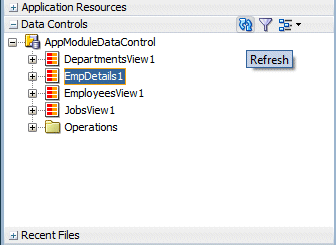
To add the employees search functionality to the page, open the Data Controls accordion, and locate EmpDetails1. (If you do not see it click the Refresh button).
-
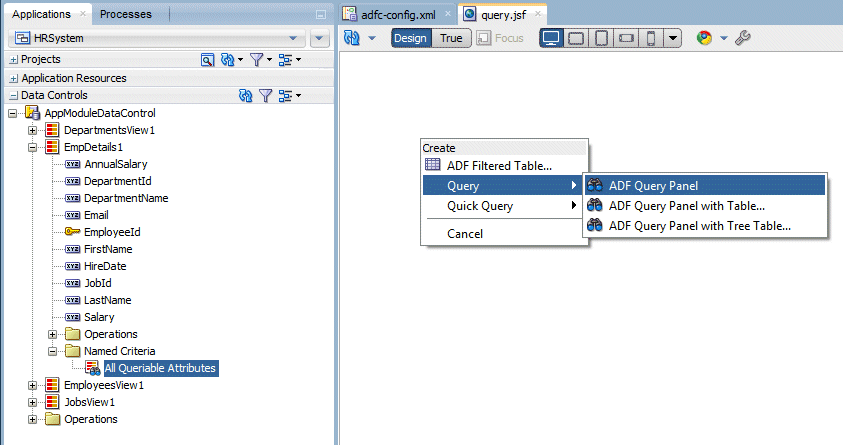
Expand the EmpDetails1 data control and expand the Named Criteria node below it. Select All Queriable Attributes and drag it into the new query.jsf page. Create it as a Query > ADF Query Panel.
-
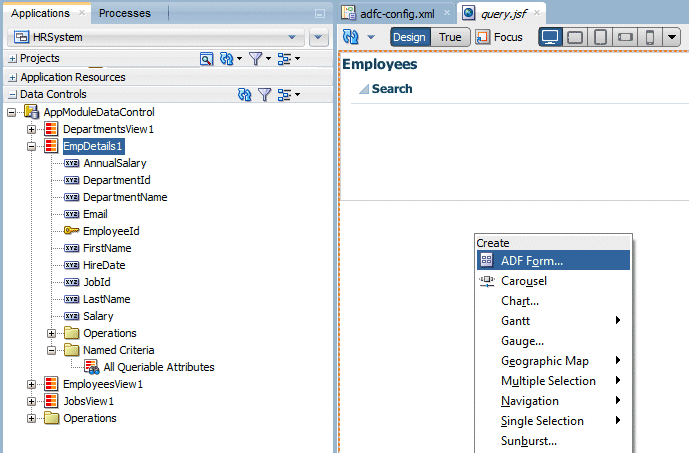
In the Data Controls accordion select the EmpDetails1 data control and drag it into the center area of the page below the query component. Create it as an ADF Form...
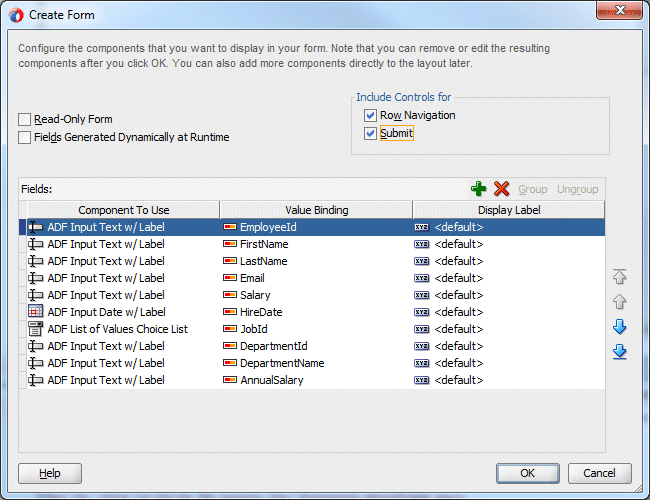
In the Edit Forms Details, check both the Row Navigation and the Submit Button checkboxes. Click OK.
-
With the panelFormLayout still selected, use the Properties window to set the Rows property to 5.
Also, set the Short Desc property to salary graph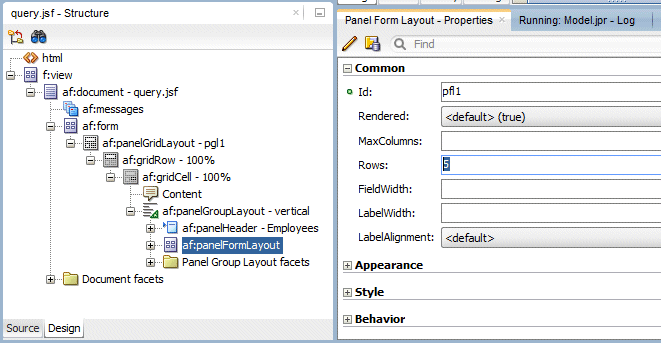
-
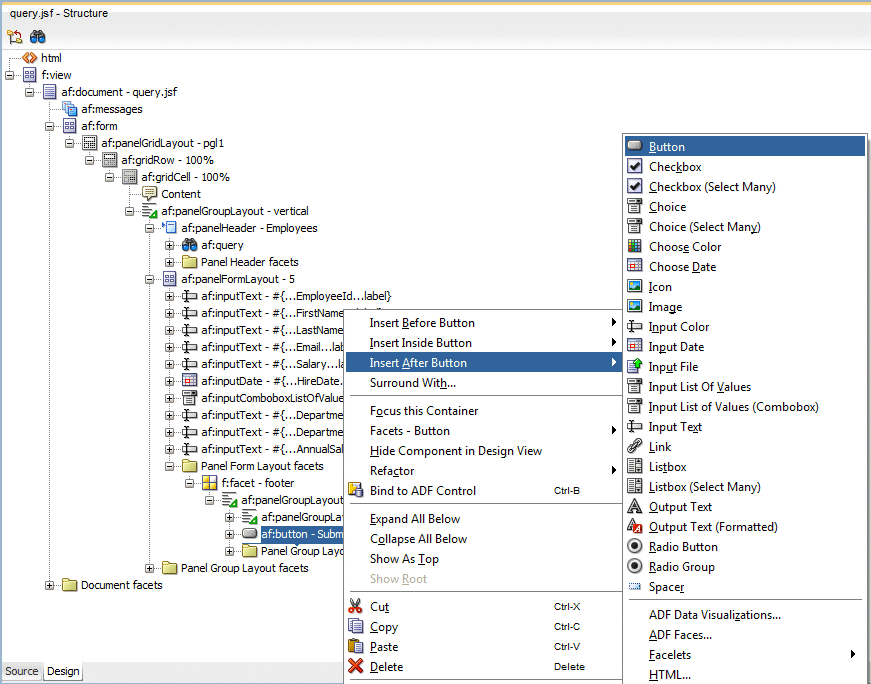
In the Structure window locate the Submit button, right-click it and select Insert After Button > Button.
-
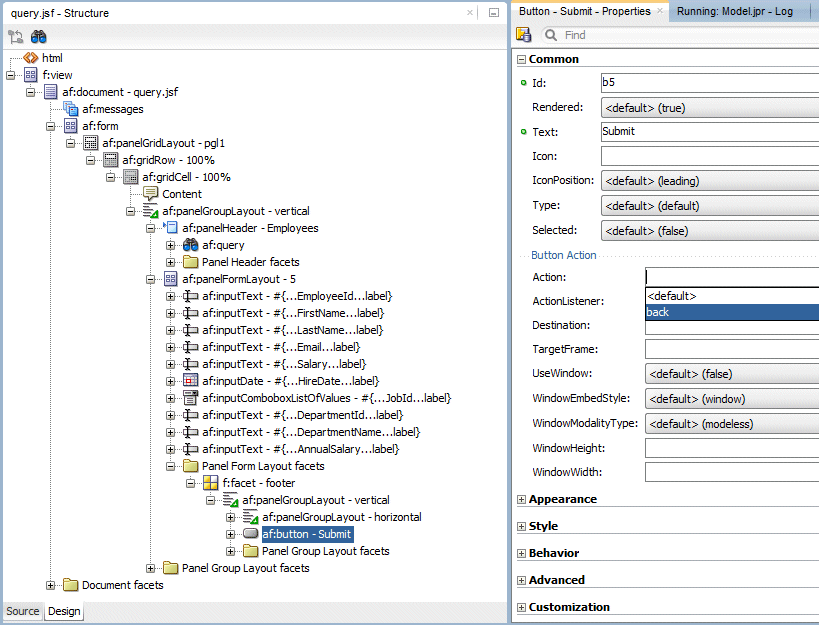
In the Properties window change the Text of the new button to Back and for the Action property select back from the drop down list. This causes the button to perform the navigation you defined in the page flow diagram.
-
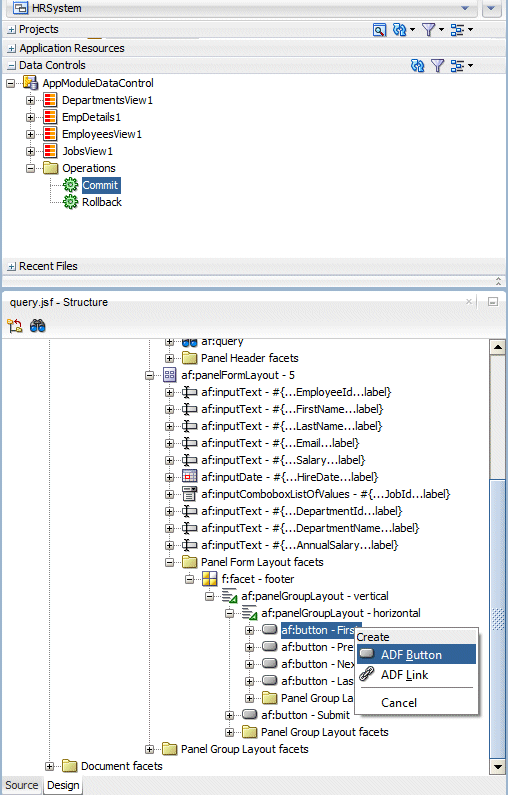
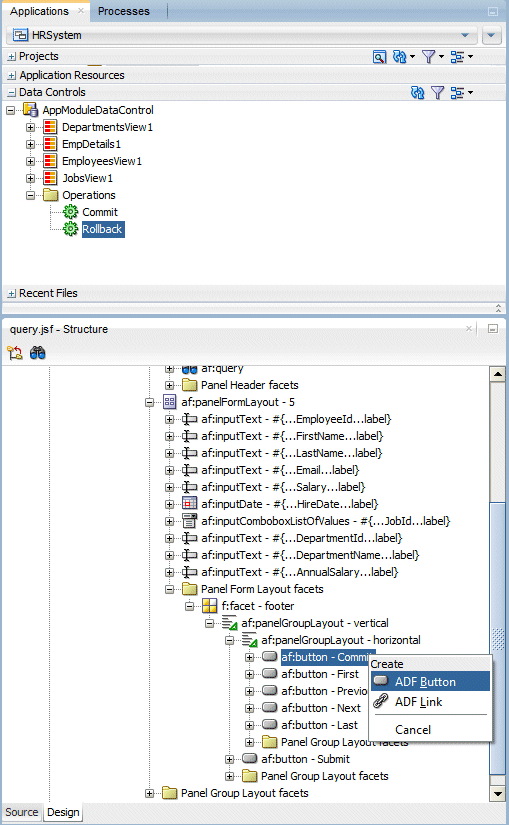
Next you add transaction operations to the page to allow you to commit and rollback changes. In the Data Controls pane expand the application module level Operations node to locate the commit and rollback operations. Drag the Commit operation into the Structure window before the First Button. When prompted for a drop target select ADF Button.
-
Repeat the same steps for the Rollback operation.
-
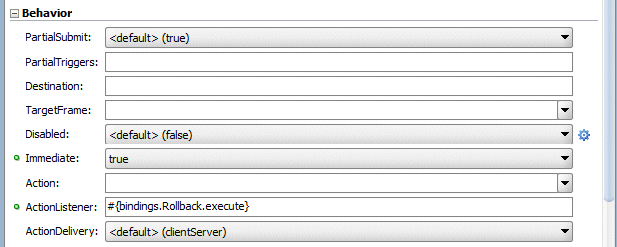
In the Properties window, for the Rollback and for the Commit buttons, reset the Disabled property to default to make both buttons always selectable.
Move the mouse over then end of the property field and you'll see a light blue gear appear. Click it to perform this operation.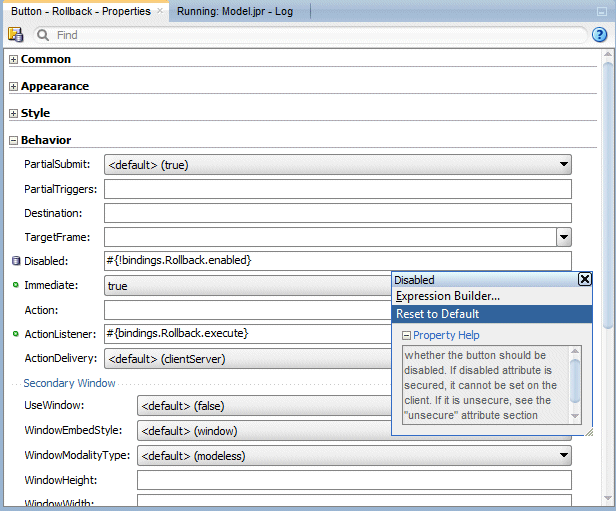
-
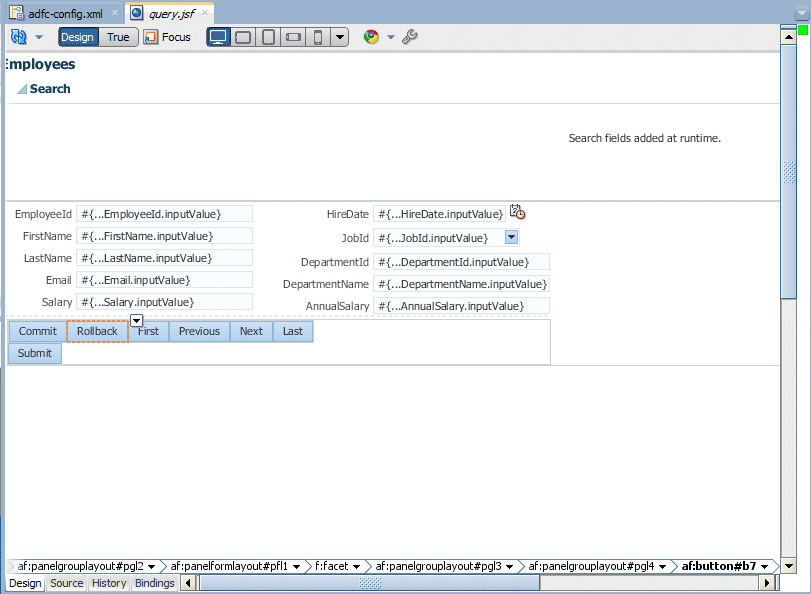
Double-click the Query.jsf tab to maximize the page in the Design Editor. Your page should look as follows:
-
Double-click the query.jsf tab again to return it to normal size.
-
Click the DeptEmpPage.jsf tab to switch back to the page. A quick way to navigate to this or any other file is by using the global find box at the top right of JDeveloper and typing the file name there.

Then just click the file name to open it in the editor.
-
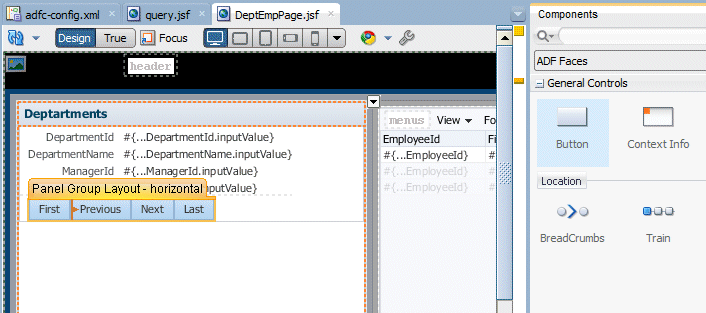
In the page design, expand the Departments accordion. From the Components window, select a Button component and drag it into the Departments accordion between the First and Previous buttons. Alternatively you can right-click the First button and select insert after > button to add the new button.
-
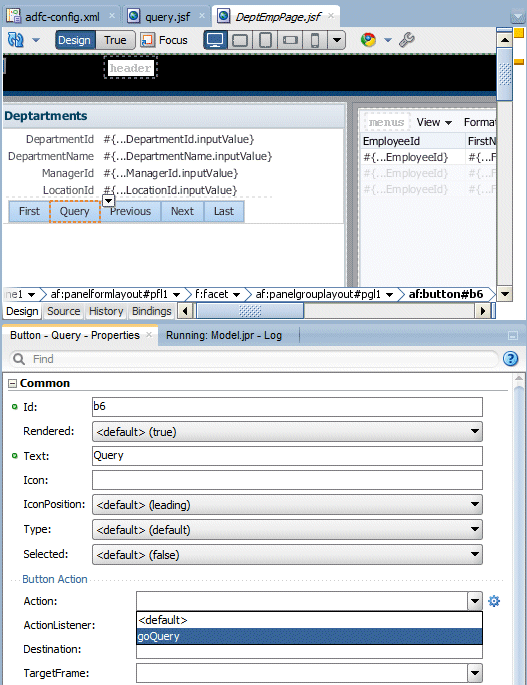
Using the Properties window change the Text of the button to Query and for the Action property type goQuery or select it from the drop down list if available. This causes the button to perform the navigation you defined in the page flow diagram.
-
Click the Save All
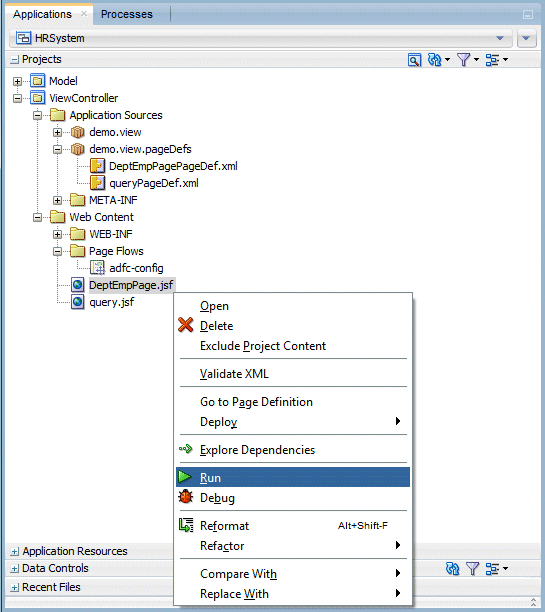
 icon on the JDeveloper menu bar to save your work, and then right-click the DeptEmpPage.jsf page and select Run.
-
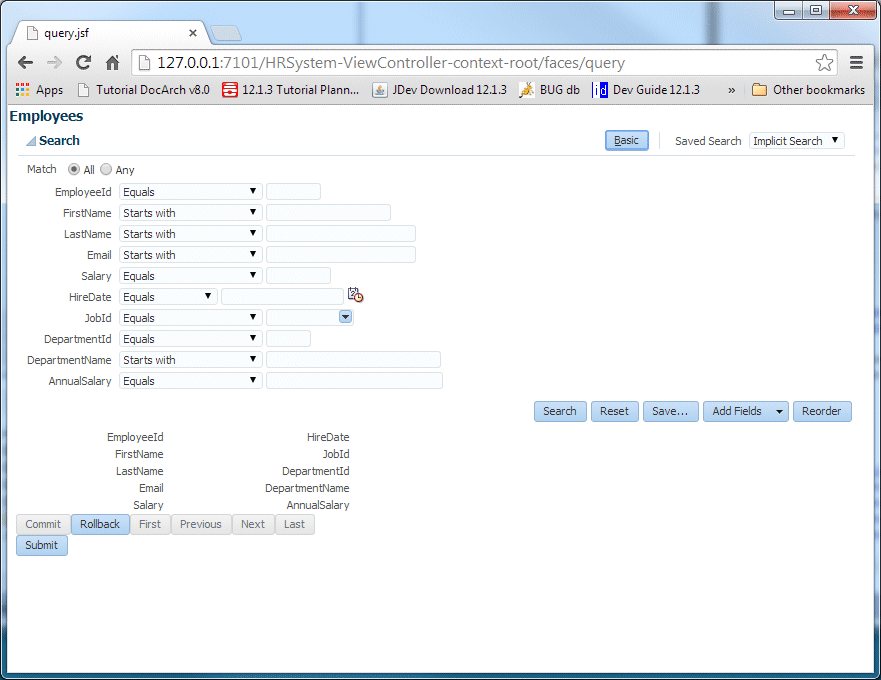
When the page displays in your browser click the Query button to navigate to the new page. In the Search page click Advanced to display detailed search criteria.
-
In the FirstName field accept the default Starts with, and type the letter G.
Press Search.The form below displays the record for Guy Himuro.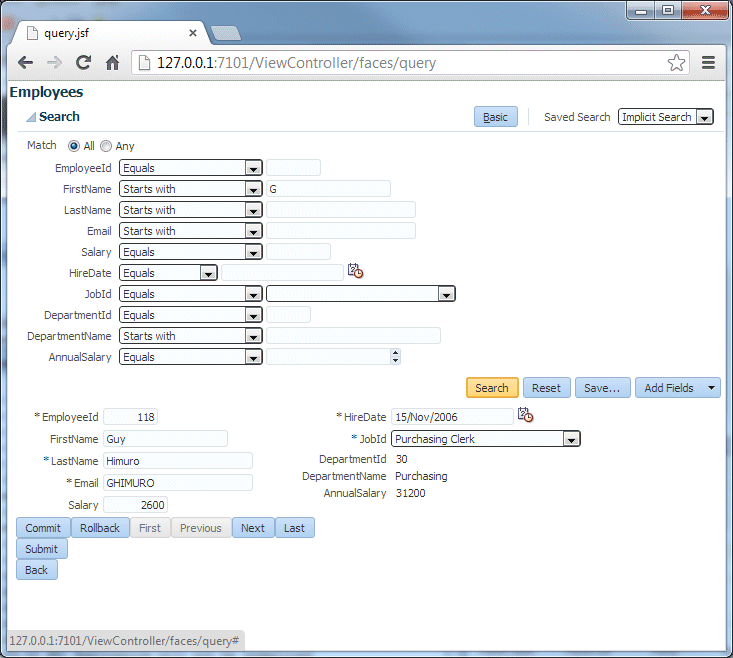
-
Experiment with the form, saving your search criteria, creating more complex queries and updating data for employees. Note how this form displays a view of the data that matches the definition in the view object you created - including information for Department name as well as a list of values for the Job id and the employee's annual salary.
You can also make changes to the data and commit and rollback your transactions as needed.
When you are finished close the browser window.
In the next steps you become acquainted with some of the features of the ADF Faces Framework. You enhance your pages with additional Ajax functionality leveraging the declarative development features offered by ADF Faces components.
-
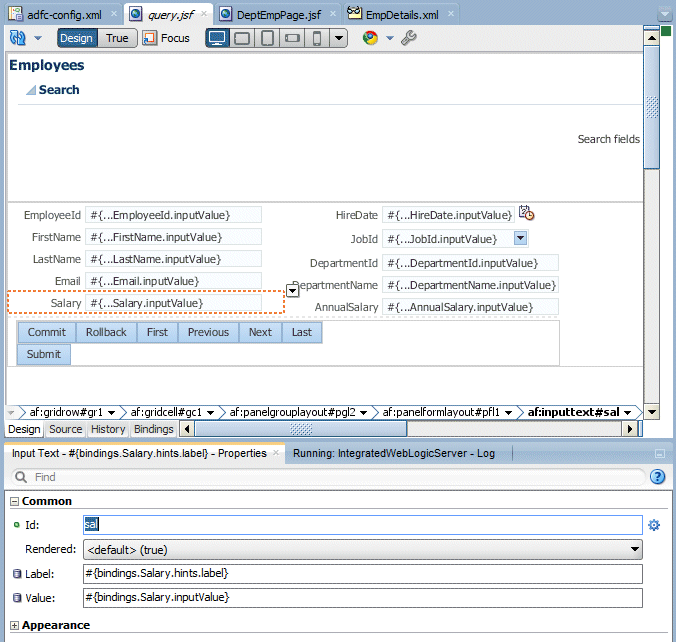
Open the query.jsf file in the Design Editor, if it is not already open. Select the Salary field. In the Properties window set the value of the Id property to sal.
-
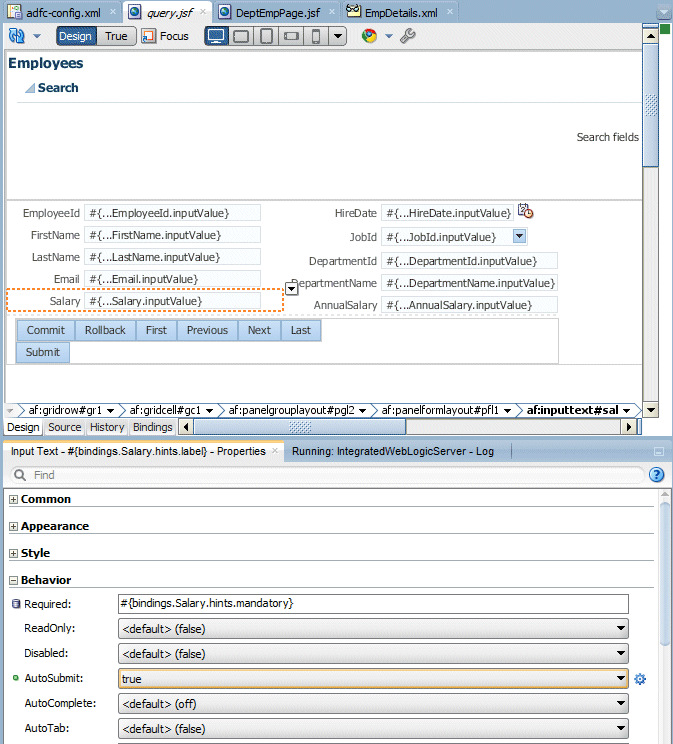
Still in the Properties window expand the Behavior node and set the AutoSubmit property to True.
-
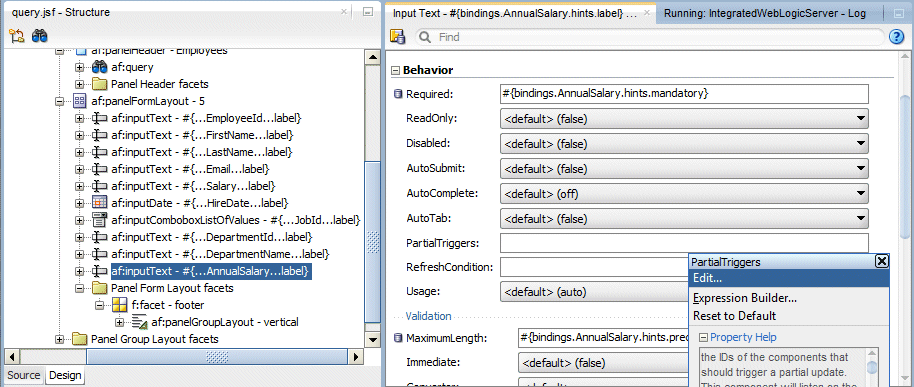
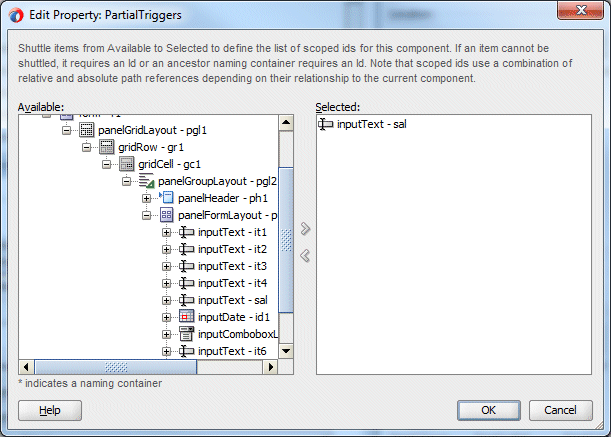
Either in the Design Editor or the Structure window locate the AnnualSalary field. Locate the PartialTriggers property under the Behavior section and click the gear icon to its right to select Edit.
-
In the Edit Property dialog locate the Salary field and shuttle it to the right using the blue arrow. Click OK.
-
Click the Save All
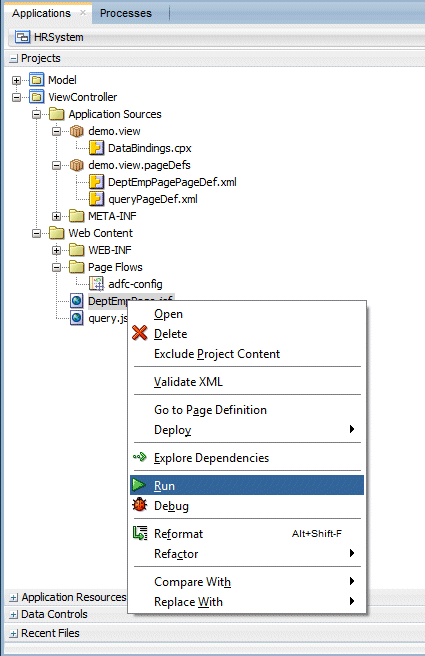
 icon on the JDeveloper menu bar to save your work, and Run DeptEmpPage.jsf.
-
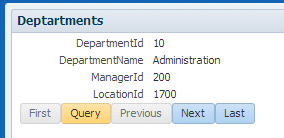
When the page displays, click the Query button in the Departments panel.
-
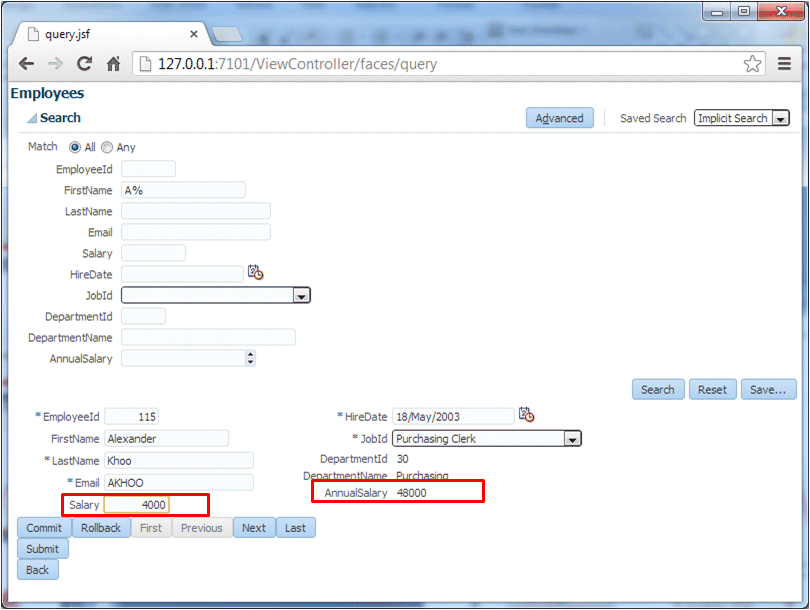
In the Search page search for employees whose first name begins with A%.
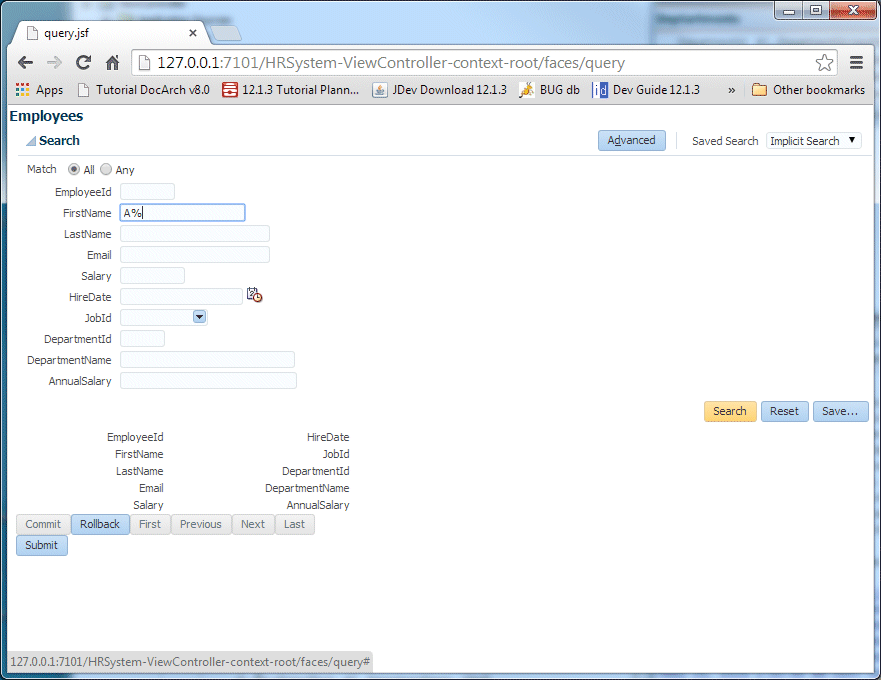
Note the salary and annual salary values.

-
Update the Salary field and then tab out of it. Notice the immediate change to the AnnualSalary field once you leave the Salary field. However this is the only field that is refreshed (not the whole page).
-
Close the browser.
-
In the query page, select the JobId field.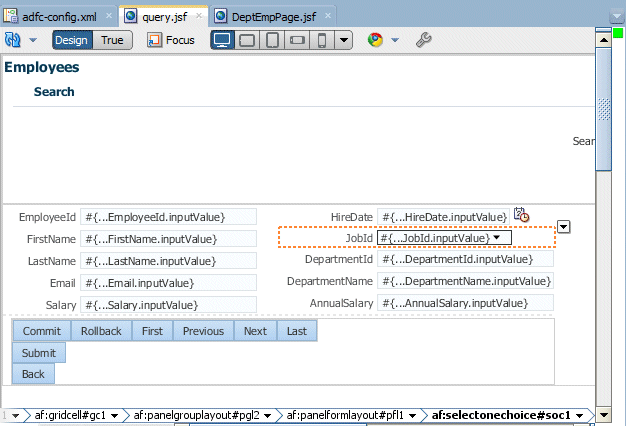
-
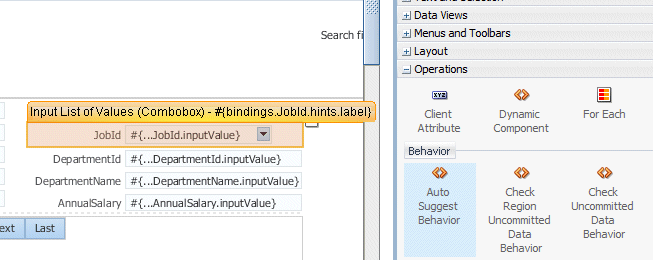
In the Components window expand the Operations node, and locate Auto Suggest Behavior in the Behavior section. Drag and drop the Auto Suggest Behavior operation onto the JobId field.
-
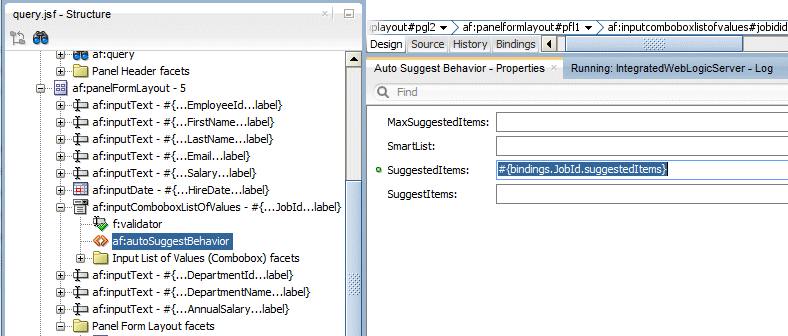
Select the af:autoSuggestBehavior component in the Structure window. In the Properties window, set the SuggestedItems property to #{bindings.JobId.suggestedItems}. You can enter the value or use the Method Expression Builder by clicking the gear icon next to the property.
-
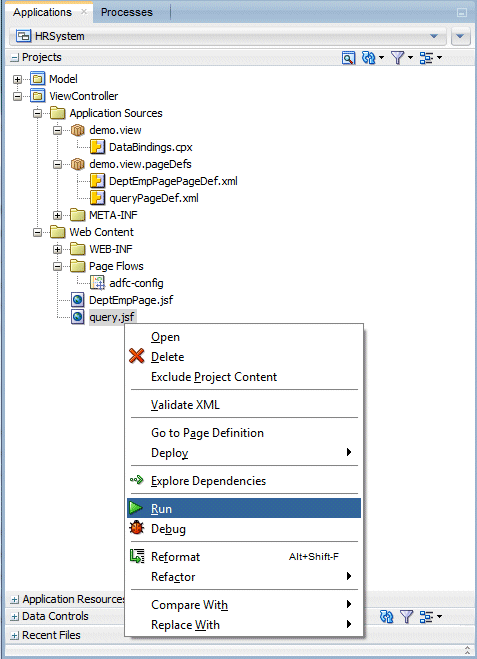
Save your work and then Run the query page.
-
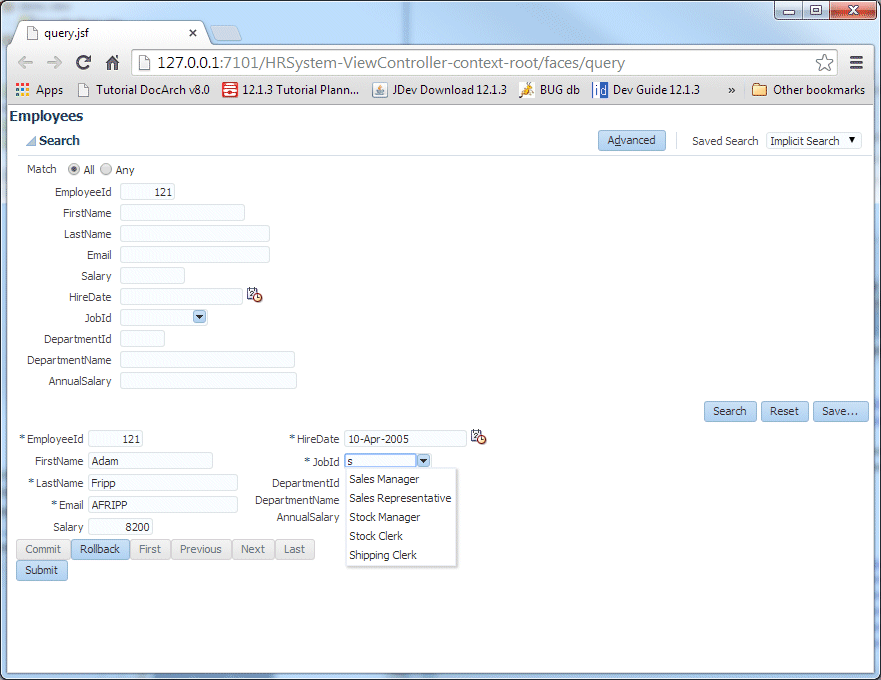
Type 121 in the EmployeeId field, and click the Search button. In the record for Adam Fripp update the JobId field by typing 's' in it. A number of jobs beginning with 's' are suggested.
-
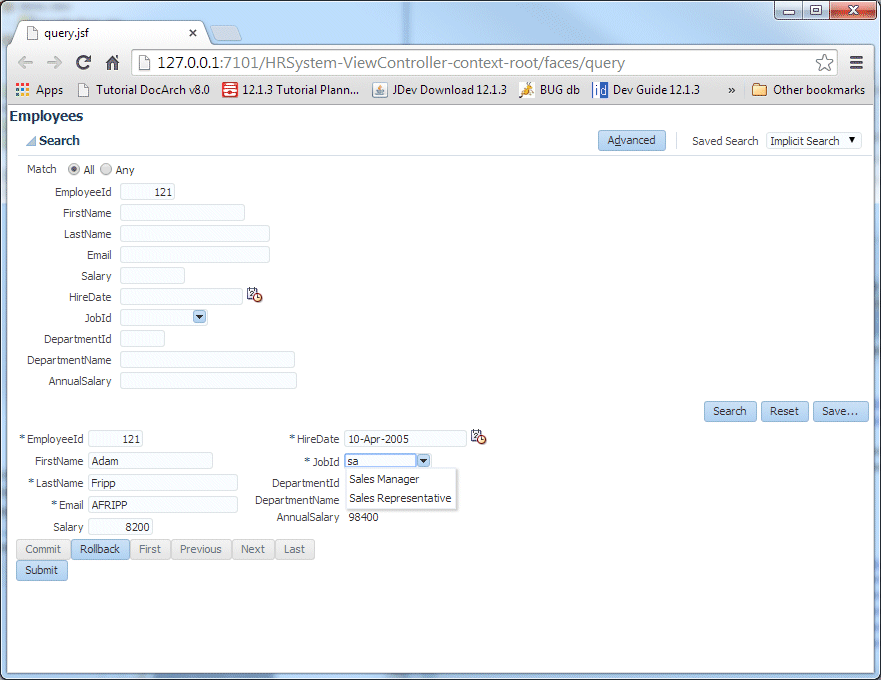
Add 'a' after the 's' and see the list of suggestions modified accordingly.
-
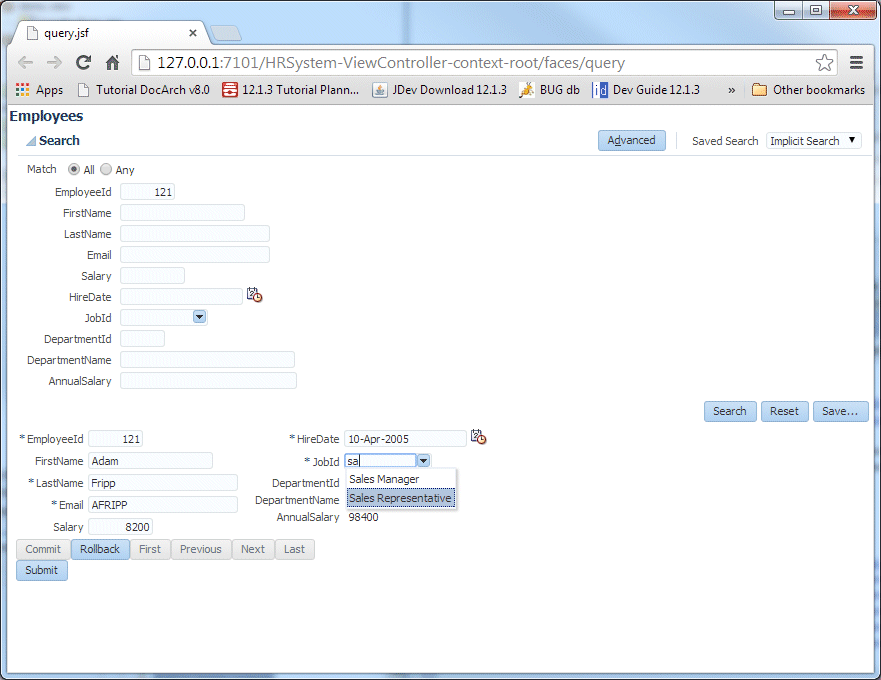
Select Sales Representative from the remaining options, to populate the field.
-
Close the browser without saving the change.
In this step you add a drop down menu to a page and use a couple of ADF Faces operation components to add Javascript-based operations to the page. On component will export table data into an Excel spreadsheet and the other will create a printable page.
-
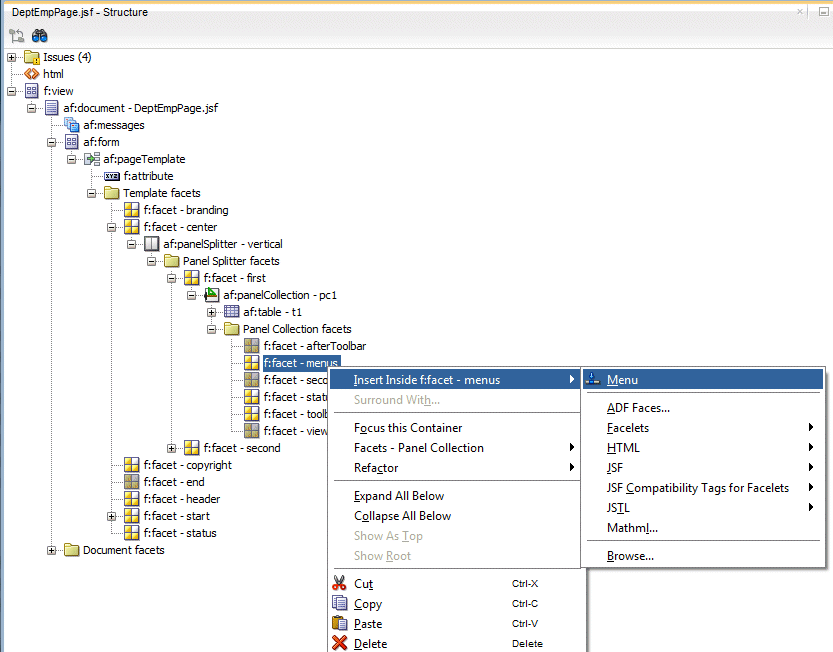
In the DeptEmpPage.jsf file click inside the menus facet in the panel collection surrounding the Employees table. Right-click and from the context menu select Insert Inside Facet menus > Menu.
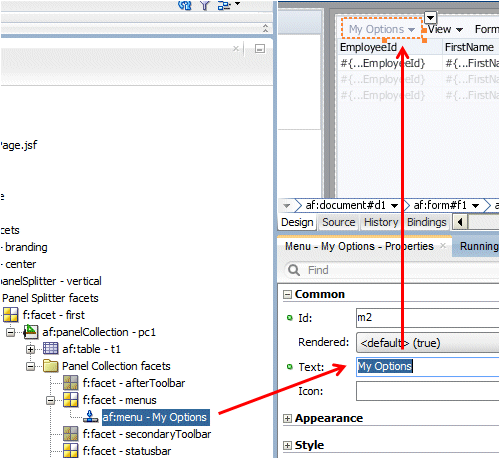
In the Properties window set the Text property to My Options.
-
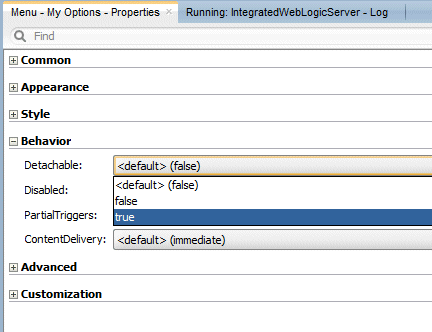
In the Properties window expand the Behavior node and set the Detachable property to true.
-
In the Structure window right-click the menu component and select Insert inside af:menu > My Options > Menu Item.

-
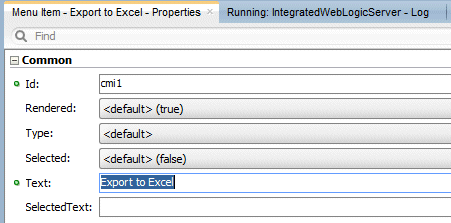
In the Properties window set the Text property of the new menu item to Export to Excel.
-
With the new Export to Excel menu item still selected in the Structure window, expand the Listeners section of the Operations node of the the ADF Faces components in the Components window.
Locate the Export Collection Action Listener component and drag it onto the Export to Excel menu option in the Structure window.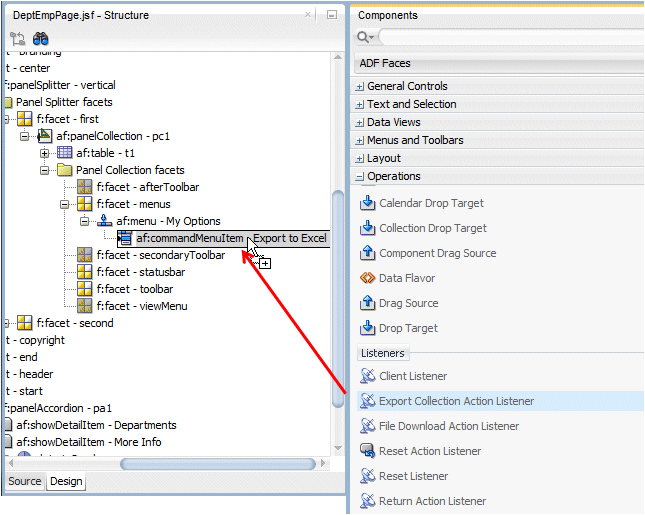
-
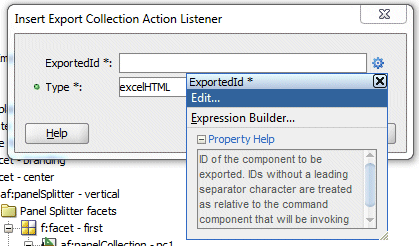
In the Insert Export Collection Action Listener dialog click the gear icon next to ExportedId field and select Edit.
-
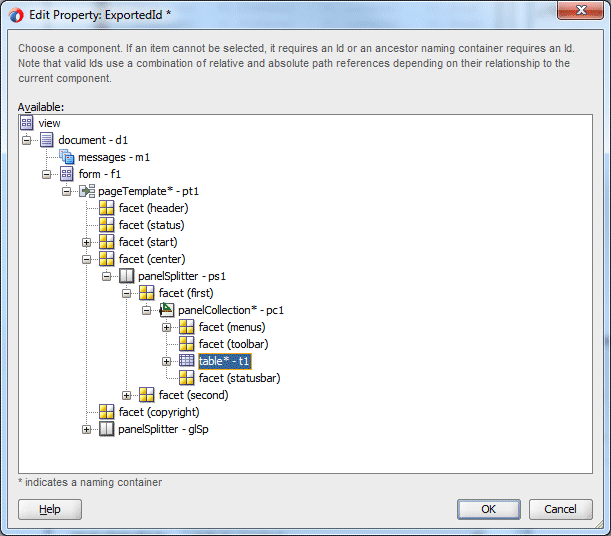
In the Edit Property dialog navigate through the page structure to locate the table - t1 component and select it. Click OK.
-
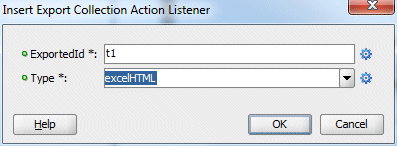
From the Type drop down list select excelHTML and click OK.
-
Add another menu option to the menu. In the Structure window right-click the Export to Excel menu component and from the context menu select Insert After Menu Item > Menu Item.

-
Set the Text property of this new menu option to Printable Page.

-
In the Behavior section under the Operations node of the Components window select the Show Printable Page Behavior operation to add it to the new menu item. Drag and drop it onto the new menu option you created.
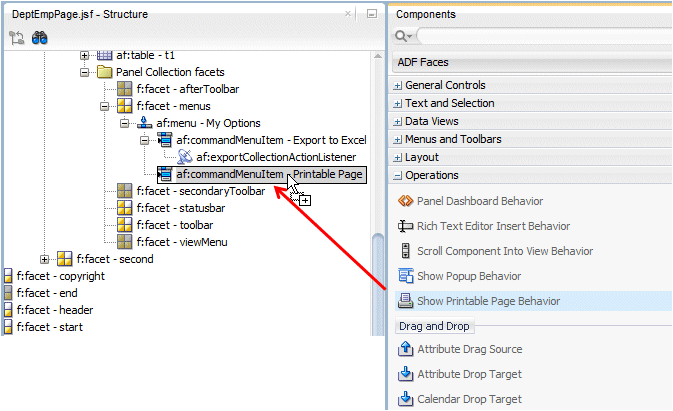
-
Click the Save All
 icon on the JDeveloper menu bar to save your work, and then run the page.
 -
When the page displays click the new "My Options" menu and detach it.
Click the 'x' to close the menu.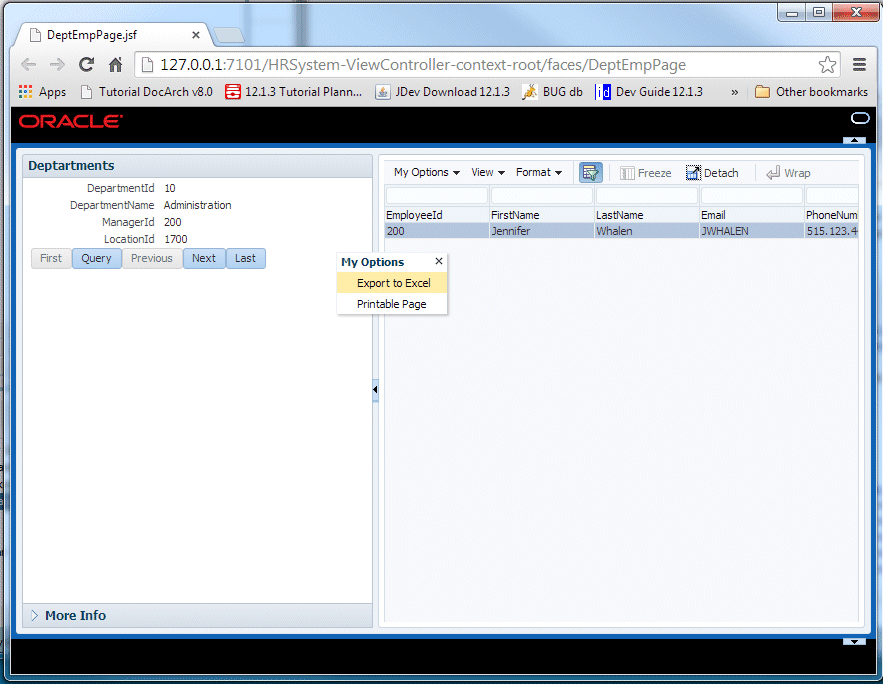
-
Then invoke each one of the menu options you created, for example Export to Excel.

You may need to accept the download of the file in the browser window to be able to access the Excel file, and it should be found in your default 'download'. directory..

-
Try the Printable Page menu option.

The page is ready for printing.

Close the browser window.
-
Click the query.jsf tab to return to the Query page, opening the Structure window. In the Data Controls accordion expand the EmpDetails1 node and then the Operations node below it. Select the CreateInsert operation.
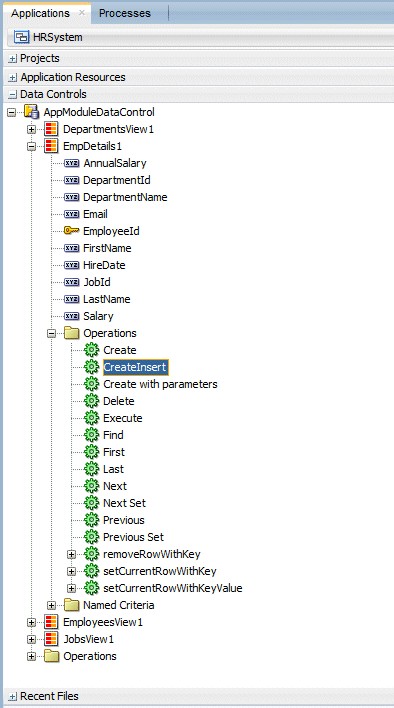
-
Drag the CreateInsert operation in the Structure window onto the af:panelGroupLayout - horizontal in the footer facet of the employees form. Create it as an ADF Button. Hint: expand af:panelFormlayout -5 > Panel Form Layout Facets > af:panelGroupLayout - vertical > af:panelGroupLayout - horizontal.
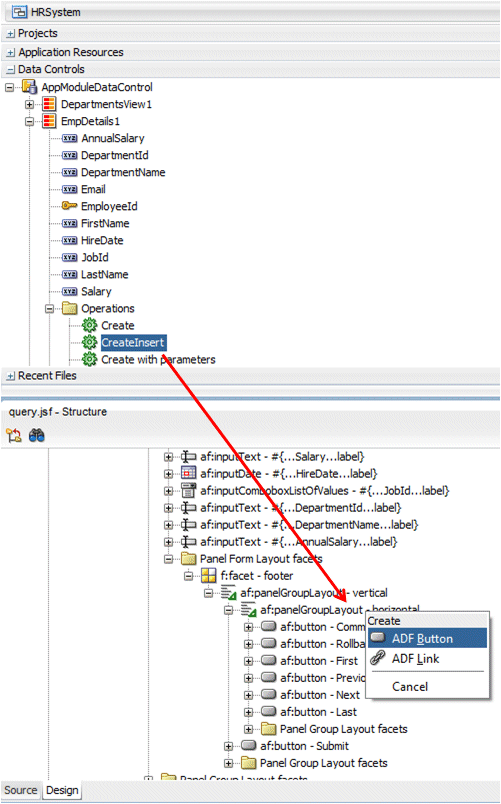
-
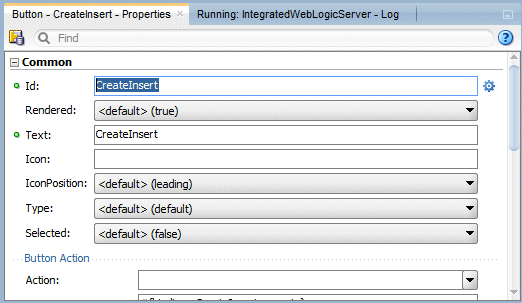
In the Properties window set the Id property for the button to CreateInsert.
-
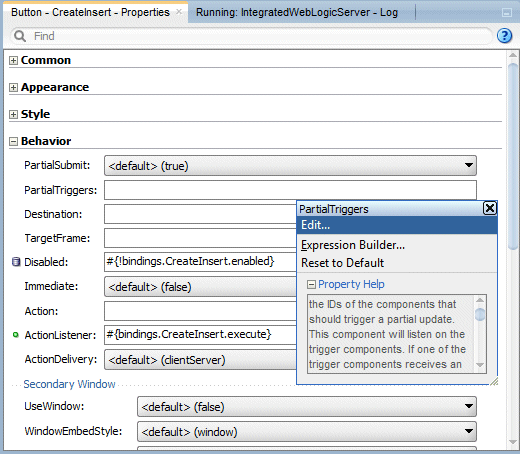
Still in the Properties window expand the Behavior node and in the PartialTriggers property select Edit from the drop down list.
-
In the Edit window scroll through the page's components until you find the CreateInsert button. Shuttle it into the Selected pane.
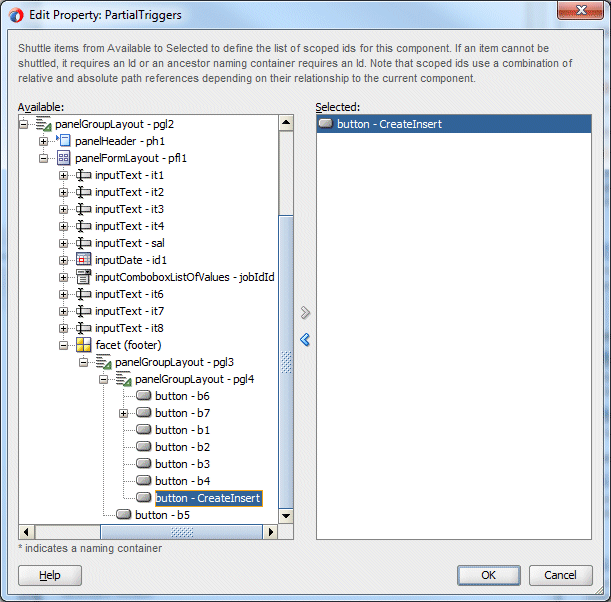
Click OK. This action defines the CreateInsert component as the trigger that will cause the table to refresh.
-
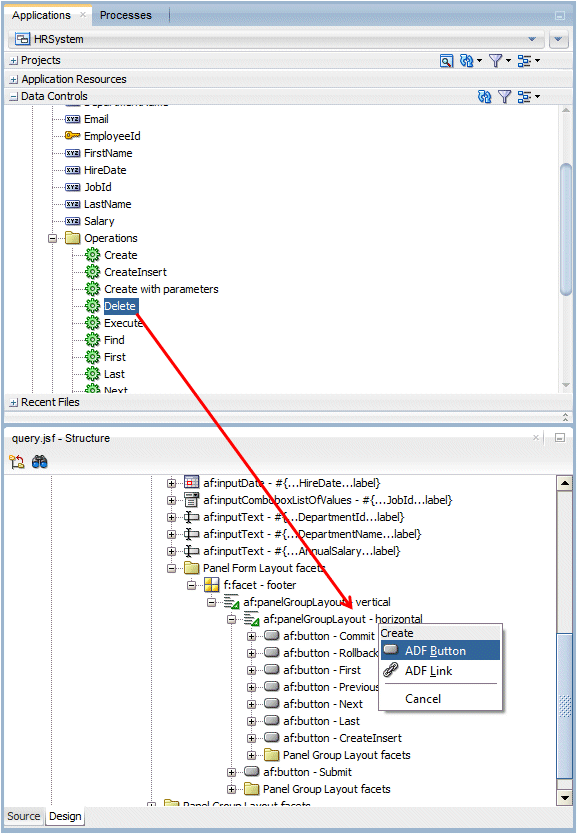
In the same way add a Delete operation by dropping the Delete operation from EmpDetails1 onto the panelGroupLayout in the page footer. As before, create it as an ADF button and set the partial trigger.
-
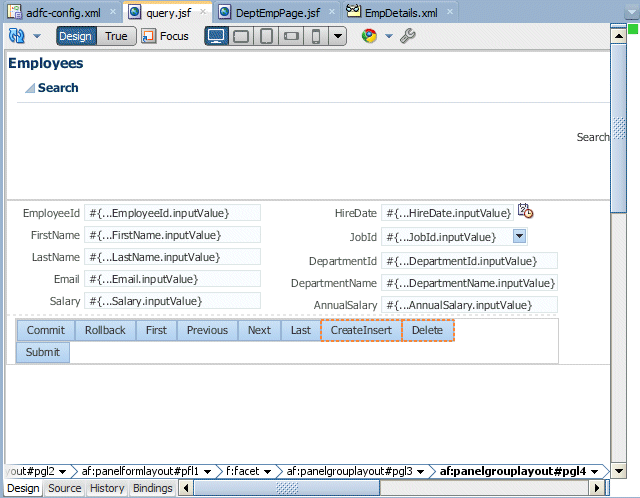
The two new buttons display at the bottom of the query page.
-
Save your work and then Run the Query page.
-
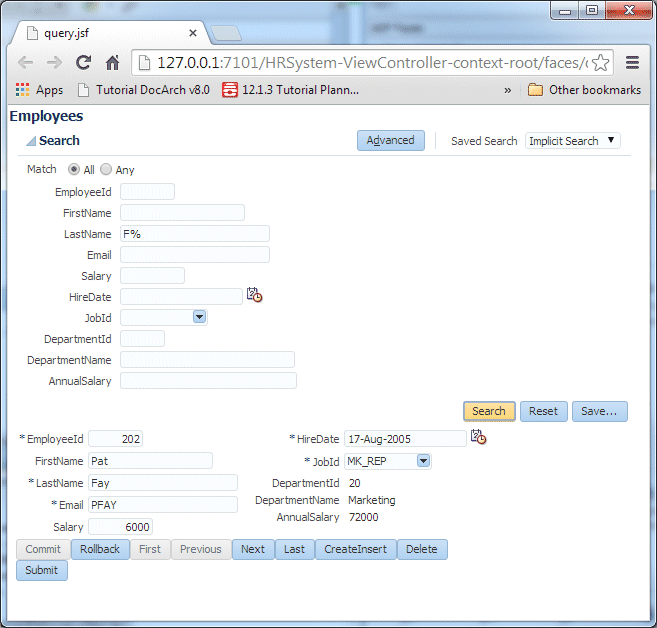
When the page displays type F% in the LastName field and click the Search button. The first "F" employee record displays.
-
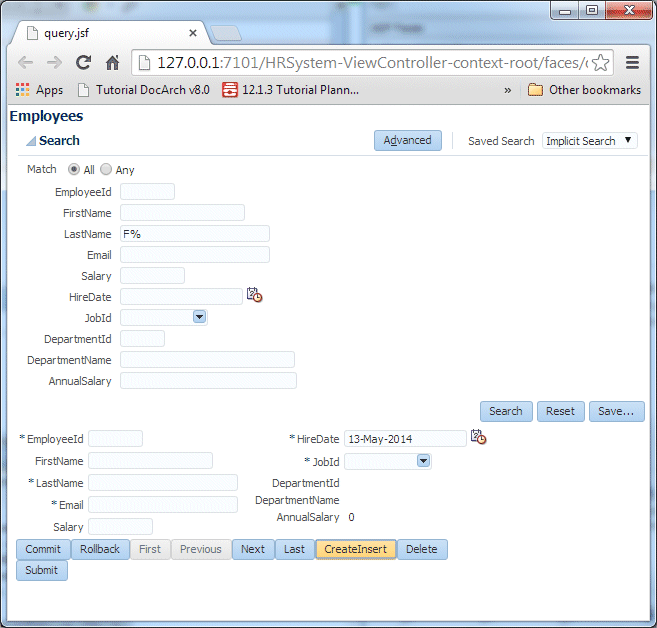
Click the CreateInsert button. The page refreshes and the fields are cleared (except for the HireDate field, which you set to default to the current date) so that a new record can be inserted.
-
Close the browser without committing.
-
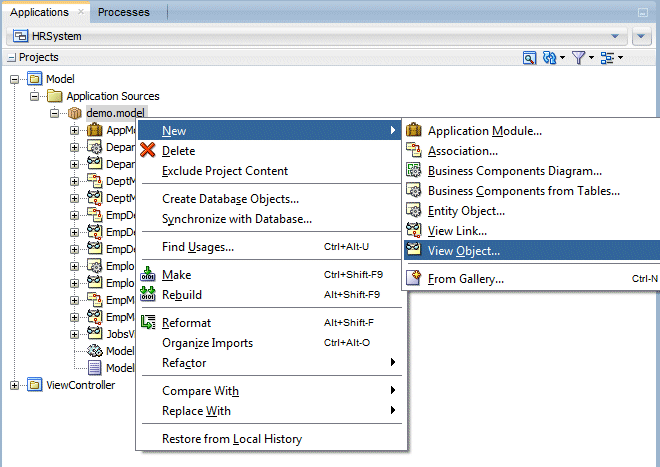
In the Applications window locate the demo.model package and right-click it to select New View Object....
-
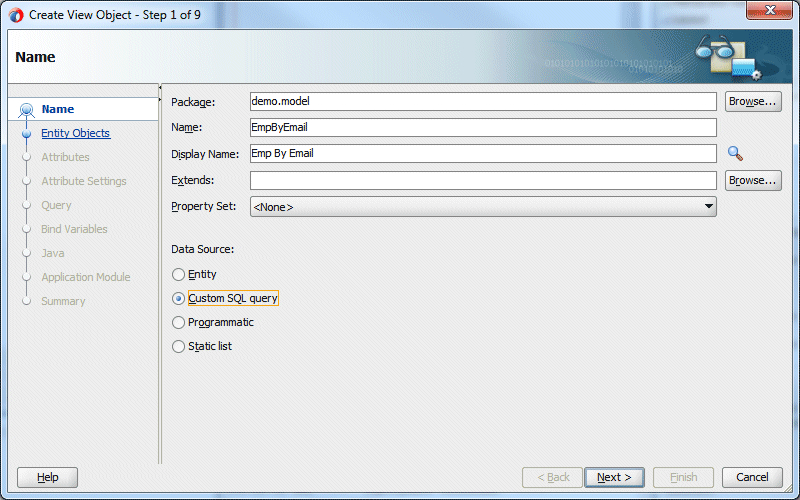
In the Create View Object wizard set the Name property to EmpByEmail and select the Custom SQL Query radio button as the data source. Click Next.
-
In Step 2 of the Create View Object wizard type the following query:
select first_name, last_name from employees where email = :p_emailThe ':' before p_email means that it is a variable that will be passed to the query.
Click the Test and Explain button to verify your query.
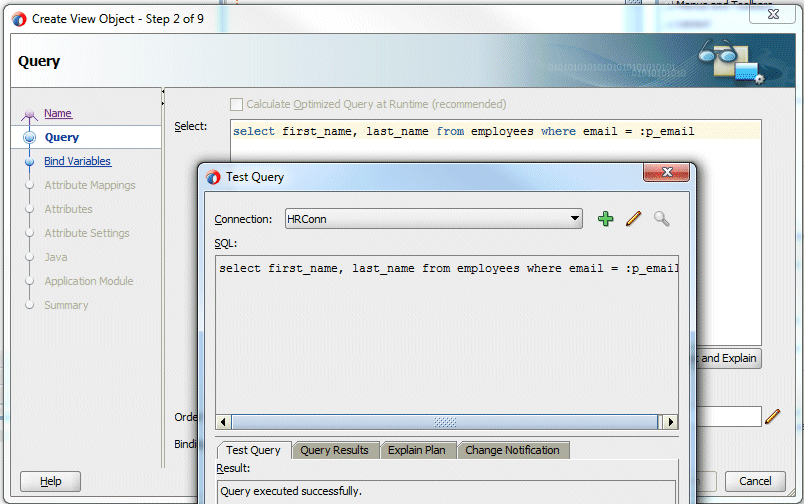
Click Close and then click Next.
-
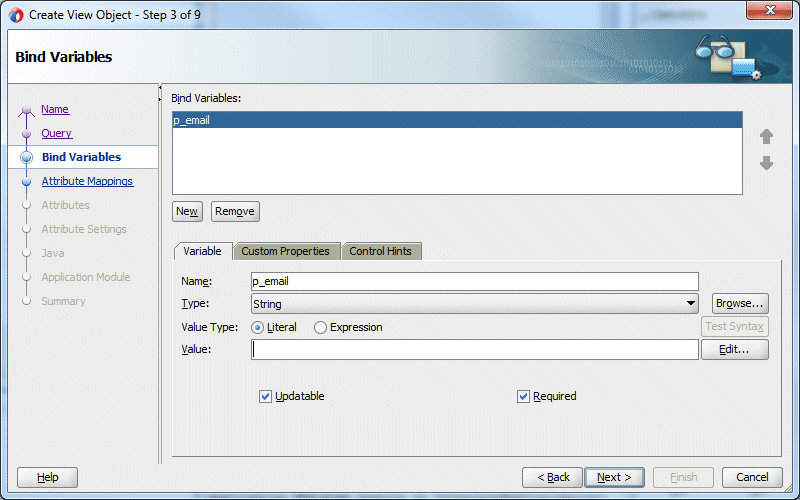
In Step 3 of the Create View Object wizard, click the New button to define a new bind variable. Set the Name property to p_email.
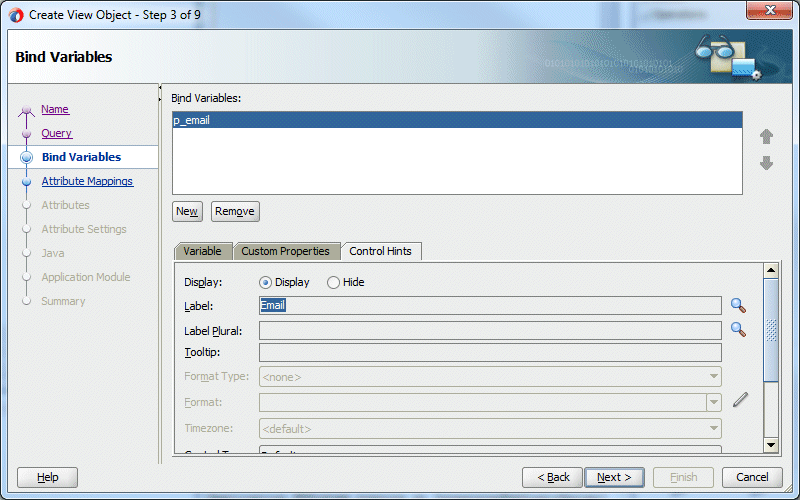
Click the Control Hints tab and set the Label Text to Email.
-
Click Next a few more times to accept all the defaults, until you get to step 8 of the wizard.
Do NOT specify a Key Attribute, when prompted.
Here check the Add to Application Module check box to include your new view in the data model.
Click the Finish button.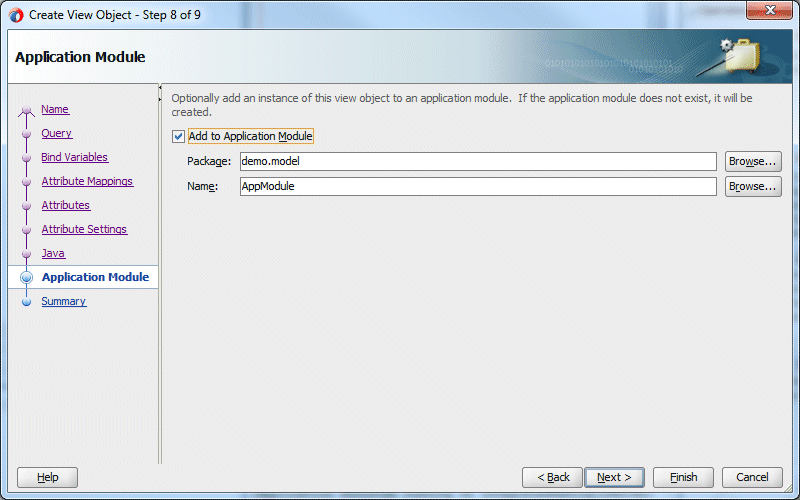
-
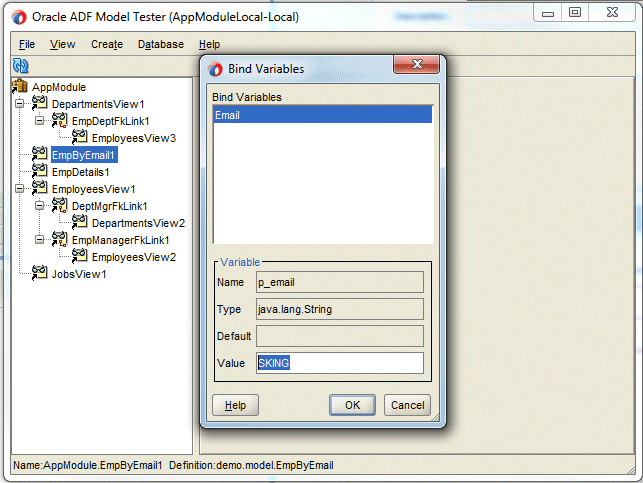
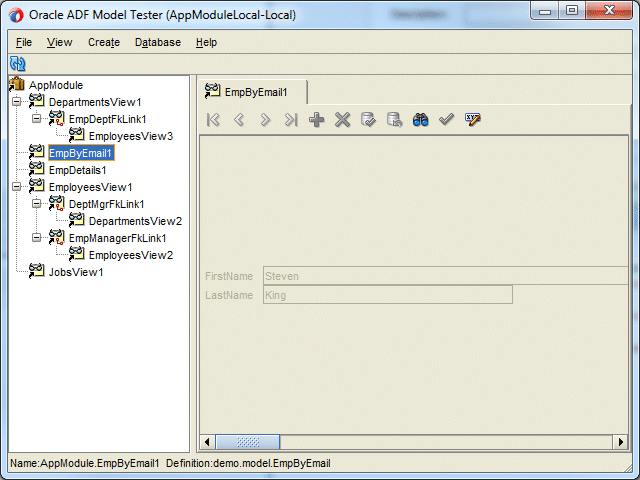
Save your work and then run the Business Component Browser to test the new view. Double-click the new EmpByEmail1 view and when prompted to insert a value for the variable enter SKING and press OK to get the results for this email address. (To run the Business Components Tester, right-click the application module and select Run)
-
Notice that the Business Components Browser shows only King.
-
Close the Business Component Browser.
In this step you create a reusable page fragment. You then embed the view object you created in the last step into the page fragment, and finally you use the page fragment in the DeptEmpPage page
-
First create a new task flow specifically for this page. In the Applications window right-click the ViewController project and select New > From Gallery.

-
In the Web Tier > JSF/Facelets category select ADF Task Flow.
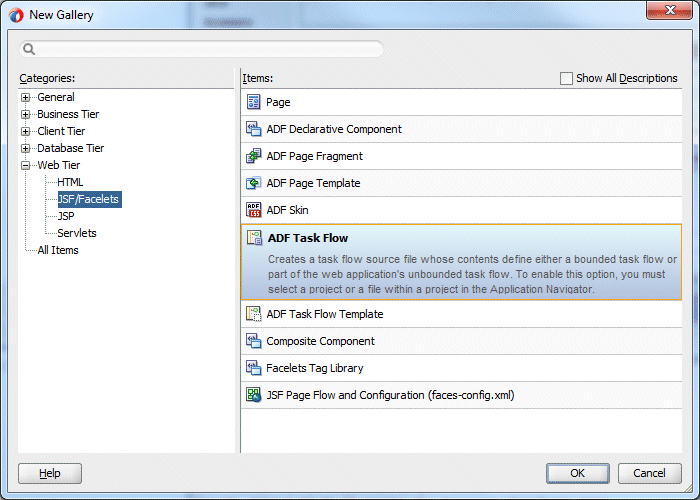
Click OK.
-
In the Create Task Flow dialog set the File Name property to search-email-flow.xml.
Verify that the Create As Bounded Task Flow and Create with Page Fragments checkboxes are both selected.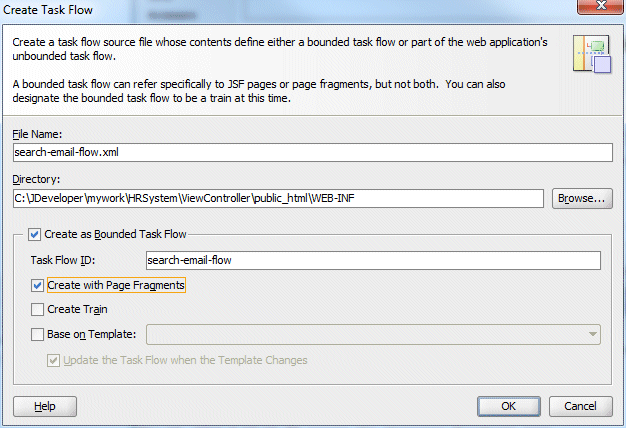
Click OK.
-
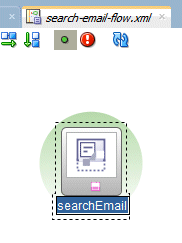
In the Design Editor drag a View component from the Components window onto the empty diagram and name it searchEmail. You only use a single page in this flow, but you can have bounded task flows with multiple pages and still include them in other JSF pages.
-
Double-click the new searchEmail view component to create the page fragment for it.
Accept all the defaults in the dialog that displays and make sure the file name is searchEmail.jsff. This creates the page as a page fragment that can be included in other JSF pages. Click OK.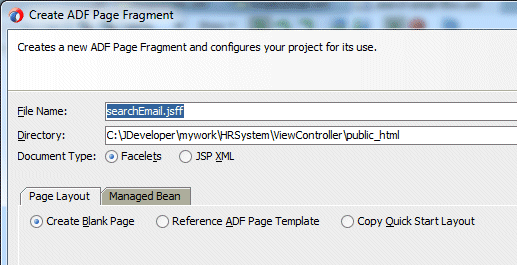
-
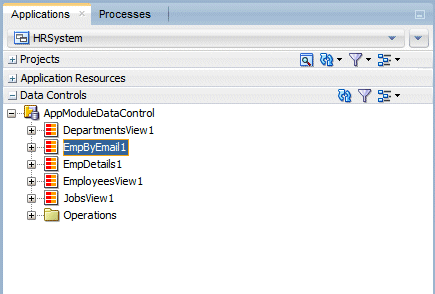
An empty page displays in the Design Editor. Expand the Data Controls accordion and, if necessary, click the Refresh button to ensure that the new EmpByEmail1 data control appears in the list.
-
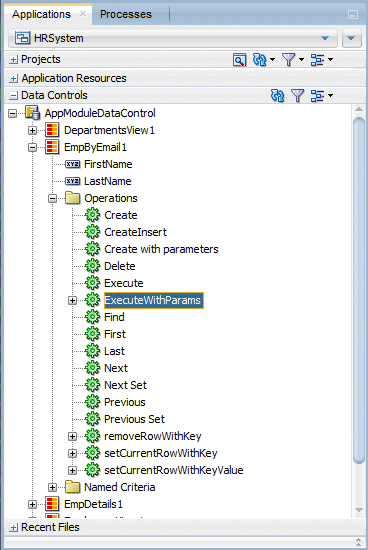
Expand the new EmpByEmail1 view and the Operations node beneath it. Select the ExecuteWithParams operation. You are going to use this operation to execute the query for this view passing it the necessary parameter.
-
Drag the ExecuteWithParams operation to your new page, and create it as an ADF Parameter Form.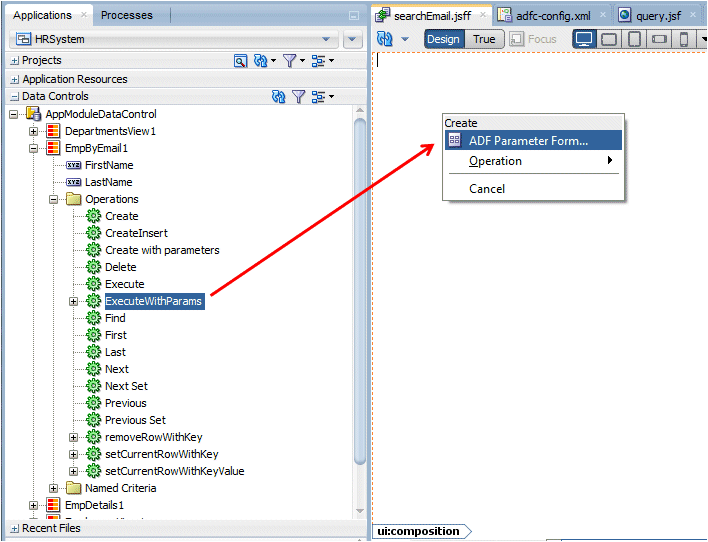
-
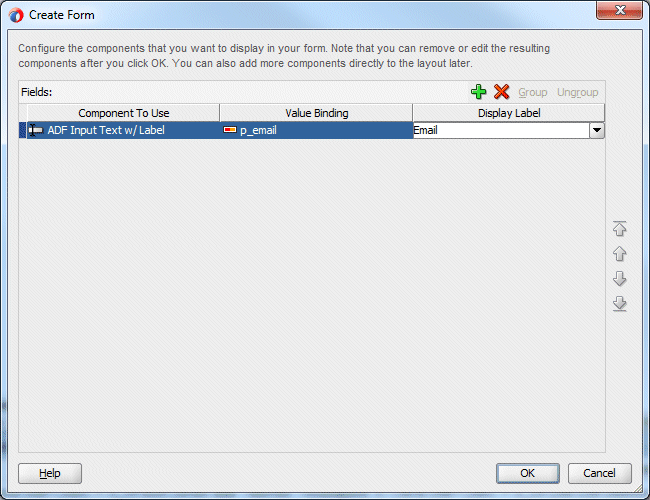
In the Edit Form Fields dialog change the display label for the p_email value from default to Email. Click OK.
-
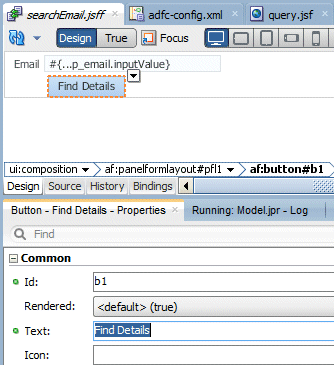
In the Design Editor for the page, click the ExecuteWithParams button and use the Properties window to change the Text property to Find Details.
-
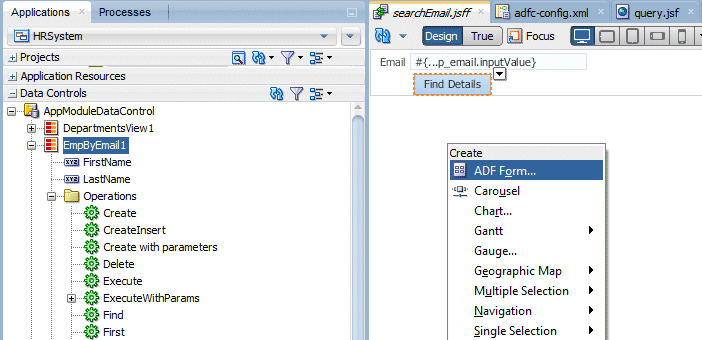
From the Data Controls pane, drag the EmpByEmail1 collection onto the page beneath the button. Create it as a Form > ADF Form....
-
Select Read-Only Form and accept the remaining defaults presented in the Edit Form Fields dialog. Then click OK.
Save your work.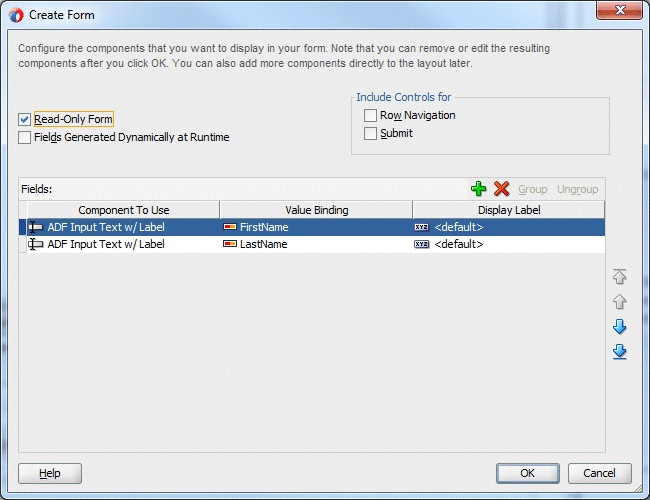
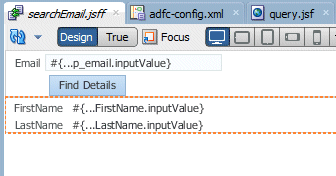
The page should look like this:
-
The new bounded task flow now contains a page fragment; next you include the complete bounded task flow inside another JSF page.
In the Applications window locate the DeptEmpPage.jsf file and open it in the Design Editor, if it is not already open. From the Components window Layout section drag and drop a Separator component into the left accordion in the DeptEmpPage.jsf page beneath the Departments form.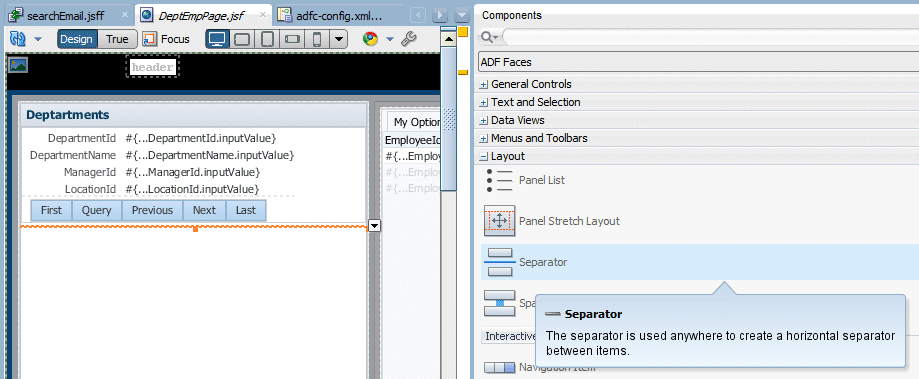
-
Add the new flow you created as a region to the existing page.
From the Applications window drag and drop search-email-flow.xml into the left accordion in the DeptEmpPage.jsf page beneath the new separator. Create it as a Region.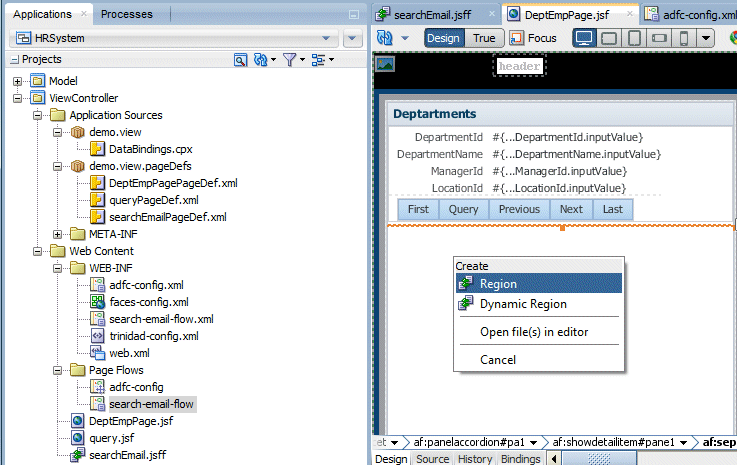
-
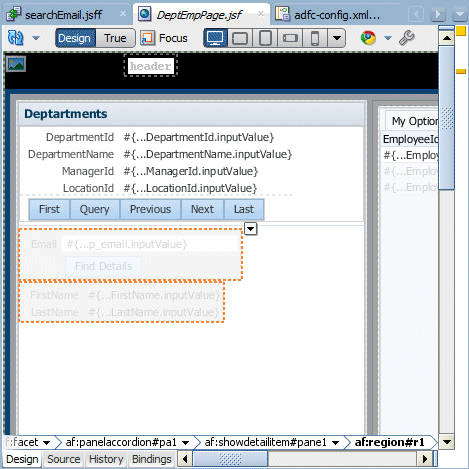
Your page should now look like the screen shot below.
-
Save your work and then Run the updated DeptEmpPage.jsf page.
When the page displays in your browser test the new functionality by entering an email value (SKING) in the Email field and pressing the Find Details button.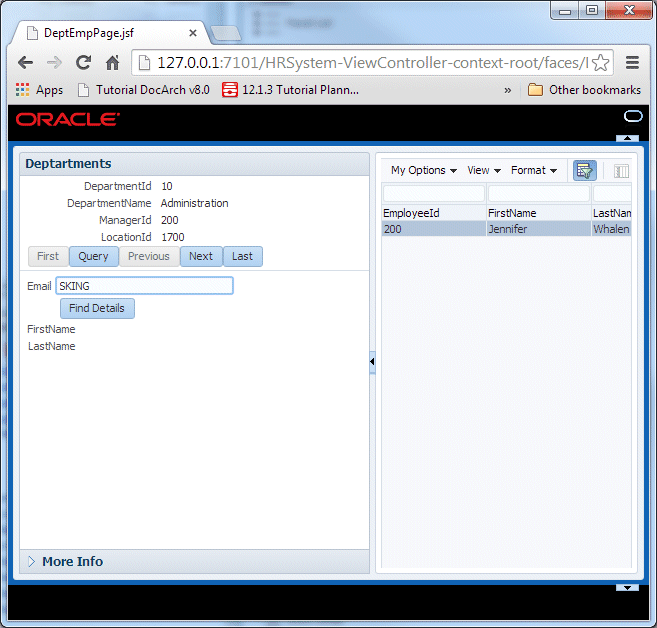
-
The employee name information is returned.
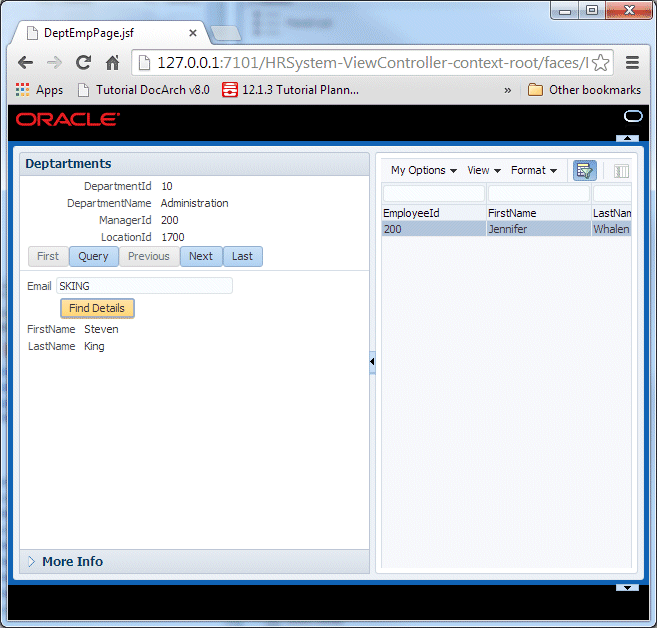
Close the browser when you are done.
In this step you use a panel springboard as a launch pad fro your pages. Once you've created your pages and task flows, you can hook them together using a panelSpringboard component. All pages must be packaged in bounded task flows as page fragments and added as regions. Each page or task flow can have an icon associated with it and you can determine the behavior of the items, once one is selected.
-
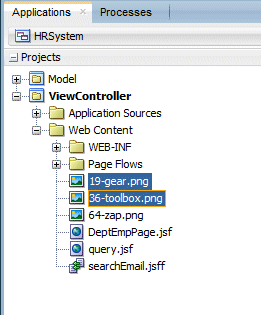
In preparation for the next set of steps, include some icons into your application. Right click on each of the following 3 images and save the the icons to your application's.../public_html directory.


-
Then back in JDeveloper, select the ViewController project and click the refresh icon. In the drop down menu, select Refresh ViewController.jpr.
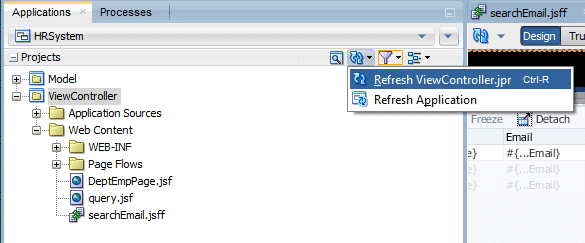
The Applications window will now display the included images.
-
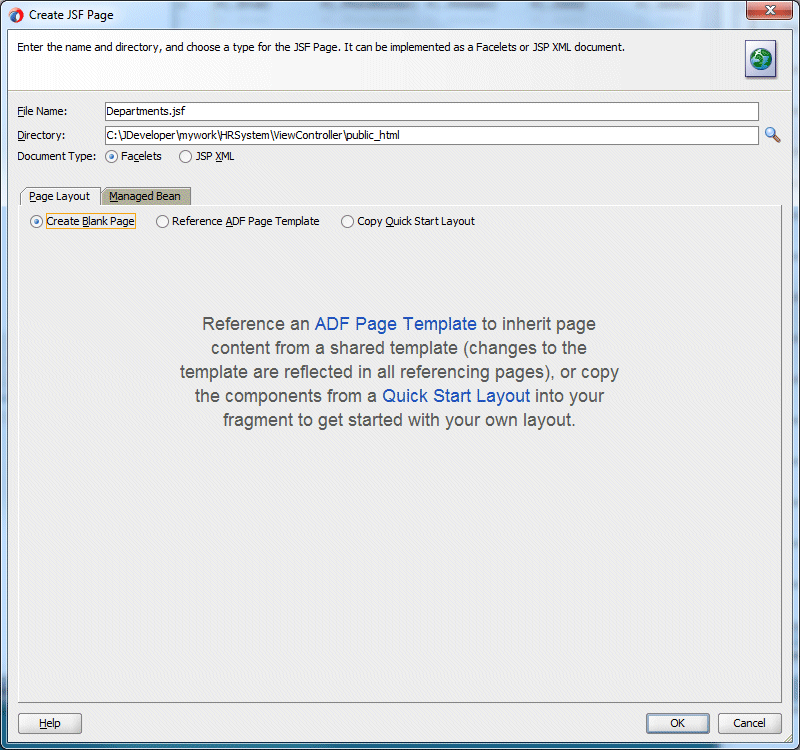
Right click the View Controller project and in the context menu select, New > Page...

-
Name it Departments.jsf and create it using a blank page.
-
From the Data Controls palette, expand the AppModuleDataControl and drag and drop the DepartmentsView1 onto the page.
In the popup menu, select Table/List View > ADF Table...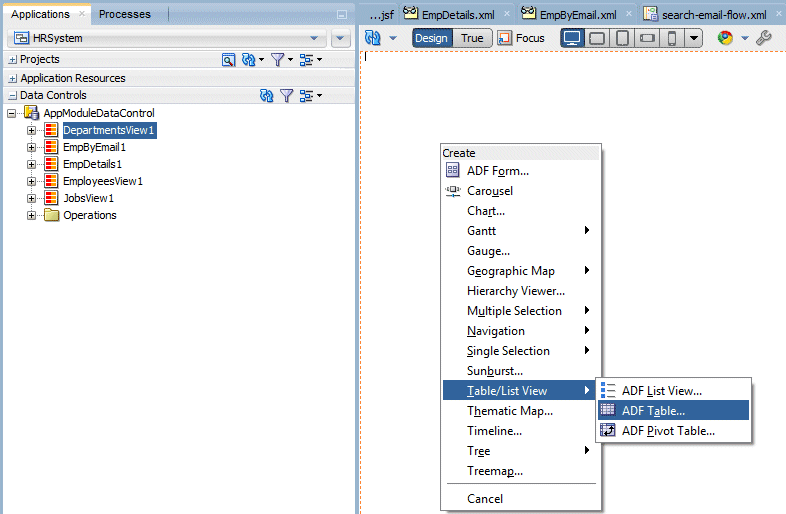
-
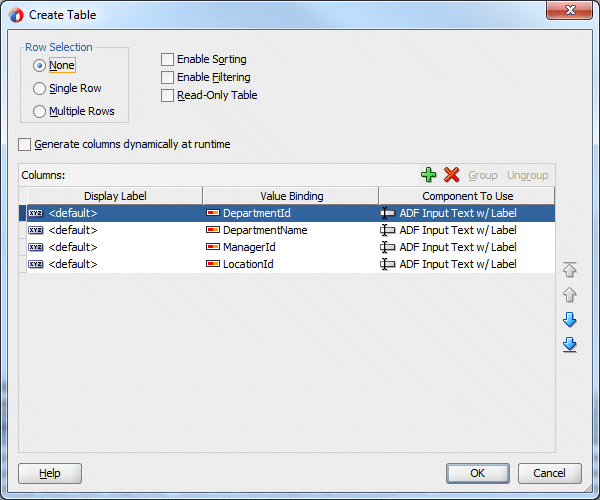
In the Create Table dialog, click OK to accept all the fields.
-
The resulting page should look like the image below. Save your work.

-
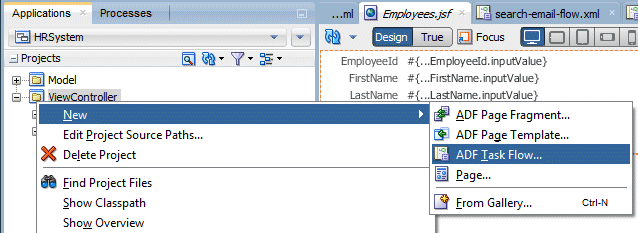
Select the ViewController project, and from the context menu select New > ADF Task Flow...
-
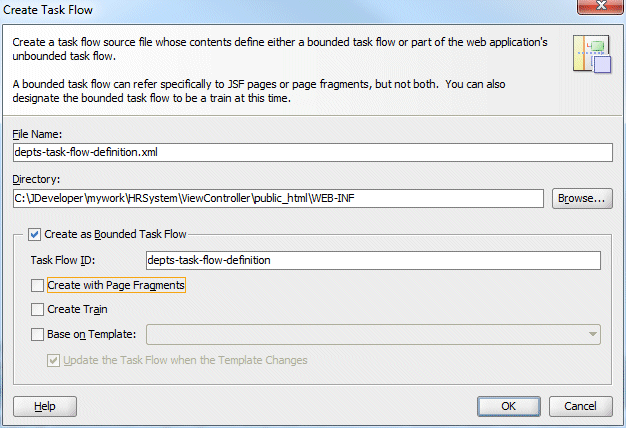
Name it depts-task-flow-definition.xml and deselect the Create with Page Fragments checkbox. Click OK to create the task flow.
-
From the Applications window, drag the Departments.jsf page onto the task flow and drop it.
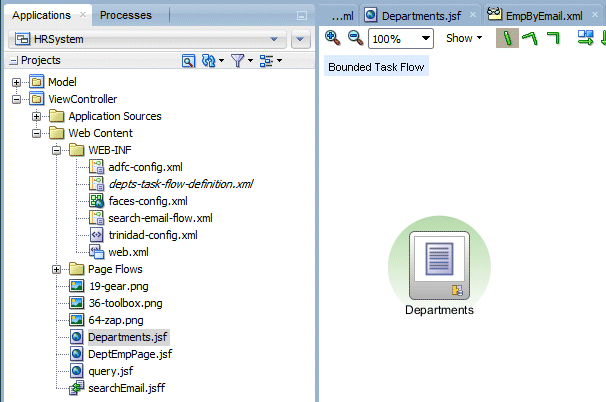
The resulting page is now part of the bounded task flow.
-
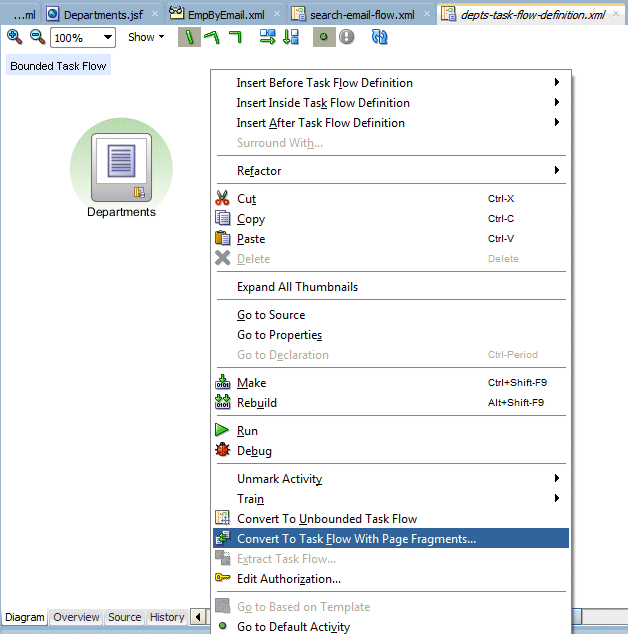
Next, right click the task flow and select Convert To Task Flow With Page Fragments...
Later on we'll create a page containing the panel springboard component. We can then add this task flow as a region on the springboard.
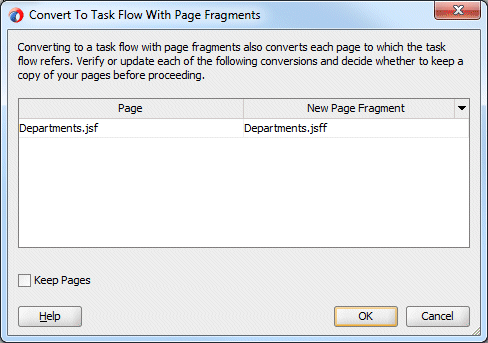
In the popup, click OK to complete the conversion process.
Save all your work.
-
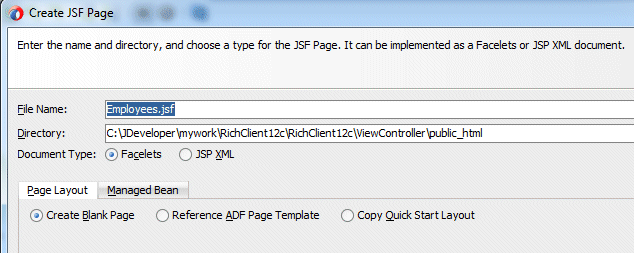
Right click the View Controller project and in the context menu select, New > Page...

-
Name it Employees.jsf and create it using a blank page.
-
From the Data Controls palette, expand the AppModuleDataControl and drag and drop the EmployeeView1 onto the page.
In the popup menu, select ADF Form ...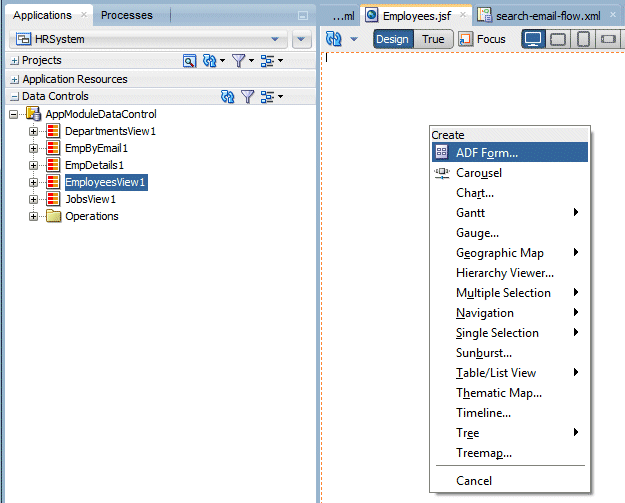
-
In the Create Form dialog, select the Read-Only Form checkbox and then delete the following fields.
JobId, Salary, CommissionPct, ManagerId, and DepartmentId
Then click OK.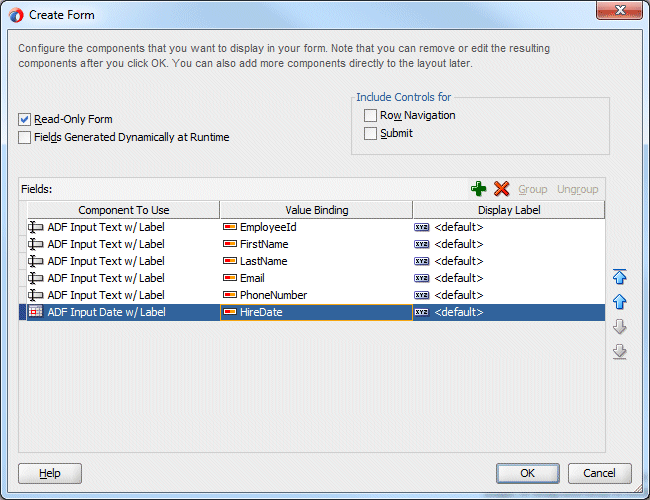
-
The resulting page should look like the image below.
Save your work.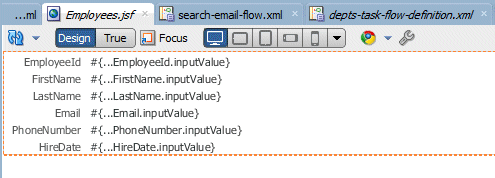
-
Select the ViewController project, and from the context menu select New > ADF Task Flow...

-
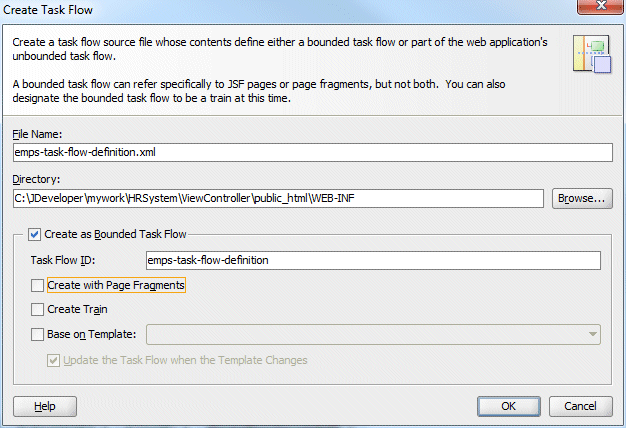
Name it emps-task-flow-definition.xml and deselect the Create with Page Fragments checkbox. Click OK to create the task flow.
-
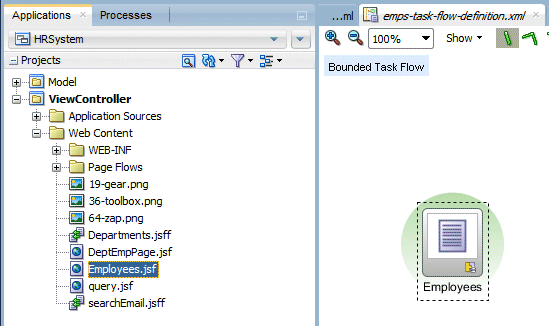
From the Applications window, drag the Employees.jsf page onto the task flow and drop it.
-
Next, right-click inside the task flow and select Convert To Task Flow With Page Fragments...
Remember, later on we'll create a page containing the panel springboard component. We can then add this task flow as a region on the springboard.
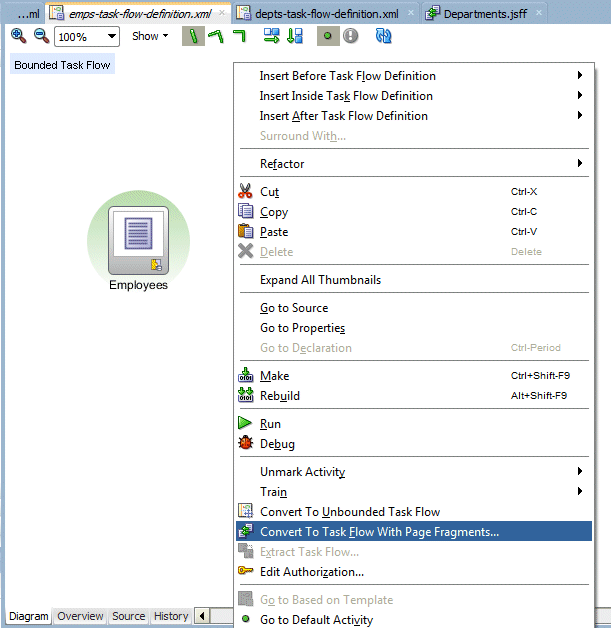
In the popup, click OK to finish the process.
-
Save your work.
-
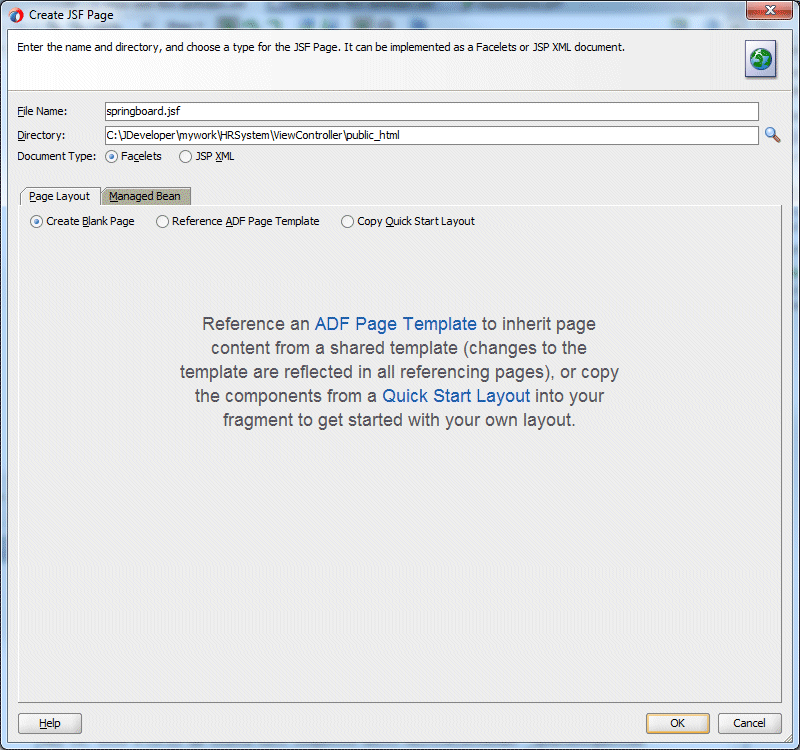
Create a page to contain the springboard. Create it in the ViewController project and name it springboard.jsf and select the Create Blank Page radio button. Then click OK.
-
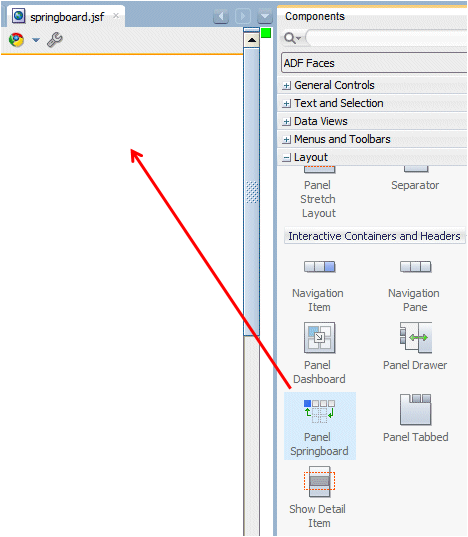
From the Components window, expand the Layout node and scroll to the Interactive Containers and Headers section. Then, select and drag and drop a Panel Springboard onto the page
-
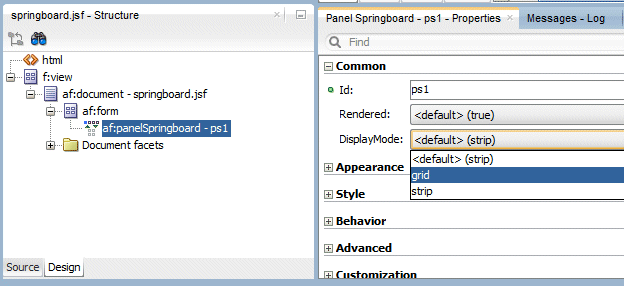
Select the panelSpringboard component and in the Properties window, set the Display Mode to grid.
-
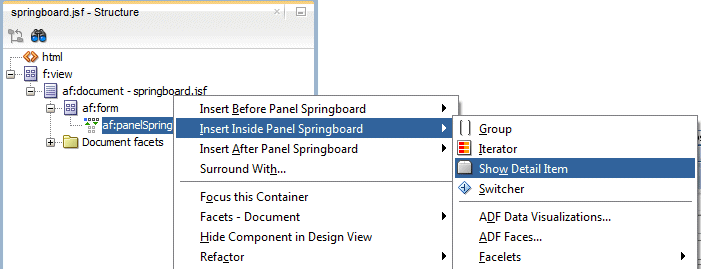
Inside the panelSpringboard component, right click and select Insert Inside Panel SpringBoard > Show Detail item
Add another detail item to the springboard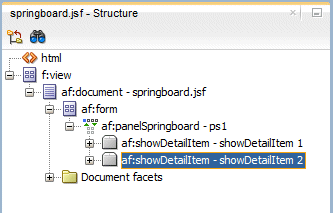
-
For each of the showDetailItems, use the Properties window to set the Text values.
showDetailItem 1 = Show Departments
showDetailItem 2 = Employees
Save your work.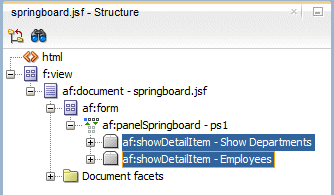
-
For each showDetailItem, select and set the Icon property to the image names as follows..
Show Departments = 36-toolbox.png
Employee = 19-gear.jpg
To set the property, move your cursor to the right side of the Icon property and click on the blue gear.

Then click it, and select Edit. 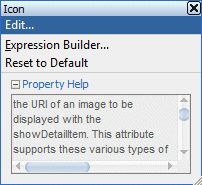
Select the appropriate image and click OK.
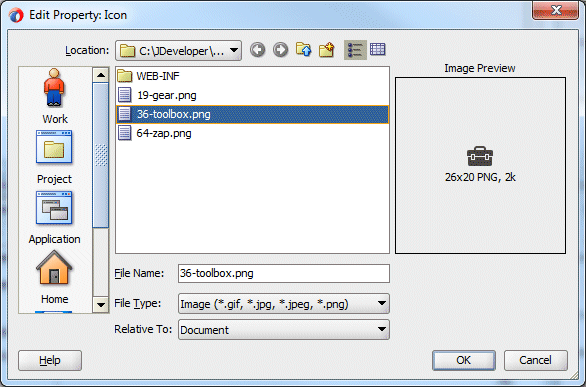
When prompted to allow the image to be put in the 'resources' directory, click Yes.
In the Save JSF Resource File accept the default name and click OK.
-
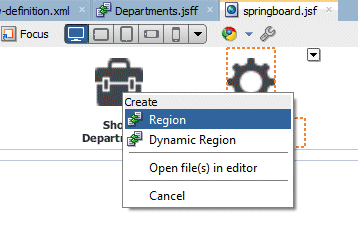
Drag depts-task-flow-definition and drop it on the Show Departments detail item.
When you release the mouse button, you're prompted for how you want the item created. In our case, create the item as a Region.
-
Drag the emps-task-flow-definition to the Employees detailItem and create it as a Region.
-
Save your work.
-
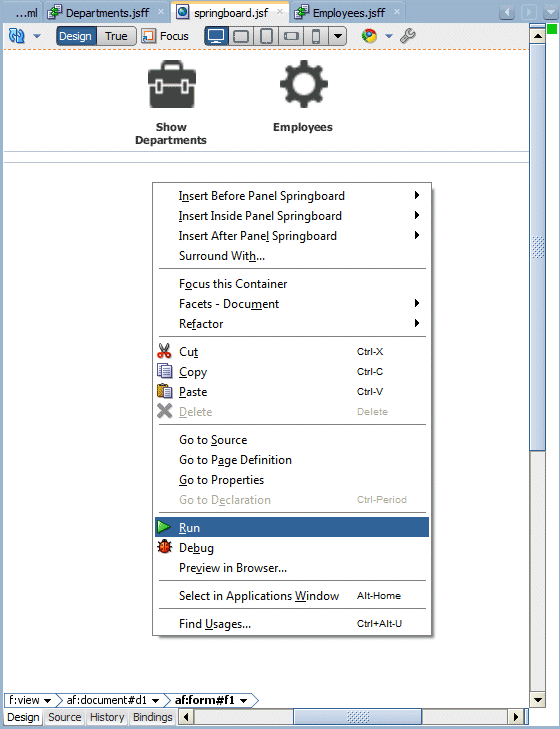
Finally, right click in the springboard.jsf page and select Run.
-
Click on each of the icons to see the see how the Springboard allows you to launch individual task flows.
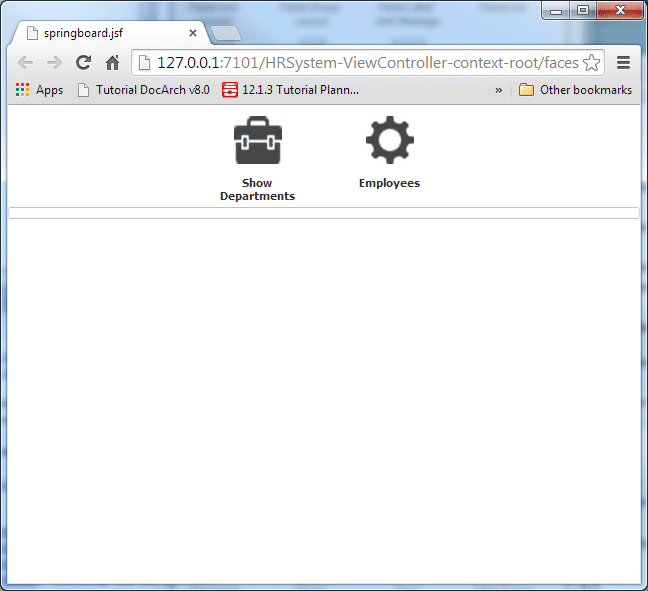
When one item is selected the icons move to the top of the browser, and the page details appear below.
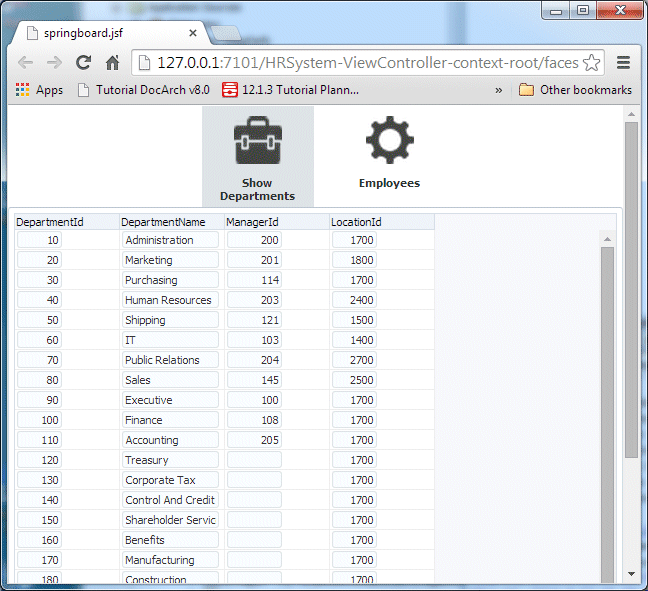
Click another icon and the page switches.
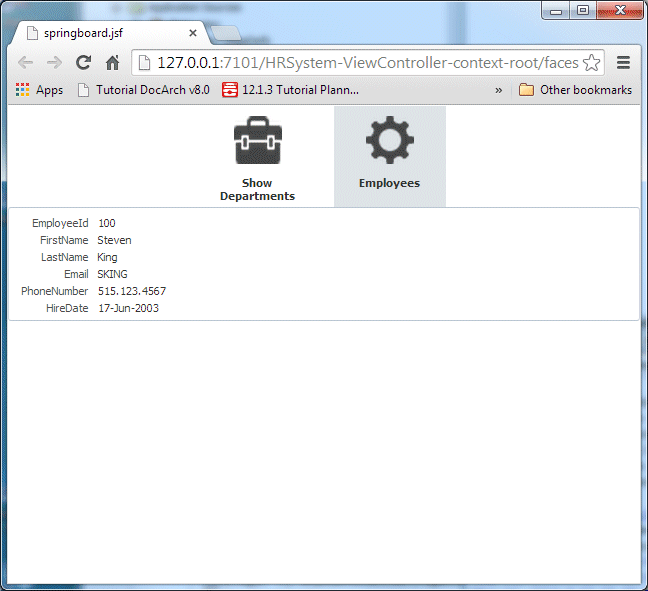
-
Close your browser and exit JDeveloper.
Now we are ready to create the components for the springboard.
The first thing we need to do is create a couple of pages and place them on bounded task flows as page fragments. There are a few different ways to do this, we'll show you one.
Now we'll do the same process for an employees page and task flow. Then we'll have two different components to add to the springboard.
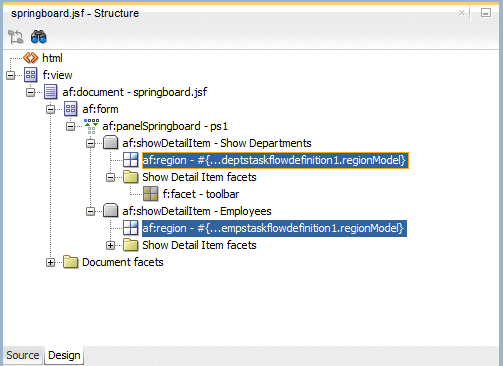
The next step is to determine and associate what page or task flow the springboard item will invoke. You can do this by dragging and and dropping a page or task flow onto the springboard detail item.
Your Structure window should look like the following image.
- Build the business services that supply the data to the application
- Create a data-bound JSF page
- Enhance the page by adding more complex operations
- Add a second JSF page to the application and create a task flow to define the navigation between the pages
- Create a reusable page fragment containing a business service based on parameters
- Add a springboard to launch your application components
- Developing Applications with Oracle JDeveloper
- Using ADF Data Controls
- Getting Started with ADF Faces
- Developing Fusion Web Applications with Oracle Application Development Framework

 Part 1: Creating a Fusion Web Application and Building the Business Services
