 Part 1:

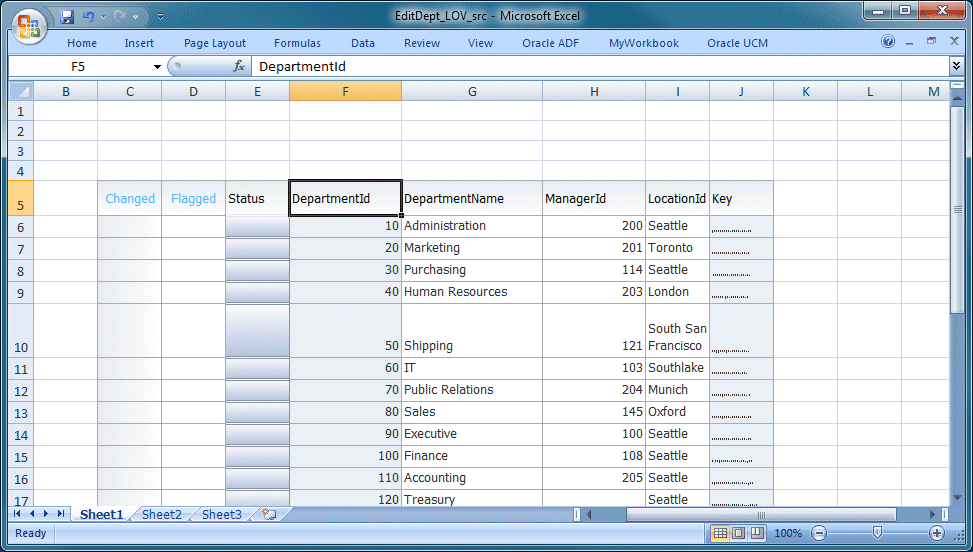
The EditDept_LOV workbook contains a list of values field and a table that has insert/update/delete functionality. You also add ribbon commands to the Excel ribbon in the workbook.
-
In this section you'll be working on the EditDept_LOV_src.xlsx workbook that you created in the previous part.
If it is not open, double click the workbook to invoke it in Excel.
-
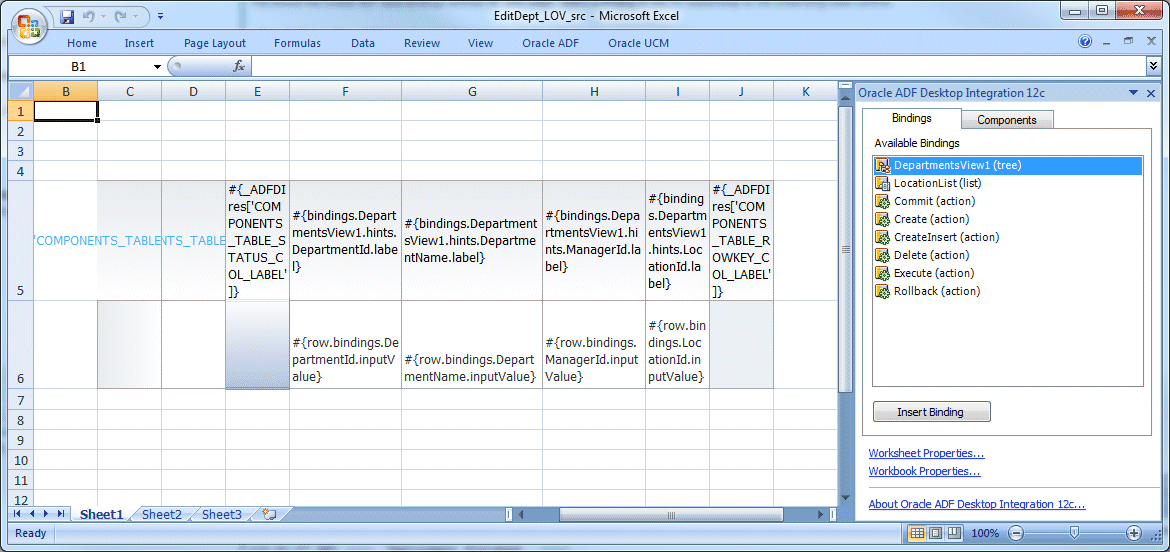
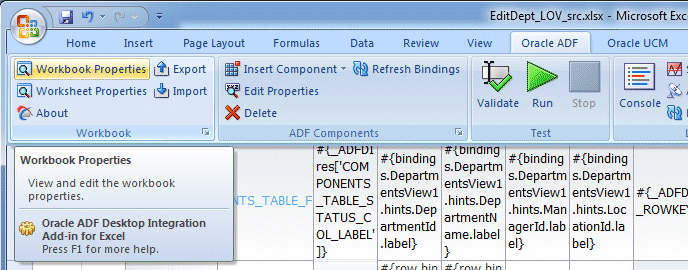
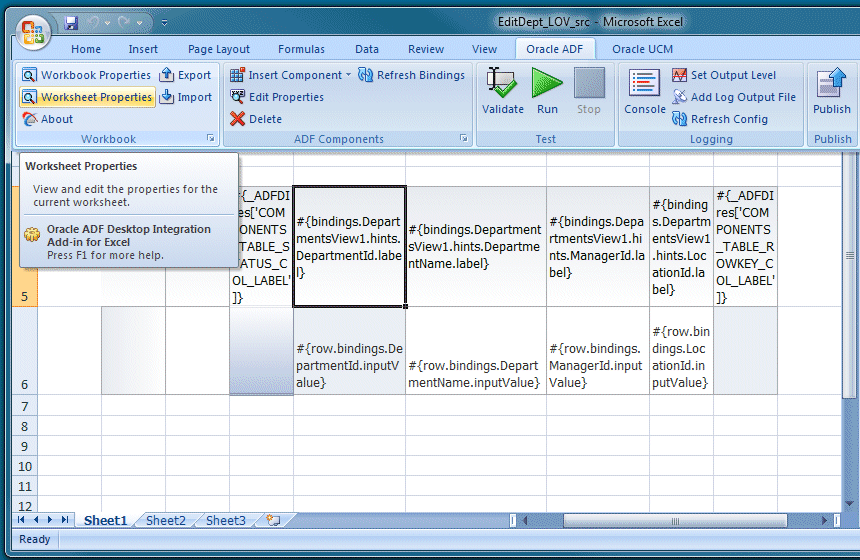
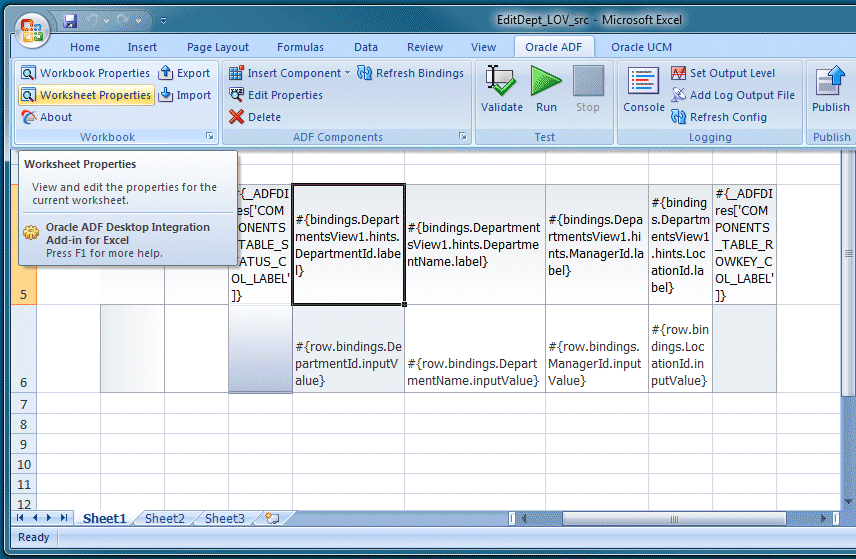
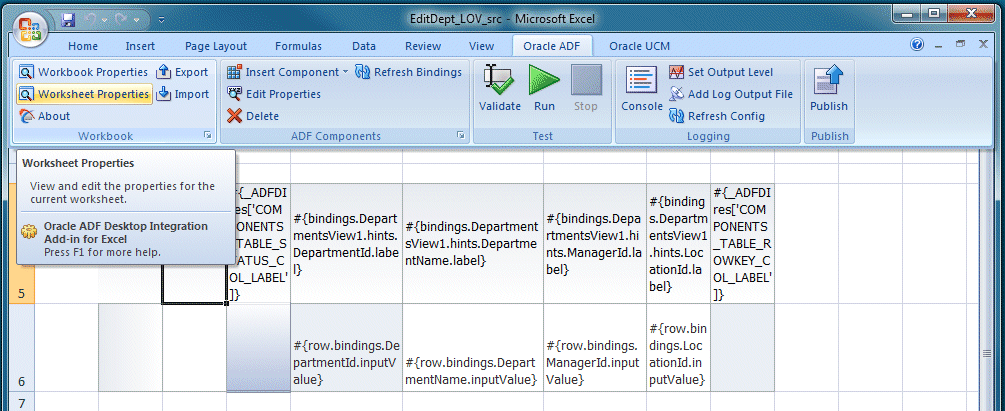
In Excel, the ADF Desktop Integration 12c bindings pane displays the available bindings from the page definition.
-
Click the Save button to make sure your worksheet is current.
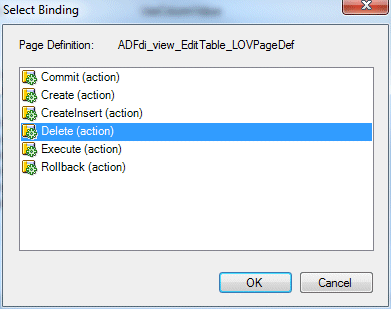
Notice the bindings in the screen shot of the data bindings for the EditTable_LOV.jspx page: the action bindings represent the button actions that the JSF page contains.
-
Click the Workbook Properties button in the Oracle ADF tab of the Excel ribbon.
-
In the Edit Workbook Properties, next to the WebAppRoot field, confirm http://127.0.0.1:7101/ADFdi_BC is the value and click OK. This was set in the previous part and is the URL for the Fusion Web application with which the workbook is integrated.
If the value is correct click OK.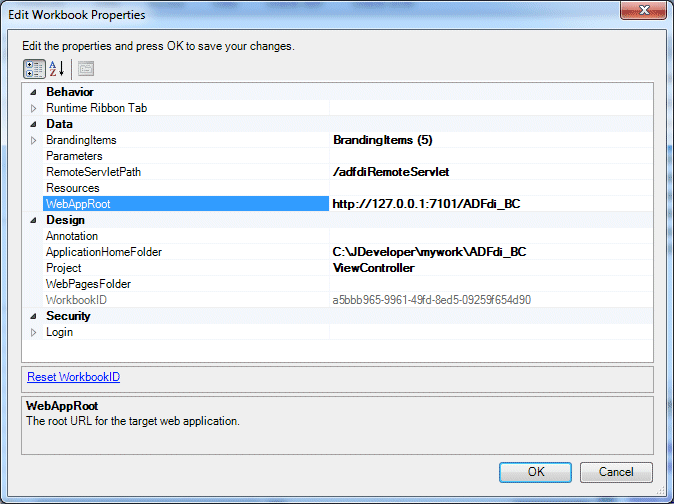
-
In the Excel worksheet, select the top left cell of your table (i.e. F5), and click the Edit Properties icon
 in the ADF Components group of the Oracle ADF tab in the Excel ribbon.
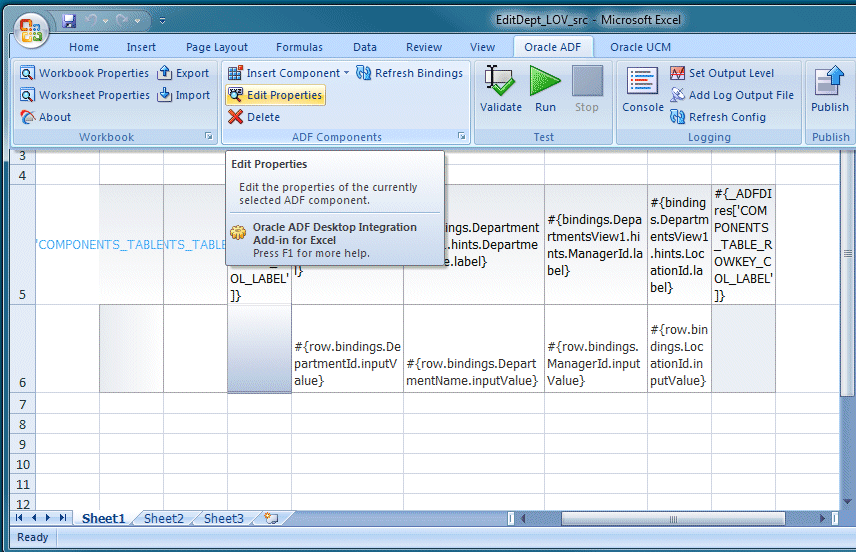
-
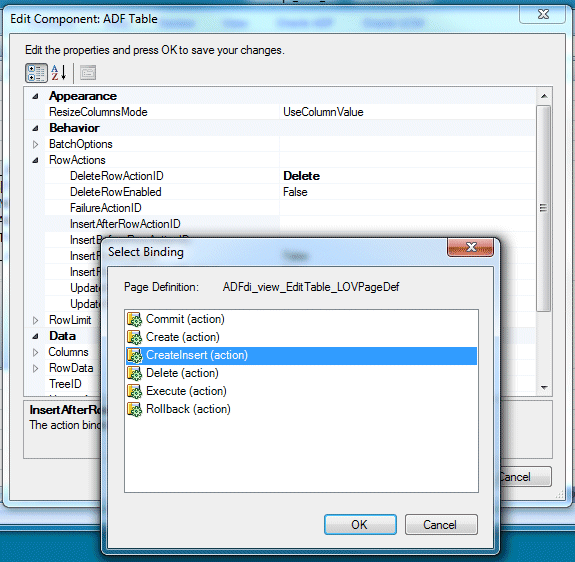
In the Edit Component: ADF Table dialog, expand the RowActions node and click the more button
 next to the DeleteRowActionID field.
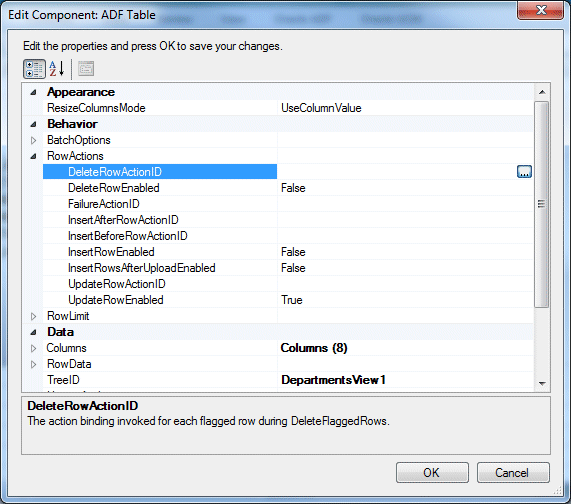
-
In the Select Binding dialog, select Delete (action) and click OK.
-
Repeat the previous step for the InsertBeforeRowActionID field and select the CreateInsert (action).
Click OK.
-
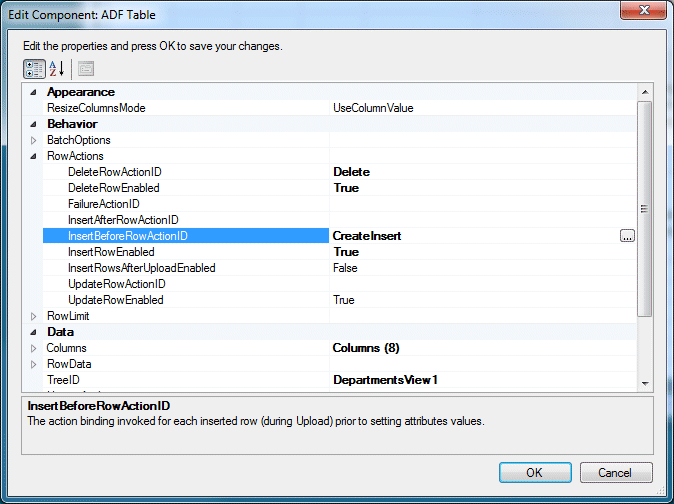
In the RowActions section, set the following additional values from drop-down list:
Option Value DeleteRowEnabled True InsertRowEnabled True UpdateRowEnabled True The RowActions properties should look as follows:
-
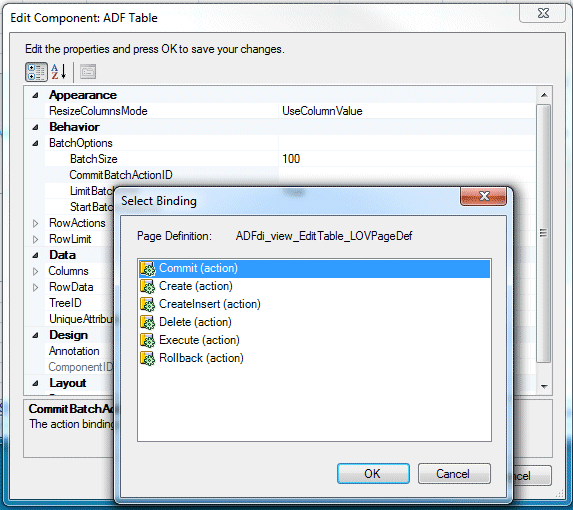
In the BatchOptions section, set the CommitBatchActionID to Commit and click OK.
-
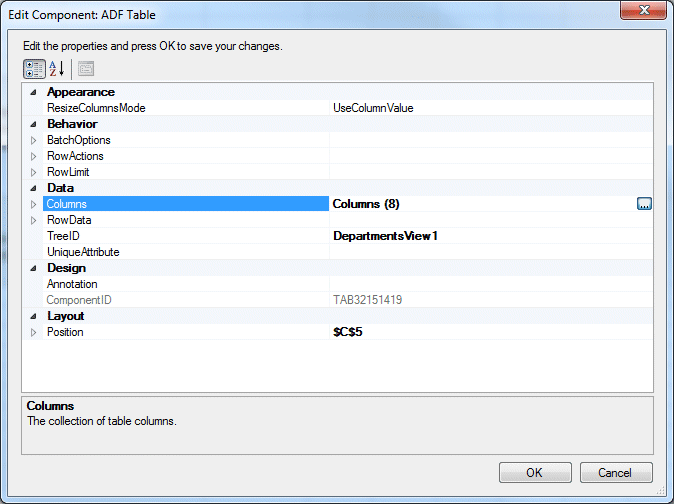
In the Edit Component dialog, click the more button
next to the Columns field. 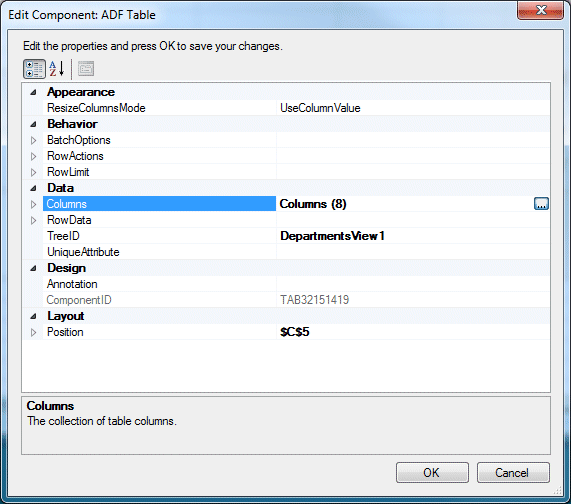
-
Select column 6 (LocationId) in the Members pane and click the more button
next to the UpdateComponent field. 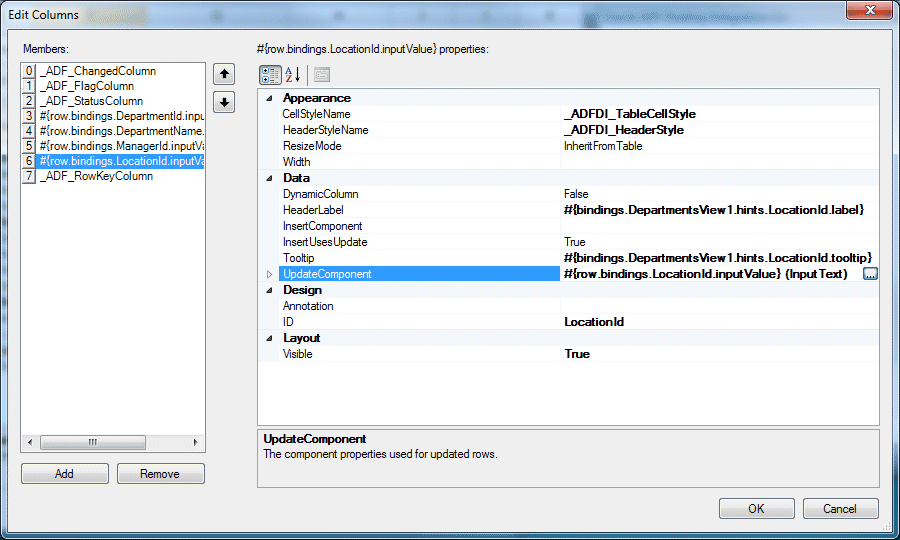
-
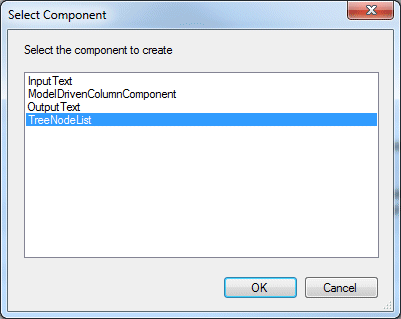
In the Select Component dialog, select TreeNodeList and click OK.
-
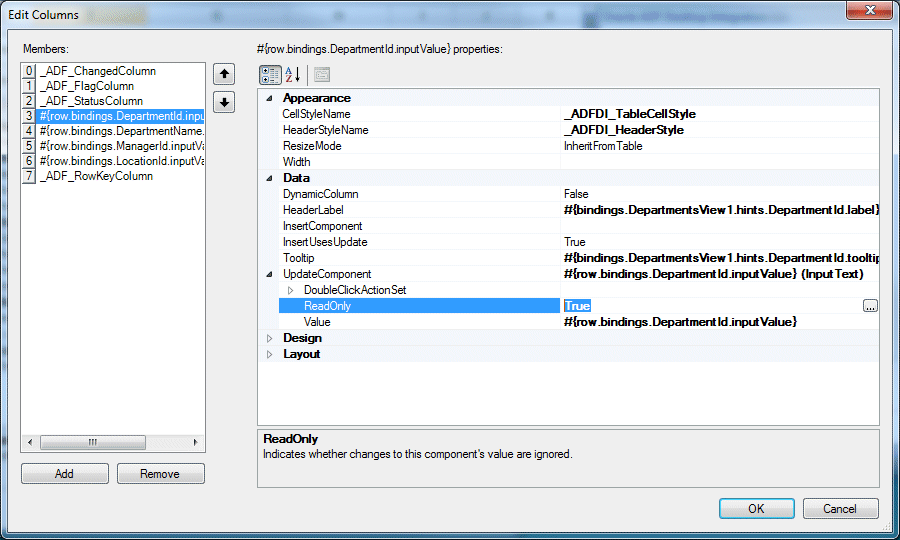
Select column number 3 (DepartmentId) and expand the UpdateComponent node. Change the ReadOnly property to True.
-
With column number 3 (DepartmentId) still selected, click the more
 button in the CellStyleName field.
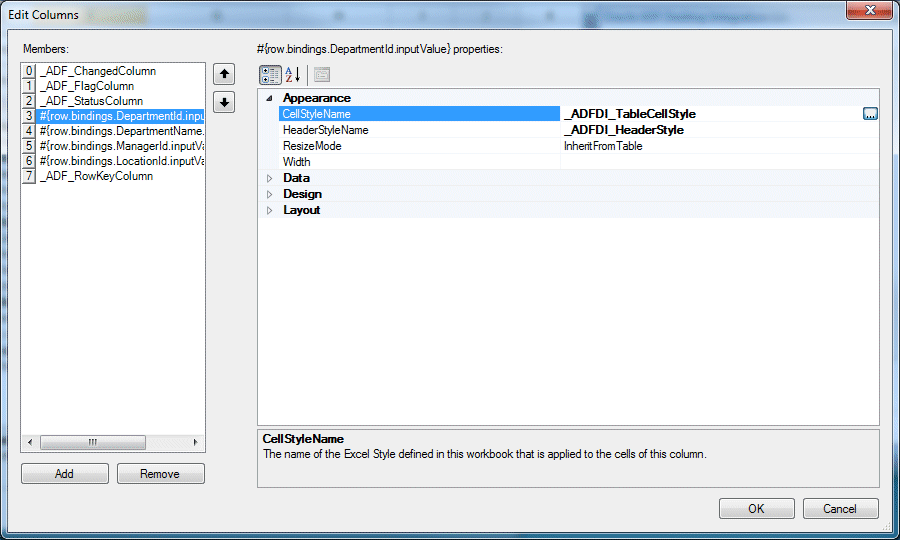
-
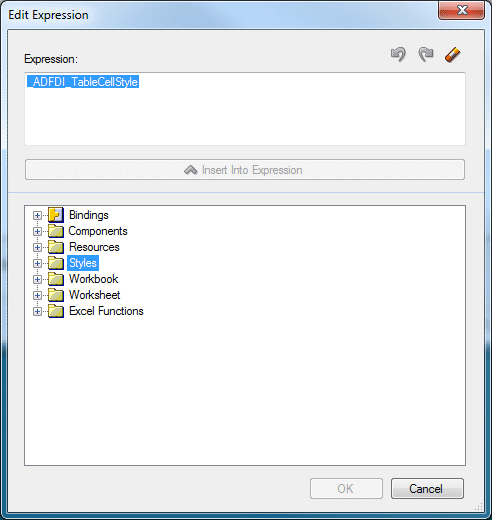
In the Edit Expression dialog, expand the Styles node.
-
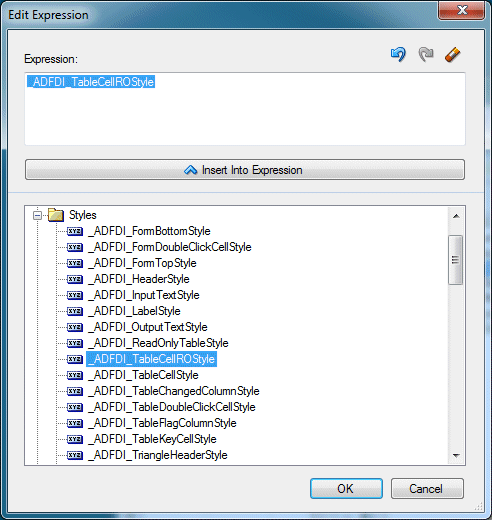
Select _ADFDI_TableCellROStyle (this is the style that visually indicates that a column is read-only) and click Insert Into Expression.
Click OK, then OK again and OK one more time to get back to Excel..
-
Save your Excel workbook.
For example selecting Delete in this step defines the action binding that should be invoked for each flagged row during DeleteFlaggedRows. The steps that follow define behaviors for other rows in the worksheet.
To implement this requirement you set the ReadOnly property to True (which you have just done in this step) and you also apply a style to the field as a visual indicator to users that they cannot update the DepartmentId field.
-
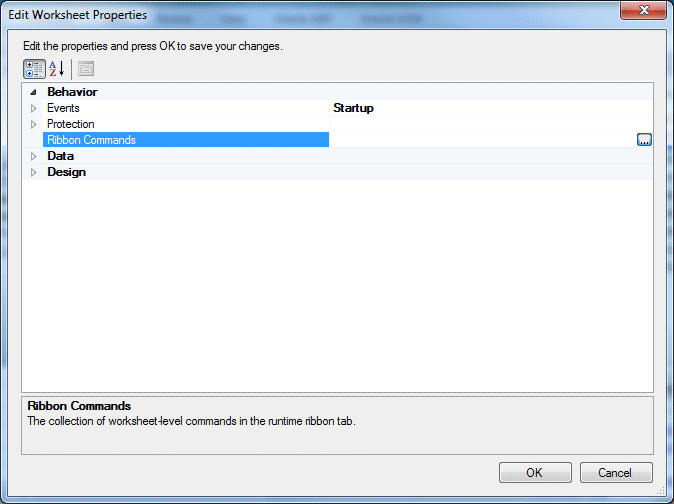
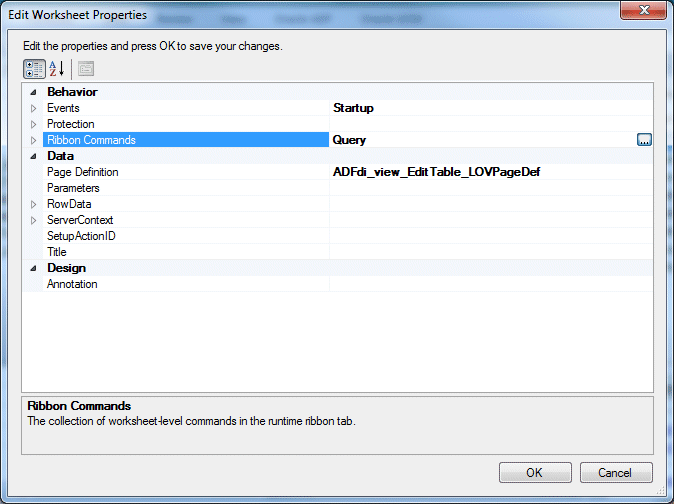
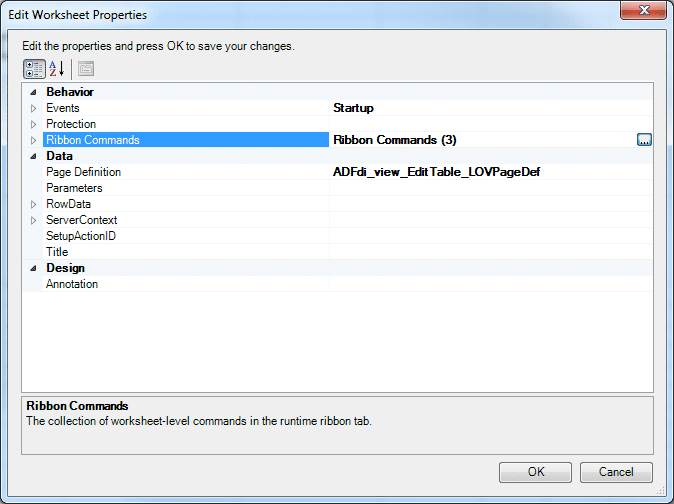
In the Oracle ADF tab, click the Worksheet Properties button. Locate Ribbon Commands and click the more
button. 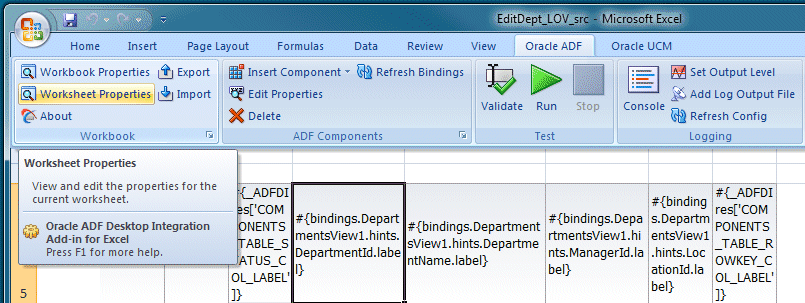
-
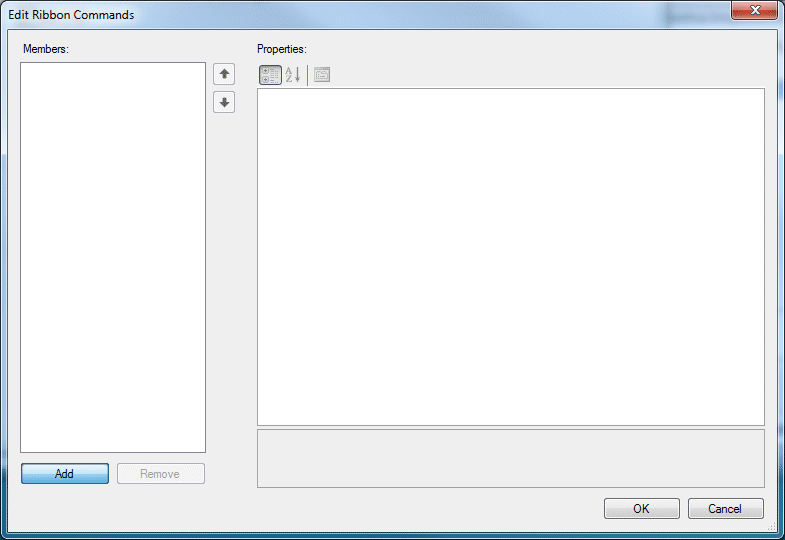
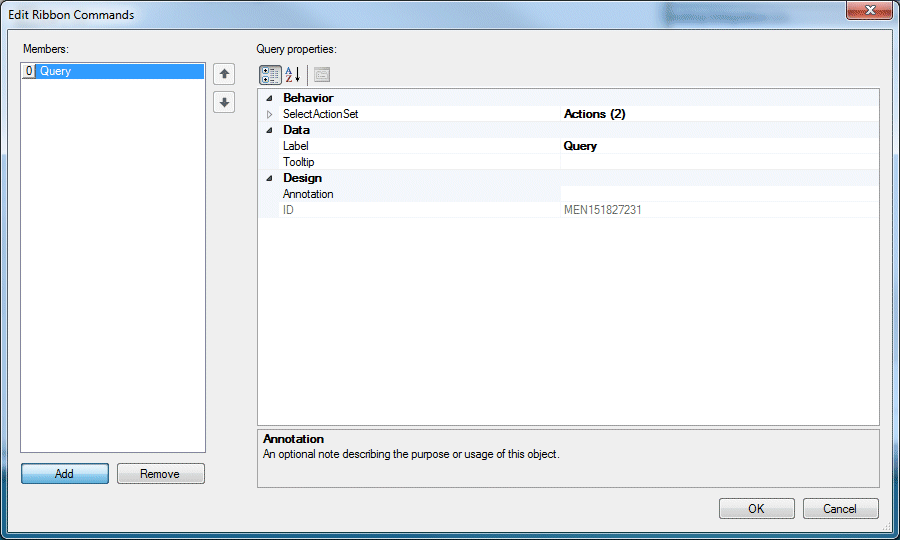
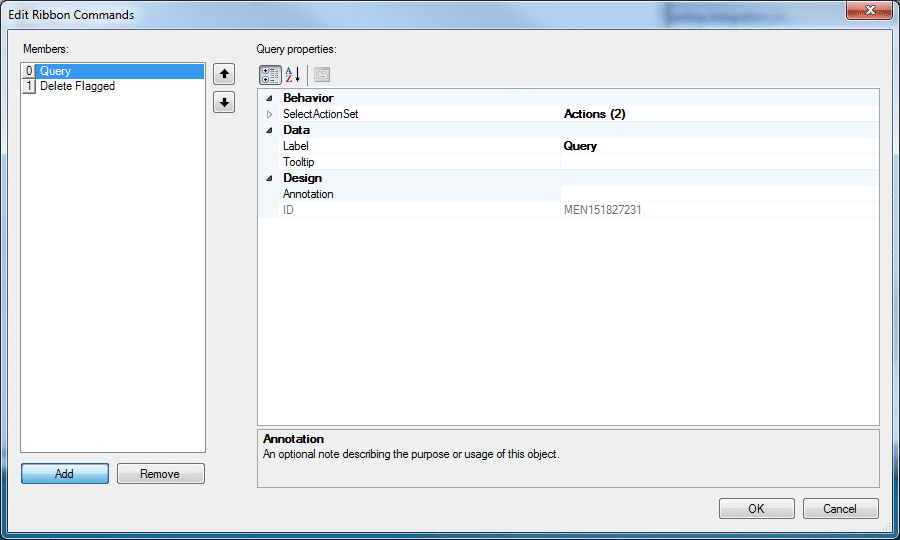
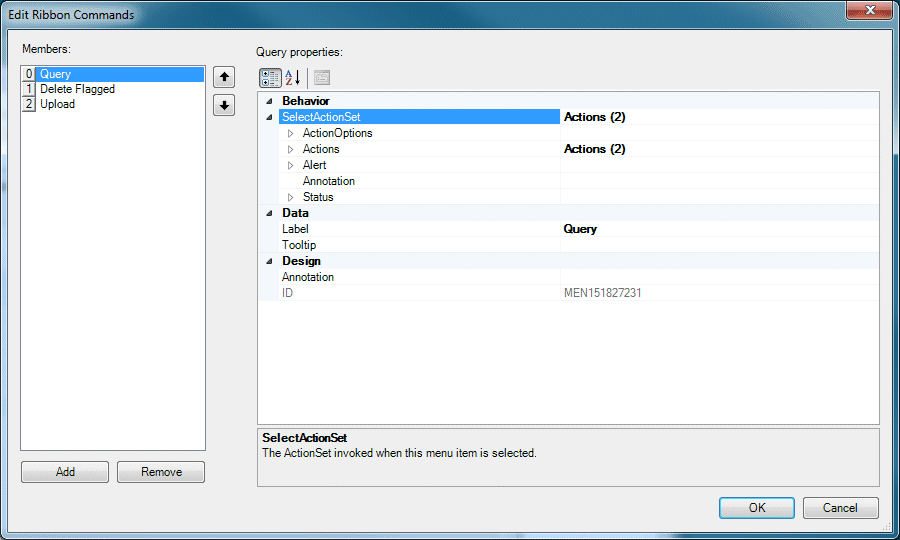
In the Edit Ribbon Commands dialog click Add.
-
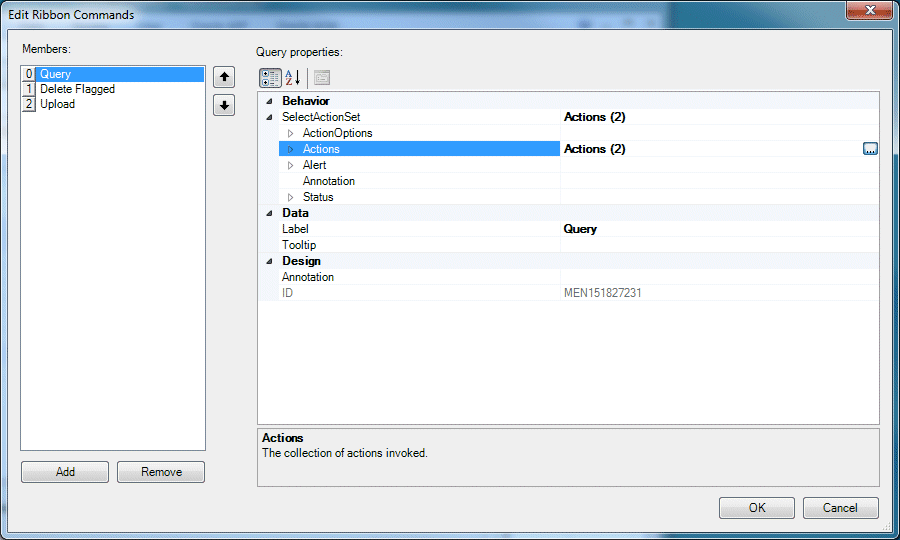
In the right-hand pane, expand the SelectActionSet node, then click the more button
next to the Actions field. 
-
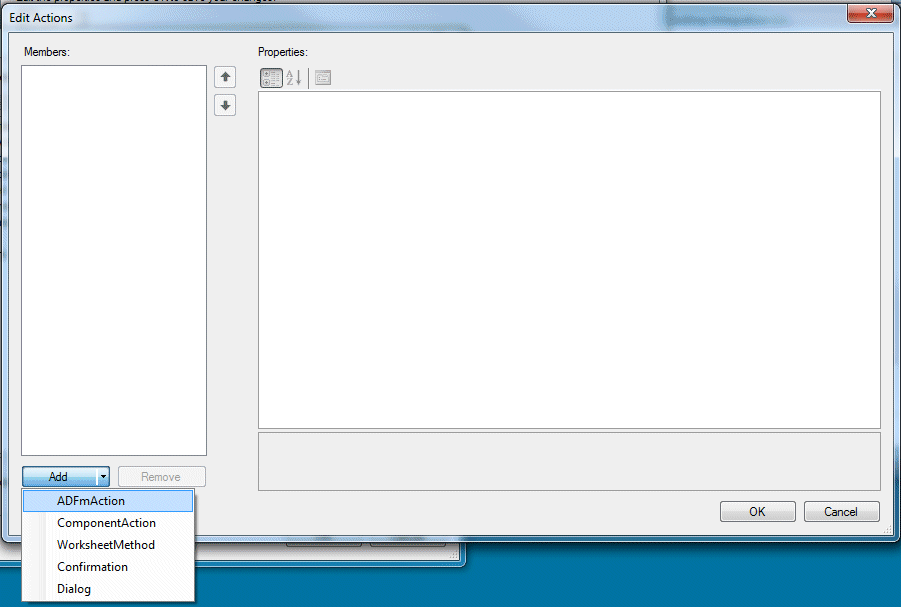
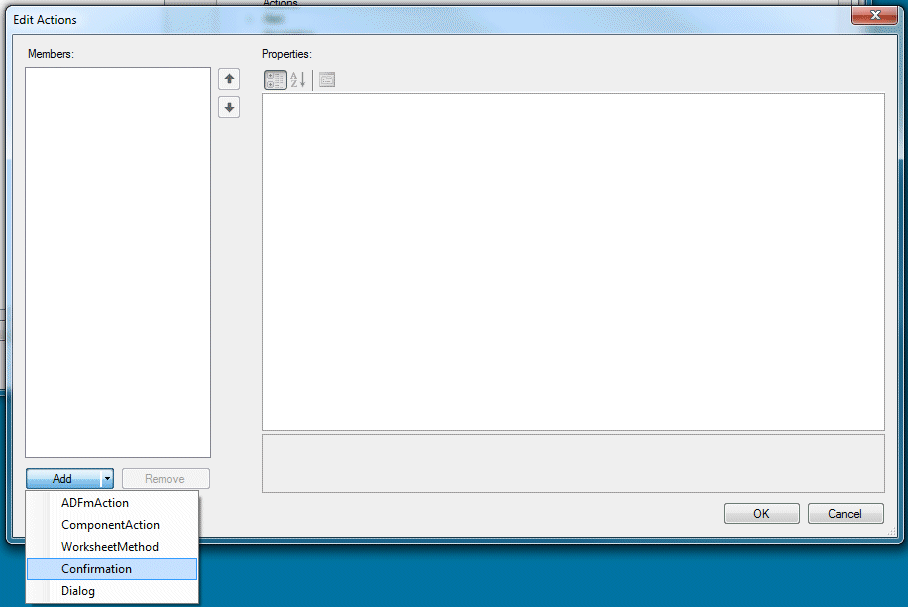
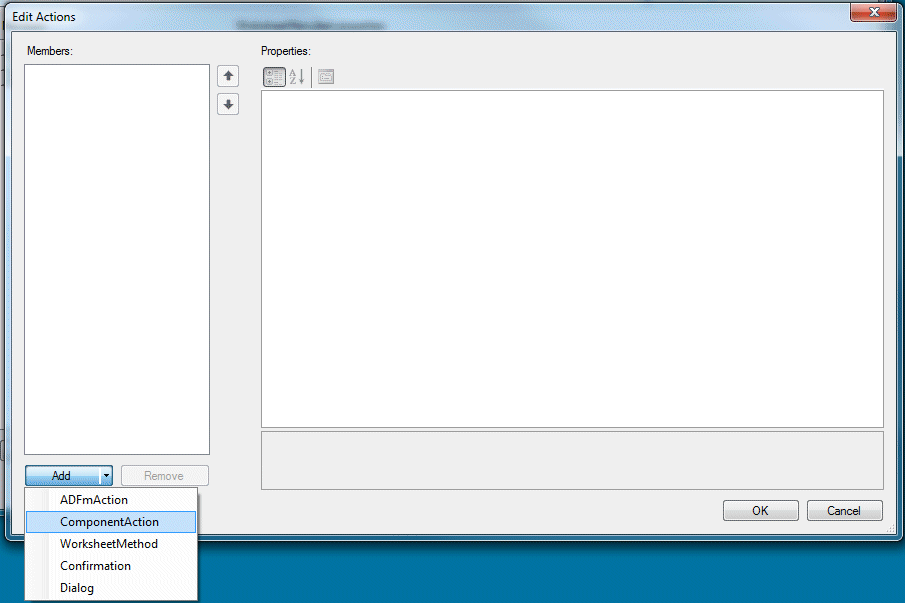
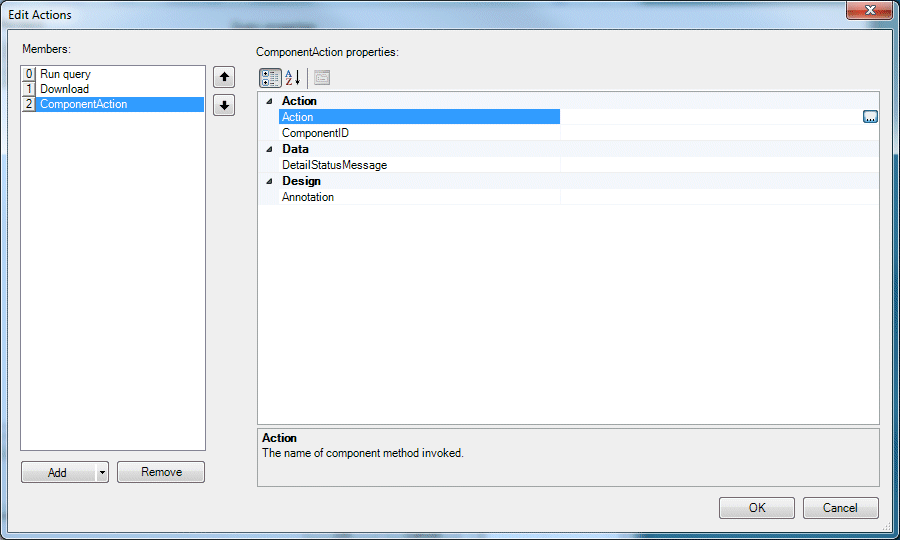
In the Edit Actions dialog, click the triangle in the Add button and select ADFmAction from the drop down list.
-
In the Edit Actions dialog for the ADFmAction properties, click the more button
next to the ActionID field.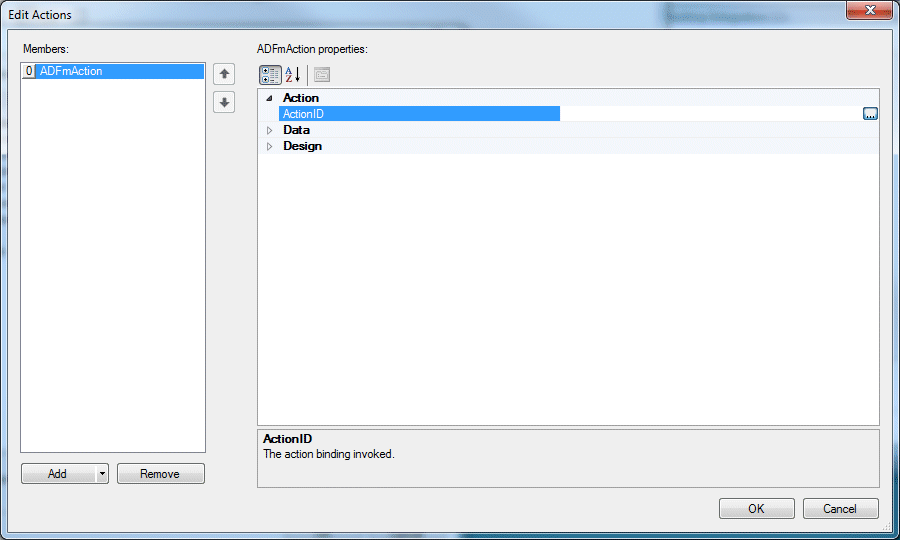
-
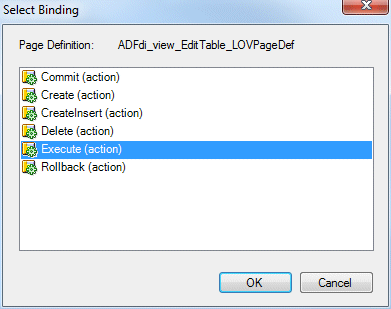
In the Select Binding dialog, select Execute and click OK.
-
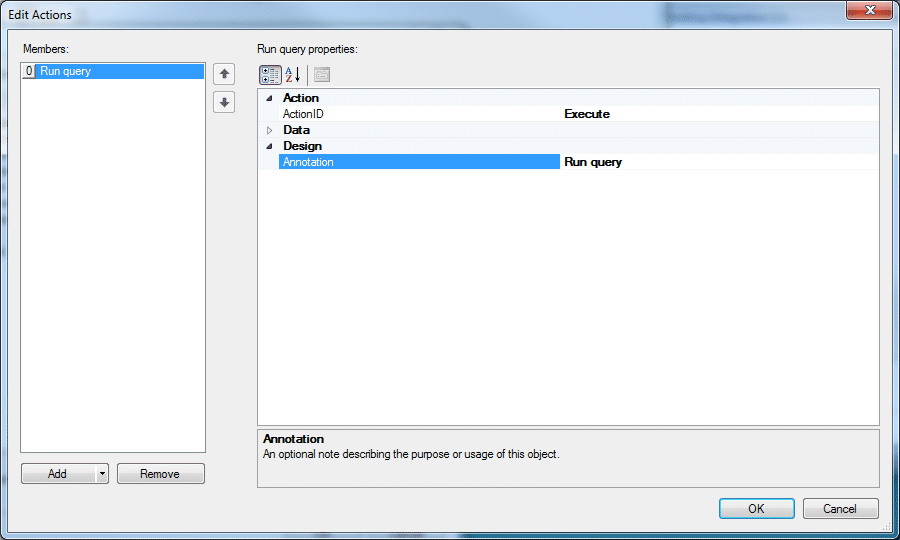
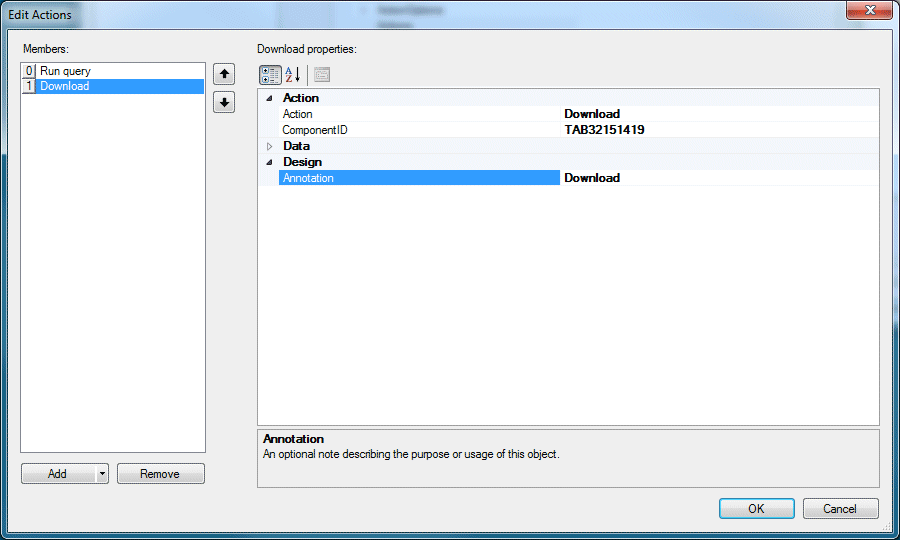
Back in the Edit Actions dialog, in the Design > Annotation field, type Run query.
-
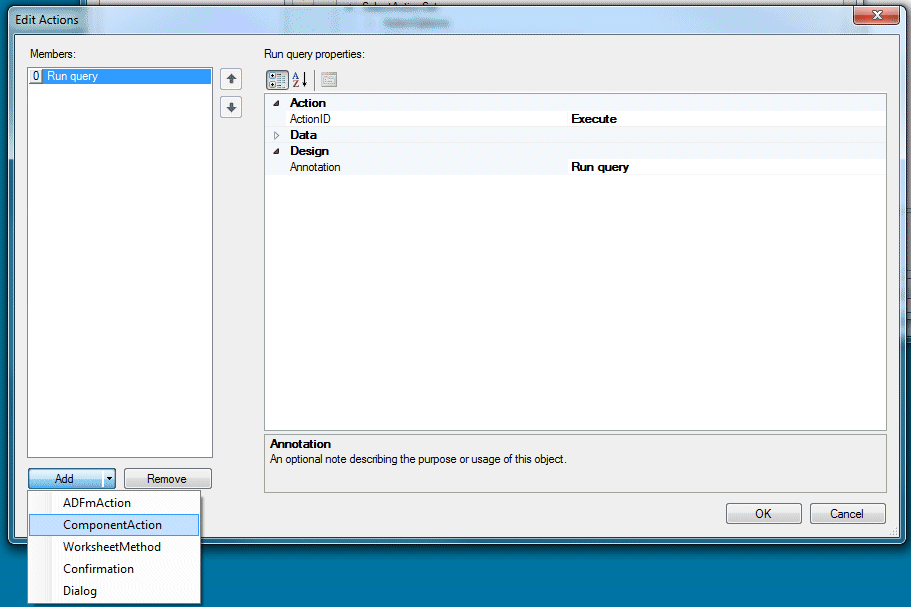
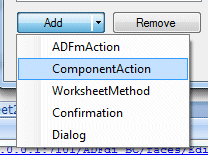
In the Edit Action dialog, click the Add button and select ComponentAction from the drop-down list.
-
Click the more button
next to the Action field. 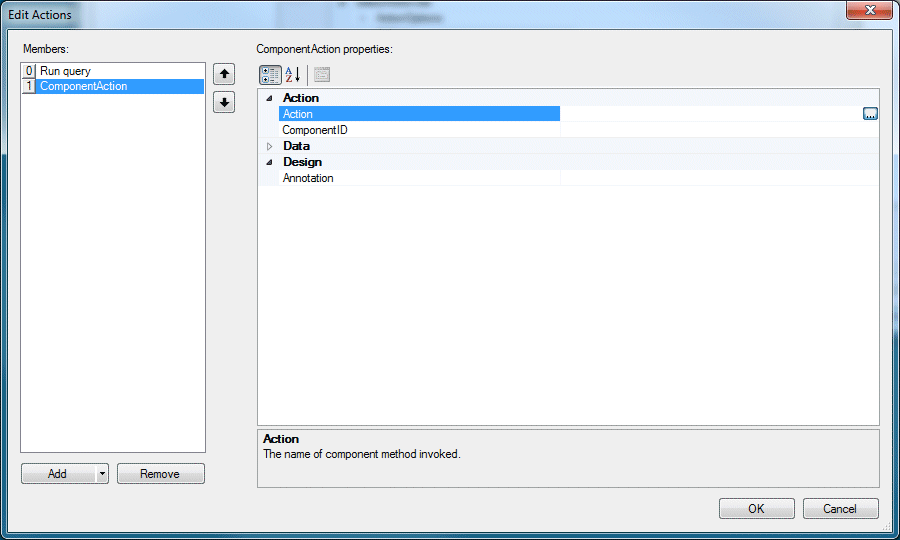
-
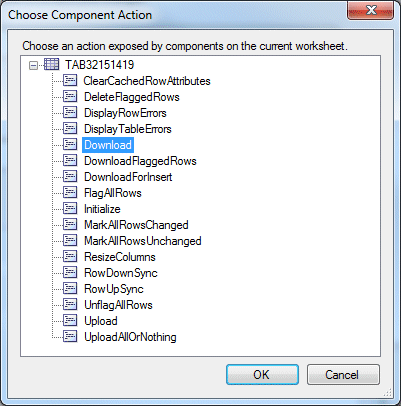
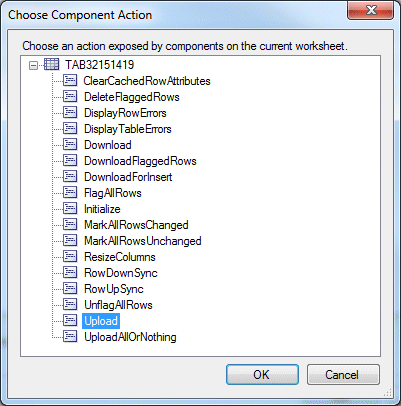
In the Choose Component Action dialog, select Download and click OK.
-
Then, back in the Edit Action, in the Design > Annotation field, type Download and click OK.
-
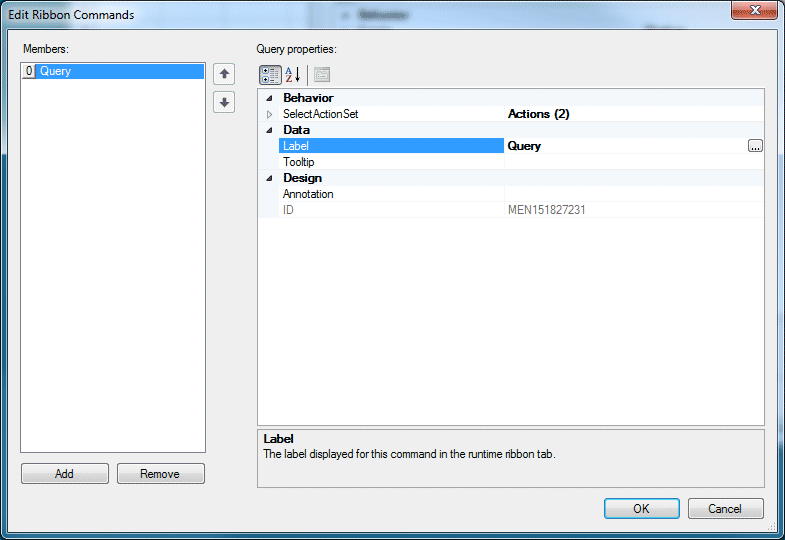
Back in the Edit Ribbon Commands dialog, type Query in the Label field.
Click OK and OK again to return to Excel.
-
Click the Save
 button to save your Excel workbook.
You can also create resource expressions for labels in order to create a 'localized' application.
-
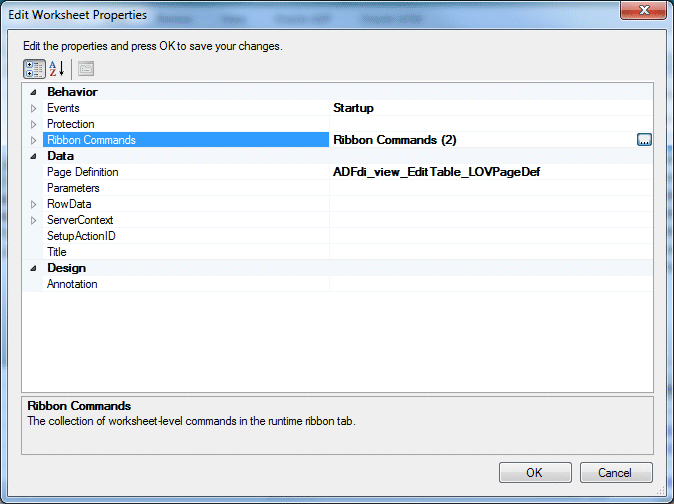
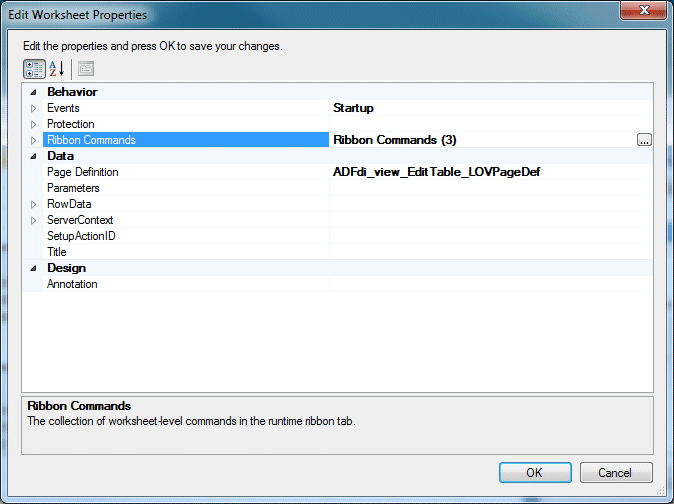
In the Oracle ADF tab, click the Worksheet Properties button.
-
In the Edit Worksheet Properties dialog, locate Ribbon Commands and click the more button.
-
In the Edit Ribbon Commands dialog click Add.
-
In the right-hand pane, click the more button
next to the Actions field. 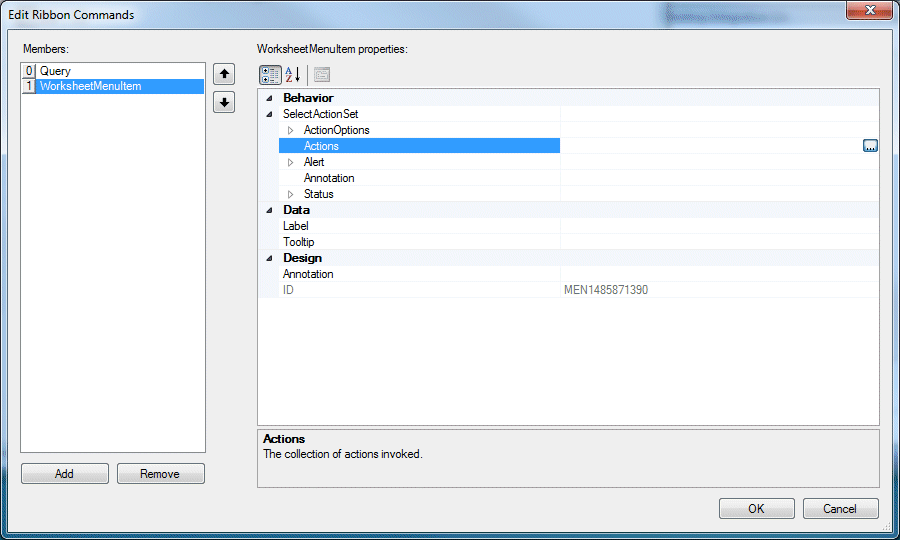
-
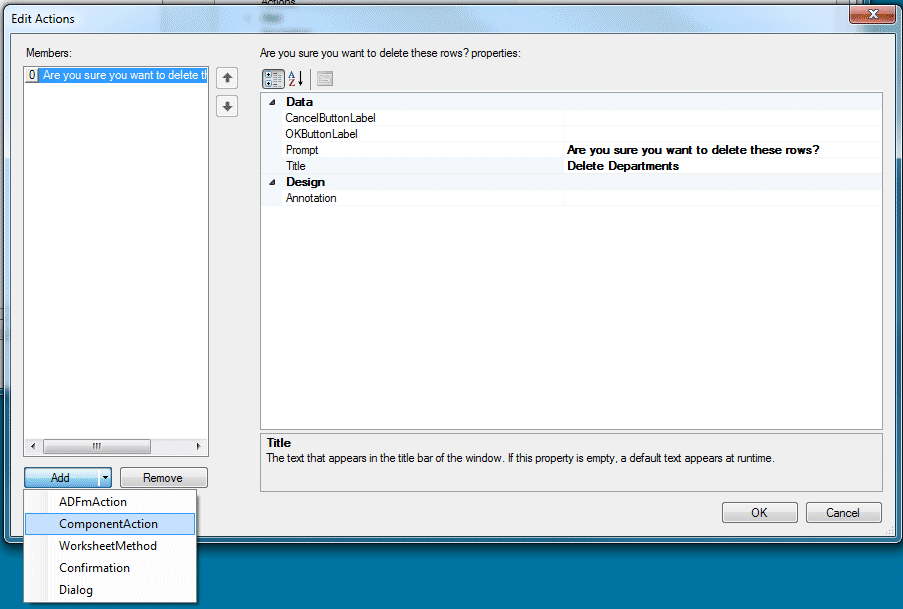
Click the triangle in the Add button and from the drop-down list select Confirmation.
-
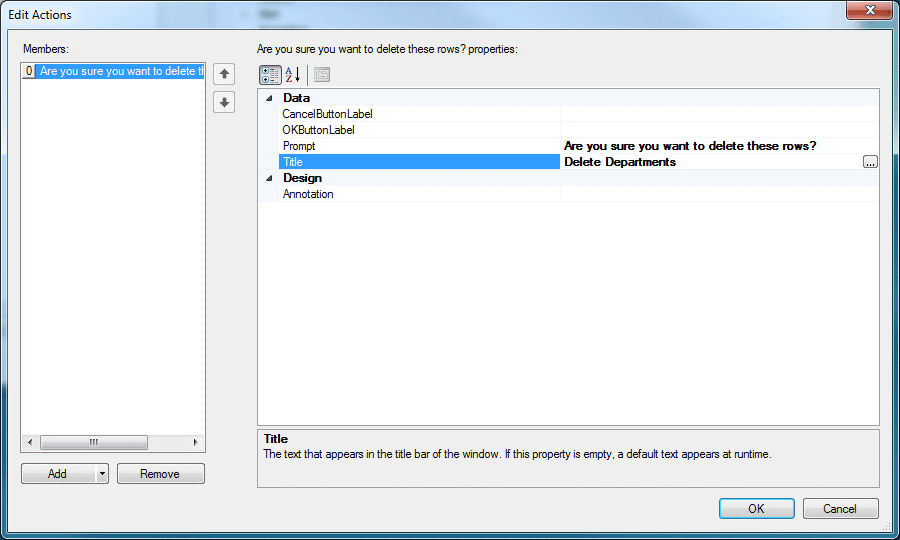
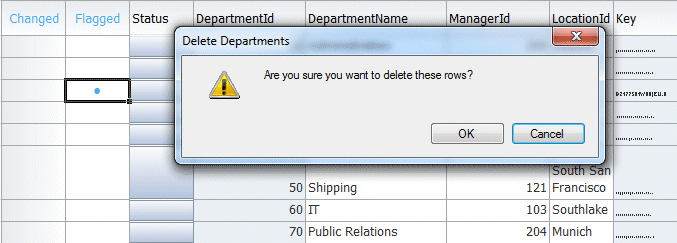
In the Data section, enter the following values:
Property Value Prompt Are you sure you want to delete these rows? Title Delete Departments
 Defining label properties.
Refer to the dev guide for details on localizing your integrated workbook. -
Click the triangle in the Add button, and from the drop-down list select ComponentAction.
-
In the Edit Action dialog, click the more button
next to the Action field.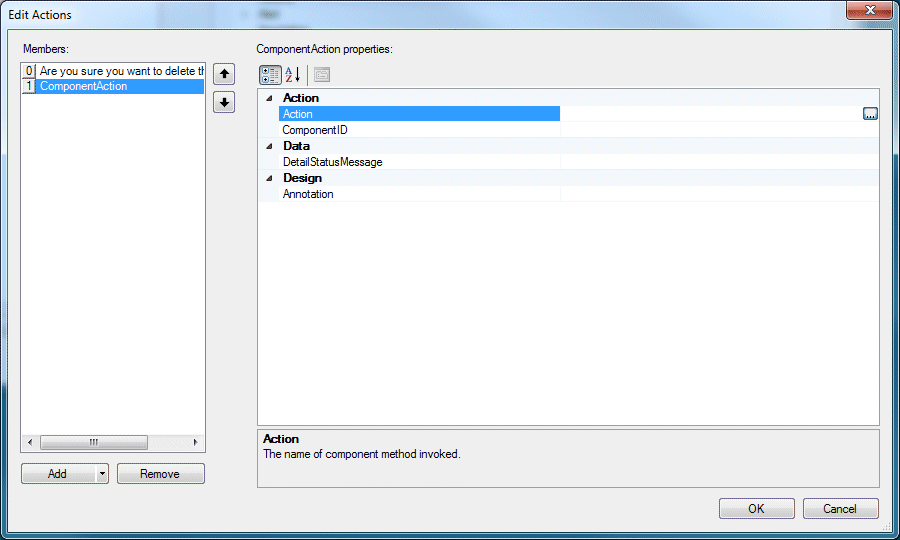
-
In the Choose Component Action, select DeleteFlaggedRows.
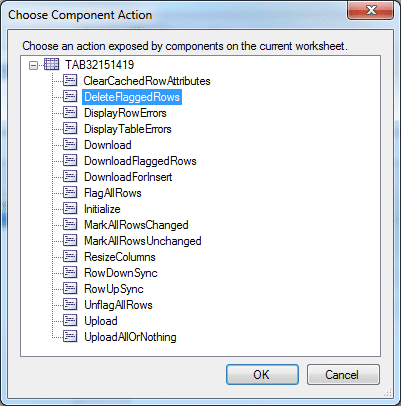
Click OK and OK again. -
In the Edit Ribbon Commands, type Delete Flagged in the Label field.
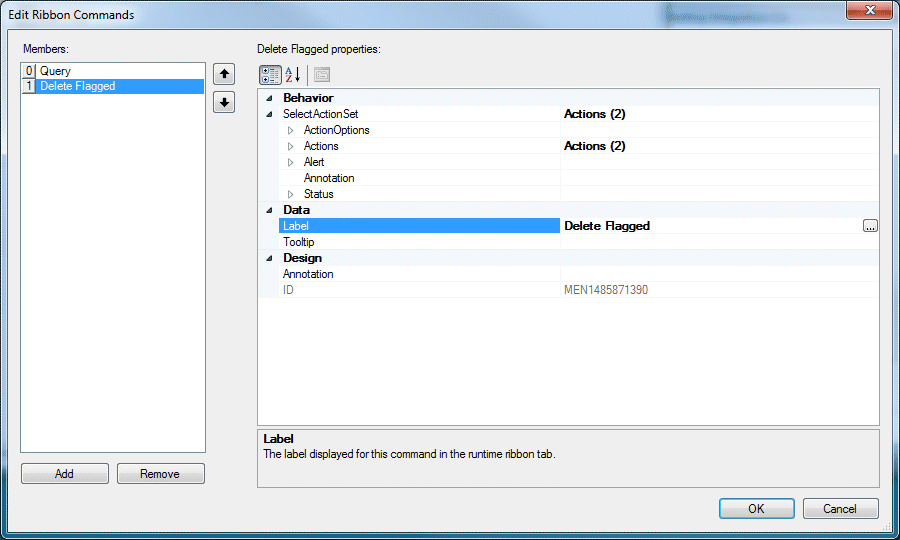
Click OK. Click OK again to return to Excel..
-
Save all your work.
-
In the Oracle ADF tab, click the Worksheet Properties button.
-
Locate Ribbon Commands and click the more button.
-
In the Edit Ribbon Commands dialog, click Add.
-
In the right-hand pane, click the more button
next to the Actions field. 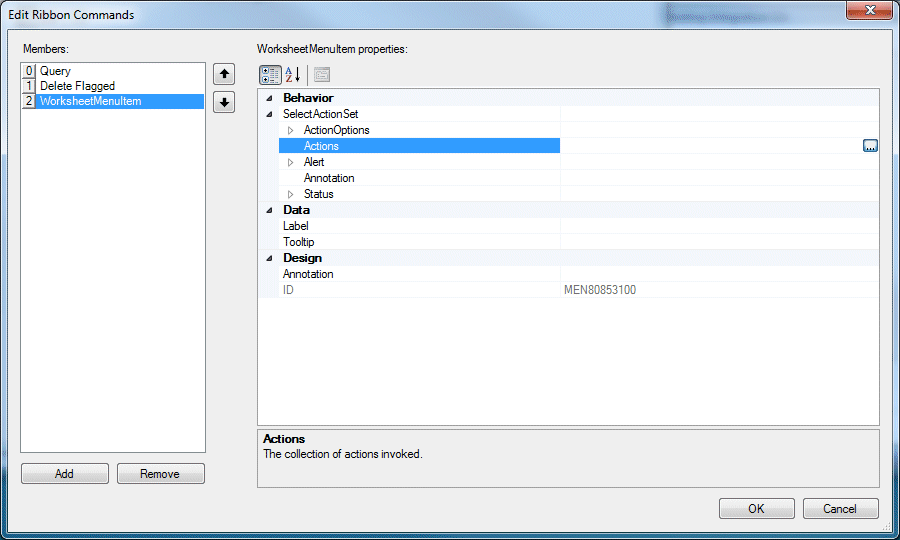
-
In the Edit Actions dialog, click the Add button and select ComponentAction from the drop down list.
-
In the Edit Actions properties, click the more button
next to the Action field.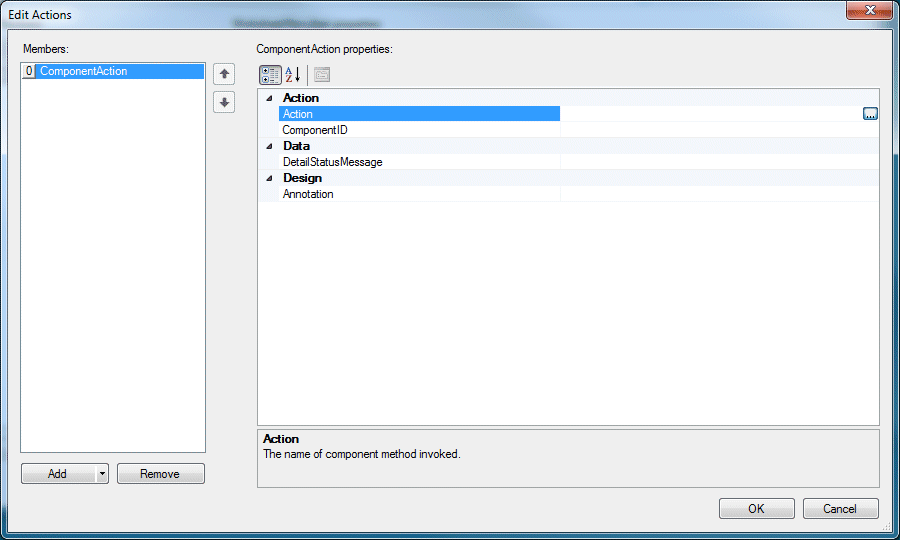
-
In the Choose Component Action dialog, select Upload. Click OK.
Click OK again.
-
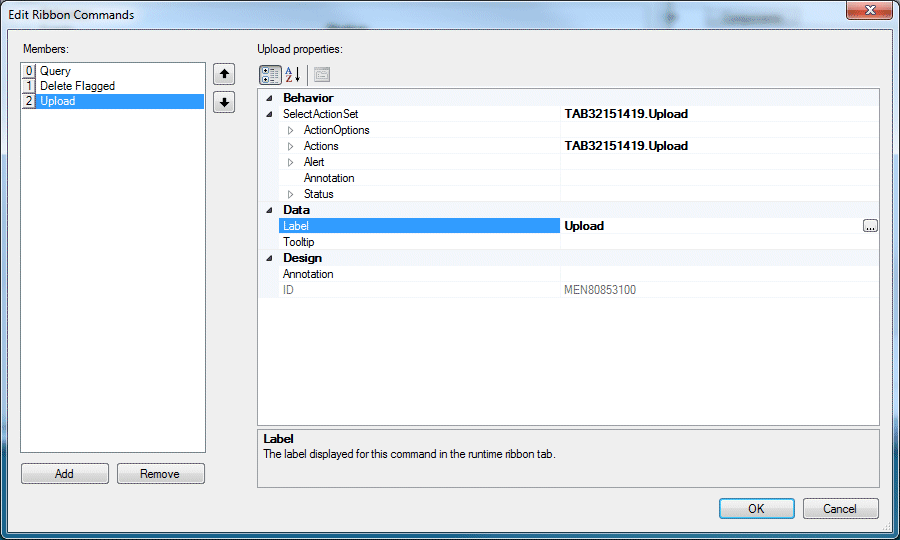
In the Edit Ribbon Commands dialog, type Upload in the Label field and click OK.
-
Now you have three ribbon commands defined for your worksheet.
Click OK.
-
Save
the workbook.
-
In this next few steps, explore using tooltips.
Each column or field may display tooltips when the user places the cursor over the column.
Get back to the design view of the EditDept_LOV_src workbook and double click in one of the workbook cells to bring up the Edit Component:ADF Table dialog.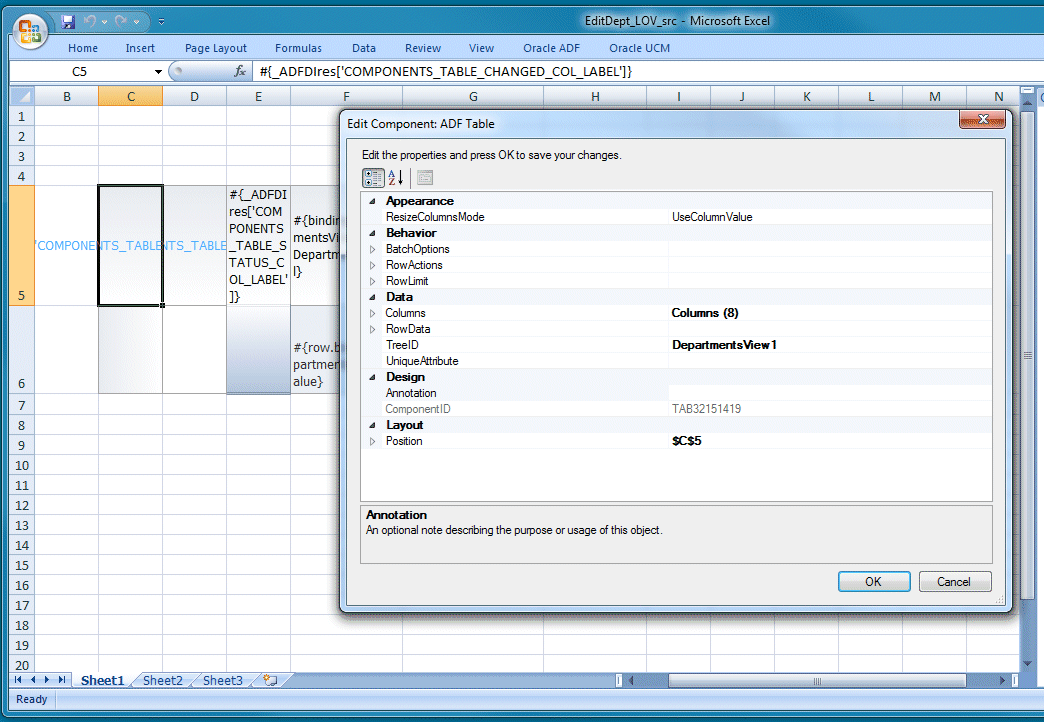
-
In the Edit Component:ADF Table, select the Columns node and then click the elipse button to the far right.
-
In the Edit Columns pane, select the DepartmentId column. Notice under the Data node, a Tooltip property.
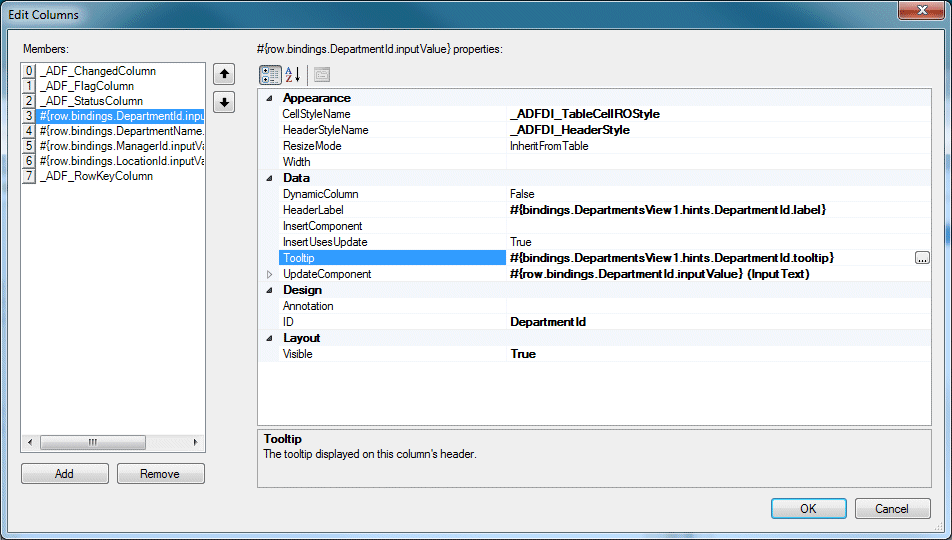
-
You could hard code a value here and that would be used as the tooltip for the Department Id. However, it would not promote reusability. That tooltip would only be seen in this workbook and you would have to go update every workbook with a tool tip value to keep them in sync.
The value you see here, references the DepartmentView's Tooltip UI Hint for the Department Id.
-
So, where do you go to set or modify the value?
Go back into JDeveloper, and in the Applications window, expand the Model project and double click the DepartmentsView view object .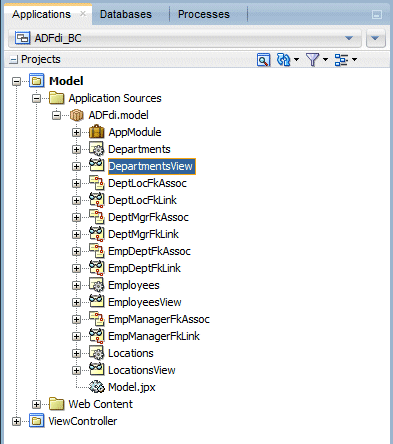
-
In the editor, select the Attributes tab.
Then, with the DepartmentId selected, find and click the UI Hints tab .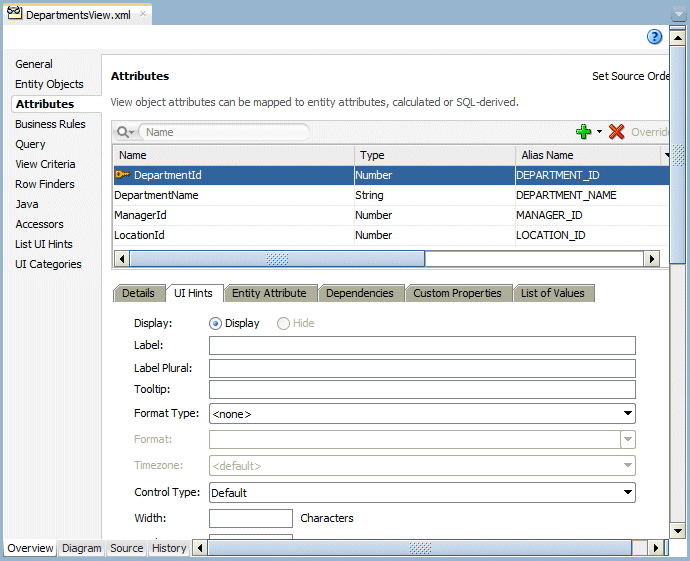
-
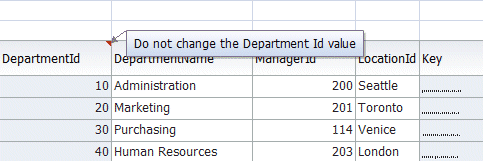
Set the value for the Tooltip property to something like Do not change the Department Id value.
Then, save your work.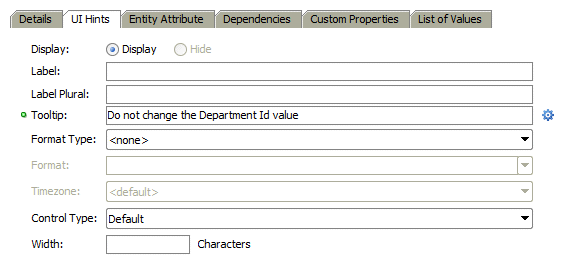
-
In the Application window, expand the ViewController > Web Content, right click the EditTable_LOV.jspx and select Run.
This will take the new tooltip value and deploy it to the application server so it can then be consumed by the Excel workbook.
Check the Log window to confirm the application deploys.
When the workbook is run, you'll notice a red triangle in the upper right of the Department Id label. Hovering over it will display the tooltip.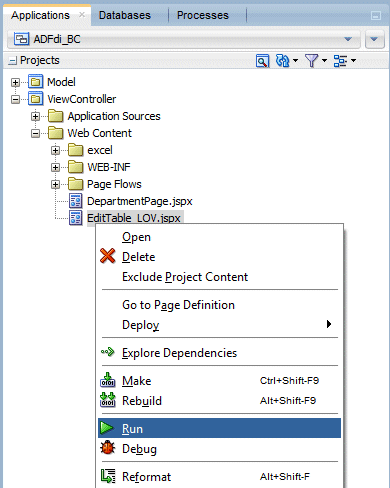
-
Next, make some modifications to the workbook. With these changes you can have the columns resize their width by the size of the data that's being displayed.
Go back to the EditDept_LOV_src Excel workbook and from the design view, double click one of the cells.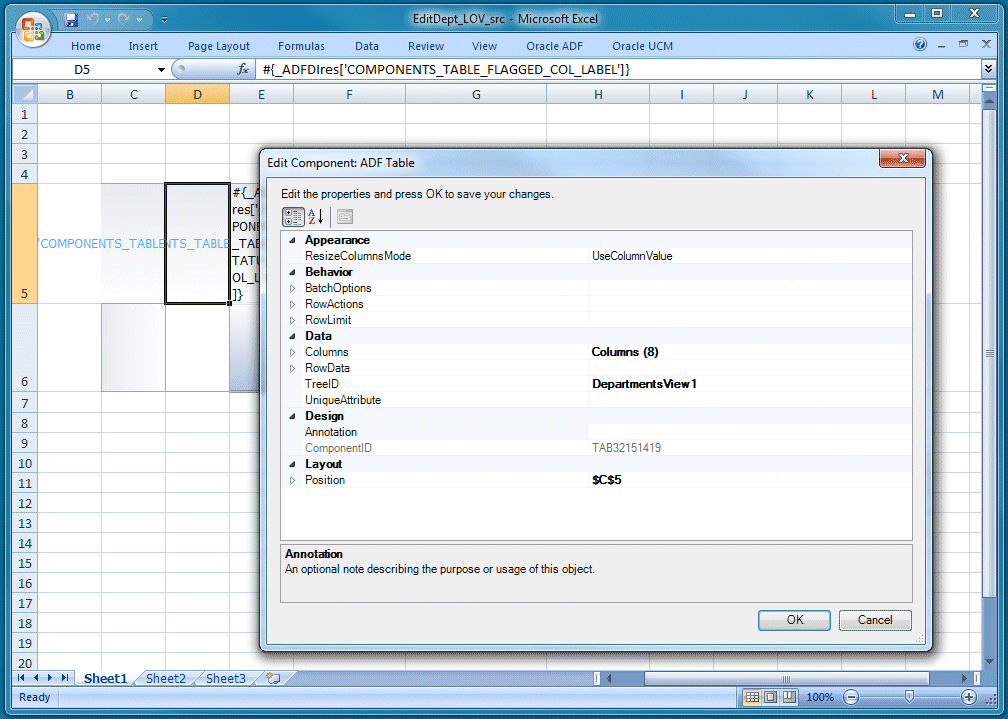
-
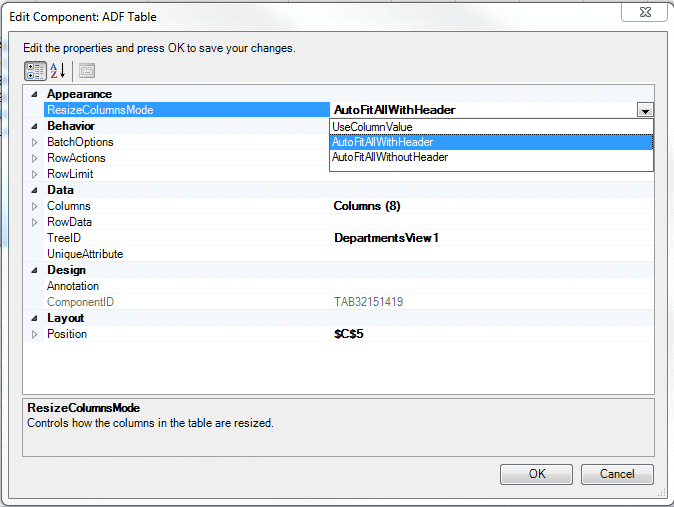
In the Appearance node select the ResizeColumnsMode and select AutoFitAllWithHeader. Then click OK.
-
In the Oracle ADF menu, select Worksheet Properties.
-
In the Behavior node, find the Ribbon Commands property and value. Click the elipse button on the right side of the property value.
-
In the Members area, select the Query command and expand the SelectActionSet node.
-
Select the Actions property and then click the elipse button.
-
In the Edit Actions pane, select the Downalod Member and then at the botton, click Add > ComponentAction.
-
Select the Action property and select the elipse button.
-
From the Component Action list, select ResizeColumns.
Then click OK, two times to return to the Edit Component: ADF Table pane.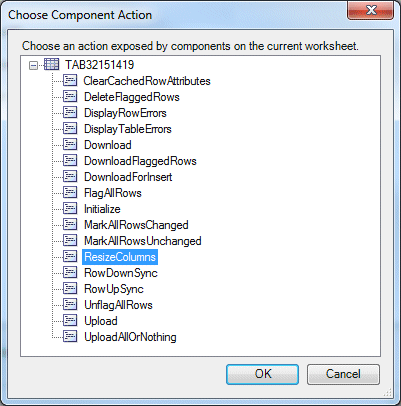
-
Below the Data node, expand the Columns node.
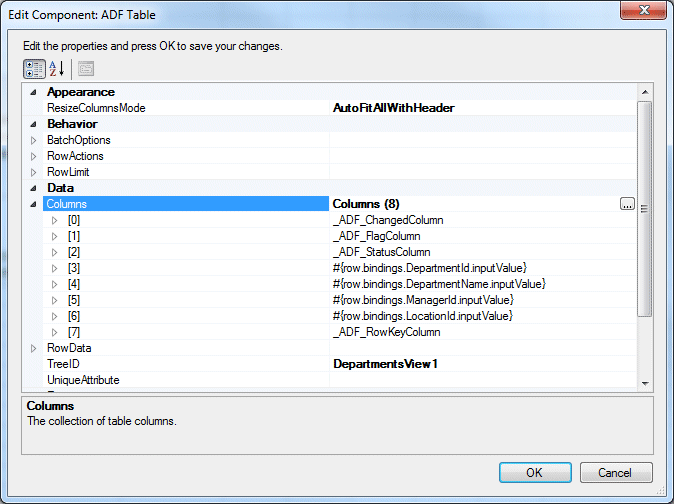
-
Expand the RowKeyColumn (7) and set the ResizeMode to SpecificedWidth.
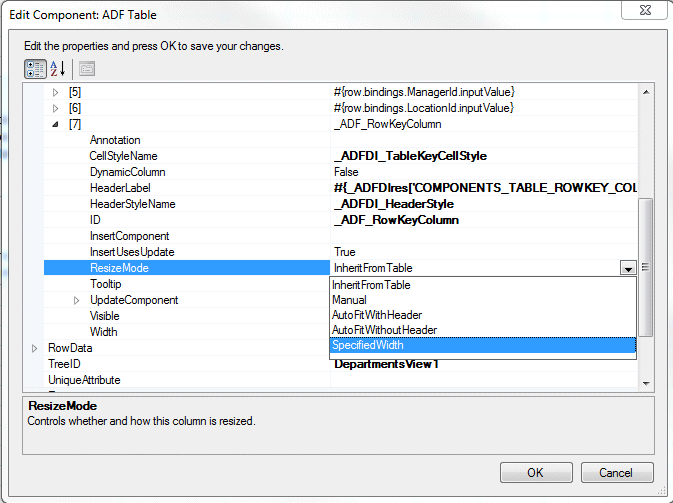
-
Set the Width property to 5.
Then, click OK,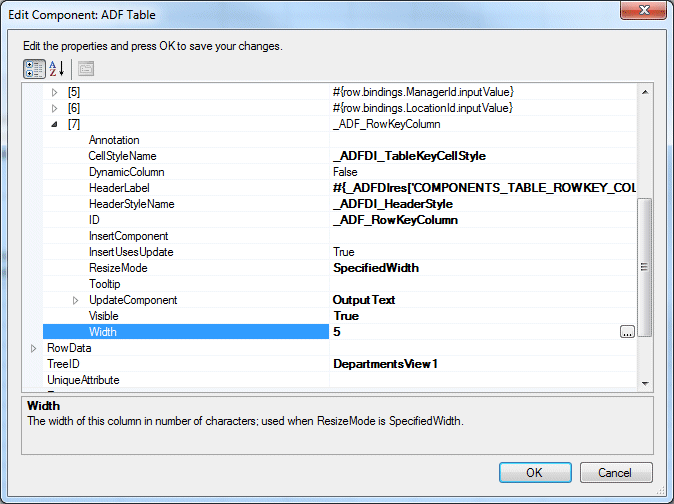
-
In Design mode, make the columns a bit wider, somewhere between 15 and 16.
Save all your work
-
Click the Oracle ADF tab in the Excel ribbon.

-
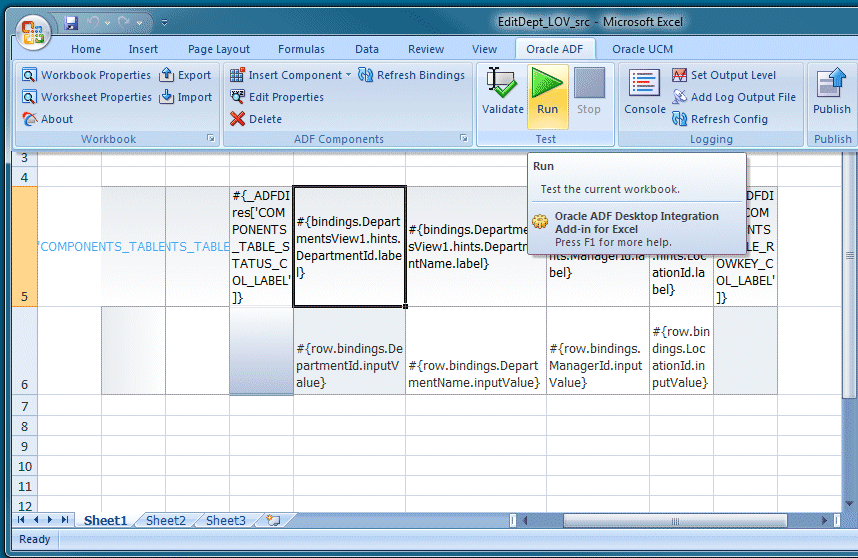
Click the Run button in the Test group.
 Clicking Validate button.
 Read more...
Notice that you could click the Validate button prior to running the worksheet to find and fix any configuration problems with your workbook.
-
The workbook loads, displaying the ADF table, populated with data from the previous part of the tutorial.
If you move your cursor over the Department Id, you'll see the tooltip value.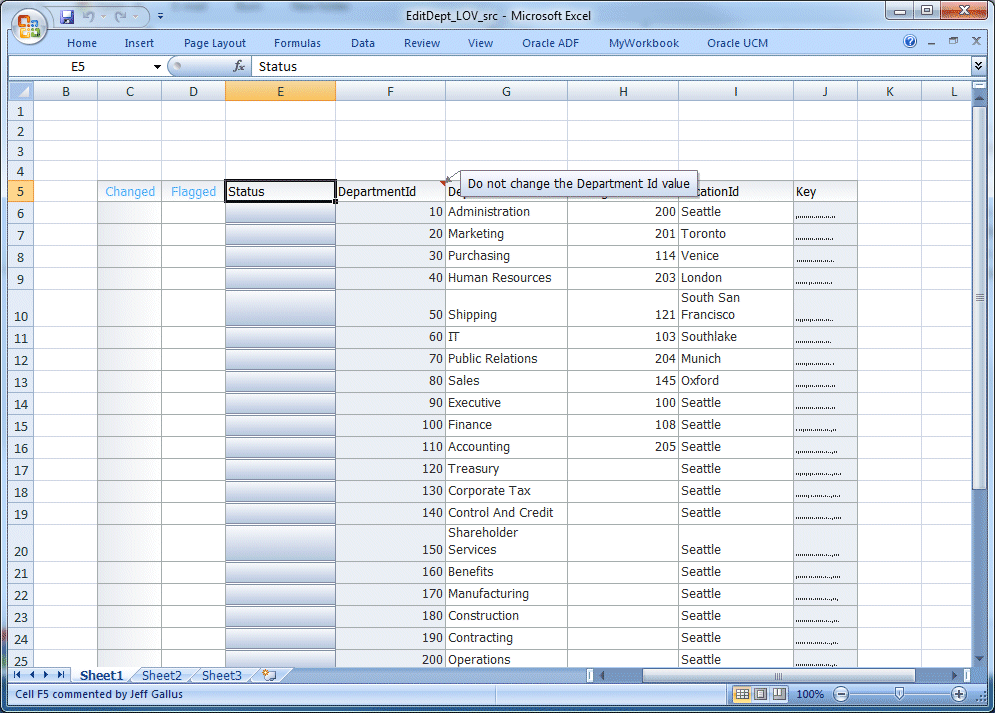
-
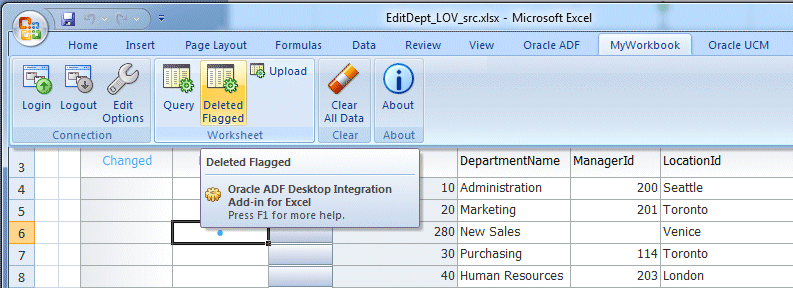
Click the MyWorkbook tab, displayed in the Excel ribbon to the right of the Oracle ADF tab.

-
Notice the three command items that you have just created, in the Worksheet group. These correspond to the three ribbon items.
Click the Query button.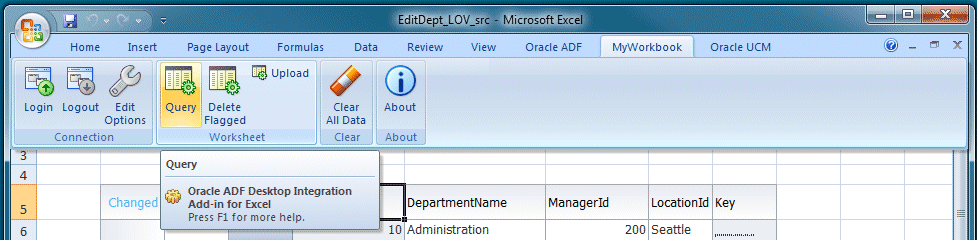
-
The retrieved data are then displayed in the worksheet. If the data had been changed by another worksheet or by the ADF web application, the updated values would appear. Since we added an download action in the previous part, the records should be the same.
-
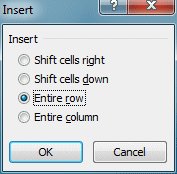
Insert a new row, right-click anywhere within the worksheet, and select Insert from the context menu.
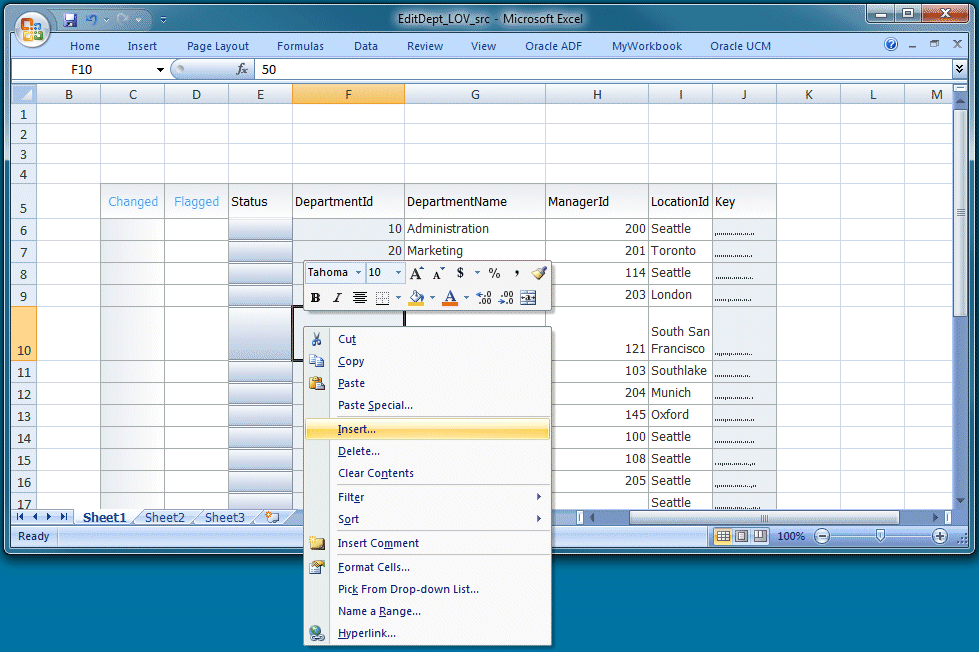
In the Insert dialog select Entire Row and click OK.
-
Type a new Department Name (New Sales) and select a city from the drop down list.
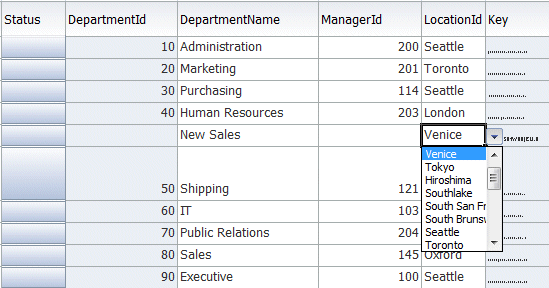
-
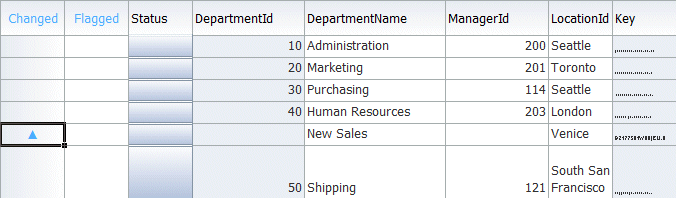
Notice that the new row is automatically flagged in the Changed column.
-
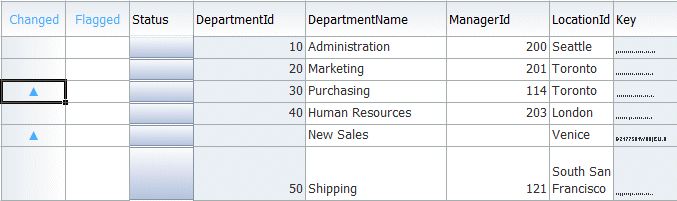
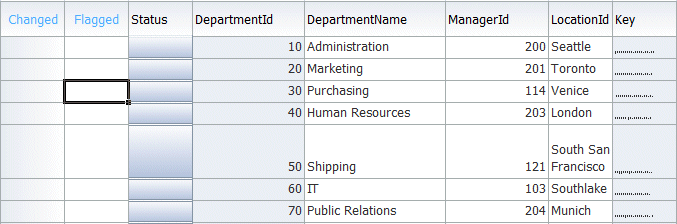
For an existing row, try changing the LocationId from the drop down list.
Notice the Changed column reflects the update to this row.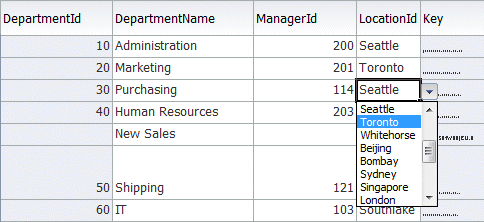
-
Click the newly-created Upload command item in the Excel ribbon to save the changes.
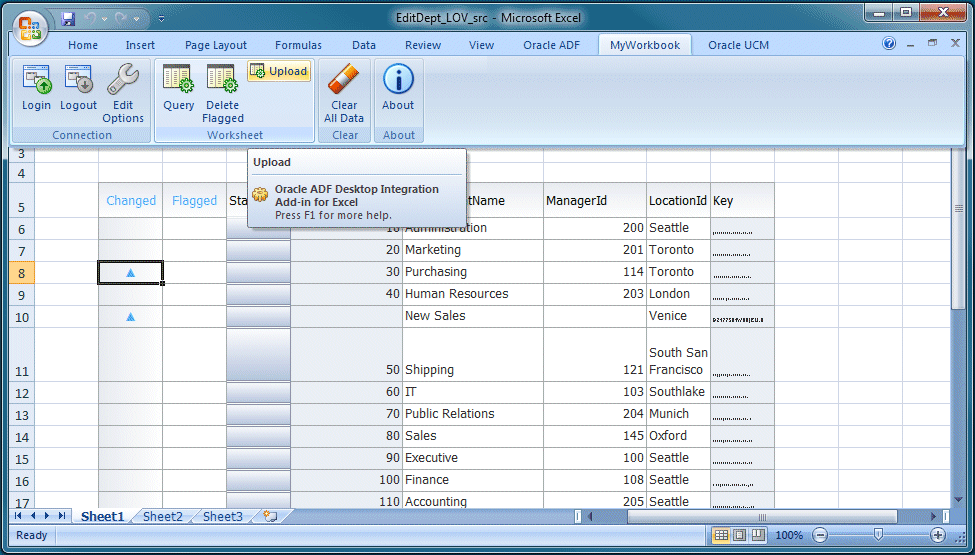
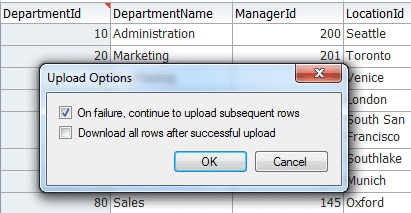
On the Upload Options dialog keep the default values, and click OK. Notice the two flags for the updated rows in the changed column.
-
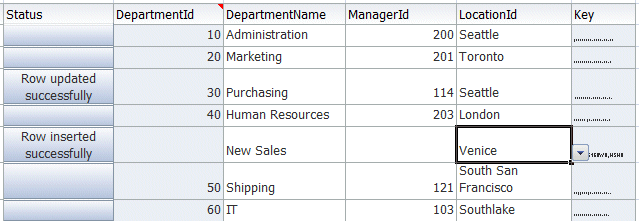
Notice that the new row has been inserted, a Department Id has been generated, and the flags have been removed.
-
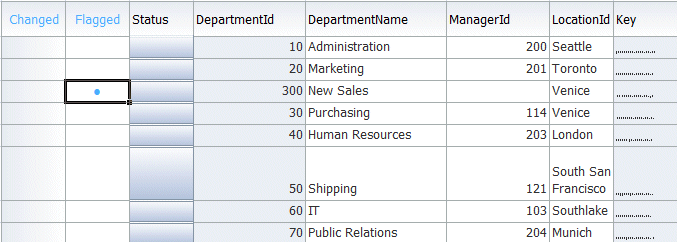
Double click in the Flagged column for the row you just inserted.
-
Click the Delete Flagged button.
-
In the Delete Confirmation dialog you created previously, click Yes.
-
The worksheet is updated.
-
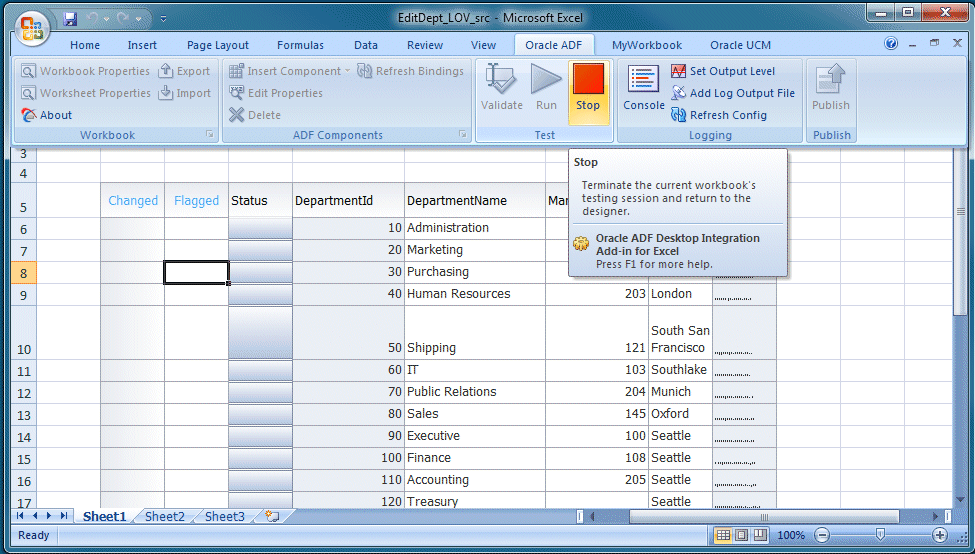
Click the Oracle ADF tab, then click the Stop button, to return to design mode.
You have created a fully-functioning workbook that is integrated with a Fusion Web application, and which allows you to insert, update and delete data from the database. The next part of this tutorial guides you through publishing your workbooks.