
| Download Docs | Site Map | Glossary | |
|
|
|||
| bea.com | products | dev2dev | support | askBEA |
 |
 |
|
|||||||
| e-docs > WebLogic Platform > WebLogic Portal > Commerce and Campaign Features Tour > A Sample Campaign |
|
Commerce and Campaign Features Tour
|
A Sample Campaign
In previous sections of the tour, the focus was on the commerce features of the sample Web application. The descriptions were primarily intended as an overview for the Java enterprise developers or corporate developers who use the JSP templates and tags to build WebLogic Portal applications.
This final chapter of the tour switches the focus to the campaign features, especially from the perspective of the power users and marketing professionals who use the BEA E-Business Control Center.
The following topics are discussed:
Introduction and Prerequisites
This tour takes you through a basic sample campaign, and shows you the simple JSP tags that have been inserted in the sample JSP templates. These JSP tags do things like provide placeholders on the Web pages for content that it either associated with a campaign, or operates independently of a campaign. The characteristics of that content is determined by the person who defines the campaigns in the E-Business Control Center, the profiles of people using the Web site, and the events that occur while people are using the Web site.
First, a few basic facts about the BEA E-Business Control Center and campaigns:
Examining a Campaign: TourCampaign1
To learn about a basic campaign, take the following steps
<BEA_HOME>
The wlcsApp sample application loads, as indicated in the E-Business Control Center's title bar.
This application is a sample enterprise application that ships with WebLogic Portal. You are not loading the enterprise application itself. Rather, you are loading a grouping of XML files that are associated with each tool in the E-Business Control Center. These files, when synchronized to the WebLogic Portal server, will help control the behavior of the enterprise application.
Figure 7-1 Explorer Window
Figure 7-2 Campaign Editor Window
In the Start/Stop pane, notice the existing start and stop dates for the campaign.
The End Criteria section of the pane is where you can set goals that, when met, will stop the campaign prior to its end date. Goals are either based on ad impressions (when a visitor simply views an ad on a Web page) or ad clickthroughs (when a visitor actually clicks a displayed ad). You determine the number of impressions or clickthroughs required to meet the goal and end the campaign. In TourCampaign1, this goal is set to 25 ad impressions.
Figure 7-3 End Criteria Detail Window
Figure 7-4 Details Display for Ad Scenario for Campaign
Again, a scenario is the primary building-block of campaigns. A scenario is composed of one or more scenario actions, all of which take place if their criteria are met: if a particular event occurs or if a customer is part of a specified customer segment As you can see, two actions are defined for this scenario. The scenario occurs if:
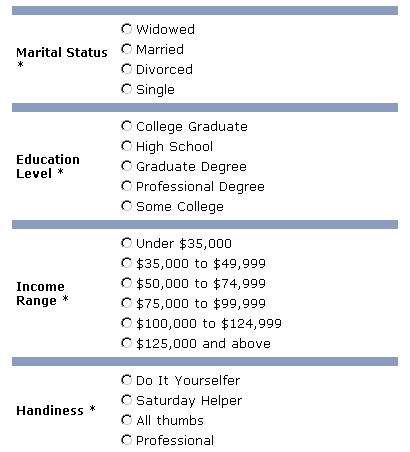
As you will recall from Demographics in newuser.jsp (Part 2 of 3), the newuser.jsp template includes a newdemographictemplate.inc file. It contains form fields that allow the person registering with the Web site to characterize themselves in one of several categories. Figure 7-5 shows a portion of the Demographic Options on the newuser.jsp:
Figure 7-5 Demographic Options from newuser.jsp Template
For the sample campaigns, there are two registered customers you need to know about:
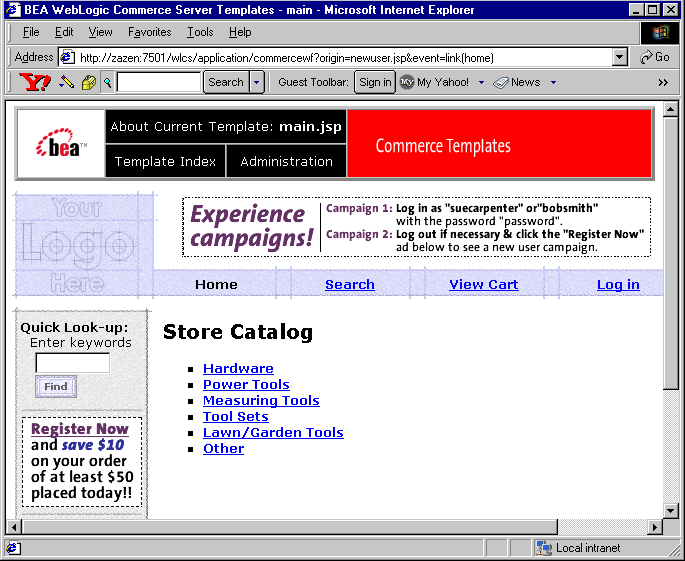
Notice how on the initial main.jsp template for the running Web application, before logging in as any user, the default banner graphics are:
Figure 7-6 shows the initial display for the sample Web application:
Figure 7-6 Initial Display for the Web Application
The tourBanner1.gif and tourSide01.gif images are default images. The placeholder JSP tag is simply: To experience the first sample campaign and see what the Web visitor will see, let's access the Web application in a browser: Note: If the server is not already running, start it as described in Starting the Commerce Server and Templates
<ph:placeholder name="<%= banner %>" />
Or:
http://yourserver:7501/wlcs
Click the Log In link in the horizontal navigation section of main.jsp.
When you arrive on the login.jsp template, log in as:
Username: suecarpenter
Password: password
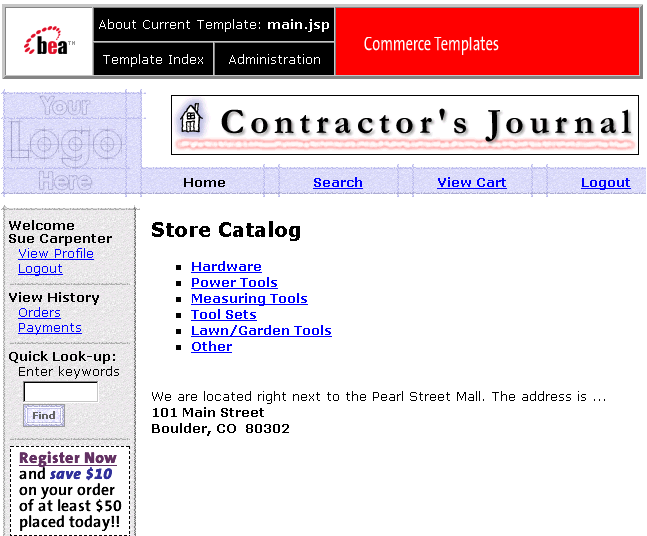
If you entered Sue's username and password correctly, notice the changes when you arrive back on the main.jsp template. Figure 7-7 shows the sample display.
Figure 7-7 Main.jsp Display for Logged-in User Sue Carpenter
Sue is in the Contractor customer segment. Notice the targeted "Contractor's Journal" ad is now used in the banner. The image file name is tourBannerJournal.gif. Let's go back to the E-Business Control Center.
Figure 7-8 Action that References Contractor Customer Segment
Figure 7-9 Notice the "ad search" link on the Ad Action Window
Username: system
Password: weblogic
The password is set when WebLogic Server is installed. Ask your system administrator for the proper password. You can also have your system administrator add you to the Administrators group in the WebLogic Portal Administration Tools. Then you can use your normal username and password.
Figure 7-10 Ad Search Window
Of course, you can now see the tourBannerJournal.gif image that is associated with customers in the Contractor customer segment, as defined in the TourCampaign1. If you want, you can highlight the item in the Descriptors row to see how the Preview function works.
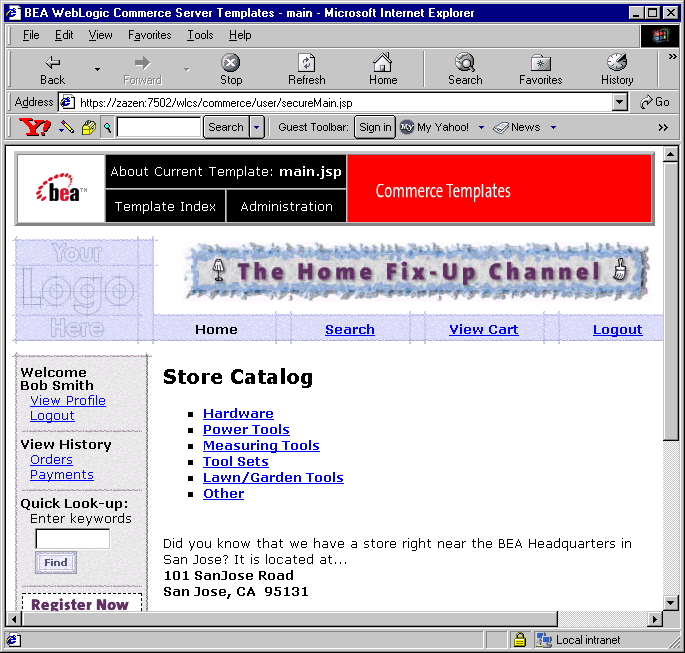
On the Web application, you can log out as Sue Carpenter and then log in as Bob Smith. (The username is bobsmith and the password is password.) Bob is in the "Affluent Mr/Ms Fixup" customer segment. Figure 7-11 shows the main.jsp display for the logged in Bob Smith.
Figure 7-11 Main.jsp Display for Logged In User Bob Smith
As you can see, the targeted banner ad for Bob Smith is using the tourBannerFixup.gif image. You can confirm this in the E-Business Control Center by following the scenario action that references the Affluent Mr/Ms Fixup customer segment. After you create a new placeholder in the E-Business Control Center, a corporate enterprise developer must use a special tag (the <ph:placeholder> JSP tag) in the location that you want to display ads. For example, if you create a placeholder to display ads in the top banner, a corporate enterprise developer must add a <ph:placeholder> tag to the top banner. When a customer accesses a page that contains a placeholder JSP tag, the tag starts the process of choosing a query, running the query, and then generating the HTML tags that the browser needs to display the ad. Once a corporate enterprise developer uses this tag on a page on your Web site, you use the E-Business Control Center to change the queries that the tag can run; you do not need a corporate enterprise developer to modify the tag.

|

|

|