

|
|
|
|
|
|
Installing WebLogic Commerce Server
This chapter includes the following sections:
Note: For information about applying the latest Service Pack of WebLogic Commerce Server and WebLogic Personalization Server 3.2, please see the Release Notes.
In this chapter, the variable WL_COMMERCE_HOME is used to represent the WebLogic Commerce Server 3.2 installation directory.
Before You Begin
Before you start the installation procedure, read the product Release Notes and all of Preparing to Install. Also refer to the following checklist:
To determine if the Java HotSpot Server VM is installed, please follow these steps:
Open the command window. Navigate to the WLCS install directory (for example, c:\WebLogicCommerceServer3.2).
Set the environment by running bin\win32\set-environment. Now check the Java HotSpot Sever VM installation by entering:
%JDK_HOME%\bin\java -server -version
You should see the following output:
java version "1.3.0"
Java(TM) 2 Runtime Environment, Standard Edition (build 1.3.0-C)
Java HotSpot(TM) Server VM (build 2.0fcs-E, mixed mode)
If instead you get an error message, or the last line includes "Client" instead of "Server," reinstall the HotSpot Server VM for the Java 2 SDK v.1.3.0.
For more information, see the Supported Platforms section of the Release Notes at http://download.oracle.com/docs/cd/E13210_01/wlcs/docs32/relnotes/relnotes.htm#platforms.
Installing the Software on Windows Systems
This section explains how to install the WebLogic Commerce Server software on a Windows system. For more information about the supported Windows platforms, see the Supported Platforms section of the Release Notes at http://download.oracle.com/docs/cd/E13210_01/wlcs/docs32/relnotes/relnotes.htm#platforms. The installation shown in this section is on a Windows NT 4.0 SP5 system.
Warning: If you are re-installing the WebLogic Commerce Server 3.2 software on the target system, make sure you first create backup copies of any files that you customized, such as the weblogiccommerce.properties file and weblogic.properties file in the %WL_COMMERCE_HOME% directory.
InstallAnywhere displays its startup screen, and then displays the splash screen for WebLogic Commerce Server and WebLogic Personalization Server. You can select the language of the button text and other InstallAnywhere instructions on screens displayed during the installation.
Figure 2-1 shows the splash screen.
Figure 2-1 Software Installation Splash Screen
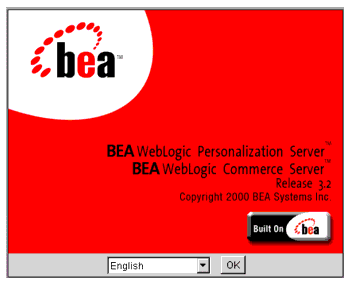
Select a language for the InstallAnywhere text and click the OK button.
Figure 2-2 Introduction Screen
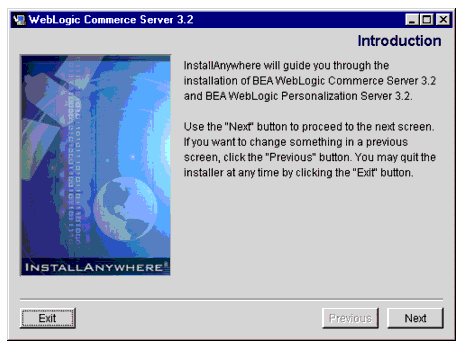
Click the Next button.
Figure 2-3 License Agreement Screen
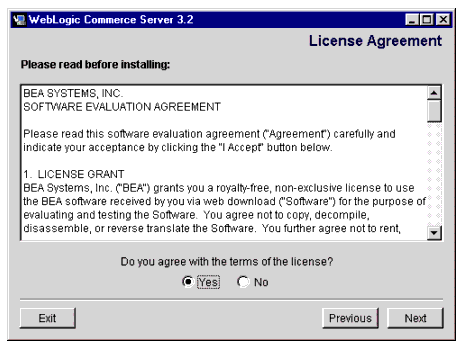
Please read the entire license agreement. If you agree, click the Yes radio button and then click the Next button.
Figure 2-4 Important Information Screen
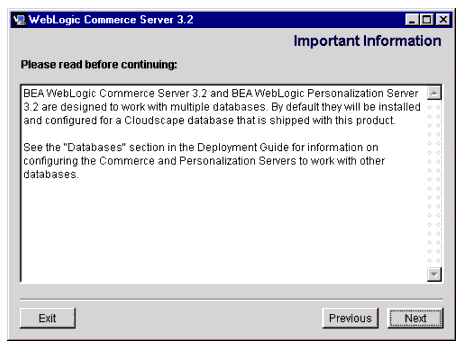
For information about changing the database type from Cloudscape to Oracle, see the Deployment Guide. To proceed with the installation, click the Next button.
Figure 2-5 Choose Install Folder Screen
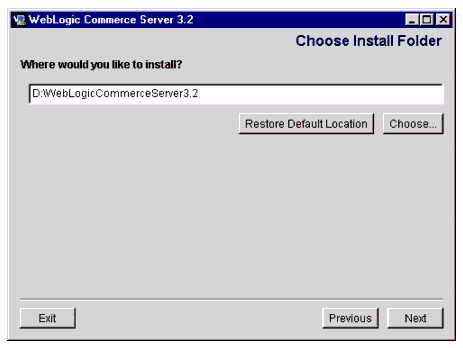
Note: The WebLogic Commerce Server 3.2 software installation will not affect data from previous versions of the products. However, you must install the 3.2 software in a new directory. Do not install the 3.2 software in a directory that contains prior versions of WebLogic Commerce Server, WebLogic Personalization Server, WebLogic Portal, WebLogic Application Solutions, or BEA JumpStart.
WebLogic Commerce Server 3.2 needs about 200 MB of disk space to perform the software installation. When the installation completes, the installed files comprise less than 130 MB. This count is an estimate and might be different on your system. The count does not include the size of the product's documentation files. For more information about installing the documentation, see Installing the Separate Documentation Kit.
After you select the target installation folder, click the Next button.
Figure 2-6 Install Complete Screen
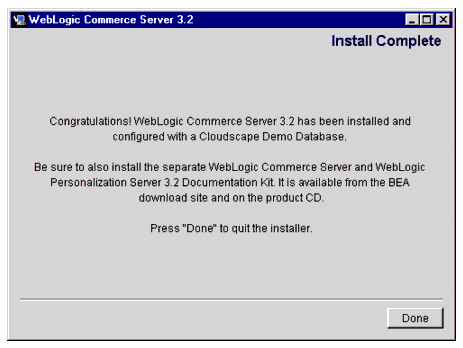
Notice the message about installing the separate documentation kit after you complete the software installation. Click the Done button to complete the software installation. See the section Installing the Separate Documentation Kit for information about installing the documentation files.
Do Not Forget the License File
After the software installation completes and before you start the server, copy the WebLogicCommerceLicense.xml license file you downloaded or purchased to the %WL_COMMERCE_HOME%\license directory. For more information, see Post-Installation Considerations.
Using WLCS_320.bin to Install on a UNIX System That Has a windowing Environment
This section explains how to install the WLCS and WLPS 3.2 software on a supported UNIX system that has a windowing environment. This section shows the installation using the WLCS_320.bin kit.
For installations on UNIX systems that do not have a windowing environment, see the section Using WLCS_320.zip to Install on a UNIX System That Does Not Have a windowing Environment.
For more information about the supported UNIX platform(s), see the Supported Platforms section of the Release Notes at http://download.oracle.com/docs/cd/E13210_01/wlcs/docs32/relnotes/relnotes.htm#platforms. The installation shown in this section is on a Sun Solaris 7 system.
Before you start the installation, note that the installation requires a Java Virtual Machine (JVM) in your path. That is, the <JDKHome>/bin directory must be in the path. This requirement should not be confused with the JDK Home that is specified during the installation. On the Choose JDK screen of the installer, be sure to enter the JDK Home directory without the /bin directory on the end.
Warning: If you are re-installing the WebLogic Commerce Server 3.2 software on the target UNIX system, make sure you first create backup copies of any files that you customized, such as the weblogiccommerce.properties file and weblogic.properties file in the 3.2 $WL_COMMERCE_HOME directory.
The WLCS_320.bin installation procedure uses InstallAnywhere and requires a windowing environment. For installations on UNIX systems, invoke the WebLogic Commerce Server 3.2 installation program on a machine that is running a windowing environment. Or run the WebLogic Commerce Server 3.2 installation program on a system that has a windowing environment, and specify a target installation directory on a UNIX workstation that may or may not have the windowing environment.
$ sh WLCS_320.bin
The installation program finds the Java Virtual Machines (JVMs) that are available to your workstation and prompts you to choose one.
Select a language for the InstallAnywhere text and click the OK button.
For information about changing the database type from Cloudscape to Oracle, see the Deployment Guide. To proceed with the installation, click the Next button.
Note: The WebLogic Commerce Server 3.2 software installation will not affect data from previous versions of the products. However, you must install the 3.2 software in a new directory. Do not install the 3.2 software in a directory that contains prior versions of WebLogic Commerce Server, WebLogic Personalization Server, WebLogic Portal, WebLogic Application Solutions, or BEA JumpStart.
WebLogic Commerce Server 3.2 needs about 200 MB of disk space to perform the software installation. When the installation completes, the installed files comprise less than 130 MB. This count is an estimate and might be different on your system.
The count does not include the size of the product's documentation files, which can be installed after the software installation completes. The documentation files comprise an additional 60 MB of disk space (including all the Javadoc) and are packaged in a separate installation kit, WLCS_320_DOC.bin. For more information, see the section Installing the Separate Documentation Kit.
After you select the target installation folder, click the Next button.
Do Not Forget the License File
After the software installation completes and before you start the server, copy the WebLogicCommerceLicense.xml license file you downloaded or purchased to the $WL_COMMERCE_HOME/license directory. For more information, see Post-Installation Considerations.
Using WLCS_320.zip to Install on a UNIX System That Does Not Have a windowing Environment
This section explains how to use the WLCS_320.zip kit to install the WLCS and WLPS 3.2 software on a UNIX system that does not have a windowing environment.
For installations on UNIX systems that do have a windowing environment, see the section Using WLCS_320.bin to Install on a UNIX System That Has a windowing Environment.
For more information about the supported UNIX platform(s), see the Supported Platforms section of the Release Notes at http://download.oracle.com/docs/cd/E13210_01/wlcs/docs32/relnotes/relnotes.htm#platforms. The installation shown in this section is on a Sun Solaris 7 system.
Note: If you are re-installing the WebLogic Commerce Server 3.2 software on the target UNIX system, make sure you first create backup copies of any files that you customized, such as the weblogiccommerce.properties file and weblogic.properties file in the WLCS 3.2 $WL_COMMERCE_HOME directory.
For example:
$ mkdir /apps/bea/wlcs
$ cd /apps/bea/wlcs
$ jar xvf /kits/bea/wlcs/WLCS_320.zip
$ pwd
apps/bea/wlcs
$ cd WebLogicCommerceServer3.2
$ pwd
/apps/bea/wlcs/WebLogicCommerceServer3.2
$ chmod 755 install.sh
$ ./install.sh
Please enter the directory where JDK is installed (Version 1.3.0 is supported):
/export/jdk/jdk1.3.0
Please enter the directory where WebLogic is installed (Version 5.1.0 is supported):
/opt/weblogic
Finding Configuration files...
#### Configuring ./bin/unix/cloudscape.sh.stock...
#### Configuring ./bin/unix/license-info.sh.stock...
#### Configuring ./bin/unix/loaddata.sh.stock...
#### Configuring ./bin/unix/loaddocs.sh.stock...
#### Configuring ./bin/unix/LoaderDriverProperties.xml.stock...
#### Configuring ./bin/unix/loadrules.sh.stock...
#### Configuring ./bin/unix/set-environment.sh.stock...
#### Configuring ./db/cloudscape/create-all-cloudscape.sh.stock...
#### Configuring ./db/cloudscape/create-wlcs-cloudscape.sh.stock...
#### Configuring ./db/cloudscape/create-wlps-cloudscape.sh.stock...
#### Configuring ./dbloader.properties.stock...
#### Configuring ./StartCommerce.sh.stock...
#### Configuring ./weblogic.properties.install...
#### Configuring ./weblogiccommerce.properties.install...
$ pwd
/apps/bea/wlcs/WebLogicCommerceServer3.2
$ ls
bin license
classes pipeline.properties
db rulesheets
dbloader.properties server
deploy src
dmsBase StartCommerce.sh
eval webflow.properties
install.sh weblogic.properties
lib weblogiccommerce.properties
$ pwd
/apps/bea/wlcs/WebLogicCommerceServer3.2
$ cp /<directory-containing-license-file>/WebLogicCommerceLicense.xml license
Example commands to set execute permissions on the specified files:
$ pwd
/apps/bea/wlcs
$ cd WebLogicCommerceServer3.2
$ pwd
/apps/bea/wlcs/WebLogicCommerceServer3.2
$ find . -name "*.sh" -exec chmod 755 {} \;$ find . -name "*.so" -exec chmod 755 {} \;$ chmod 755 ./UninstallerData/Uninstaller_Haystack
find . -name "*.sh" -exec ls -l {} \;
find . -name "*.so" -exec ls -l {} \;
$ ls -l ./UninstallerData/Uninstaller_Haystack
See also Post-Installation Considerations.
Installing the Separate Documentation Kit
This section explains how to install the separate documentation kit on supported Windows and UNIX systems.
Documentation Kit Names and Target Locations
The documentation kit names are:
Both of the documentation kits give you the option of installing either:
If you choose the integrated option, the documentation installation will also copy a DocumentMapping.properties file into the WLCS directories, as explained in the section The DocumentMapping.properties File.
The documentation installation requires about 70 MB of temporary, free disk space; on Windows, the installation program uses your %TEMP% directory and on UNIX, the installation program uses /tmp. When the installation completes, the documentation files comprise an additional 60 MB of disk space (including all the Javadoc).
If you do not have adequate temporary disk space, InstallAnywhere exits the installation process.
The DocumentMapping.properties File
In addition to installing the documentation files on an existing software directory, the Integrated documentation installation option installs a DocumentMapping.properties file in:
The property values in DocumentMapping.properties, along with a DocumentMappingSI.properties file, are used map calls from the product's administration screens to the documentation files. If the documentation has been installed locally, the DocumentMapping.properties file is used. Otherwise, the DocumentMappingSI.properties file is used to find the corresponding documentation files on the BEA e-docs Web site. The WLCS software kit installs the DocumentMappingSI.properties file.
Documentation Installation on Windows
The steps to install the documentation kit on a supported Windows system are as follows:
Figure 2-7 Documentation Installation Splash Screen
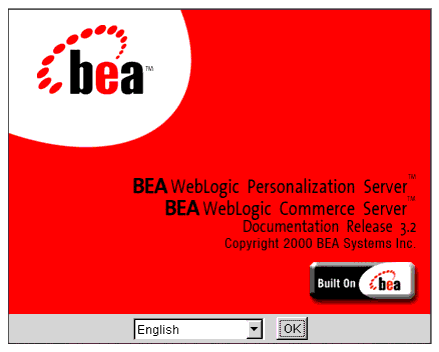
Select a language for the InstallAnywhere text and click the OK button.
Figure 2-8 Documentation Introduction Screen
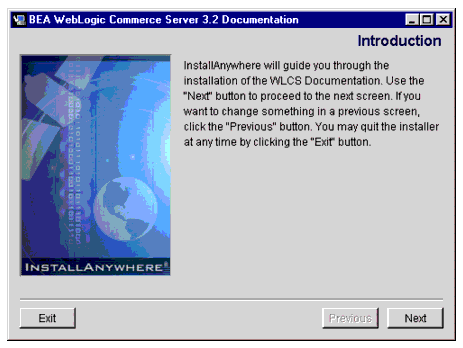
To continue the documentation installation, click the Next button.
Figure 2-9 Documentation Installation Choice Screen
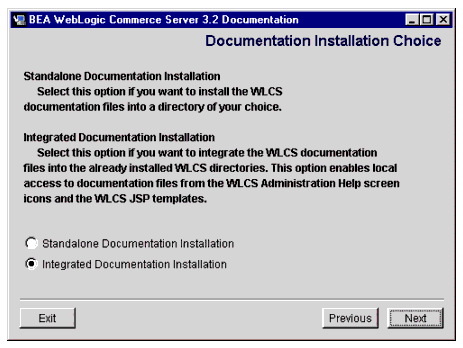
Select the Standalone Documentation Installation option if you want to install the WLCS documentation files in a directory of your choice. BEA provides this option primarily for customers who want to install the documentation on systems that do not necessarily have the WLCS software installed.
Select the Integrated Documentation Installation option if you want the documentation files to be integrated into the already installed WLCS directories. The files will be placed in:
WL_COMMERCE_HOME\server\public_html\docs\...
Make your selection in the radio buttons, and then click the Next button.
Figure 2-10 Documentation Installation Method Confirmation Screen
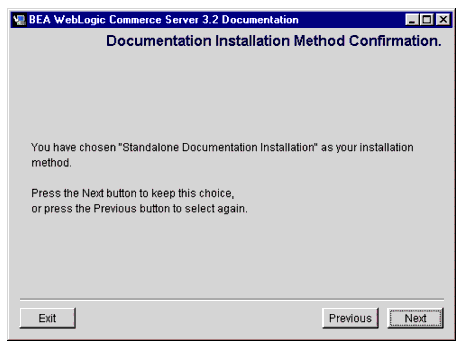
To proceed, click the Next button. Or click the Previous button to return to the selection screen.
Figure 2-11 shows a sample progress screen.
Figure 2-11 Sample Progress Screen During the Documentation Installation
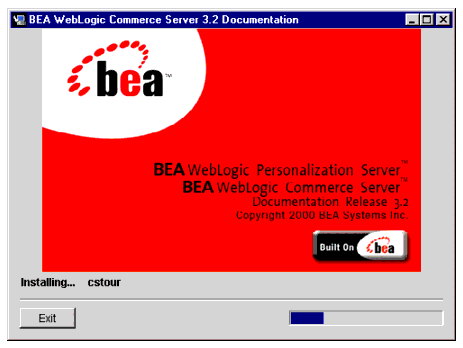
Figure 2-12 Install Complete Screen for the Documentation Kit
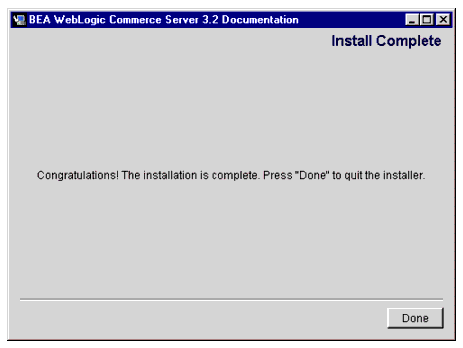
Click the Done button to complete the installation.
After the installation completes, open the index.htm file. Or you can open the documentation home page by selecting the following Start menu option:
Start --> Programs --> WebLogic Commerce Server 3.2 --> Documentation
This Start menu option links to a file-based local URL. That is, the server does not have to be running to view the documentation files.
Documentation Installation on UNIX
This section explains how to install the documentation files on a supported UNIX system. There are two types of options available with the documentation kit for UNIX systems:
/WebLogicCommerceServer3.2/server/public_html/docs/...
If you choose the integrated option, the documentation installation will also copy a DocumentMapping.properties file into the WLCS directories, as explained in the section The DocumentMapping.properties File.
To launch the graphical version of the documentation installer, enter:
$ sh WLCS_320_DOC.bin
To launch the console version of the documentation installer, enter:
$ sh WLCS_320_DOC.bin -i console
Important: If you selected the Integrated option, make sure you enter the exact capitalization of the WLCS software installation directory name. Notice the capital letters W, L, C, and S in the default name: /WebLogicCommerceServer3.2. If you entered, for example, /WeblogicCommerceserver3.2, the installer will install the documentation files in that new directory structure.
After the installation completes, use Netscape to open the index.htm file. The server does not have to be running to view the documentation files.
Uninstalling the Documentation Files
This section explains how to uninstall (remove) the WebLogic Commerce Server 3.2 and WebLogic Personalization Server 3.2 documentation files.
If you installed the documentation files and selected the Integrated option, you may want to uninstall the documentation files before you uninstall the product software files. Because each uninstaller program only knows about the files that it placed on the system, an uninstall of the software files first would leave the documentation files in the WL_COMMERCE_HOME\server\public_html\docs\... directory.
The WebLogic Commerce Server documentation kit on the BEA Download Web site may be updated periodically between product releases to contain new or corrected descriptions. Before you install an updated documentation kit, please uninstall the current set of WebLogic Commerce Server documentation files from the release's directory structure. Doing so will ensure that obsolete files are no longer found in the directories.
Uninstalling the Documentation on Windows Systems
The steps to uninstall (remove) the WebLogic Commerce Server and WebLogic Personalization Server documentation files on Windows systems are as follows:
Start-->Programs-->WebLogic Commerce Server 3.2-->Uninstall Commerce Server Documentation
Figure 2-13 First Documentation Uninstall Screen
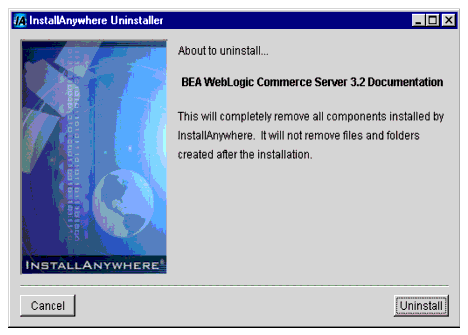
Click the Uninstall button to start the removal of WebLogic Commerce Server and WebLogic Personalization Server documentation files from your system.
After the uninstall, check any remaining files in the WL_COMMERCE_HOME directory structure and decide whether you need to set those files aside for subsequent use.
Uninstalling the Documentation on UNIX Systems
Follow these steps to uninstall the documentation files on UNIX systems.
When the uninstall operation completes, the InstallAnywhere Uninstaller program displays a screen that details which folders could not be removed. Not removing certain directories or files is intentional; InstallAnywhere will not remove any directories that contain files that you modified or added to the WL_COMMERCE_HOME directories.
Uninstalling the Software
This section explains how to uninstall (remove) the WebLogic Commerce Server 3.2 and WebLogic Personalization Server 3.2 software that was installed previously with the WLCS_320.exe or WLCS_320.bin procedures.
Note: This section does not apply if you used the WLCS_320.zip install script, which is for supported UNIX systems that do not have a windowing environment.
Uninstalling the Software on Windows Systems
The steps to uninstall (remove) the WebLogic Commerce Server and WebLogic Personalization Server software on Windows systems are as follows:
Start-->Programs-->WebLogic Commerce Server 3.2-->Uninstall Commerce Server
Figure 2-14 First Uninstall Screen on Windows
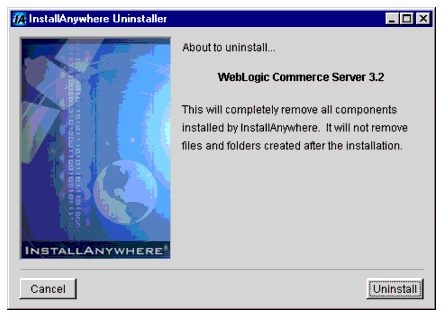
Click the Uninstall button to start the removal of WebLogic Commerce Server and WebLogic Personalization Server files from your system. (InstallAnywhere usually has a delay enabling the display of its Uninstall button as it gathers information.)
Figure 2-15 Progress Screen During the Uninstall
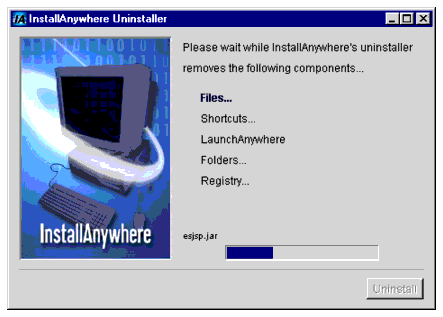
Figure 2-16 Sample Uninstall Results Screen
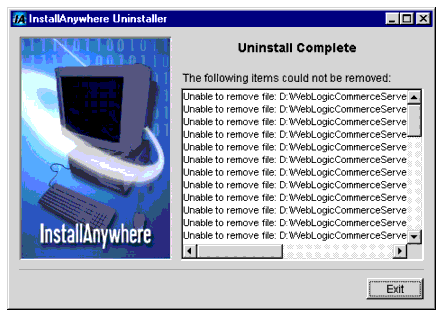
Click the Exit button.
After the uninstall, check any remaining files in the WL_COMMERCE_HOME directory structure and decide whether you need to set those files aside for subsequent use. If desired, remove the WebLogicCommerceServer3.2 folder from the directory structure.
Uninstalling the Software on UNIX Systems
The steps to uninstall the WebLogic Commerce Server software on UNIX systems is similar to the steps on Windows systems.
Note: This section does not apply if you used the WLCS_320.zip install script, which is for supported UNIX systems that do not have a windowing environment.
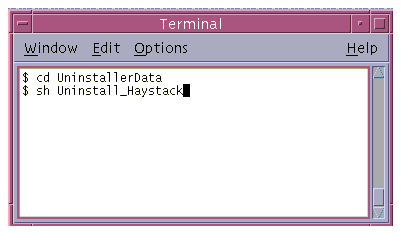
You start by going to the UninstallerData directory, and then run the script Uninstall_Haystack. Figure 2-17 shows a sample screen.
Figure 2-17 Running the Uninstall Program on UNIX

|

|

|
|
|
|
Copyright © 2000 BEA Systems, Inc. All rights reserved.
|