
|
|
|
|
|
|
Installing the eLink Adapter for Mainframe Software
This section provides information and step-by-step instructions for installing BEA eLink Adapter for Mainframe software. After completing the tasks included in Preparing to Install eLink Adapter for Mainframe, install the eLink Adapter for Mainframe components according to your configuration requirements as described in the following section.
Notes: Refer to the BEA eLink Adapter for Mainframe Release Notes if you are upgrading from a previous version of eLink Adapter for Mainframe, and for information about hardware and software requirements. For additional operational and administrative information on the CRM, refer to the BEA eLink Adapter for Mainframe CRM Administration Guide.
All references to ATMI files, functions, and documentation apply to Tuxedo files, functions, and documentation.
Information topics are grouped by platform and by component (Gateway or CRM) if the component installations differ for particular platforms.
This section includes the following topics:
Prerequisites for Installation
Before you install BEA eLink Adapter for Mainframe, you should install Tuxedo 8.
Warning: If you are installing BEA eLink Adapter for Mainframe on AIX, rename the jre130 directory to jre. The jre130 directory was installed in your BEA Home directory at the same level as Tuxedo 8.
Installing the CRM on z/OS or OS/390 Platforms
The CRM may be installed on mainframe platforms as described in the following sections:
Installing the CRM on a z/OS or OS/390 UNIX Platform
This section explains how to install the CRM component on a z/OS or OS/390 UNIX platform.
Note: This procedure assumes you are familiar with File Transfer Protocol (FTP) functions.
tar xvfo os390.tar
Executing the tar command extracts the install.sh script and subdirectories containing the software to be installed.
sh install.sh
Listing 2-1 Sample OS/390 UNIX Installation
Please don't forget to fill out and send in your registration cardinstall.sh
01) os390/os390r8
Install which platform's files? [01- 1 , q to quit, l for list]: 1
** You have chosen to install from os390/os390r8 **
Communications Resource Manager Release 4.1
This directory contains the Communications Resource Manager 4.1
for IBM OS/390 Unix R8 on IBM OS/390.
Is this correct? [y,n,q]: y
To terminate the installation at any time
press the interrupt key,
typically <del>, <break>, or <ctrl+c>.
The following packages are available:
1 crm Communications Resource Manager
Select the package(s) you wish to install (or 'all' to install
all packages) (default: all) [?,??,q]: 1
Communications Resource Manager
(OS390) Release 4.1
Copyright (c) 2000 BEA Systems, Inc.
All Rights Reserved.
Distributed under license by BEA Systems, Inc.
BEA eLink is a trademark of BEA Systems, Inc.
Directory where Communications Resource Manager files are to be installed
(Enter your directory path) [?,q]: /work/tmp
Using /work/tmp as the Communications Resource Manager base directory
The following CRM stack support options are available:
1 vtm28 OpenEdition MVS 390
Select an option [?,??,q]: 1
Determining if sufficient space is available ...
46648 blocks are required
8529000 blocks are available to /work/tmp
Unloading /bea/os390/os390r8/crm/CRMSA.Z ...
4665 blocks
x bin/CRM
x bin/CRMLOGS
x bin/crmdown
x bin/crmlkoff
x bin/crmlkon
x bin/uss.env
x lib/csxappc.dll
x lib/csxcrm.dll
x lib/csxgpw.dll
x lib/csxscrm.dll
x lib/csxxcrm.dll
x lib/csxxfm.dll
x lib/csxxmw.dll
x lib/ctxos_12.dll
x lib/ctxplat_12.dll
x lib/ctxprim_12.dll
x lib/libgp40.dll
x lib/libgpnet.dll
... finished
Unloading /bea/os390/os390r8/crm/STKSA.Z ...
233 blocks
x lib/csxvtm28.dll
... finished
Changing file permissions...
... finished
Installation of Communications Resource Manager was successful
Installing the CRM on a z/OS or OS/390 MVS Platform
This section explains how to install the CRM component on a z/OS or OS/390 Multiple Virtual Storage (MVS) platform.
Note: The installation process assumes the installer is familiar with Job Control Language (JCL) job operations and File Transfer Protocol (FTP) functions.
Summary of Installation Tasks
The following list is a summary of the tasks detailed in "Installation Procedure":
The installation for this environment is semi-automated. Three JCL files are provided to facilitate prerequisites for allocating datasets in the MVS environment and to unload eLink Adapter for Mainframe product software into the allocated datasets.
The product CD-ROM contains the following files relating to this installation procedure:
Installation Procedure
Perform the following steps to install the CRM component on a z/OS or OS/390 MVS platform:
dsupload.jcl
install.jcl
uncmprss.jcl
Use the SET statements in the DSUPLOAD job to set the high-level qualifiers of the receiving datasets according to the following syntax:
SET PRODHLQ=[QUALIFIER]
The DSUPLOAD job has the following steps:
DELOLD
Deletes any existing datasets previously created so you can run this JCL multiple times, if necessary.
CREATE
Allocates the initial datasets needed to receive the product software files.
Table 2-1 MVS Installation Product Files and DD Name Datasets
Note the following example of a put command:
put EAM41.LOAD 'BEA.EAM41.LOAD'
Transfer the datasets using the put command.
Use the SET statements to alter the job for your environment according to the following syntax:
SET BEAPDSE=[QUALIFIER]
In this statement, [QUALIFIER] is the high-level qualifier for the SNACRM Load Library. The load library containing the EAM41.LOAD program objects must be a Partitioned Dataset with Extended attributes (PDSE). The PDSE minimally must have storage class SMS declaration for z/OS or OS/390.
SET SCLASS=[CLASS NAME]
In this statement, [CLASS NAME] is the storage class name of the PDSE. This is required for z/OS or OS/390.
SET BEAPDS=[QUALIFIER]
In this statement, [QUALIFIER] is the high-level qualifier for the sample and data datasets. These are standard PDS.
The INSTALL job has the following steps:
DELOLD
Deletes any existing datasets created by the INSTALL job so you can run this JCL multiple times, if necessary.
CREATE
Creates the MVS datasets for you.
This step includes the minimal JCL needed to create the datasets for z/OS or OS/390. You may change the JCL to reflect your own environment.
Use Table 2-2 as a worksheet to fill out the names of the datasets created in this step.
Table 2-2 Set Statements and Corresponding Datasets
Modify the following variables in the JCL to the high-level qualifier you listed in the tables according to the following syntax:
<PRODHLQ>=[QUALIFIER]
Use the qualifier you listed in Table 2-1.
<BEAPDSE>=[QUALIFIER]
Use the PDSE qualifier you listed in Table 2-2.
<BEAPDS>=[QUALIFIER]
Use the PDS qualifier you listed in Table 2-2.
The UNCMPRSS job has the following step:
UNLOLD
Performs a TSORECEIVE to uncompress and unload the data in your installation datasets created in step 8.
To manually perform the TSO RECEIVE command to unload the data in your installation datasets created in Step 8, enter a command similar to the following command:
TSO RECEIVE INDS(`xxx')
When prompted, enter:
DA(`yyy')
In these statements, the following definitions apply:
Installing the Gateway on AIX, HP-UX, Solaris 7, or Windows
In addition to Solaris 8 installation as described in Installing eLink Adapter for Mainframe Components on Solaris 8, the eLink Adapter for Mainframe Gateway may also be installed on AIX, HP-UX, Solaris 7, or Windows platforms.
Note: The CRM is not available on any of these platforms and can only be installed on Solaris 8 non-mainframe UNIX. Refer to the BEA eLink Adapter for Mainframe Release Notes for more detailed information about platform support.
AIX, HP-UX, and Solaris 7 installations may be performed in Console Mode or Graphics Mode, while Windows installations must be performed in Graphics Mode.
Installing the Gateway in Console Mode
To install the eLink Adapter for Mainframe Gateway on non-mainframe UNIX in console mode, you run one of the following .bin programs as appropriate for your operating system:
Perform the following steps to install the eLink Adapter for Mainframe software in console mode:
$ su -
Password:
# mount -r -F cdfs /dev/cdrom/c1b0t0l0 /mnt
# cd /mnt/eam41
# ls
eam41_Aix.bin
eam41_Hp.bin
eam41_Sol7.bin
eam41_Sol8.bin
eam41_Win.exe
os390.tar
mvs
# sh eam41_Hp.bin -i console
Listing 2-2 UNIX Console Mode Installation Example, Gateway on HP-UX 11
Preparing to install...
Preparing CONSOLE Mode Installation...

===============================================================================
BEA eLink Adapter for Mainframe        (created with InstallAnywhere by Zero G)
-------------------------------------------------------------------------------
===============================================================================
Introduction
------------

This installer will guide you through the installation of 'eLink Adapter for
Mainframe'. On each step, answer the questions provided.  Type "quit" at any
time to exit the installer.

===============================================================================
License Agreement
-----------------

Please read before installing:

BEA eLink Adapter for Mainframe(r) 4.1 Software License

The Software and accompanying documentation (respectively "Software"
and "Documentation") you have acquired are protected by the copyright laws of
the United States and international copyright treaties...
              .
              .
              .
User Count means the number of users specified on the uniform product code
label provided on the outside packaging of the Product.

Connection Management Software means...
              .
              .
              .
Copyright 2001, BEA Systems, Inc.  All Rights Reserved.

DO YOU AGREE WITH THE TERMS OF THE LICENSE? (Y/N):  y

===============================================================================
Choose BEA Home Directory
-------------------------

    1- Create a New BEA Home
    2- Use Existing BEA Home

Enter a number: 2
    1- /bea/
    2- /bea/Tuxedo 8.0

Existing BEA Home: 1

===============================================================================
Installing...
-------------

 [==================|==================|==================|==================]
 [------------------|------------------|------------------|------------------]

===============================================================================
License Selection Option
------------------------

    1- Copy License File Now
    2- Copy License File Later

Enter a number:  2

===============================================================================
Install License Later.
----------------------

You will need to manually append lic.txt (on license diskette)
to your base product license file (in udataobj directory).
Refer to your BEA eLink Adapter for Mainframe Installation Guide for details on how to do this.

===============================================================================
Install Complete
----------------

Congratulations. 'eLink Adapter for Mainframe' has been successfully installed
to:

   /bea/loads/tux80

PRESS <ENTER> TO EXIT THE INSTALLER: ENTER
Installing the Gateway in Graphics Mode
Perform the following steps to install the eLink Adapter for Mainframe Gateway on a Windows or UNIX platform in Graphics Mode:
On Windows:
Note: All screen illustrations in this section are for Windows NT.
On UNIX:
$ su -
Password:
> mount -r -F cdfs /dev/cdrom/c1b0t0l0 /mnt
> cd /mnt/eam41
# ls
eam41_Aix.bin
eam41_Hp.bin
eam41_Sol7.bin
eam41_Sol8.bin
os390.tar
mvs
/mnt/eam41> sh eam41_Aix.bin
The Introduction screen (similar to Figure2-1) displays.
Figure 2-1 Introduction Screen
Figure 2-2 License Agreement Screen
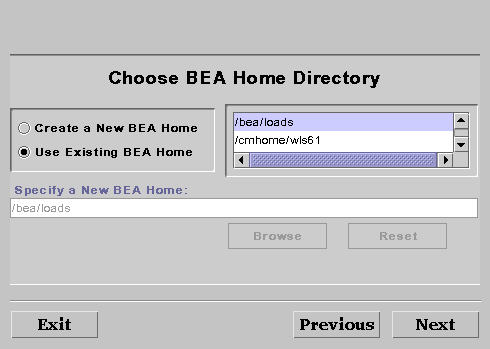
Figure 2-3 Choose BEA Home Directory
Screen
If you want to create a new BEA Home directory, follow these steps:
If you already have one or more BEA Home directories on your system, you can use one of those directories as follows:
Figure 2-4 Previous Installation Found Message Box
From this message box, do one of the following:
Figure 2-5 Tuxedo 8 Not Found Message Box

From this message box, do one of the following:
Figure 2-6 License Installation Choice Screen
Click Next and the Choose License Location Directory Screen displays (Figure2-7).
Figure 2-7 Choose License Location Directory Screen
Click Browse to specify the directory where your
eLink Adapter for Mainframe license key (lic.txt) is located and then click
Next to append the eLink Adapter for Mainframe license key to your Tuxedo 8
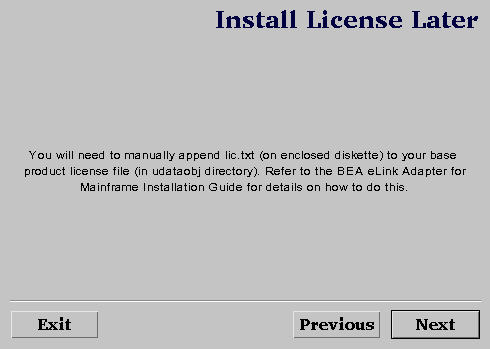
license. Click Next and the Install License Later screen
displays with instructions for installing the license later (Figure2-8). You may also refer to Manually Setting Up the License Key for
more information about installing the license later. Figure 2-8 Install License Later
Screen
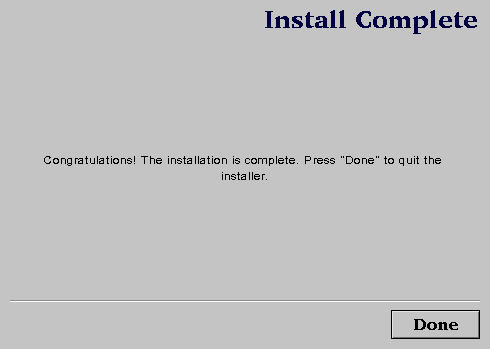
Figure 2-9 Install Complete Screen
Installing eLink Adapter for Mainframe Components on Solaris 8
The eLink Adapter for Mainframe Gateway, the CRM, or both the Gateway and CRM may be installed on Solaris 8.
Installing the Software in Console Mode
To install the eLink Adapter for Mainframe software on Solaris 8 in console mode, you will run the eam41_Sol8.bin program. If you choose the Full Installation set, this program installs both the Gateway and the CRM on Solaris 8. You may also choose to install only the Gateway or only the CRM on Solaris 8.
Perform the following steps to install the eLink Adapter for Mainframe software in console mode on Solaris 8:
$ su -
Password:
# mount -r -F cdfs /dev/cdrom/c1b0t0l0 /mnt
# cd /mnt/eam41
# ls
eam41_Aix.bin
eam41_Hp.bin
eam41_Sol7.bin
eam41_Sol8.bin
eam41_Win.exe
os390.tar
mvs
# sh eam41_Sol8.bin -i console
If you choose the Gateway Only or Full Install, the software will be installed in your tuxedo8.0 directory. If you choose to install the Distributed CRM, the software will be installed in the eam41 directory.
Note: If you select the Distributed CRM, you will not be prompted for the license location.
Listing 2-3 UNIX Console Mode Installation Example, Full Installation on Solaris 8
Preparing to install...
Preparing CONSOLE Mode Installation...

===============================================================================
BEA eLink Adapter for Mainframe        (created with InstallAnywhere by Zero G)
-------------------------------------------------------------------------------

===============================================================================
Introduction
------------

This installer will guide you through the installation of 'eLink Adapter for
Mainframe'. On each step, answer the questions provided.  Type "quit" at any
time to exit the installer.

===============================================================================
License Agreement
-----------------

Please read before installing:

BEA eLink Adapter for Mainframe(r) 4.1 Software License

The Software and accompanying documentation (respectively "Software"
and "Documentation") you have acquired are protected by the copyright laws of
the United States and international copyright treaties...
              .
              .
              .
User Count means the number of users specified on the uniform product code
label provided on the outside packaging of the Product.

PRESS <ENTER> TO CONTINUE: y

Connection Management Software means...
              .
              .
              .
Copyright 2001, BEA Systems, Inc.  All Rights Reserved.

DO YOU AGREE WITH THE TERMS OF THE LICENSE? (Y/N)y

===============================================================================
Choose Install Set
------------------

Please Choose the Install Set to be installed by this installer.

  ->1- Gateway Only
    2- Distributed CRM
    3- Full Install

ENTER THE NUMBER FOR THE INSTALL SET, OR <ENTER> TO ACCEPT THE DEFAULT:  3
===============================================================================
Choose BEA Home Directory
-------------------------

    1- Create a New BEA Home
    2- Use Existing BEA Home

Enter a number: 2
    1- /bea
    2- /bea/tuxedo8.0

Existing BEA Home: 1

-----------------------------------------------
A previous installation of eLink Adapter for Mainframe 4.1
has been detected at /bea/loads/tux80.
 The following options are available:

    1- Continue to install over /bea/loads/tux80
    2- Cancel to select another BEA Home Directory
    3- Exit the installation

Choose a number: 1

===============================================================================
Installing...
-------------

 [==================|==================|==================|==================]
 [------------------|------------------|------------------|------------------]

===============================================================================
License Selection Option
-----------------------

    1- Copy License File Now
    2- Copy License File Later

Enter a number:2

===============================================================================
Install License Later.
----------------------

You will need to manually append lic.txt (on license diskette)
to your base product license file (in udataobj directory).
Refer to your BEA eLink Adapter for Mainframe Installation Guide for details on how to do this.

===============================================================================
Install Complete
----------------

Congratulations. 'eLink Adapter for Mainframe' has been successfully installed
to:

   /bea/tux80

PRESS <ENTER> TO EXIT THE INSTALLER: <ENTER>
Installing the Software in Graphics Mode
Perform the following steps to install the eLink Adapter for Mainframe software in graphics mode on Solaris 8:
$ su -
Password:
> mount -r -F cdfs /dev/cdrom/c1b0t0l0 /mnt
> cd /mnt/eam41
# ls
eam41_Aix.bin
eam41_Hp.bin
eam41_Sol7.bin
eam41_Sol8.bin
os390.tar
mvs
/mnt/eam41> sh eam41_Sol8.bin
The Introduction screen (see Figure2-10) displays.
Figure 2-10 Introduction Screen
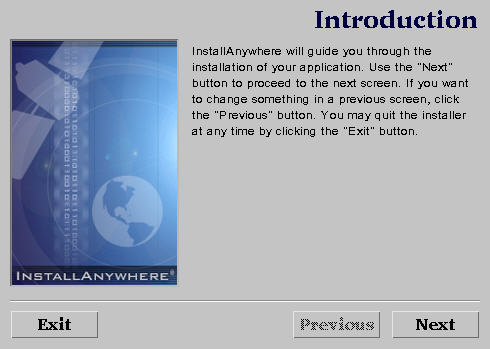
Figure 2-11 License Agreement Screen
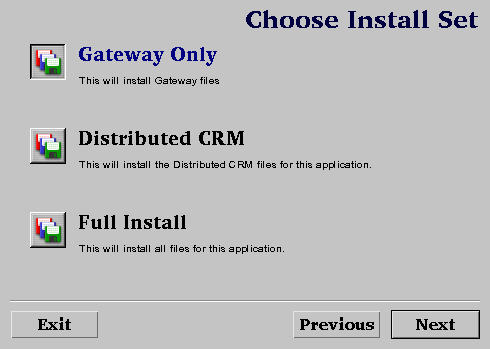
Figure 2-12 Choose Install Set
Screen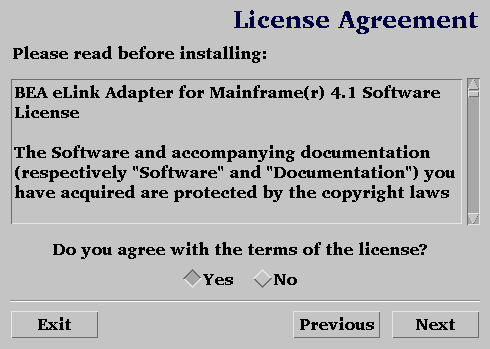
Note: If you choose the Gateway Only or Full Install, the software will be installed in your tuxedo8.0 directory. If you choose to install the Distributed CRM, the software will be installed in the eam41 directory.
Figure 2-13 Choose BEA Home Directory Screen
If you want to create a new BEA Home directory, follow these steps:
If you already have one or more BEA Home directories on your system, you can use one of those directories as follows:
Figure 2-14 Previous Installation Found Message Box
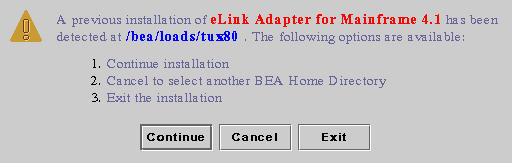
From this message box, do one of the following:
Figure 2-15 Tuxedo 8 Not Found Message Box

From this message box, do one of the following:
Note: If you are installing the Distributed CRM, you will not be prompted for the License Installation Choice. Proceed to step 16.
Figure 2-16 License Installation Choice Screen
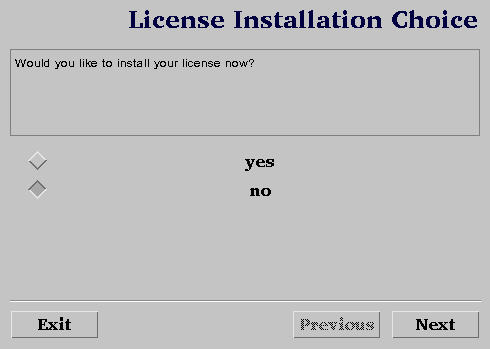
Click Next and the Choose License Location Directory Screen displays (Figure2-17).
Figure 2-17 Choose License Location Directory Screen
Click Browse to specify the directory where your
eLink Adapter for Mainframe license key (lic.txt) is located and then click
Next to append the eLink Adapter for Mainframe license key to your Tuxedo 8
license. Click Next and the Install License Later screen
displays with instructions for installing the license later (Figure2-18). You may also refer to Manually Setting Up the License Key for
more information about installing the license later. Figure 2-18 Install License Later
Screen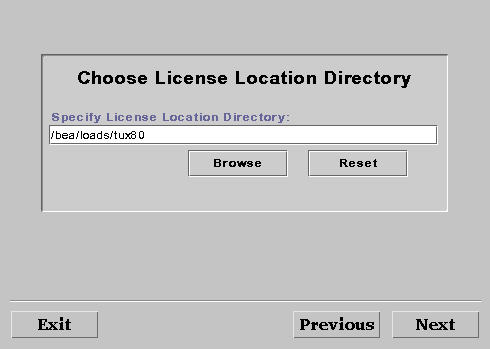
Figure 2-19 Install Complete Screen
Validating the eLink Adapter for Mainframe Software Installation
You can validate the eLink Adapter for Mainframe software installation in the following ways:
Verifying Installation Files and Directories
The eLink Adapter for Mainframe CD-ROM contains libraries and executable programs for each of the supported platforms as described in the tables in the following sections. After installing the eLink Adapter for Mainframe software, verify that these libraries and programs are installed on your system.
All directories are relative to the installation directory. Platform-specific stack abstraction libraries are included in these tables as well.
eLink Adapter for Mainframe Gateway Installation Files and Directories
The eLink Adapter for Mainframe Gateway includes the files listed in the following tables.
AIX 4.3.3
Verify that the following files are installed for the eLink Adapter for Mainframe Gateway Installation:
HP-UX 11
Verify that the following files are installed for the eLink Adapter for Mainframe Gateway Installation:
Solaris 7 or 8
Verify that the following files are installed for the eLink Adapter for Mainframe Gateway Installation:
Windows NT 4.0 Server, Windows 2000 Server, or Windows 2000 Advanced Server
Verify that the following files are installed for the eLink Adapter for Mainframe Gateway Installation:
CRM Installation Files and Directories
The CRM includes the files listed in the following tables.
Solaris 8
Verify that the following files are installed for the eLink Adapter for Mainframe CRM Installation:
z/OS UNIX V1R1 or OS/390 UNIX V2R8, V2R9, or V2R10
Verify that the following files are installed for the CRM Installation:.
z/OS V1R1 or OS/390 MVS V2R8, V2R9, or V2R10
Verify that the following files are installed for the CRM Installation:.
Solaris 8 Full Installation Files and Directories
Verify that the following files are installed for the Full Installation of the eLink Adapter for Mainframe Gateway and CRM on Solaris 8:
Running the Sample Applications
After you install eLink Adapter for Mainframe, you can verify your eLink Adapter for Mainframe installation by running the following sample applications:
Refer to the "Verifying the Software" section of the BEA eLink Adapter for Mainframe User Guide for more detailed information about verifying your software.
Uninstalling eLink Adapter for Mainframe
This section provides instructions for uninstalling eLink Adapter for Mainframe. The following topics are discussed:
Note: Uninstall on non-mainframe UNIX platforms can only be done in Console Mode. Graphic Mode is not available.
Uninstalling on Non-mainframe UNIX Platforms in Console Mode
To remove eLink Adapter for Mainframe from a UNIX platform:
> cd /bea/tuxedo8.0/uninstaller_EAM
/bea/tuxedo8.0/uninstaller_EAM> sh Uninstall -i console
Listing2-4 displays an eLink Adapter for Mainframe uninstallation.
Note: The single-dash bar just beneath the double-dash bar in Listing2-4 is a progress indicator. When the single-dash bar becomes the same length as the double-dash bar, uninstallation is complete.
Listing 2-4 UNIX Console Mode Uninstall Example
Preparing CONSOLE Uninstall...
===============================================================================
BEA eLink Adapter for Mainframe         (InstallAnywhere Uninstaller by Zero G)
-------------------------------------------------------------------------------

About to uninstall...

   BEA eLink Adapter for Mainframe

This will completely remove all components installed by InstallAnywhere.  It
will not remove files and folders created after the installation.

PRESS <ENTER> TO BEGIN THE UNINSTALL, OR 'QUIT' TO EXIT THE UNINSTALLER: <ENTER>

===============================================================================
Uninstall...
------------

 [==================|==================|==================|==================]
 [------------------|------------------|------------------|------------------]

===============================================================================
Uninstall Complete
------------------

All items were successfully uninstalled.

PRESS <ENTER> TO EXIT THE UNINSTALLER: <ENTER>
Uninstalling on Windows Platform
Perform the following steps to remove the eLink Adapter for Mainframe software from a Windows platform:
Figure 2-20 eLink Adapter for Mainframe Uninstaller Screen
Figure 2-21 eLink Adapter for Mainframe
Uninstall Complete Screen
Note: Some files may not be removed because they are required for another BEA product.
Uninstalling on z/OS or OS/390 Platforms
To remove the eLink Adapter for Mainframe product from your z/OS or OS/390 platform, consult with your system administrator. The process for removing applications from these platforms varies, depending on your particular system setup.
Manually Setting Up the License Key
You must enter the license key for eLink Adapter for Mainframe software to enable the connection capabilities for your system. As a prerequisite, the Tuxedo 8 must be installed and operational with its license key file available. To enable the eLink Adapter for Mainframe license key, you must append the license key file provided with the product software to the Tuxedo license key file.
Warning: Do not alter any parameters within sections of the license key files. Doing so will invalidate the license and may disable your product software.
Perform the following steps to use the license key.
Listing 2-5 Example of BEA License Key File
[TUXEDO 8.0]
LICENSEE=BEA Professional Services
SERIAL=1000000104
ORDERID=0
USERS=20
TYPE=SDK
WEBGUI=separate
WSCOMPRESSION=separate
EXPRIATION=2001-12-31
SIGNATURE=Xo201490OtaTEUb5L45UtAhUA12imvbiz92HladkaphonjQA/zeXXY=
Listing 2-6 Example of eLink Adapter for Mainframe License Key File Appended to BEA License Key File
# BEA License File
#
# This file contains license tokens to enable BEA TUXEDO and
# optional components.
# Each License begins with a "[section name]" and ends with
# a "SIGNATURE=" line.
#
# New license sections should be appended to this file, and the
# old section, if present, should be deleted.
#
# WARNING: Altering parameters withing a section will invalidate
# the license. This is a violation of BEA Systems licensing
# agreement, and may also disable TUXEDO or optional components.
# For Technical Support and to obtain a license, call 888-BEA-SUPT
# (888-232-7878) or 408-570-8070

[BEA TUXEDO]
VERSION=8.0
LICENSEE=BEA Internal Development User
SERIAL=177
ORDERID=Internal
USERS=400000
TYPE=SDK
DEVELOPERS=200000
EXPIRATION=2001-12-31
SIGNATURE=MC0CFA6ehW+FOQnKL45UtAhUAUAohqPyD/IB/mgPOe6AVr7YIvW8a0=
             .
             .
             .
# BEA eLink Adapter License File
#
# This file contains license tokens to enable a BEA eLink Adapter.
# Each License begins with a "[section name]" and ends with
# a "SIGNATURE=" line.
#
# WARNING: Altering parameters withing a section will invalidate
# the license. This is a violation of BEA Systems licensing
# agreement, and may also disable eLink components.
#
# For Technical Support and to obtain a license, call 888-BEA-SUPT
# (888-232-7878) or 408-570-8070

[eLink Adapter for Mainframe]
LICENSEE=BEA SYSTEMS
VERSION=4
SERIAL=A101999739
ORDERID=Internal
EXPIRATION=2003-09-29
SIGNATURE=Xo201490OtaTEUb5L45UtAhUA12imvbiz92HladkaphonjQA/zeXXY=
 |
 |
|
|
Copyright ©
2001 BEA Systems, Inc. All rights reserved. |