5 Setting Your Personal Preferences
This chapter includes the following topics:
Permissions
The tasks described in this chapter are available to any WebCenter Portal user.
See Also:
Preferences associated with specific areas of WebCenter Portal are discussed in the chapters that cover each area.
For information about Messaging, Subscription, and Notifications preferences, see:
For information about People Connections preferences, see:
For information about Instant Messaging and Presence preferences, see Identifying Your Preferred Instant Messaging Provider.
For information about Search preferences, see Setting Individual Preferences for Search Results.
For information about Mail preferences, see Selecting Your Preferred Mail Connection.
5.1 Accessing the Preferences Pages
To access the pages of your personal preferences:
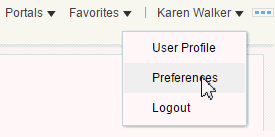
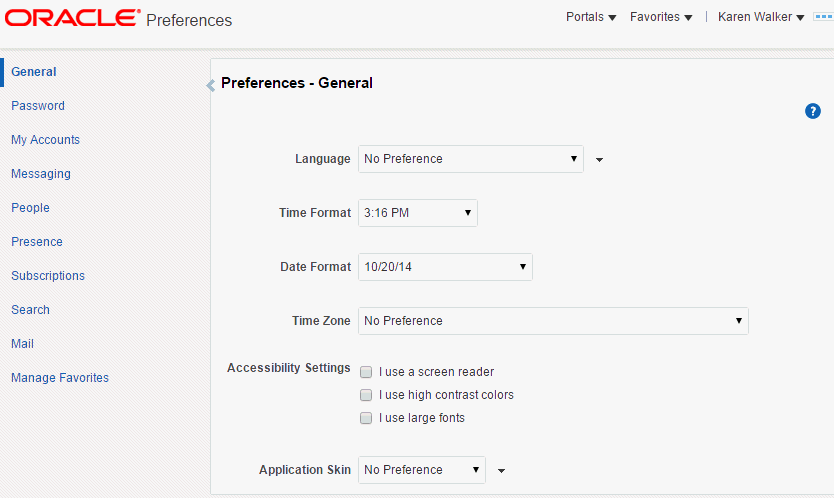
From your user menu in the menu bar, select Preferences (Figure 5-1) to open Preferences on the General page (Figure 5-2).
5.2 Choosing Your Preferred Display Language
The display language controls the language for user interface (UI) elements in your browser. UI elements include button and field labels, application links, screen text, and so on. The display language also provides options for identifying the current locale, which determines symbols, such as monetary symbols, and reading direction for UI text.
To set a display language:
Note:
You can also set a display language on the Welcome page before you log in. Select a language in the language switcher (Figure 5-3).
Figure 5-3 Language Switcher on Welcome Page
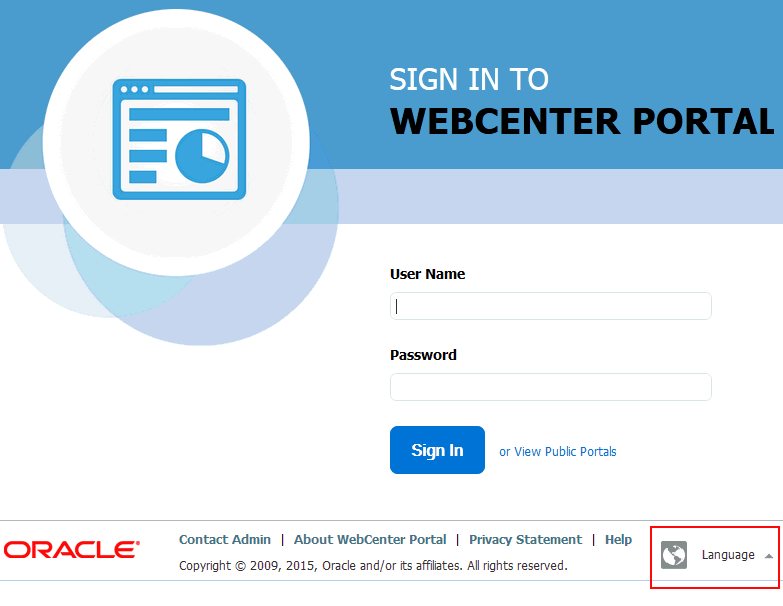
Description of "Figure 5-3 Language Switcher on Welcome Page"
5.3 Setting Date and Time Preferences
Use date and time preferences to specify your preferred date and time formats and your current locale's time zone:
Note:
Some content may be developed with an intrinsic time display format. In such cases, this content is not influenced by your date and time format selections.
To set your preferred time format, date format, and time zone:
5.4 Setting Your Accessibility Options
Use accessibility options to optimize the application user interface (UI) for use with a screen reader, such as JAWS; to enable support of high-contrast colors; and to enable support for large fonts.
This section includes the following topics:
5.4.1 About Application Accessibility Options
WebCenter Portal accessibility options appear on the General panel of the Preferences page. Accessibility options assist visually and non-visually impaired users in navigating the application user interface.
This topic discusses things you should know about WebCenter Portal accessibility options. It includes the following topics:
The next topic, Applying Accessibility Options, describes how to apply WebCenter Portal accessibility options.
Note:
The color contrast of disabled actions—which are gray—against a white screen may be difficult to discern for some users. Because disabled actions are not selectable, this issue does not affect the use of WebCenter Portal.
5.4.1.1 Submenu Items
If you use a screen reader such as JAWS, JAWS normally announces the links associated with a menu selection. With the Actions menu, JAWS does not announce the submenu items. For example, JAWS does not read the submenu items under Manage on the Actions menu. The workaround is to select the menu items using direct keyboard navigation. That is, instead of using JAWS Links Chooser, navigate to the Manage submenu of the Actions menu using the Tab key on your keyboard.
5.4.1.2 Unlabeled UI Objects
Not all drop-down menus, fields, and radio buttons on WebCenter Portal administration pages are labeled. As a result, the JAWS screen reader renders a pound sign (#) instead of a label when the JAWS command Insert-F7 is invoked. The problem occurs in the following areas:
Drop-down menus in portal administration pages
Radio buttons on portal administration pages
Fields on the Documents page
The workaround is to use the Tab and arrow keys to navigate to each individual form field in order to hear each form field read.
5.4.1.3 Add Resources
When you add resources from the resource catalog, JAWS announces all resource catalog items as Add. This makes it difficult to identify the selected resource. To work around this issue, press the Tab key to get to the Add link for the resource, then press the Down Arrow key. JAWS then reads the description of the resource.
5.5 Changing the Look and Feel of Your View
Use application skins to change the look and feel of your view of the Home portal. Application skins specify the application background color, screen fonts, and, with some skins, the shapes and images used for application buttons and icons. The skin you select through Preferences affects only the look and feel of your view of the Home portal. No other users' views and no other areas of the application are affected.
To change the Home portal skin in your view:
5.6 Changing Your Application Password
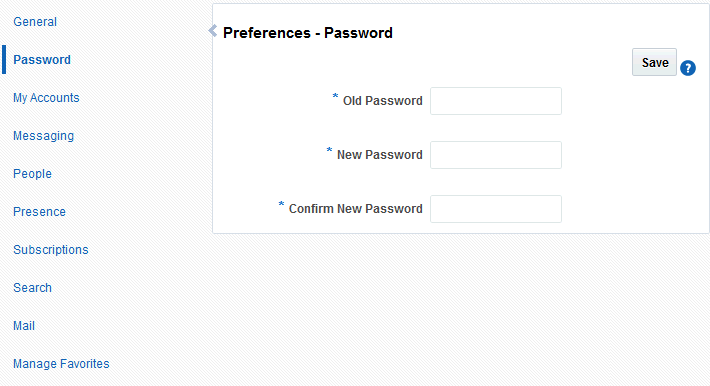
Provided your system administrator has enabled you to do so, you can change your WebCenter Portal password. Changing your password on a regular basis is one way you can participate directly in securing your application software.
To change your WebCenter Portal password:
5.7 Providing Login Information for External Applications
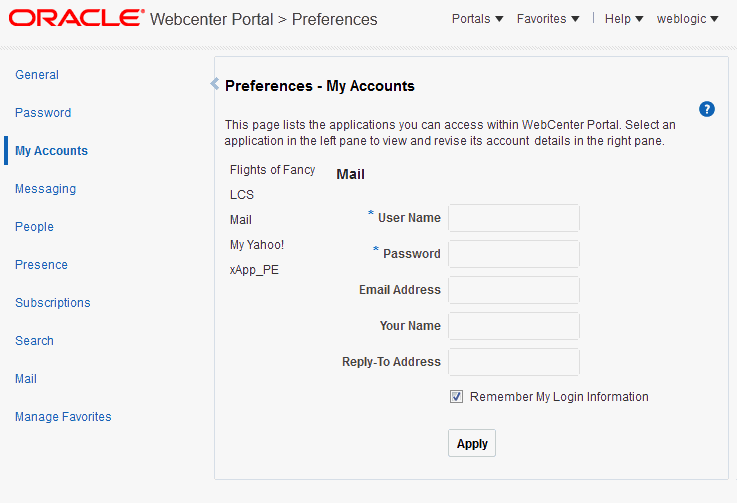
The My Accounts page enables you to provide login credentials for all external applications that are configured to be accessed through WebCenter Portal. After you have provided your credentials, every time you access an external application within WebCenter Portal, the login credentials are provided automatically. This gives you a single-sign-on type of experience where one login (to WebCenter Portal) provides access to multiple applications.
Note:
If you change the login credentials for an application, you must enter them again into the My Accounts page as described in this section.
To provide login credentials for external applications:
