5 Installing the Server Into a Rack
This section describes how to install the server into a rack using the slide-rail assembly in the Rackmount Kit.
Rackmount procedure figures depict Oracle Server X9-2L. Rackmount procedures are the same for Oracle Server X9-2.
Note:
In this guide, the term "rack" means either an open rack or a closed cabinet.
Installation Prerequisites
Before you start the rackmount procedures, ensure that the following tasks are complete:
-
Install optional components purchased for the server. See Optional Component Installation.
-
Confirm that your site meets the required electrical and environmental requirements. See Preparing for Server Installation.
Safety Precautions
This section describes safety precautions you must follow when installing the server into a rack.
Caution:
Observe these safety precautions:
Leveling feet position: When unpacking the rack at the installation site, or when repackaging and moving the rack to a new location, verify that the leveling feet are up before moving the rack.
Shipping brackets: The rack shipping brackets are not for use for bracing or anchoring the rack during seismic events.
Stabilize rack: Deploy the anti-tilt bar on the equipment rack before starting an installation.
Equipment loading: Always load equipment into a rack from the bottom up so that the rack does not become top-heavy and tip over. Deploy your rack anti-tilt bar to prevent the rack from tipping during equipment installation.Lifting equipment: Oracle Server X9-2 weighs approximately 45 lbs (20.41 kg). Oracle Server X9-2L weighs 73 lbs (33.11 kg). Two people are needed to mount either server into the rack enclosure.

Communicate instructions: When performing a two-person procedure, communicate your intentions clearly to the other person before, during, and after each step to minimize confusion.
Elevated operating ambient temperature: If you install the server in a closed or multi-unit rack assembly, the operating ambient temperature of the rack environment might be higher than the room ambient temperature. Install the equipment in an environment compatible with the maximum ambient temperature (Tma) specified for the server. For server environmental requirements, see Environmental Requirements.
Reduced airflow: Install the equipment in a rack so that it does not compromise the amount of airflow required for safe operation of the equipment.
Mechanical loading: Mount the equipment in the rack so that it does not cause a hazardous condition due to uneven mechanical loading.
Circuit overloading: Consider the connection of the equipment to the supply circuit and the effect that overloading the circuits might have on over-current protection and supply wiring. Also consider the equipment nameplate power ratings used when you address this concern.
Reliable earthing: Maintain reliable earthing of rackmounted equipment. Pay attention to supply connections other than direct connections to the branch circuit (for example, use of power strips).
Mounted equipment: Do not use slide-rail-mounted equipment as a shelf or a workspace.
ESD Precautions
Electronic equipment is susceptible to damage by static electricity. To prevent electrostatic discharge (ESD) when you install or service the server:
-
Use a grounded antistatic wrist strap, foot strap, or equivalent safety equipment.
-
Place components on an antistatic surface, such as an antistatic discharge mat or an antistatic bag.
-
Wear an antistatic grounding wrist strap connected to a metal surface on the chassis when you work on system components.
Caution:
Equipment damage: Electrostatic damage can permanently disable the system or require repair by authorized service technicians.
Before installing the server, read the safety information in Oracle Server Safety and Compliance Guide and in Important Safety Information for Oracle's Hardware Systems.
Rack Compatibility
The rack into which you install Oracle Server X9-2 or Oracle Server X9-2L must meet the requirements listed in the following table. Oracle Rack Cabinet 1242 and Sun Rack II are compatible with both servers. For information about the racks, see Preparing for Server Installation.
| Item | Requirement |
|---|---|
|
Structure |
Four-post rack: (mounting at both front and back) Supported rack types: square hole (9.5 mm) and round hole (M6 or 1/4-20 threaded only). Two-post racks are not compatible. |
|
Rack horizontal opening and unit vertical pitch |
Conforms to ANSI/EIA 310-D-1992 or IEC 60297 standards. |
|
Distance between front and back mounting planes |
Minimum 61 cm and maximum 91.5 cm (24 inches to 36 inches). |
|
Clearance depth in front of front mounting plane |
Distance to front cabinet door is at least 2.54 cm (1 inch). |
|
Clearance depth behind front mounting plane |
Distance to back cabinet door is at least 90 cm (35.43 inches) with the cable management arm, or 80 cm (31.5 inches) without the cable management arm. |
|
Clearance width between front and back mounting planes |
Distance between structural supports and cable troughs is at least 45.6 cm (18 inches). |
|
Minimum clearance for service access |
Clearance, front of server: 123.2 cm (48.5 inches) Clearance, back of server: 91.4 cm (36 inches) |
The following table contains Oracle Rack Cabinet 1242 rack specifications:
| Requirement | Specification |
|---|---|
|
Usable rack units |
42 |
|
Height |
199.9 cm (78.74 inches) |
|
Width (with side panels) |
60 cm (23.62 inches) |
|
Maximum dynamic load |
1005 kg (2215 lbs) |
The following table contains Sun Rack II Model 1242 and Sun Rack II Model 1042 rack specifications:
| Requirement | Specification |
|---|---|
|
Usable rack units |
42 |
|
Height |
199.8 cm (78.66 inches) |
|
Width (with side panels) |
60 cm (23.62 inches) |
|
Depth Model 1242 |
120 cm (47.24 inches) |
|
Depth Model 1042 |
105.8 cm (41.66 inches) |
|
Weight Model 1242 |
150.6 kg (332 lbs) |
|
Weight Model 1042 |
123.4 kg (272 lbs) |
|
Maximum dynamic load |
1005 kg (2215 lbs) |
Note:
Depth is measured from front door handle to back door handle.
Related Topics
Rackmount Kit Contents
The following figure shows the Rackmount Kit contents. For additional instructions on how to install your server in a four-post rack using the slide-rail and cable management arm options, refer to the Rackmounting Template.
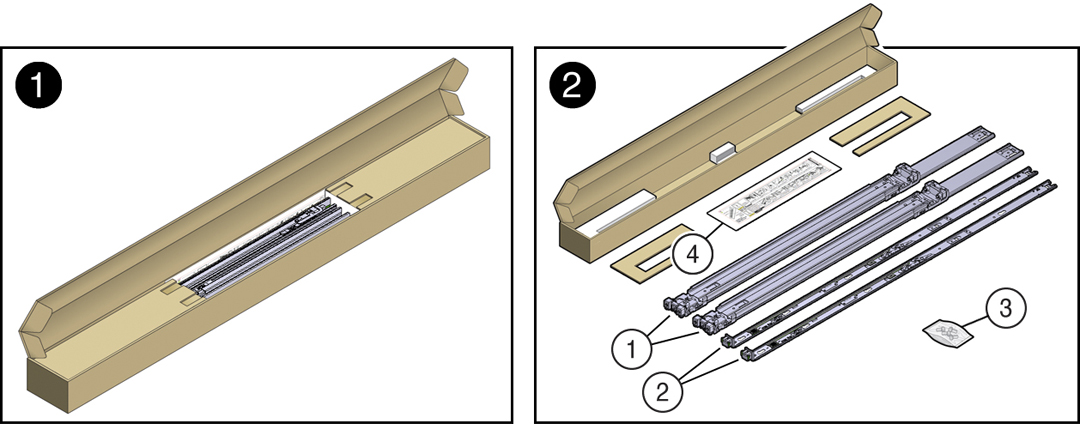
| Call Out | Description |
|---|---|
|
1 |
Slide-rails |
|
2 |
Mounting brackets |
|
3 |
Four M4 x 5 fine-pitch mounting bracket securing screws (optional) |
|
4 |
Rackmounting Template |
Rackmounting the Server
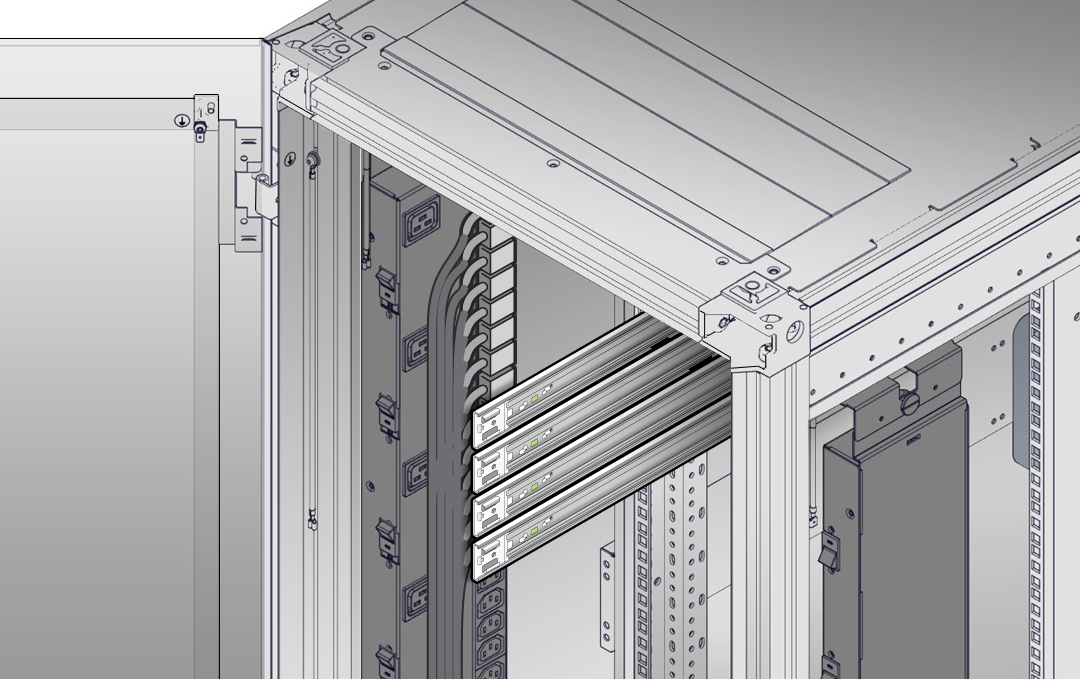
To rackmount the server, secure the rack to the floor, stabilize the rack, and install the mounting brackets and slide rails. Then, install the server into the rack.
Stabilize the Rack
Caution:
To reduce the risk of personal injury, stabilize the rack cabinet, and extend the anti-tilt bar before you install the server.
Refer to your rack documentation for detailed instructions for the following steps.
Install Mounting Brackets on the Server
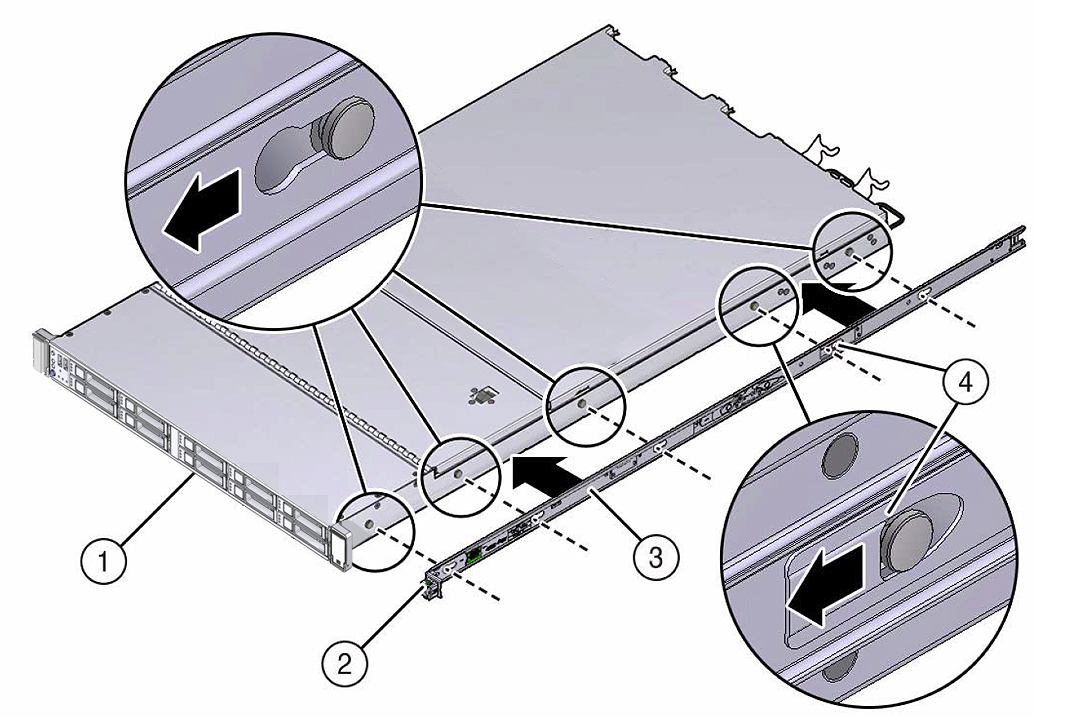
To install the mounting brackets on the sides of the server:
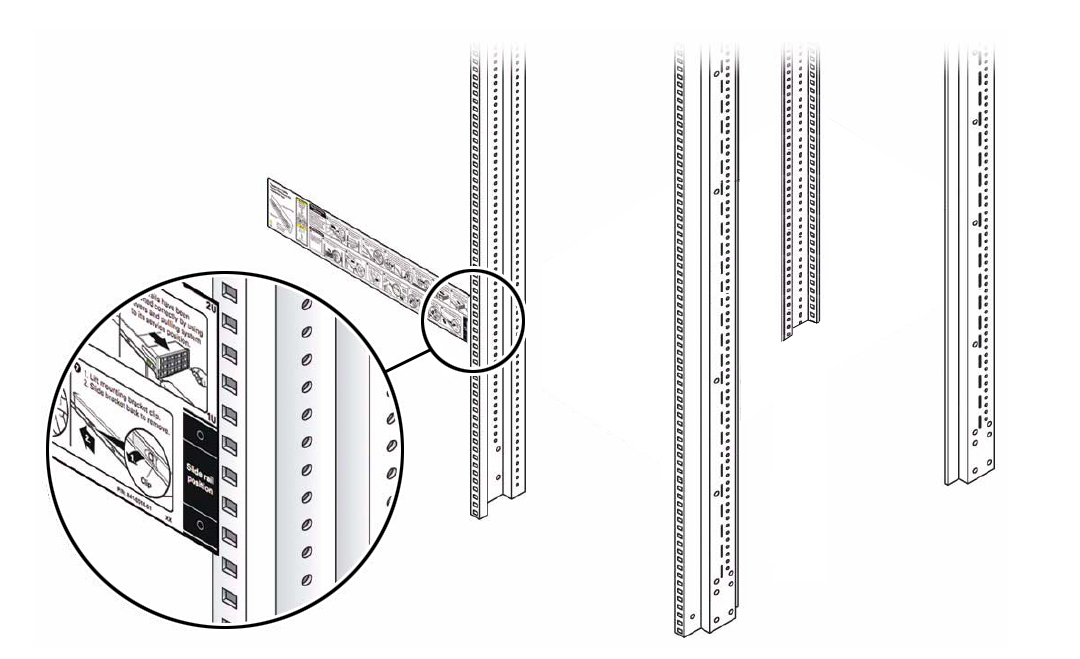
Mark the Rackmount Location
Identify the location in the rack where you want to place the server. Oracle Server X9-2 requires one rack unit (1U). Oracle Server X9-2L requires two rack units (2U). Use the Rackmounting Template to identify the correct mounting holes for the slide-rails.
Caution:
Always load equipment into a rack from the bottom up so that the rack does not become top-heavy and tip over. Extend the rack anti-tilt bar to prevent the rack from tipping during equipment installation.
Attach the Slide-Rails
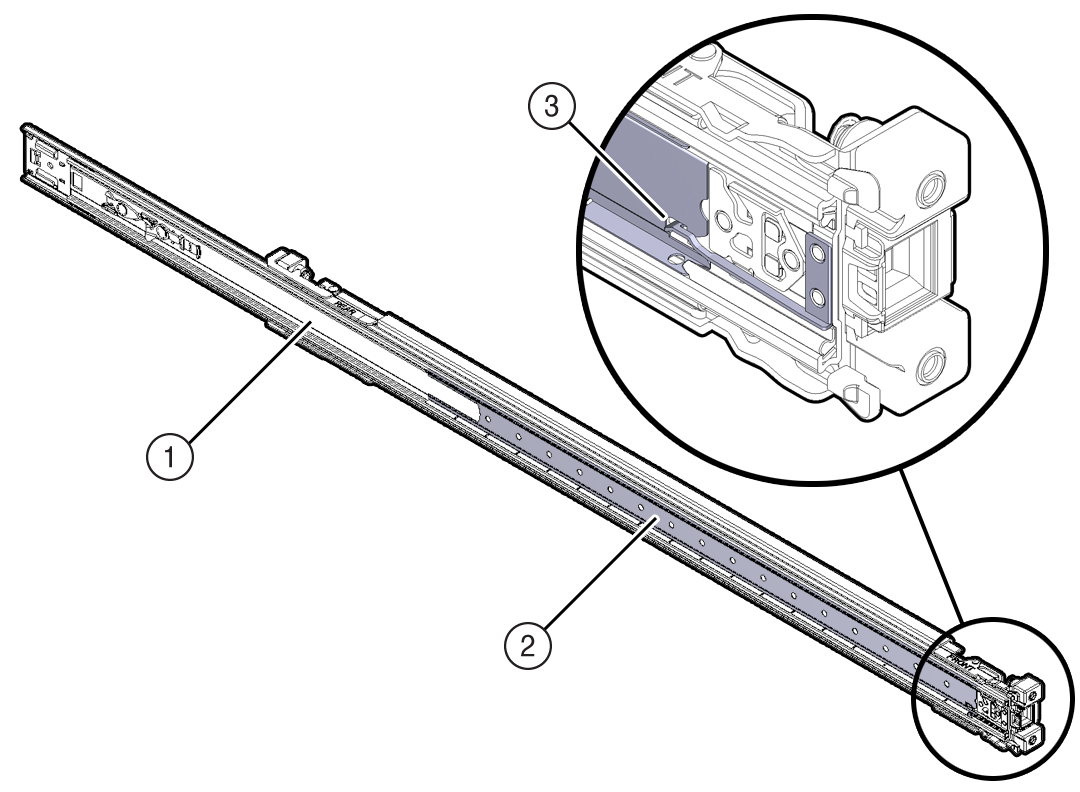
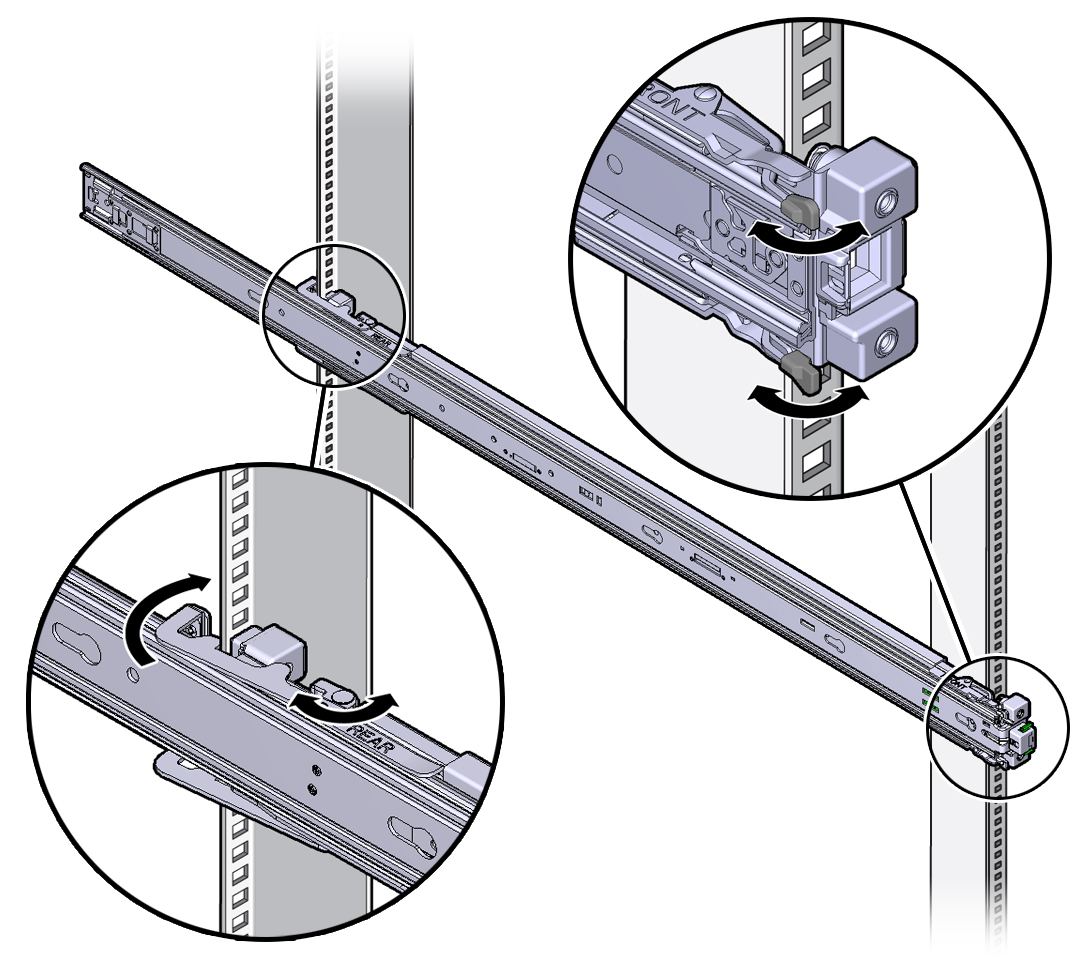
Use this procedure to attach slide-rail assemblies to the rack.
Note:
Before you install the slide-rails, be sure to install the server right-angle AC power cables (part number 7079727 - Pwrcord, Jmpr, Bulk, SR2, 2m, C14RA, 10A, C13). In the 1000 mm rack, the standard rail kit slide-rails obstruct access to the front of the 15kVA, 22kVA, and 24kVA Power Distribution Unit (PDU) electrical sockets. If you use the standard AC power cables, first plug them in, and then install the slide-rails into the rack. After you install the slide-rails, you cannot disconnect or remove the standard AC power cables from the PDU but you can remove them from the system.
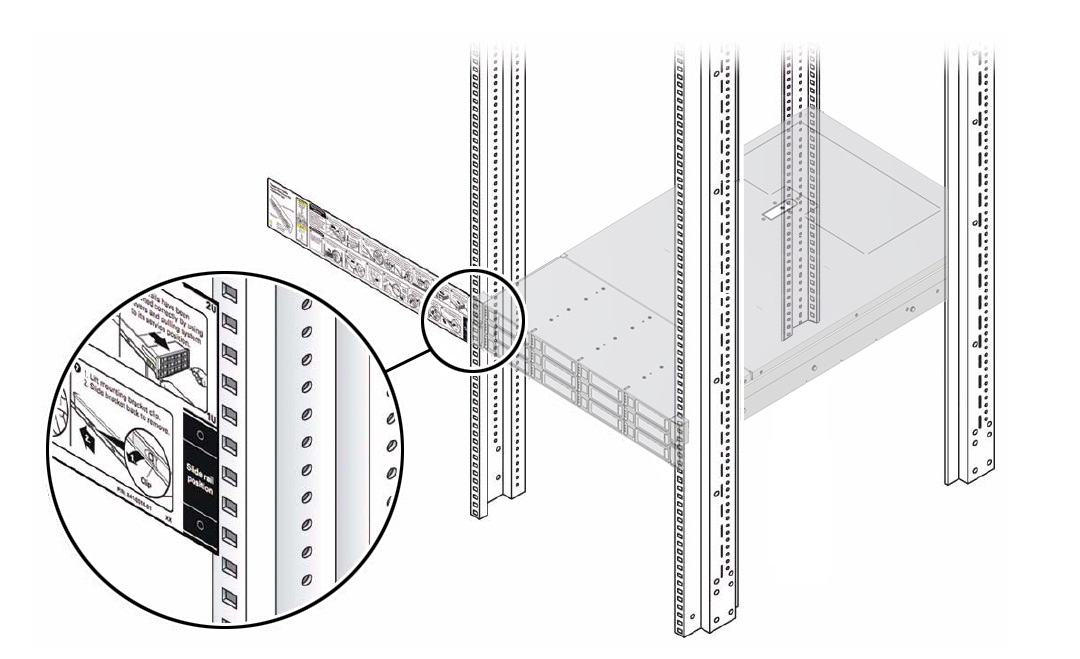
Install the Server Into the Slide-Rail Assemblies
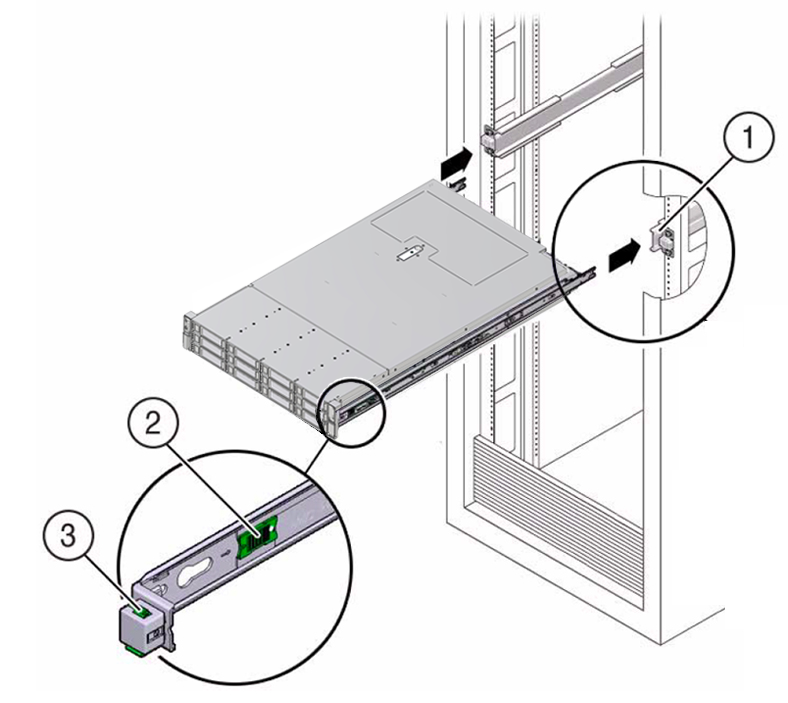
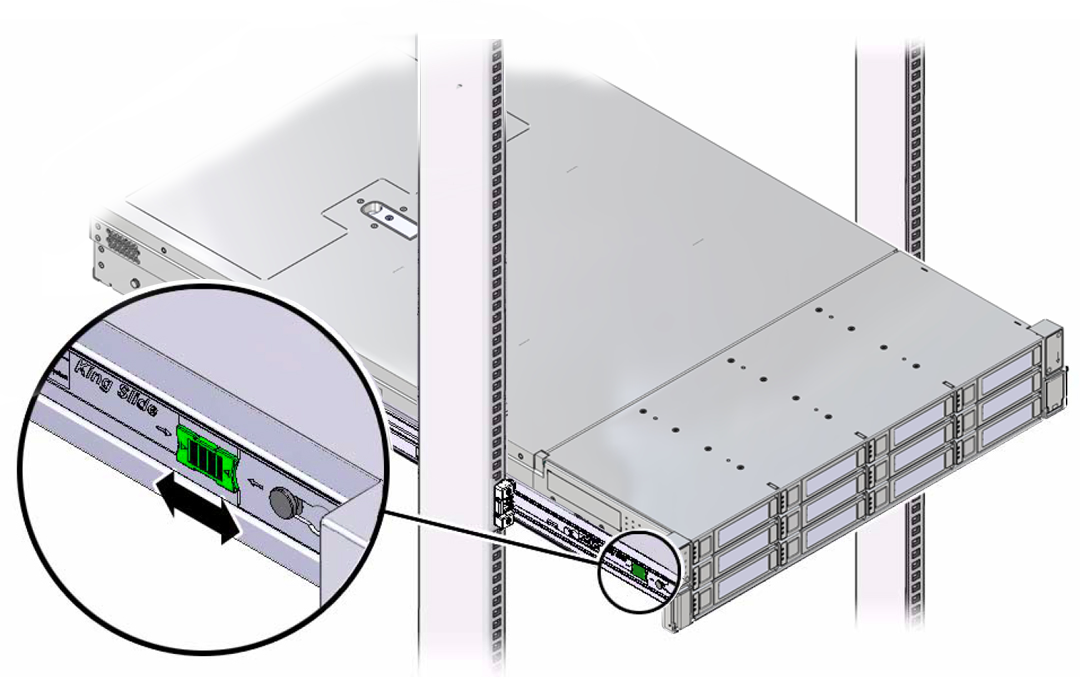
Use this procedure to install the server chassis with mounting brackets into the slide-rail assemblies that are mounted to the rack.
Caution:
Personal Injury or Equipment Damage: This procedure requires a minimum of two people because of the weight of the server. Attempting this procedure alone could result in equipment damage or personal injury.
Caution:
Personal Injury or Equipment Damage: Always load equipment into a rack from the bottom up so that the rack does not become top-heavy and tip over. Extend the rack anti-tilt bar to prevent the rack from tipping during equipment installation.
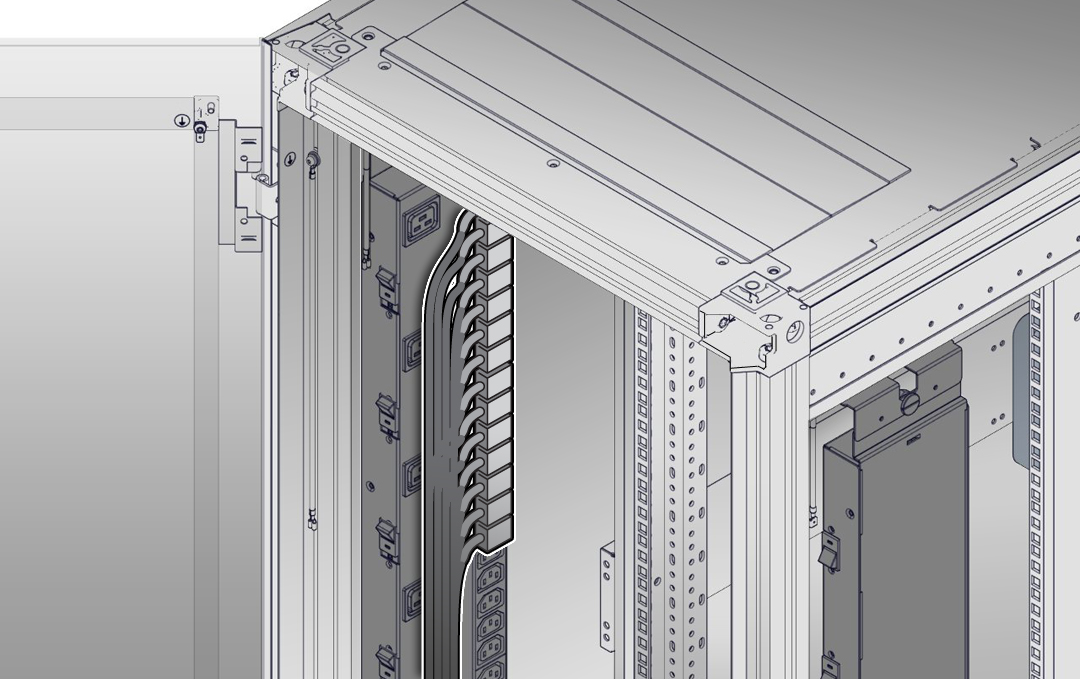
Install the Cable Management Arm (Optional)
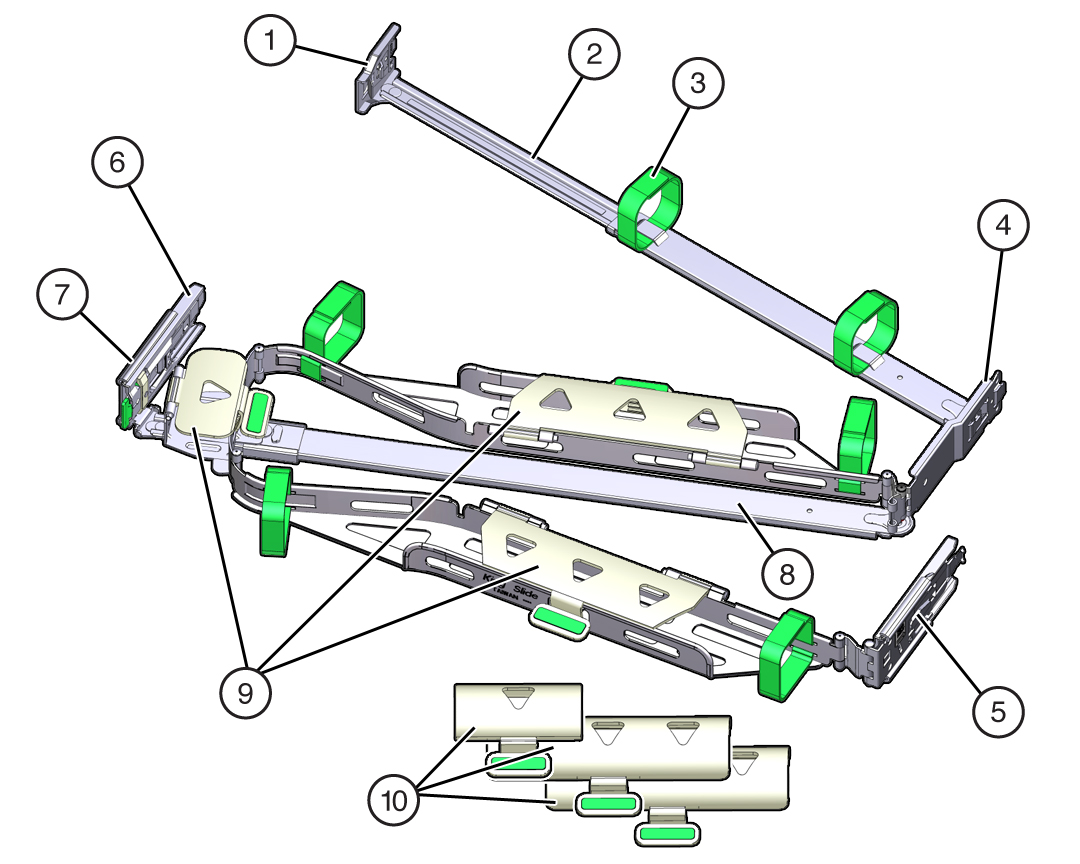
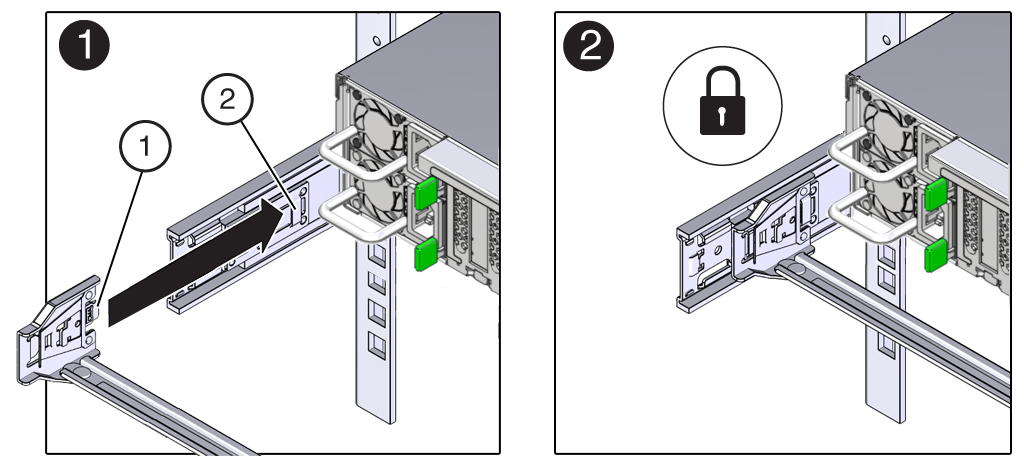
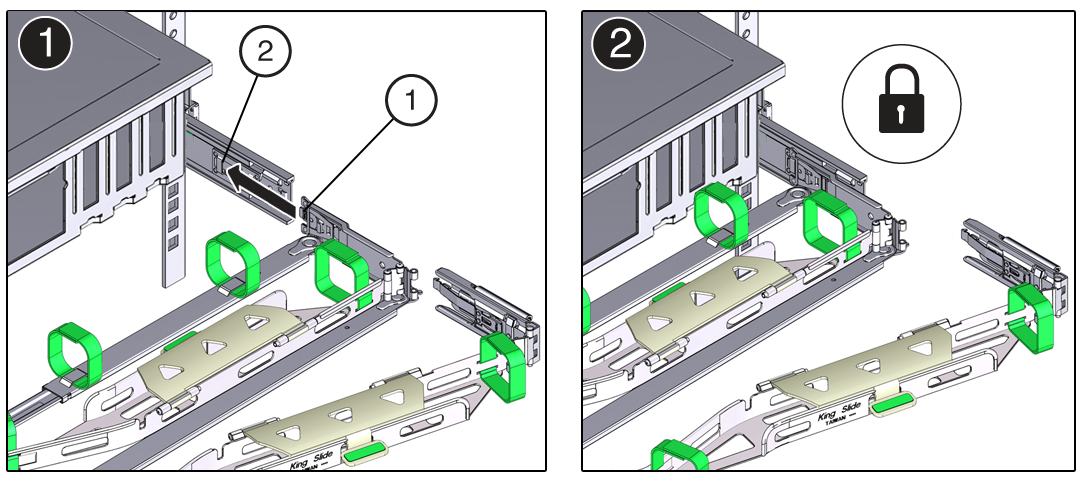
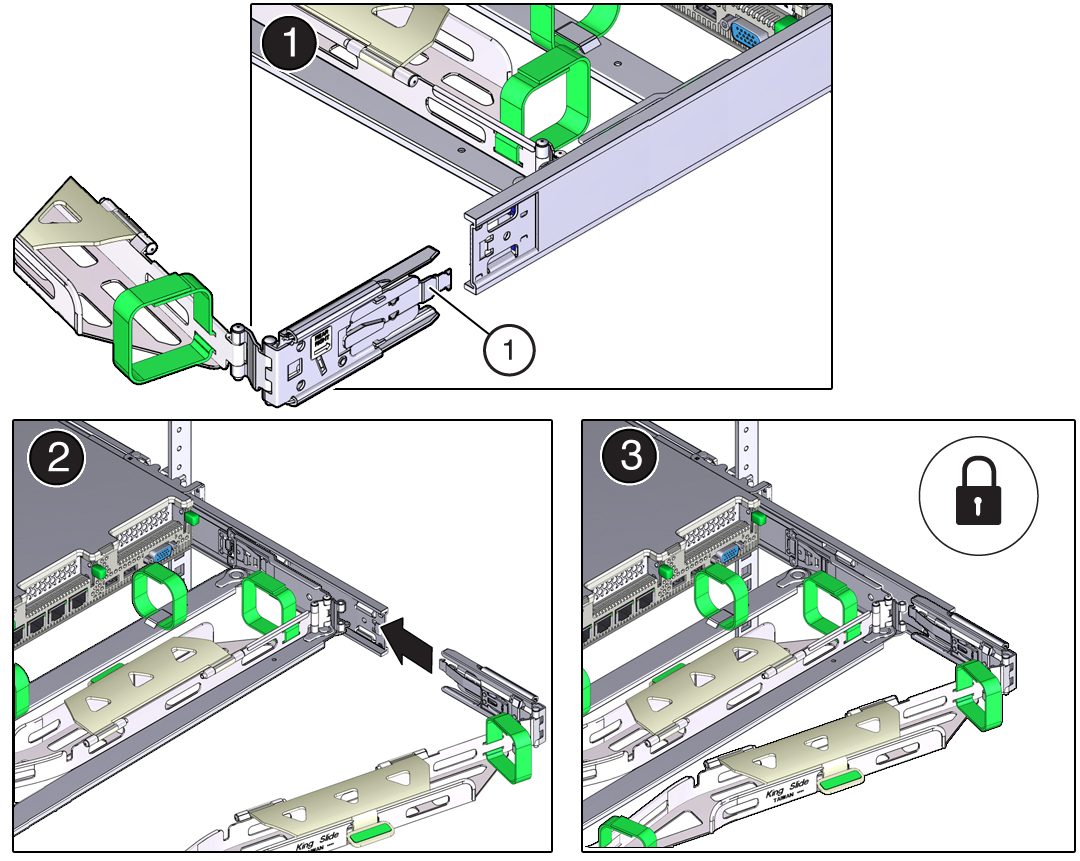
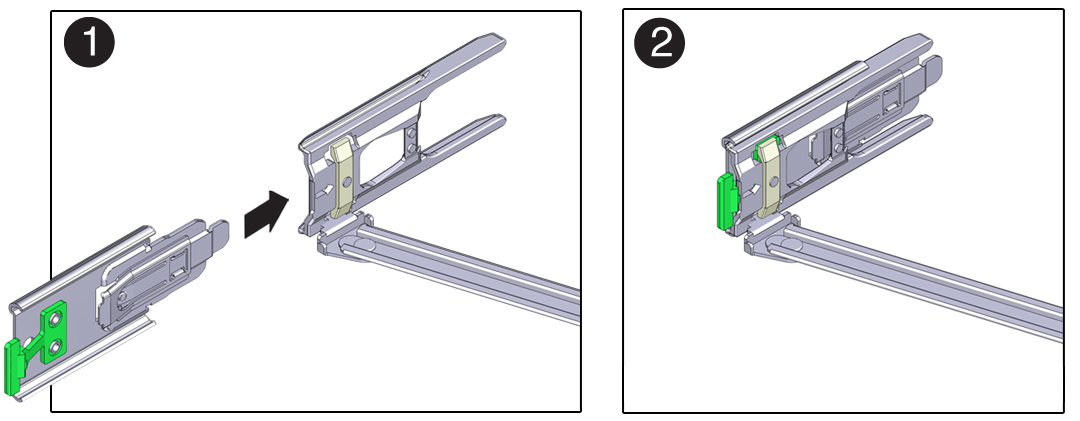
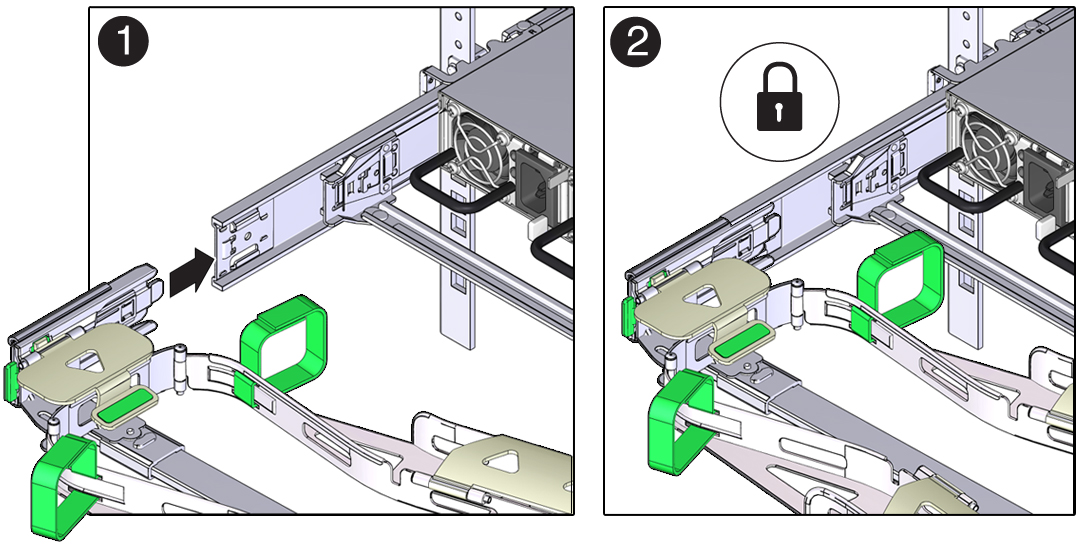
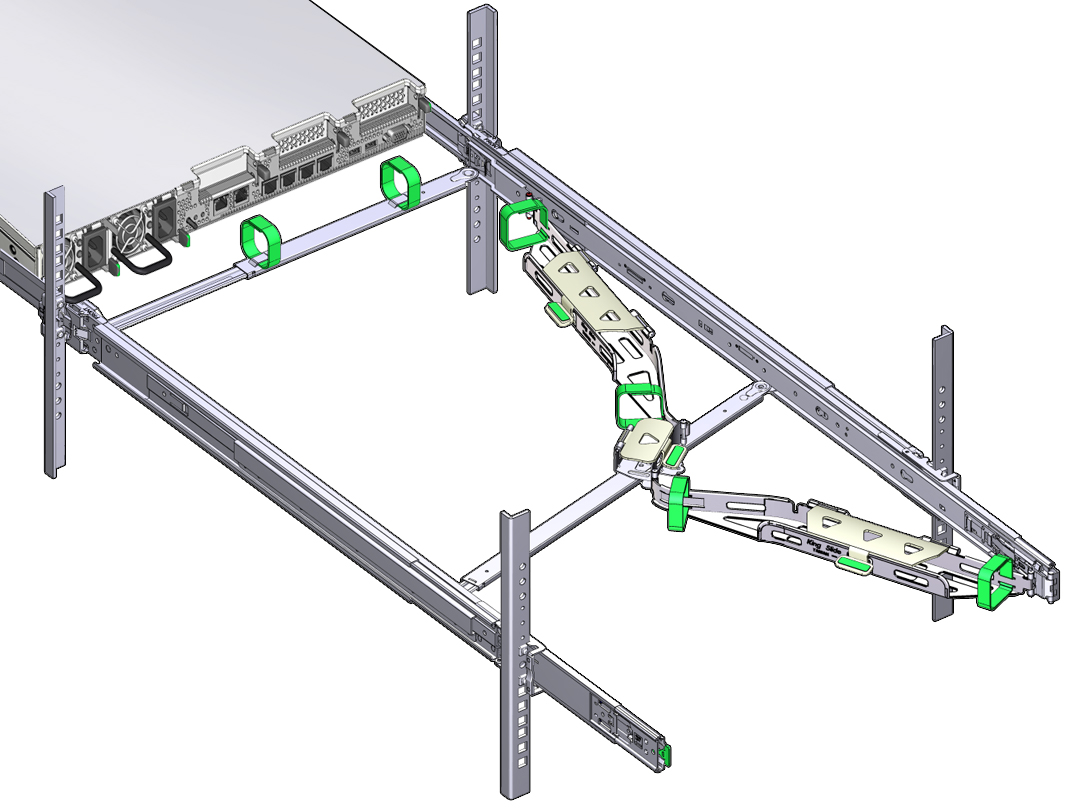
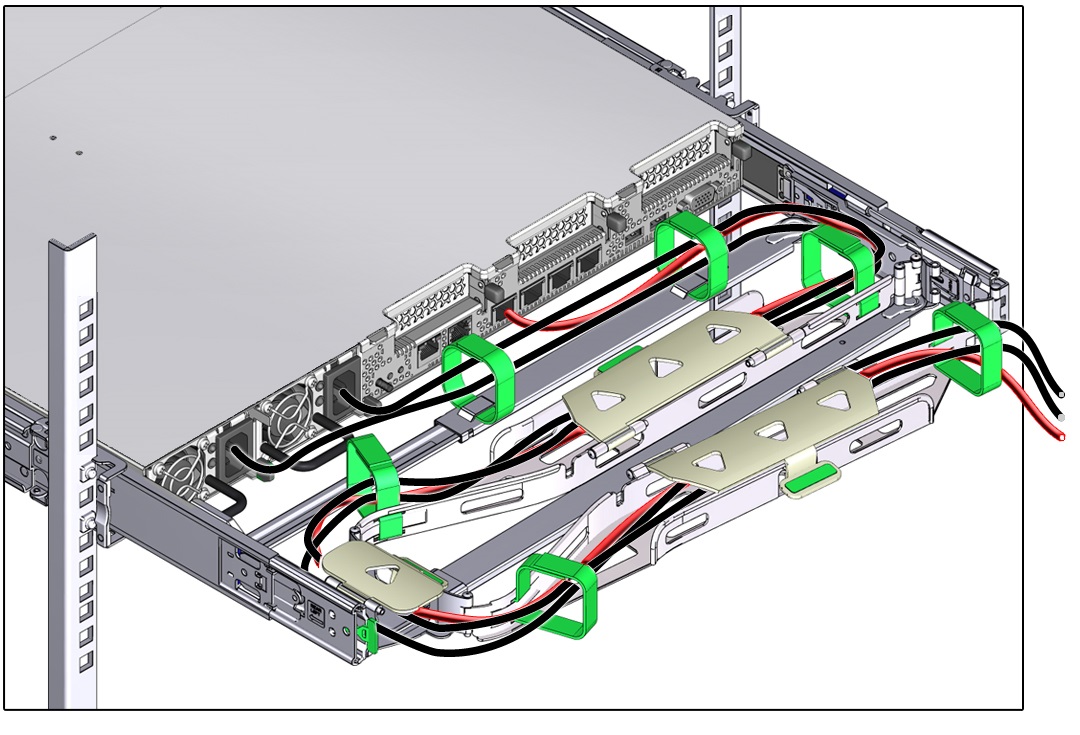
Follow this procedure to install the cable management arm (CMA), which you can use to manage cables connected to the back of the server.
Note:
Before you install the CMA, ensure that the right-angle AC power cables are long enough to connect to the rackmounted servers when routed through the CMA.
Remove the Cable Management Arm
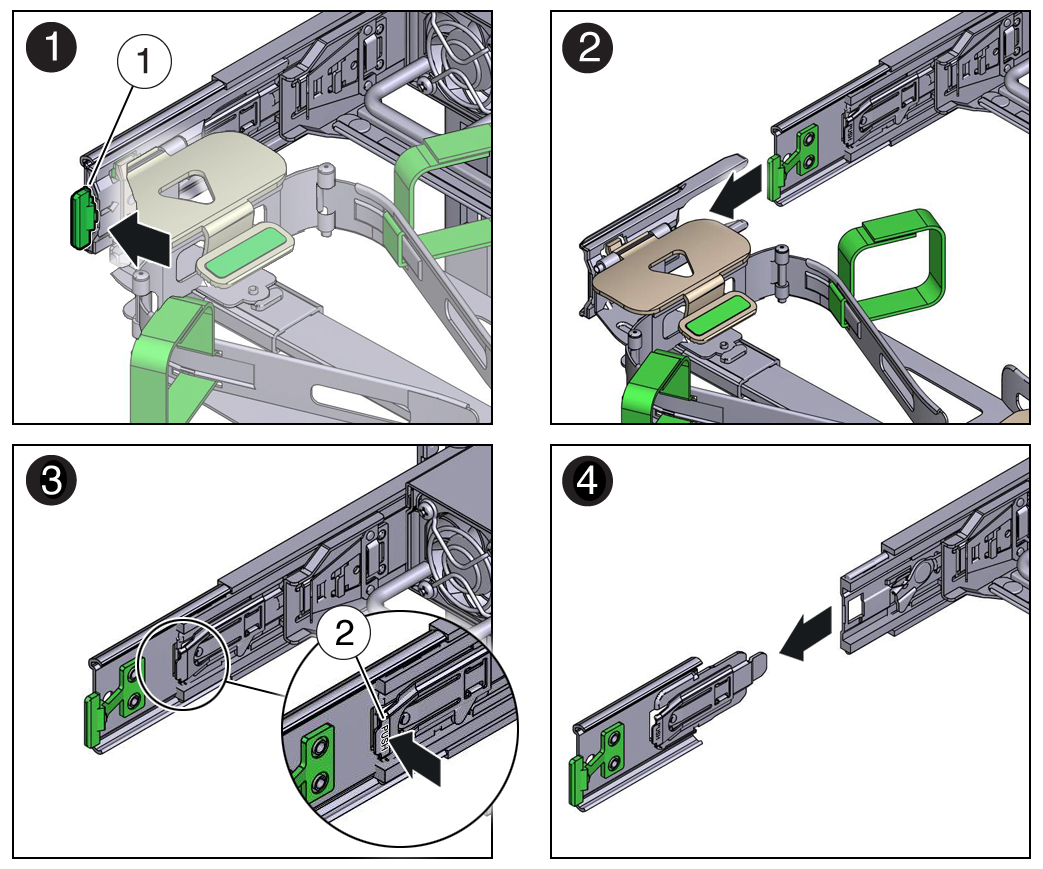
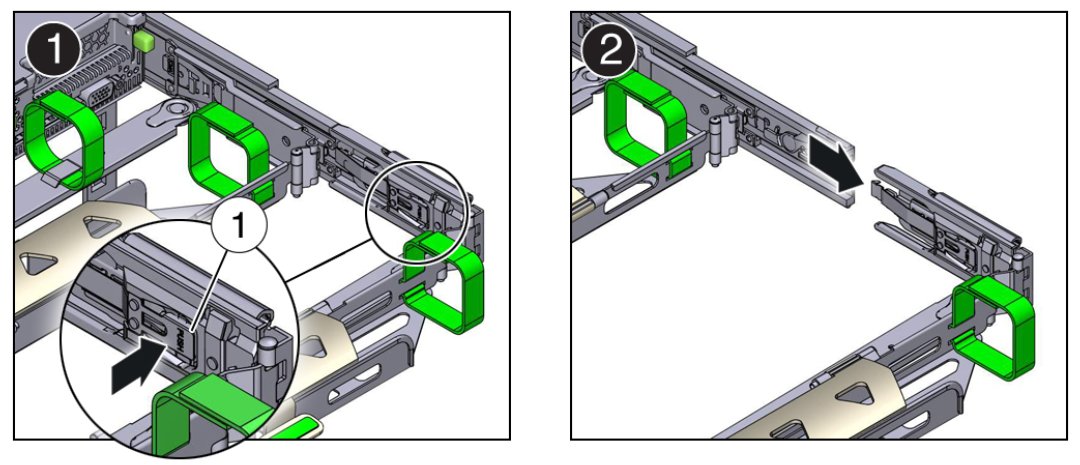
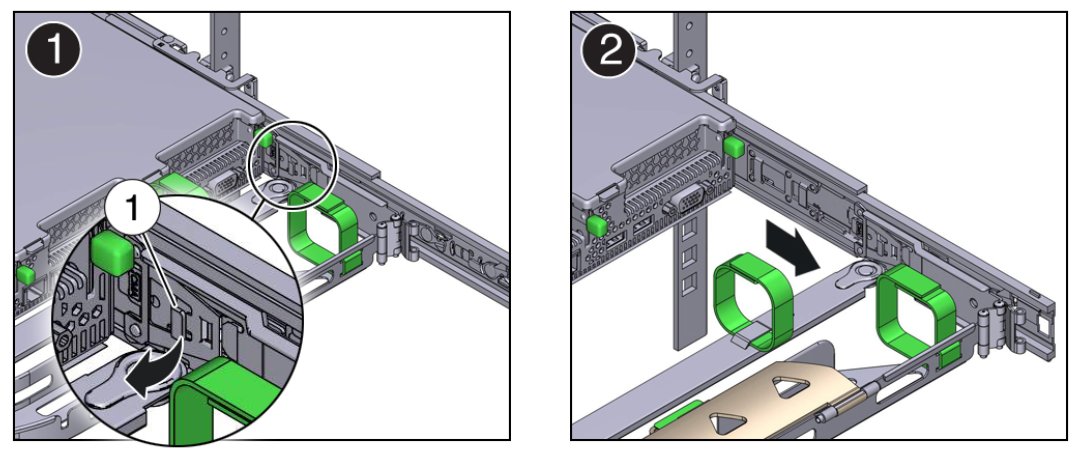
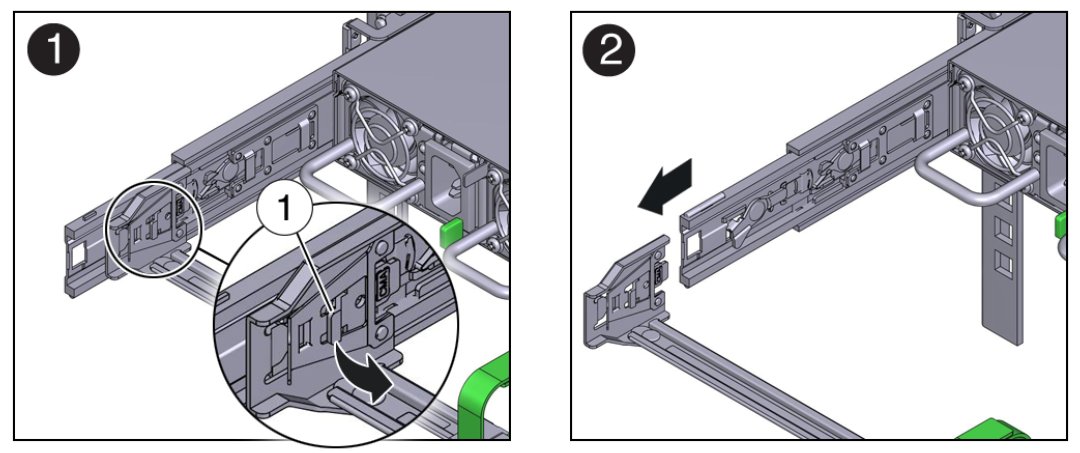
Follow this procedure to remove the cable management arm (CMA).
Before you begin this procedure, refer to the illustration provided in Step 1 in the procedure Install the Cable Management Arm (Optional) to identify CMA connectors A, B, C, and D. Disconnect the CMA connectors in the reverse order in which you installed them, that is, disconnect connector D first, followed by C, B, and A.
Throughout this procedure, after you disconnect any of the CMA four connectors, do not allow the CMA to hang under its own weight.
Note:
References to “left” or “right” in this procedure assume that you are facing the back of the equipment rack.
Related Topics
