Prepare Factory-Installed PDUs
If you ordered a rack with factory-installed PDUs, you must prepare the PDUs for use.
Note - Refer to the Oracle Rack Cabinet 1242 Power Distribution Units User's Guide for instructions on how to install, service, and use these PDUs.
-
Open the rear door and attach an antistatic wrist strap.
See Attach an Antistatic Wrist Strap for instructions.
-
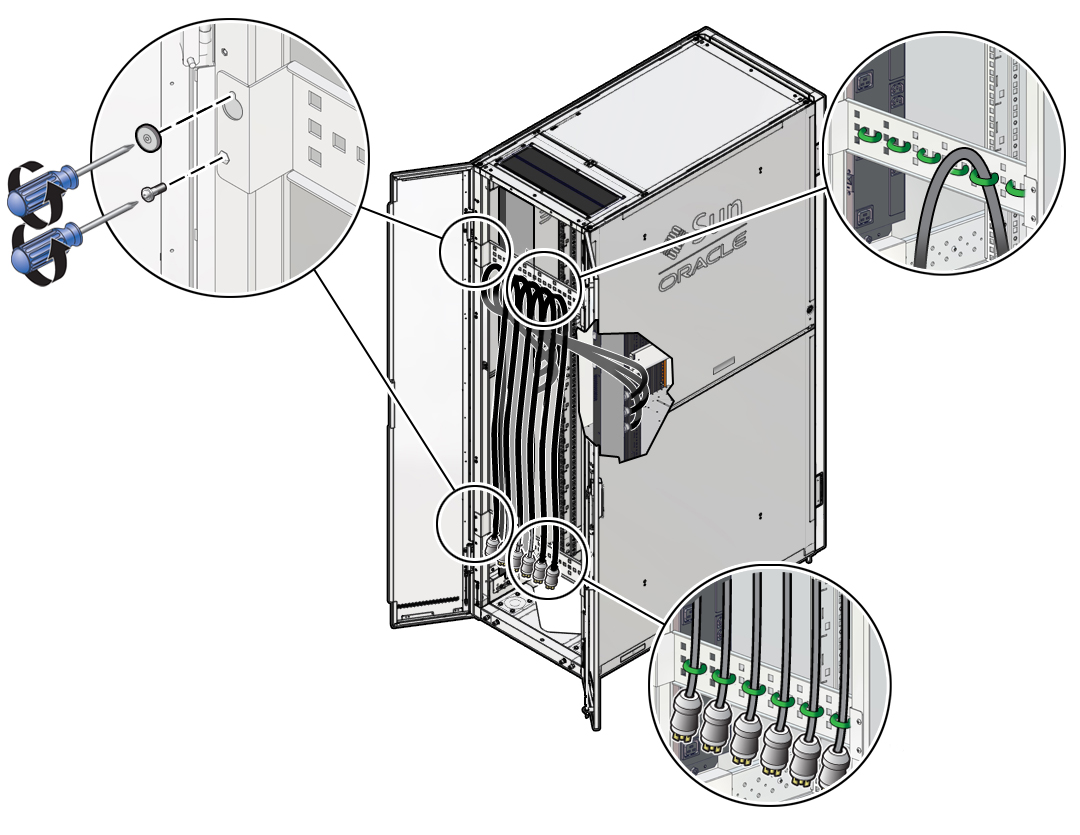
Use a diagonal cutter to cut the tie-wraps securing the PDU power lead cords
to the shipping brackets.
The PDU cables are secured to the rack using the shipping brackets.
-
Loosen the two screws that attach each shipping bracket to the rack
Do this for both shipping brackets.

- After the screws are loosened, lift each bracket up and off the studs on the rack frame.
-
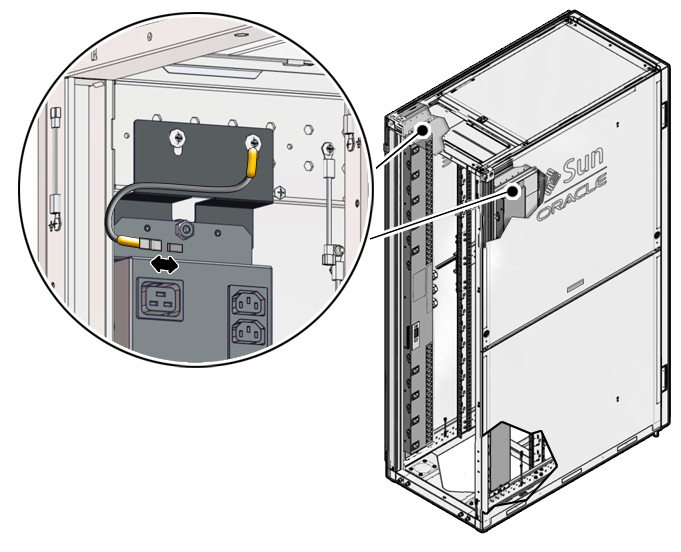
Connect the grounding straps from the rack frame to the PDU.

-
Route the power input lead cords between the rear RETMA rail and side
panel.
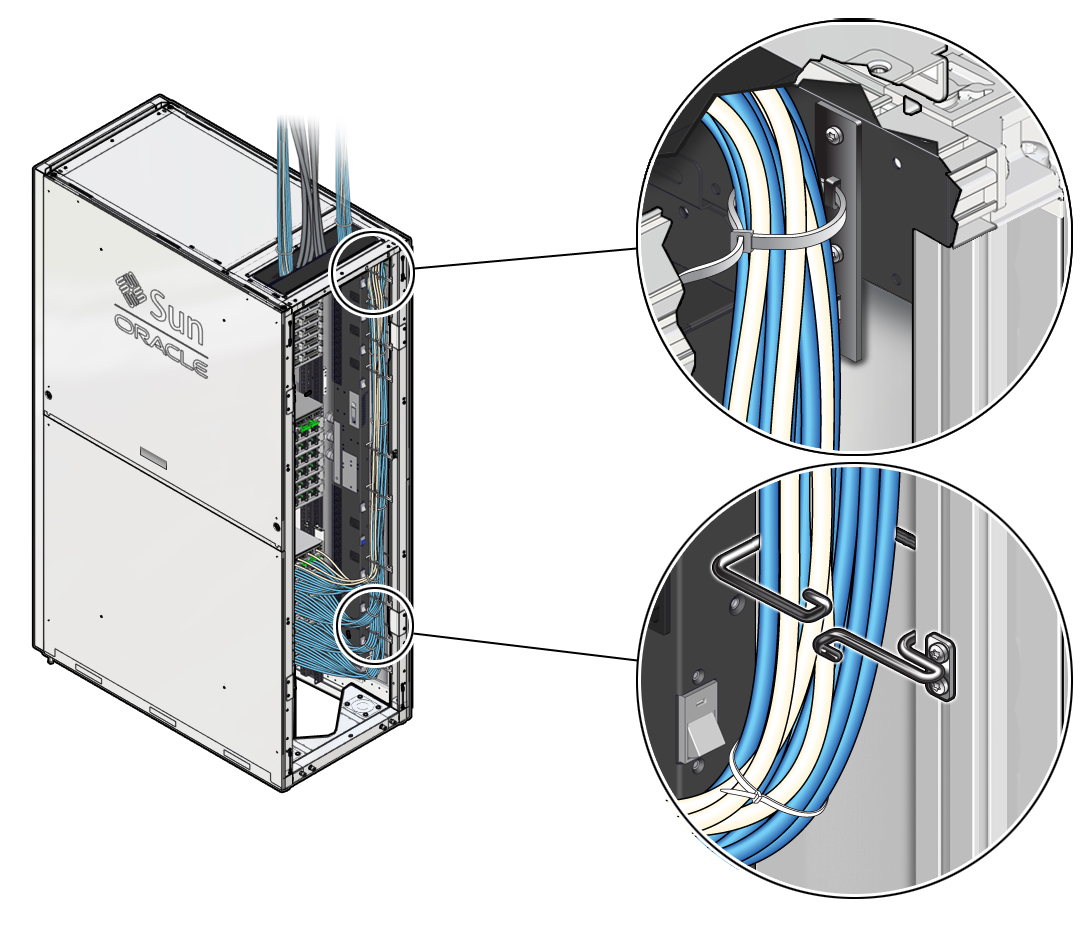
A PDU has one to three power input lead cords, which you must route between the side panel and the rear RETMA rail.
Route the power input lead cords either down through the bottom of the rack or up through the top of the rack, depending on where you plan to connect the cords to the main power source.

Caution - Never twist, kink, or tightly bend a power input lead.
The following figures shows routing the power leads through the bottom and top of the server..

-
Use a T-30 Torx screwdriver to secure cable routing brackets to the rack frame
using two M6 screws per bracket.
Install these brackets near where the power input lead cords exit the rack.
- Use tie-wraps to secure the standard PDU input lead cords to the tie-down brackets.