Using the GUI Installer
The following steps are limited to what's relevant to a Btrfs installation. For the complete procedure, see Installing in Graphics Mode.
- Boot the system from the installation media using the Unbreakable Enterprise Kernel boot ISO file.
- On the Installation Summary screen, select Installation Destination, then select the local disks and add any Specialized & Network disks that you want to use for the installation.
- Under Storage Configuration, select Custom and then click Done.
The Manual Partitioning screen is displayed. Custom partitioning can be either automatic, where mount points are automatically created, or manual, where you individually create and configure mount points.
Automatic Partitioning
-
From the list of partitioning schemes, select Btrfs.
-
Click Click here to create them automatically.
The following mount points are created:
-
/home -
/boot -
/(root) -
swap
-
-
Optionally, select each mount point and verify in the corresponding information that the mount point's device type is
Btrfs.Note:
The
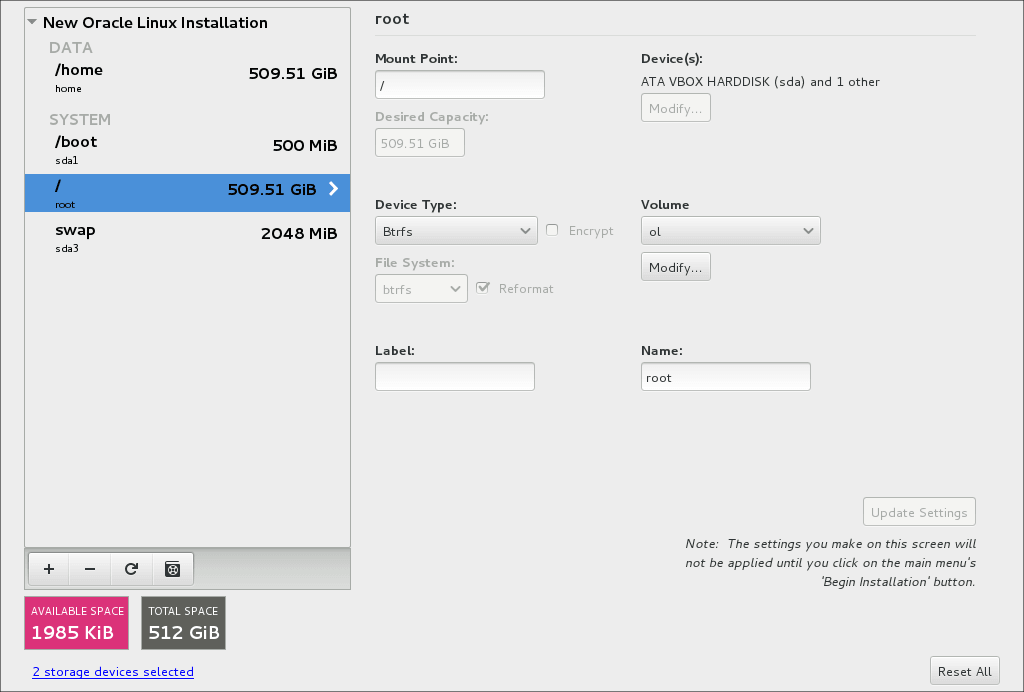
swappartition can't be configured as a Btrfs file system.The mount point information might resemble the following example:
Figure 6-1 Mount Points

-
Optionally for each mount point, configure the respective volumes.
-
Click Done, then on the partition summary that's displayed, click Accept Changes.
Manual Partitioning
-
From the list of partitioning schemes, select
Btrfs. -
Click + to create the mount point.
The Add A New Mount Point window opens.
-
Select the mount point and enter its size as prompted, then click Add mount point.
As a minimum, create mount points for
/,/boot,/home, andswap. -
Select each mount point you created and verify that their corresponding information is correct.
Note:
The
swappartition can't be configured as a Btrfs file system. -
Optionally, change the volume of each mount point, as needed.
-
Click Done and on the partition summary that's displayed, click Accept Changes.
-
- Complete the configuration of any other sections in the Installation Summary screen.
- Click Begin Installation.