10 Working with Resource Catalog Components on a Page
Permissions:
To perform the tasks in this chapter, you must be a portal manager or a portal member with the portal-level permission Basic Services: Edit Page Access, Structure, and Content (standard permissions) or Pages: Edit Pages (advanced permissions).
About Resource Catalogs
On the Assets and Shared Assets pages, WebCenter Portal provides three built-in resource catalogs:
-
Default Portal Catalog, assigned to portal pages by default, contains resources to add to pages and task flow assets in a portal.
-
Default Home Portal Catalog, assigned to pages in the Home portal by default, contains resources to add to a personal or business role page.
-
Default Page Template Catalog, assigned to page templates and page styles by default, contains a Navigations folder and a Portal Components folder, which provide access to resources specifically used in page templates and page styles. Note that all pages in a portal use the same page template, though there may be several page templates available as portal assets.
Alternatively, portal designers can develop custom resource catalogs. Within a portal, you can create a new resource catalog from scratch or copy an existing resource catalog into a new resource catalog. If a resource catalog is a shared asset (available to all portals), it is shown on the Assets page of all portals along with portal-specific resource catalogs.
Resource catalogs are portal assets that expose components and connections that you can add to a portal. You can use a resource catalog to populate pages, page templates, page styles, and task flows. The items listed in a resource catalog are collectively referred to as resources.
The resource catalog available to you as you edit a page, page template, page style, or task flow is established by the portal administration settings, and may be a built-in resource catalog or a custom resource catalog.
Displaying and Using a Resource Catalog
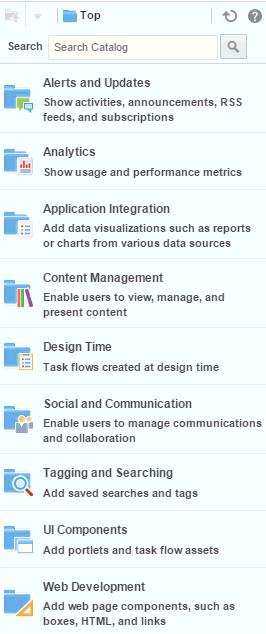
When you edit a page, page template, page style, or task flow, the resource catalog is shown when you click Add Content in any region, or when you click the Show Catalog icon. A resource catalog is organized into folders and subfolders to categorize resources. You can click a folder to expand the resource category, then select the resource that you want to add.
You can navigate back through the resource catalog hierarchy using the icons in the resource catalog menu bar. Use the Search field to locate resources by name or description. Click the Refresh icon to update the resource catalog with newly added resources.
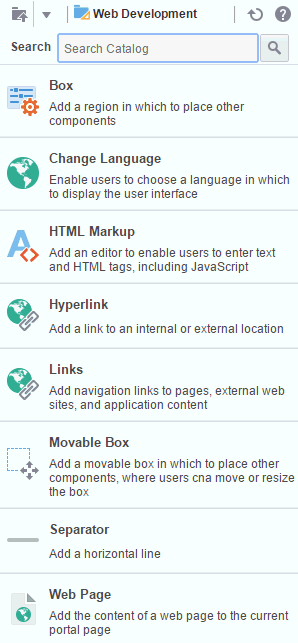
Figure 10-1 shows the Default Portal Catalog, one of the built-in resource catalogs described in About the Built-In Resource Catalogs.
Figure 10-1 Default Portal Catalog
Adding a Component to a Page
The method for adding a component to a page is the same for every resource in the resource catalog.
Notes:
-
When you add a component to a page, you must wait for the application status indicator to finish processing before taking additional action.
-
The content of the resource catalog varies according to the services that are integrated with the portal, the location from which the catalog is opened, and the resources provided by your administrator. For example, the components that appear in the catalog when you open it from the Home portal differ from those that appear when you open it from a portal.
-
For a full list of all components available in WebCenter Portal, you can see the Resource Registry. If the component you want is not present in the resource catalog assigned to the portal pages, you may need to add it.
To add a component to a page:
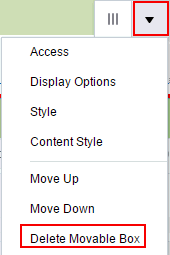
Performing Actions on a Component
When editing a page, you can view and perform available actions on any component.
To view and perform actions on a component on a page:
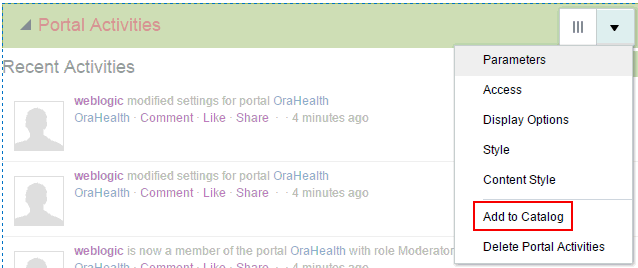
Saving a Customized Task Flow to a Resource Catalog
Note:
To perform this task on shared resource catalogs, you must have the application-level Create, Edit and Delete Resource Catalogs permission. Users with the Application Specialist role have this permission by default.
To perform this task on a portal-level resource catalog, you must have the portal-level permission Create, Edit and Delete Assets (standard permissions) or Create, Edit, and Delete Resource Catalogs (advanced permissions).
The resource catalog assigned to pages in a portal contains many task flows that you can add to a page (for example, task flows for all tools and services such as analytics, documents, and so on).
Note:
For a full list of all task flows available in WebCenter Portal, you can refer to the Task Flows folder of the Resource Registry. If you want to use a task flow that is not available to the resource catalog assigned to the portal pages, you can create a custom resource catalog that includes the task flow, and assign that resource catalog to the pages of your portal.
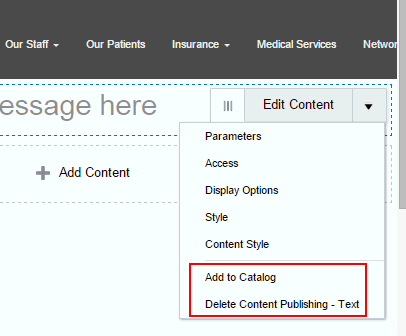
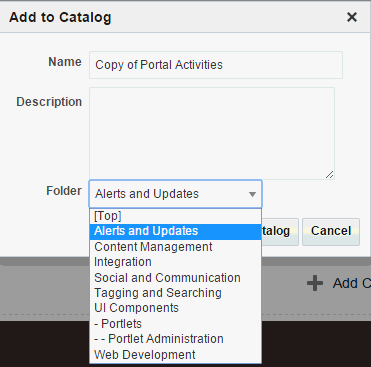
After you have added a task flow to a page, you can modify the properties of the task flow, then save the task flow with those customizations to the resource catalog as a new task flow. This means that you can reuse the customized task flow in other locations in your portal without having to modify the property settings for each instance. This saves time, and ensures consistency.
For example, you can add an RSS task flow to a page, modify the RSS properties to point to a news feed, and set the title to "News". If you save this customized task flow to the resource catalog as "News", then other users can simply select it from the resource catalog to add it to a page. Note that only changes to the properties of a task flow are saved in the new task flow added to the resource catalog. Changes to the content of the task flow remain unique to the task flow instance and are not included when saving the task flow to the resource catalog as a new task flow.
Once added to the resource catalog, the task flow can be selected in the resource catalog by any user who has permissions to edit pages in the portal.
To add a task flow to the resource catalog assigned to pages in a portal:
Modifying Component Properties
The components that you can add to a page from the resource catalog have configurable properties that control the appearance and behavior of the component. The properties available differ from component to component.
This section describes how to customize and set properties on page components, including component access:
About Component Properties
You can use component properties to adjust the appearance and behavior of a component instance and to wire components to each other and to page parameters and page definition variables.
Note:
For those properties that allow you to type a value, there is no validation of the value that you enter. If you enter an invalid value for such properties, then the component will ignore the property setting.-
Parameters—Settings, unique to the component type, that can control such things as the source of the component's content.
-
Access—Security settings to show or hide the component to specific roles, users, or groups.
-
Display Options—Settings for determining content orientation, hiding and showing a header, selecting a display method for an actions menu, and so on.
-
Style—Font, color, and dimension settings on the component that override such values on the parent component, the page, and the application. Style values affect component content and the elements that surround the content, but may or may not be exposed depending on whether or not the component elements (such as the skin) support modifications to these settings.
-
Content Style—Font, color, and dimension settings on component content that override such values specified for Style. These settings may or may not be exposed depending on whether or not the component elements (such as the skin) support modifications to these settings.
Setting Properties on a Component
This section outlines the general steps for setting properties on any page component.
See Also:
For information about properties associated with a particular component, see the section that covers that component.
Note:
-
When you enter most types of property values and then click Apply, the properties dialog remains open. With values other than expected value types, the dialog closes, and the page is refreshed to reflect the new value. For example, if a component takes a
java.util.ArrayListofjava.awt.Colorclasses, then the properties dialog closes after you add the value, and the page refreshes with the new properties. -
In addition to entering literal text (
value), you can also enter an Expression Language (EL) expressions (#{value}). If you need EL assistance, an application developer can provide an EL expression; see Expression Language Expressions in Developing for Oracle WebCenter Portal. -
When you enter EL in the generic Display Options dialog, the entry is automatically validated. If the EL syntax is invalid, an error appears and the value is neither applied nor saved. Generic Display Options are those cataloged in Table 10-1.
EL validation is not performed on non-generic display options.
To set properties of a component on a page:
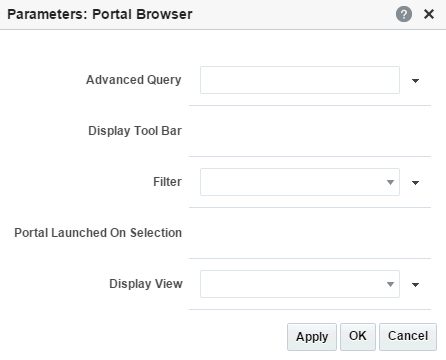
Setting Component Parameters
Component parameters vary from component to component. For example, on some components they provide the opportunity to specify the source and range of task flow content; on other components they present read-only, application-generated identifiers that are used in maintaining a task flow instance's association with its customizations.
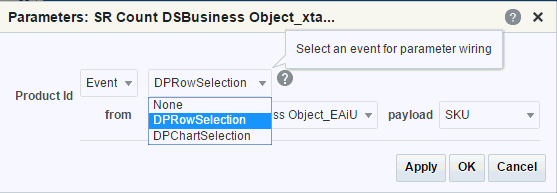
When there are no producer components on the page, the Parameters dialog displays only parameter names and values. When there is at least one producer component on the page, and the current component is a consumer component, a parameter can bind to either a specified value or to an event. When bound to an event, additional settings are required to specify event details.
Figure 10-11 Parameters Dialog for a Consumer Component
To set the parameters for a component on a page:
Setting Component Access
By default, the pages you create in a portal are viewable by all portal members. In the Home portal, the personal pages you create are accessible only to you and the system administrator. You can modify the access for a portal or personal page.
There may be pages you want to expose to many users, but certain components on the page to only a select set of users—or even only one user. For example, imagine that you have created a portal for all sales people. The portal's home page includes two Events task flow instances: one for all sales people and one for sales managers only. You can secure the second Events instance so that only those users assigned the custom role sales_manager can see it.
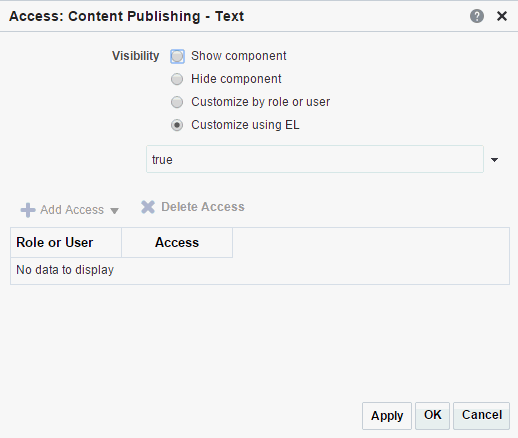
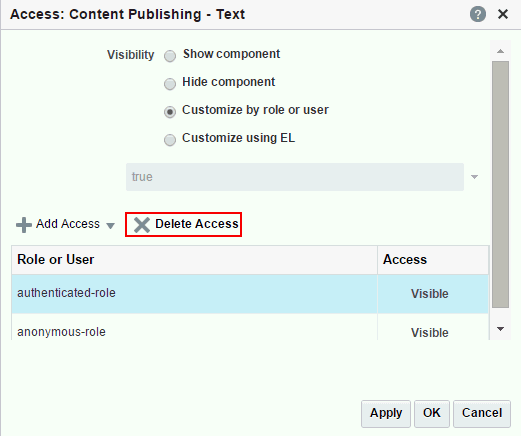
By default, a component on a portal page is visible to all users who have access to the page. You can set the component's Access properties to show or hide the component, or specify more granular visibility by role or user, or by using an EL expression.
Any component that has associated Access properties can be secured in this way. Those components that do not have associated Access properties can be placed inside a component that does (such as a Box component), and in this way be secured.
See Also:
You can also set security on the custom components that you import through the Assets Manager. For more information, see Setting Security for an Asset.
To set the access (visibility) for a component on a page:
Setting Component Display Options Properties
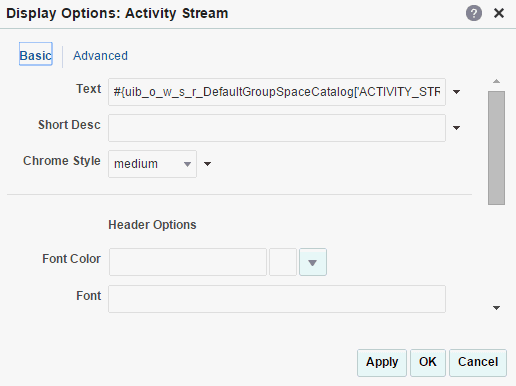
Component display options control a range of display-related behaviors on a given component instance. Typically, display options settings affect the display elements surrounding component content (that is, its chrome). Chrome includes the header, the Actions menu, Expand and Collapse icons, and so on. For example, use the display options on a task flow component to hide or show a header and enable or disable menus and other options on the header.
Though it is not obvious in the page editor, the showDetailFrame component is usually wrapped around task flows. Consequently, the Display Options dialog for task flows, and any other component wrapped in a showDetailFrame, share the same Display Options properties.
The Display Options dialog for several components is divided into two subtabs: Basic and Advanced. This provides a means of separating an otherwise long list of display options into more manageable and relevant groups.
Note:
While Display Options are available for all components, the settings may not have an effect on some components.
The following table lists and describes the Display Options properties that generally apply to most components. Where there are variations, they are noted in the tables covering the specific components.
Table 10-1 Display Options Properties
| Property | Description |
|---|---|
|
|
Select whether to show the minimize action on the component header (that is, a Collapse icon on the component chrome).
The minimize action collapses the component like a window shade, leaving only its header on view.  When a component is minimized, the icon toggles to an Expand icon, which you can use to restore the full component to view. |
|
|
Select whether to enable users to move the component on the page. Choose from:
|
|
|
Select whether to show the Remove icon on the component header (that is, the component chrome) when the page is in view mode. Choose from:
 Note that after you select to remove a component in this way in page view mode, you can restore the component only by editing the page and adding another component instance. As a page author, you may not wish to allow end users to remove a component when viewing the page. Users authorized to edit the page can remove the component in the page editor. |
|
|
Select whether to show a window resizer on a component instance. The window resizer enables you to increase the component height.
 Note: Selecting this property fixes the height of a |
|
|
Select to specify a shade for the component background. Enter:
|
|
|
Select this check box to show a header on the component instance. |
|
|
Select to render a shadow behind the component instance. |
|
|
Specify the font to use for text appearing in the component header. Enter one or more fonts. Separate multiple values with a comma (,), for example |
|
|
Select a color for the text appearing in the component header. Select a color using one of the following techniques:
|
|
|
Specify the size of text appearing in the component header. Enter a value using one of the following types of values:
|
|
|
Select an option for applying a font style to the text in a component header. Choose from:
|
|
|
Provide tooltip text for the component instance. When users roll their mouse pointers over the component instance, the text you enter here pops up. |
|
|
Select whether to enable users to move the component on the page. Choose from:
|
|
|
Select whether to stretch the component content.
|
|
|
Enter text to appear in the component header. If you select to hide the header, the value you enter here is ignored. |
To set the display options for a component on a page:
Setting Style and Content Style Properties
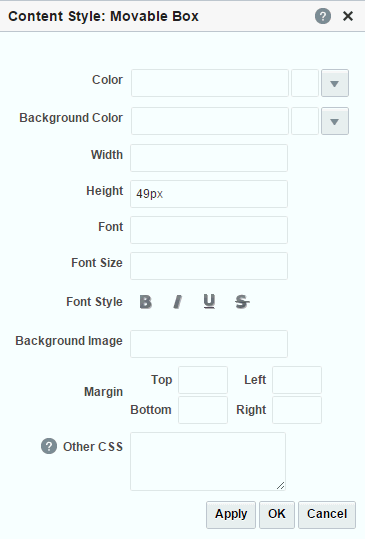
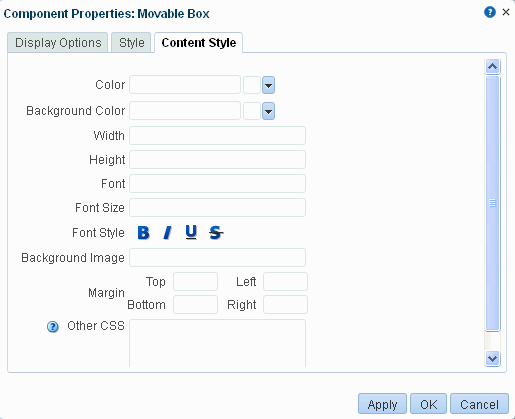
Style and Content Style properties can be used to fine-tune your portal's look and feel at the component level:
-
Style properties apply to the
ShowDetailFramecontainer of the component instance, overriding any styles specified for the component through the component's parent container, the page, and the application. -
Content Style properties apply to the content within the
ShowDetailFramecontainer of the component instance, overriding any styles specified for Style properties, the page, and the application.
For example, in a Movable Box component, Style settings control the look and feel of the Movable Box; Content Style settings control the look and feel of the components contained within the Movable Box. This look and feel may, in turn, be overridden by the Style settings set on those individual components.
Note, however, that Content Style properties set for a container, such as a Movable Box, may not take effect if the component inside the container overrides the container Content Style properties by a means other than the component's own Content Style properties. For example, the background color set for a Movable Box that contains a task flow may not take effect if, at design time, instead of being set to inherit from the container, the task flow background color was set with a hard-coded value.
Additionally, the Style and Content Style settings may or may not be exposed depending on whether or not the component elements (such as the skin) support modifications to these settings. Thus, while you can set Style and Content Style properties for a component, these settings may not take effect due to other settings that apply to the component.
Table 10-2 Style and Content Style Properties
| Property | Description |
|---|---|
|
|
Select a component background color. If you specify a background color for Content Style, then the background color specified for the Style property is not applied. |
|
|
Enter the URL to an image you want to render in the component background. Use standard CSS syntax. For example:
|
|
|
Select a default color for any text included in the component instance. For example, imagine that you have added a Text component to a Box component. When you set Box Style properties, the default text color you apply to the Box is also automatically applied to the Text component, unless you also define a Color value for the Text component. Select a color using one of the following techniques:
|
|
|
Specify the font to use for text appearing in the component header. Enter one or more fonts. Separate multiple values with a comma (,), for example |
|
|
Enter the size of component text relative to either your browser's default font size or the font size of the parent element. Enter one value from the following types of values:
|
|
|
Select the style for the component fonts. Choose from:
The font style you select here applies to any text inside the component. |
|
|
Specify the height of component content. Set a fixed height for component content. You can use any standard CSS unit of measure, such as Avoid expressing a Height value as a percentage. Because of differences between browsers and between layout containers, percentages do not work as you expect. For example, resizing an image using a % value will resize its parent container, not the image itself. If you want your component to take up 100% of a page, consider creating a page using the Stretch page style and adding the component to it. The Height property works with the |
|
|
Specify the border of space to draw around the component. Enter one of the following types of values:
|
|
|
Specify additional CSS for the component. Add any other CSS encoding you care to that is not covered by the other Style or Content Style properties. You must use standard CSS syntax for this value to be valid. For example, a setting of |
|
|
Specify the CSS style class to use for this component. For example, you can use this property to target specific skin settings on an individual Box component. The style class may be defined in your JSF ( Note: Style classes are a set of styles bundled together and given a name. In contrast, values entered for This property appears only in the Style dialog. |
|
|
Specify the width of component content. Set a fixed width for component content. You can use any standard CSS unit of measure, such as Avoid expressing a Width value as a percentage. Because of differences between browsers and between layout containers, percentages do not work as you expect. For example, resizing an image using a % value will resize its parent container, not the image itself. If you want your component to take up 100% of a page, consider creating a page using the Stretch page style and adding the component to it. |
To set the Style and Content Style properties for a component on a page:
Other CSS Property: Usage and Examples
The Other CSS property allows you to apply CSS styles that are not covered by other properties. Use standard CSS syntax, separating multiple entries with a semicolon (;). Use the Style Class property to specify the CSS style class to use for the component.
See http://www.w3.org/TR/CSS2/propidx.html.
For example:
background: #00FF00 url(http://www.google.com/intl/en_ALL/images/logo.gif) no-repeat fixed top; font-size: xx-small
Note:
Some CSS styles are not supported by popular browsers. Moreover, some styles are specific to one browser and may not work correctly in another browser
One example application of the Other CSS property is to provide a variety of borders on task flows, portlets, and some web development components.
To create a border on a task flow, access its properties and add CSS encoding in the Other CSS field in the Style dialog.
Figure 10-18 Adding CSS Encoding to a Component
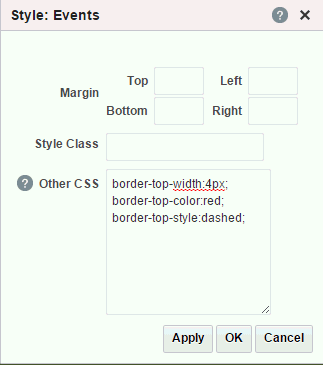
Description of "Figure 10-18 Adding CSS Encoding to a Component"
Figure 10-19 A Border Created Through the Other CSS Property
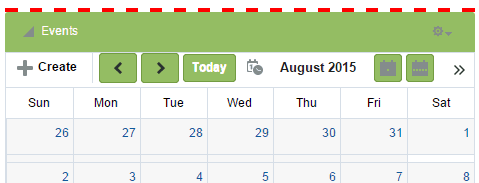
Description of "Figure 10-19 A Border Created Through the Other CSS Property"
This table provides examples of CSS you can use the set the Other CSS property.
| Value | Description and Examples |
|---|---|
|
|
Size of component text relative to either your browser's default font size or the font size of the parent element. Syntax:
where
|
|
|
Starting position of a background image. Syntax:
|
|
. |
Typically, you enter two values. Except where noted, if you specify only one value, the second value is interpreted as
For example:
|
|
|
Repetition value for the background image. Syntax:
where
|
|
|
White space (or clear space) around a component. Enter up to four values. Express values in a specific length or as a percentage of the closest element, using any standard CSS unit of measure, such as
|
|
|
White space (or clear space) below of the element. Express values in a specific length or as a percentage of the closest element. For example: |
|
|
White space (or clear space) at the left side of the element. Express values in a specific length or as a percentage of the closest element. For example: |
|
|
White space (or clear space) at the right side of the element. Express values in a specific length or as a percentage of the closest element. For example: |
|
|
White space (or clear space) above the element. Express values in a specific length or as a percentage of the closest element. For example: |
