Specifying a Task Owner Statically Through the User Directory or a List of Application Roles
Task owners can be selected by browsing the user directory (Oracle Internet Directory, Java AuthoriZatioN (JAZN)/XML, LDAP, and so on) or a list of application roles configured for use with Oracle SOA Suite.
To specify a task owner statically through the user directory or a list of application roles:
-
In the first list to the right of the Owner field in the General section, select User, Group, or Application Role as the type of task owner. Figure 29-5 provides details.
Note:
By default, group names in human tasks are case sensitive. Therefore, if you select Group and enter a name in upper case text (for example,
LOANAGENTGROUP), no task is displayed under the Administrative Tasks tab in Oracle BPM Worklist. To enable group names to be case agnostic (case insensitive), you must set the caseSensitiveGroups property tofalsein the System MBeans Browser. For information, see Administering Oracle SOA Suite and Oracle Business Process Management Suite.Figure 29-5 Specify a Task Owner By Browsing the User Directory or Application Roles

Description of "Figure 29-5 Specify a Task Owner By Browsing the User Directory or Application Roles" -
In the second list to the right of the Owner field in the General section, select Static.
-
See the step in Table 29-4 based on the type of owner you selected.
-
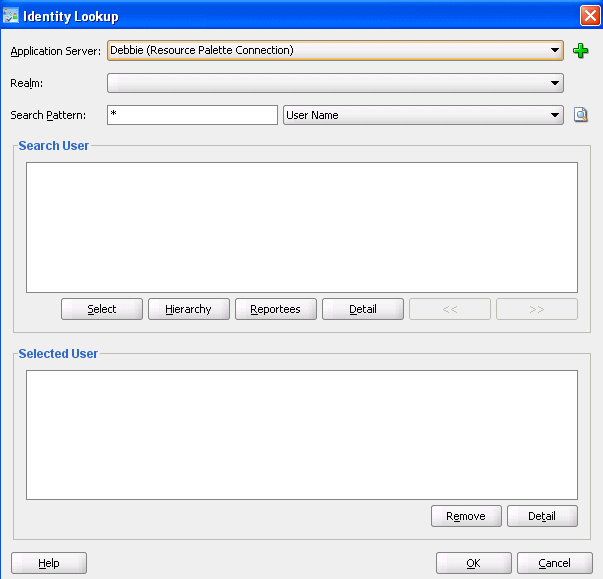
If you selected User or Group, the Identity Lookup dialog box shown in Figure 29-6 appears.
To select a user or group, you must first create an application server connection by clicking the Add icon. Note the following restrictions:
-
Do not create an application server connection to an Oracle WebLogic Administration Server from which to retrieve the list of identity service realms. This is because there is no identity service running on the Administration Server. Therefore, no realm information displays and no users display when performing a search with a search pattern in the Identity Lookup dialog box. Instead, create an application server connection to a managed Oracle WebLogic Server.
-
You must select an application server connection configured with the complete domain name (for example,
myhost.us.example.com). If you select a connection configured only with the hostname (for example,myhost), the Realm list may not display the available realms. If the existing connection does not include the domain name, perform the following steps:-
In the Resource Palette, right-click the application server connection.
-
Select Properties.
-
In the Configuration tab, add the appropriate domain to the hostname.
-
Return to the Identity Lookup dialog box and reselect the connection.
-
-
Select or create an application server connection to display the realms for selection. A realm provides access to a policy store of users and roles (groups).
-
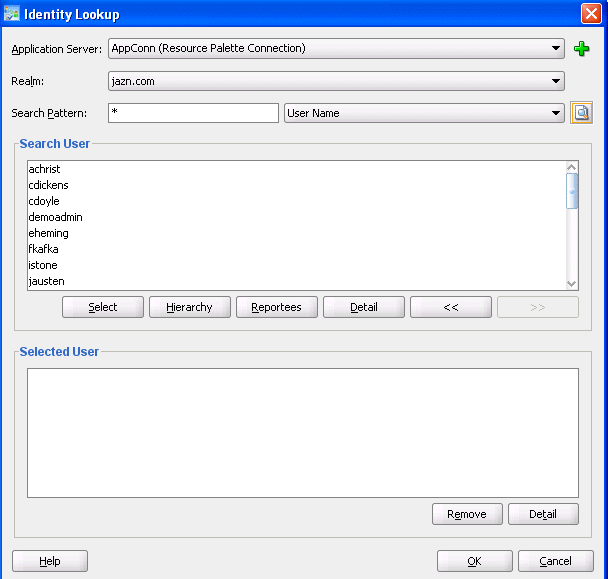
Search for the owner by entering a search string such as
jcooper, j*, *,and so on. Clicking the Lookup icon to the right of the User Name field fetches all the users that match the search criteria. Figure 29-7 provides details. One or more users or groups can be highlighted and selected by clicking Select.Figure 29-7 Identity Lookup with Realm Selected
Description of "Figure 29-7 Identity Lookup with Realm Selected" -
View the hierarchy of a user by highlighting the user and clicking Hierarchy. Similarly, clicking Reportees displays the reportees of a selected user or group. Figure 29-8 provides details.
Figure 29-8 User Hierarchy in Identity Lookup Dialog
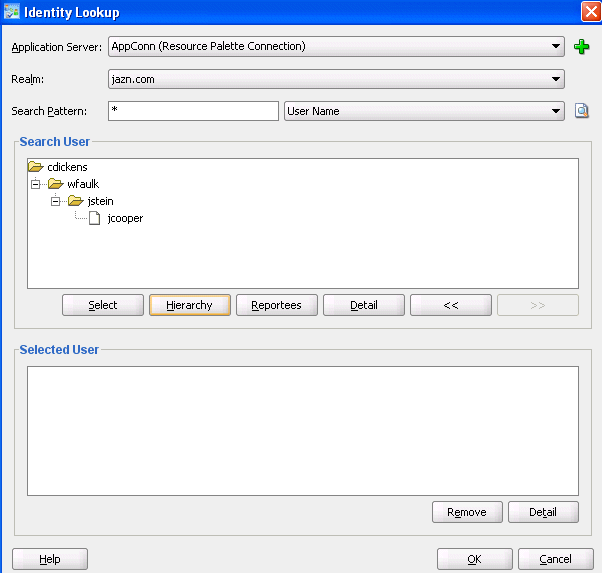
Description of "Figure 29-8 User Hierarchy in Identity Lookup Dialog" -
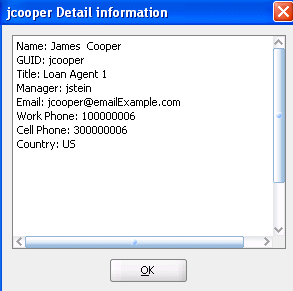
View the details of a user or group by highlighting the user or group and clicking Detail. Figure 29-9 provides details.
-
Click OK to return to the Identity Lookup dialog box.
-
Click Select to add the user to the Selected User section.
-
Click OK to return to the Human Task Editor.
Your selection displays in the Owner field.
-
-
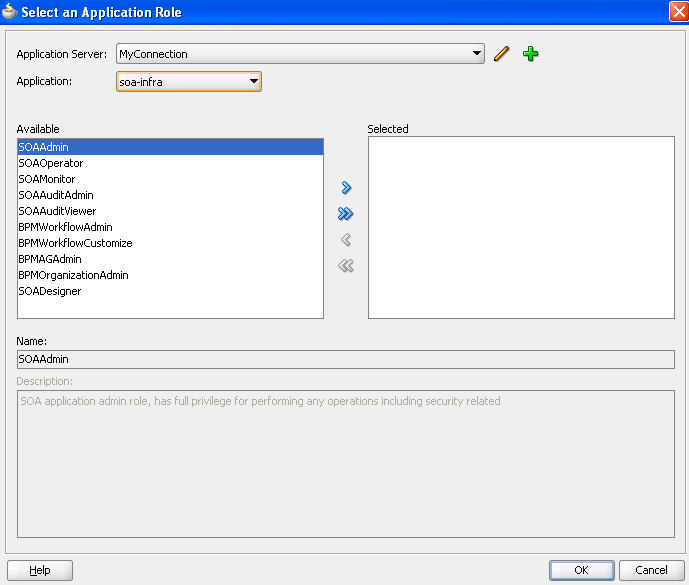
If you selected Application Role, the Select an Application Role dialog box appears.
-
In the Application Server list, select the type of application server that contains the application role or click the Add icon to launch the Create Application Server Connection wizard to create a connection.
-
In the Application list, select the application that contains the application roles (for example, a custom application or soa-infra for the SOA Infrastructure application).
-
In the Available section, select appropriate application roles and click the > button. To select all, click the >> button. Figure 29-10 provides details.
-
Click OK.
-
