Sparse Mappings
Schemas are often created to handle a large range of possibilities. When schemas of this type are used to produce source and target trees, the trees can contain hundreds of thousands, or even millions of nodes. However, in many cases, the user is only interested in using or populating a small portion of the nodes defined in the schema.
There are various ways of handling sparse mappings.
Using Sample XML to Generate a Schema
The 12c XSLT Editor has the ability to create schemas from XML documents that can then be used as schema documents for a source or target tree. If you have a sample XML document for your source and/or target, this document can be used to build small schema documents that contain only those nodes that you need for the map.
To create an XSLT map using sample source and target XML documents, select the Generate from XML option while selecting the schema for a source or target in a new XSL map.
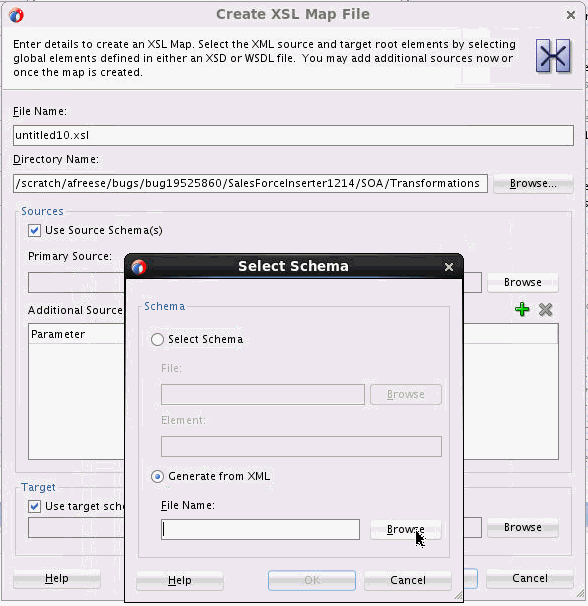
A schema is generated and placed in the Schemas folder. This schema will be used to create the source and target trees for your mapping, and consequently will contain only the nodes that exist in your original sample XML document.
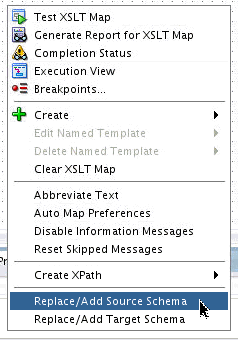
If you wish to switch back and forth from the small sample schema to the larger schema that you might be avoiding, you can select Replace/Add Source or Target Schema from the canvas context menu. Then select either the small sample schema from the Schemas folder or the larger schema.
Using XSLT View
The 12c editor contains a new view available within the Design View tab. This is the XSLT View. It can be reached by clicking the XSLT button on the top right of the XSLT editor toolbar.

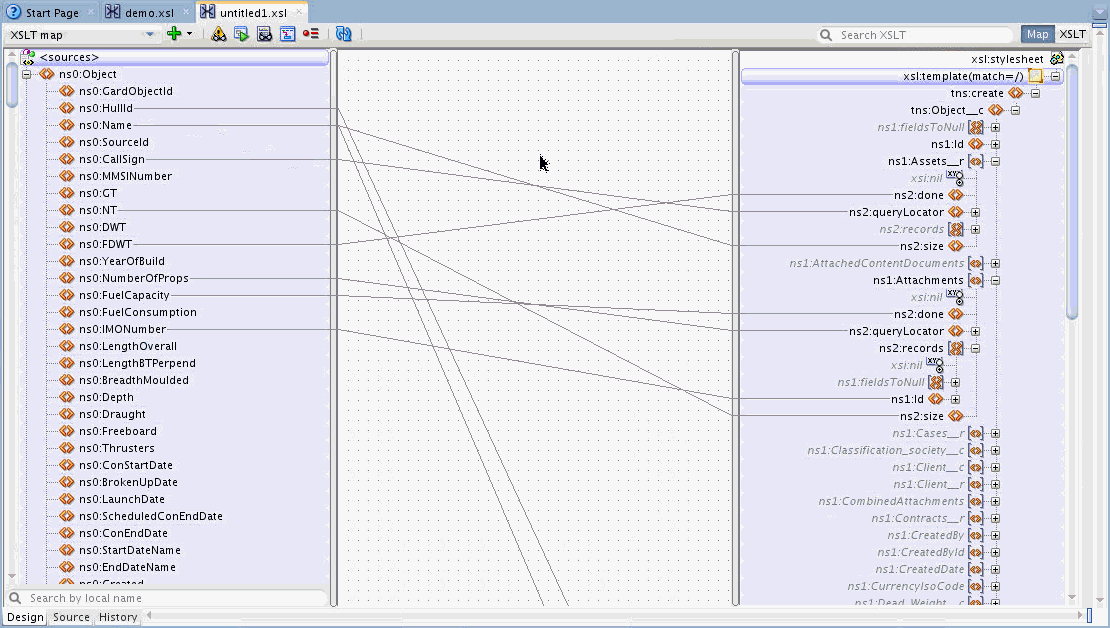
XSLT View shows the existing statements in the XSLT file. Users who have previously edited XSLT in a source xml editor may appreciate this view. It is organized in the same way as statements would appear in the XSLT source. Using this view will provide a condensed look at the mappings you are creating. For instance, here is a map against a large target schema document in Map View. Note that some lines run off the bottom of the display as they map to nodes that appear in the schema later in the tree.
Here is the same mapping in XSLT view:
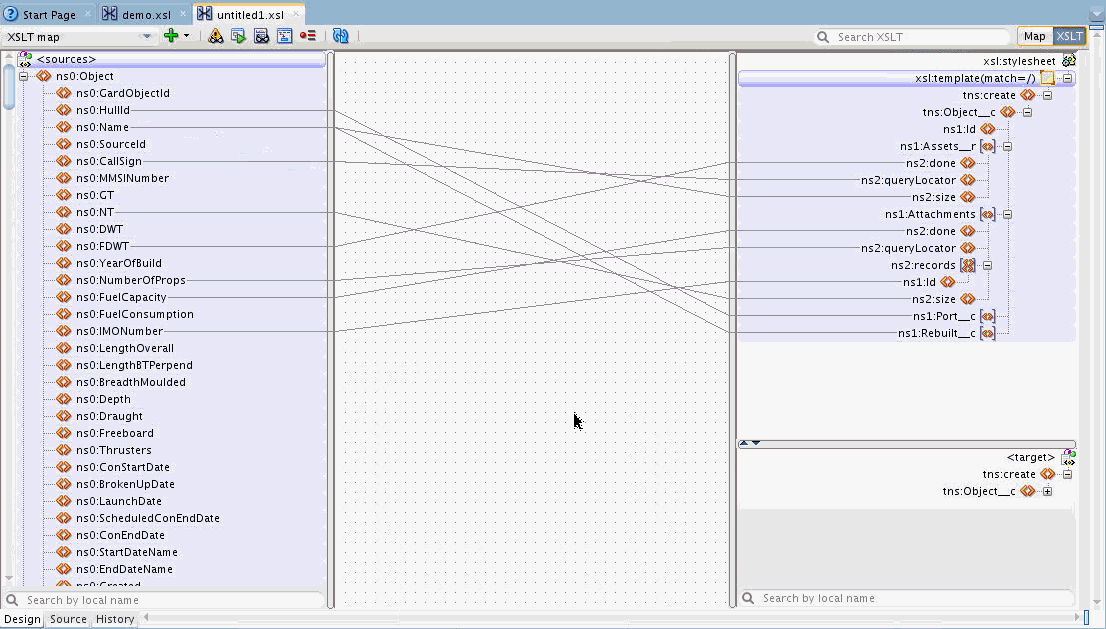
You can now see all of your mappings clearly without unused target nodes taking up space. If you need to add a new target element from the schema, use the Add Children From Schema option on the context menu.
From the context menu on any parent node select the Add Children From Schema option and a list of possible child nodes will appear that can be selected and added. You also have the option to select All Attributes/All Elements/All Required from this menu for any parent node.
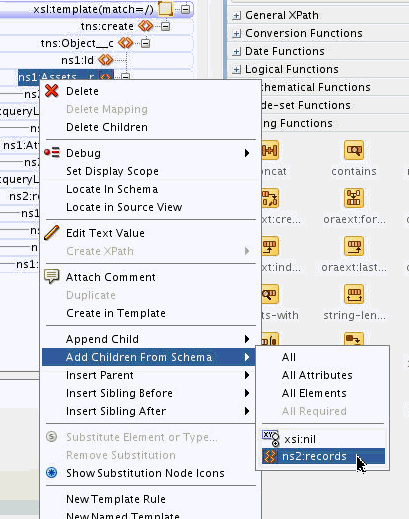
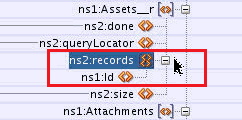
As an added bonus, when nodes are added this way, all required children of any node you insert will be added automatically for you. In the example above, when we select the ns2:records element to be added, it is inserted at its correct place in the tree and its required ns1:id node is automatically added for you.
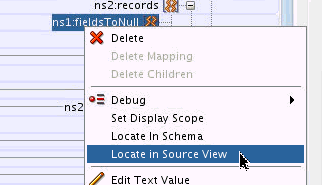
If you are used to editing in Source view, an option was added in 12.2.1.0.0 to allow you to move easily back and forth from source to design view. Right-click any node in the XSLT panel and select Locate in Source View.
The source view opens and the node is selected:
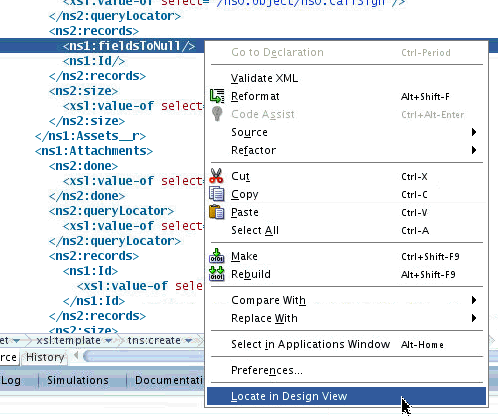
To navigate back to any node in Design view, you can select the Locate in Design View option while in Source View.
XSLT view can also be used to insert any XSLT statement and allows the use of named and matched templates (template rules). See Editing an XSLT Map in XSLT View for more information on XSLT view.