How to Specify Multilingual Settings

You can specify resource bundles for displaying task details in different languages in Oracle BPM Worklist. Resource bundles are supported for the following task details:

  • Displaying the value for task outcomes in plain text or with the message(key) format.

  • Making email notification messages available in different languages. At runtime, you specify the hwf:getTaskResourceBundleString(taskId, key, locale?) XPath extension function to obtain the internationalized string from the specified resource bundle. The locale of the notification recipient can be retrieved with the function hwf:getNotificationProperty(propertyName).

Resource bundles can also simply be property files. For example, a resource bundle that configures a display name for task outcomes can look as follows:

  • APPROVE=Approve

  • REJECT=Reject

To specify multilingual settings:
  1. In the Presentation section, click the Add icon across from Resource Bundle.

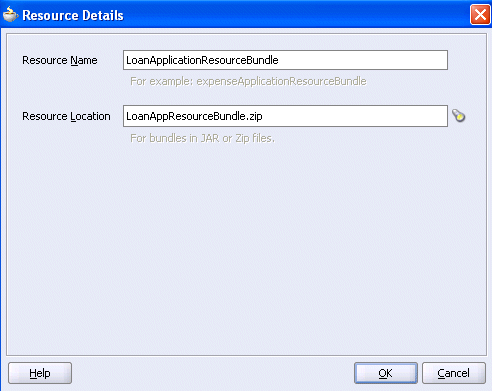
    The Resource Details dialog box shown in Figure 29-48 appears.

    Figure 29-48 Resource Details Dialog

    Description of Figure 29-48 follows
    Description of "Figure 29-48 Resource Details Dialog"
  2. In the Resource Name field, enter the name of the resource used in the resource bundle. This should be a .properties-based resource bundle file.
  3. In the Resource Location field, click the Search icon to select the JAR or ZIP resource bundle file to use. The resource bundle is part of your system archive (SAR) file.

    If the resource bundle is outside of the composite project, you are prompted to place a local copy in SCA-INF/lib.

    If the resource bundle file is not in the composite class loader (directly under SCA-INF/classes or in a JAR file in SCA-INF/lib), you must specify its location. For example, if the resource bundle is accessible from a location outside of the composite class loader (for example, an HTTP location such as http://host:port/bundleApp/taskBundles.jar), then this location must be specified in this field.

  4. Click OK to return to the Human Task Editor.