How To Create Group Rules
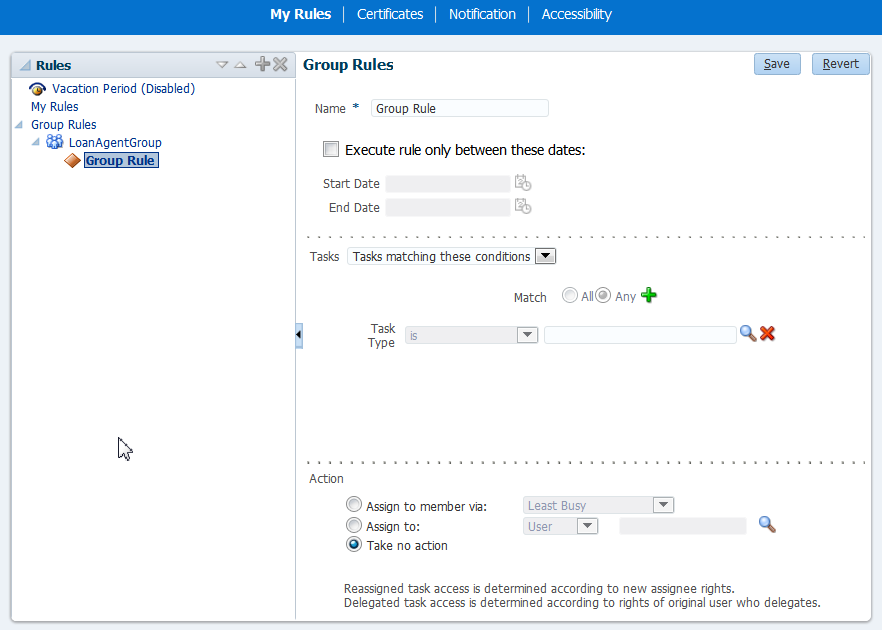
Creating a group rule is similar to creating a user rule, with the addition of a list of the groups that you (as the logged-in user) manage. Examples of group rules include:
-
Assigning tasks from a particular customer to a member of the group
-
Ensuring an even distribution of task assignments to members of a group by using round-robin assignment
-
Ensuring that high-priority tasks are routed to the least busy member of a group
Group rules do the following actions:
-
Assign to member via—You can specify a criterion to determine which member of the group gets the assignment. This dynamic assignment criterion can include round-robin assignment, assignment to the least busy group member, or assignment to the most productive group member. You can also add your custom functions for allocating tasks to users in a group.
-
Assign to—As with user rules, you can assign tasks to subordinates or groups you directly manage.
-
Take no action—As with user rules, you can create a rule with a condition that prevents a more generic rule from being executed.
To create a group rule:
