How to Create Custom Database Tables

As mentioned previously, all the runtime data by default gets stored in the XREF_DATA table. If you want to create custom database tables, then perform the following steps.

To create custom database tables:

  1. From the Optimize list, select Yes in the Cross Reference Editor.

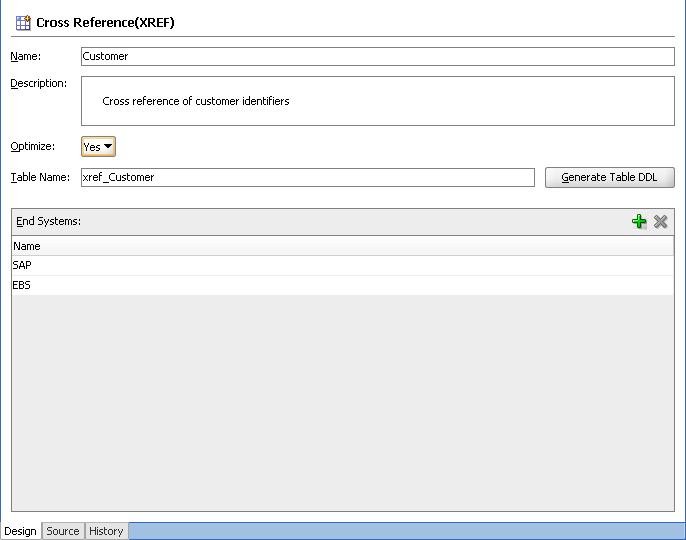
    The name of the custom database table to be generated is displayed in the Table Name field, as shown in Figure 44-4.

    Figure 44-4 Generating Custom Database Tables

    Description of Figure 44-4 follows
    Description of "Figure 44-4 Generating Custom Database Tables"

    The Table Name field is editable and you can change the name of the custom table. The custom database table name should be prefixed with xref_. If you do not prefix your table name with xref_, then while generating the table, you receive the following error message:

    Table name should begin with 'xref_' and cannot be 'xref_data' or 
    'xref_deleted_data' which are reserved table names for XREF runtime.
    
  2. Click Generate Table DDL. The Optimize XREF dialog is displayed.
  3. Select the Generate Drop DDL check box to drop the table and associated indexes, if a table with the same name already exists. If you select this option and click Run, then the Running Drop DDL Warning dialog is displayed with the following message:
    Running the Drop DDL will remove the table and indexes, do you want to
    continue?
    
  4. Click Run. The Run Table DDL dialog is displayed.
  5. From the Connection list, select the database connection to use.

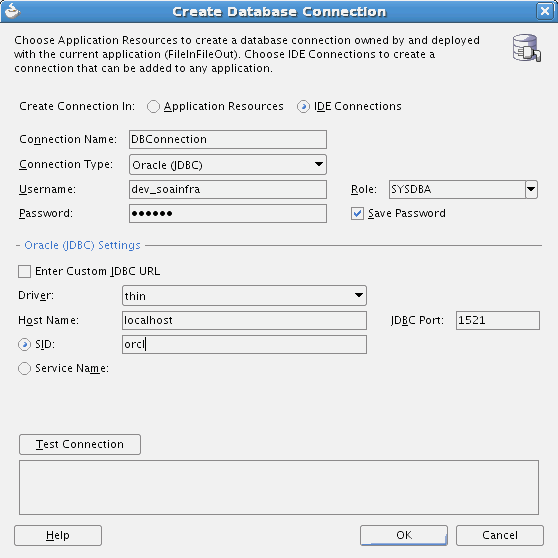
    If there is no available connection, then click Create a new database connection to open the Create Database Connection dialog, as shown in Figure 44-5. If you want to edit an existing connection, then select the connection and click Edit selected database connection to open the Edit Database Connection dialog.

    Figure 44-5 Create Database Connection Dialog

    Description of Figure 44-5 follows
    Description of "Figure 44-5 Create Database Connection Dialog"
  6. Enter all the required details and click OK. The Connection list of the Run Table DDL dialog is now populated.

    Note:

    Create the database table in the soainfra schema of the database.

  7. Click OK on the Run Table DDL dialog to run the DDL script.

    The Table DDL Run Results dialog displays the execution status of your DDL scripts.

For custom database tables, two additional attributes, namely mode and dbtable, are added to the schema definition mentioned in What Happens When You Create a Cross Reference. They are added for the table element in the following way:

 <attribute name="mode" type="string" default="generic" />
 <attribute name="dbtable" type="string" default="xref_data"/>