How to Create a Correlation Set with the Correlation Wizard
To create a correlation set with the Correlation wizard:
-
Right-click an applicable activity (such as a receive activity), and select Setup Correlation.
The Correlation wizard - Define Correlation Set page is displayed.
-
Provide responses appropriate to your environment, then click Next. Table 9-2 provides details.
Table 9-2 Correlation Wizard - Define Correlation Set Page
Field Description Create Correlation Set
Select to create a new correlation set.
Choose Existing Correlation Set
Select an existing correlation set in which to include the selected activity.
Name
Enter the name of the correlation set you want to create.
Scope
Displays the scope or process in which to create the new correlation set.
Properties
-
Click Add to create a new property in the Name column of the Properties table or click Browse to select an existing property.
-
Click the Type column, then click the ellipses to invoke the Type Chooser dialog for selecting the property type (for example, integer, boolean, or some other type).
When complete, the Correlation wizard - Define Correlation Set page looks as shown in Figure 9-2.
Figure 9-2 Correlation Wizard - Define Correlation Set Page
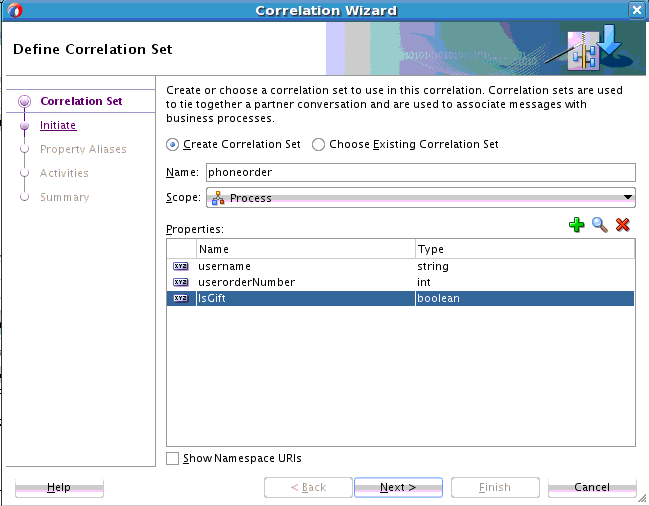
Description of "Figure 9-2 Correlation Wizard - Define Correlation Set Page"The Correlation wizard - Initiate Settings page is displayed.
-
-
Provide responses appropriate to your environment, then click Next. Table 9-3 provides details.
Table 9-3 Correlation Wizard - Initiate Settings Page
Field Description Activity
Displays the activity on which the correlation is set.
initiate
Select whether this activity is the initiator in the correlation set.
When set to yes, the correlation set is initiated with the values of the properties occurring in the message being sent or received.
When complete, the Correlation wizard - Initiate Settings page looks as shown in Figure 9-3.
Figure 9-3 Correlation Wizard - Initiate Settings Page
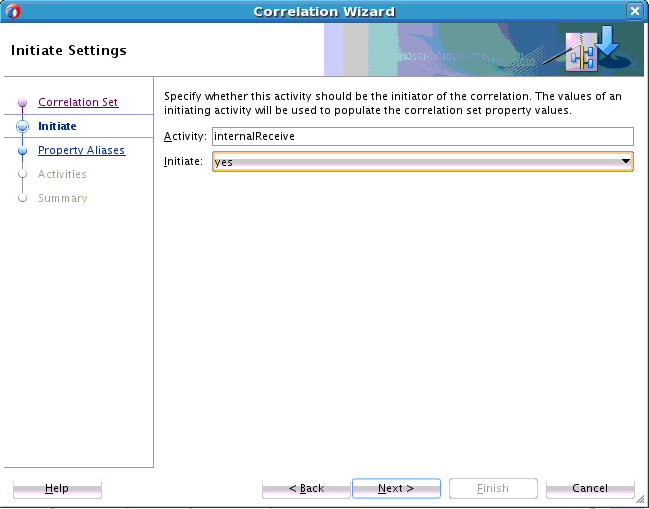
Description of "Figure 9-3 Correlation Wizard - Initiate Settings Page"The Correlation wizard - Property Aliases page is displayed for mapping properties to values. The properties defined previously in the Define Correlation Set page of the wizard are displayed in the Property Aliases table.
Property aliases enable you to map a property to a field in a specific message part of a variable. This action enables the property to become an alias for the message part and location.
-
Click a property in the table and select a method for mapping the message part of the variable to the property. Table 9-4 provides details.
-
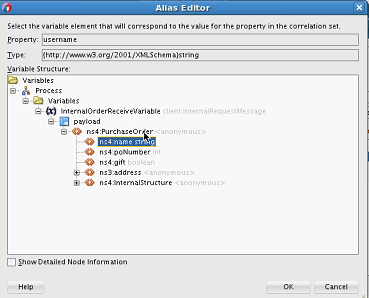
Click the Edit (first) icon to invoke the Alias Editor dialog.
-
Expand the variable.
-
Select the message part to represent the property, and click OK. Figure 9-4 provides details.
-
-
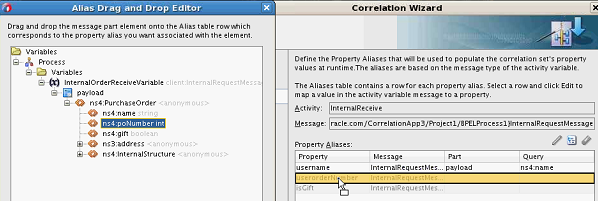
Click the Alias Drag and Drop Editor (second) icon to invoke the Alias Drag and Drop Editor dialog.
-
Expand the variable.
-
Select the message part to represent the property.
-
Drag and drop the message part onto the property row in the Correlation wizard - Property Aliases page. Figure 9-5 provides details.
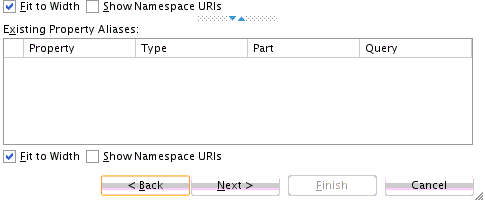
Existing property aliases are listed in the lower part of the Correlation wizard - Property Aliases page, as shown in Figure 9-6. For this example, there are no existing property aliases.
Figure 9-6 Correlation Wizard - Property Aliases Page - Lower Part
Description of "Figure 9-6 Correlation Wizard - Property Aliases Page - Lower Part" -
When complete, click Next.
-
-
Select additional properties to map to specific message parts of variables.
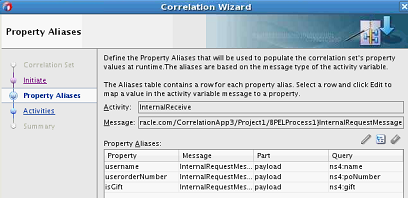
When complete, the Correlation wizard - Property Aliases page looks as shown in Figure 9-7. The properties created in Figure 9-2 are displayed in the Property column. The message elements to which the properties were mapped with either the Alias Editor (Figure 9-4) or Alias Drag and Drop Editor (Figure 9-5) are displayed in the Query column.
Figure 9-7 Correlation Wizard - Property Aliases Page
Description of "Figure 9-7 Correlation Wizard - Property Aliases Page" -
Click Next.
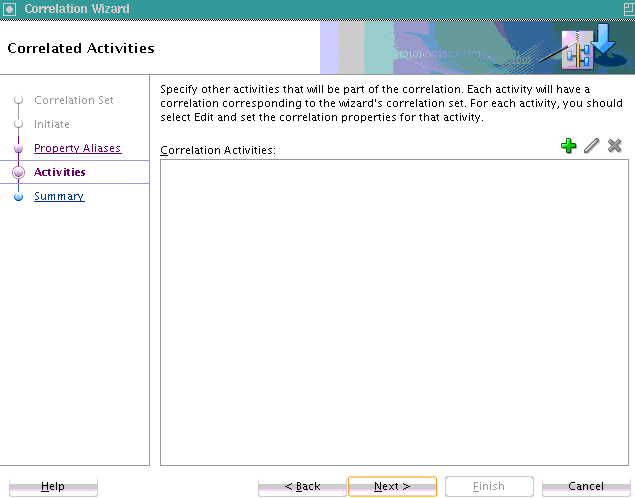
The Correlation wizard - Correlated Activities page is displayed. Figure 9-8 provides details.
Figure 9-8 Correlation Wizard - Property Aliases Page (Without Activity)
Description of "Figure 9-8 Correlation Wizard - Property Aliases Page (Without Activity)" -
Click the Add icon to add more activities to this correlation set (multiple activities can correlate on the correlation set).
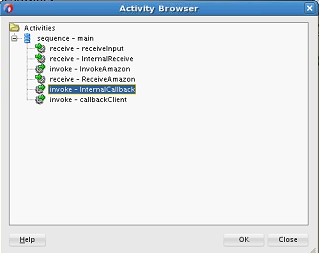
The Activity Browser dialog is displayed.
-
Select the activity to add, and click OK. Figure 9-9 provides details.
Figure 9-9 Activity Browser for Selecting an Activity
Description of "Figure 9-9 Activity Browser for Selecting an Activity"The activity is added to the Correlation Activities field of the Correlation wizard - Correlated Activities page.
-
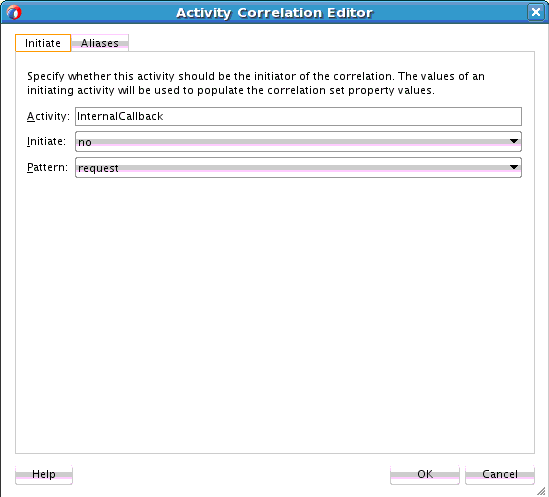
In the Correlation Activities field, select the activity and click Edit to invoke the Initiate tab of the Activity Correlation Editor dialog. Figure 9-10 provides details.
Figure 9-10 Activity Correlation Editor - Initiate Tab
Description of "Figure 9-10 Activity Correlation Editor - Initiate Tab" -
Select appropriate values in the Initiate and Pattern lists. For this example:
-
Select no from the Initiate list (because the correlation set validates the value of the property available in the message).
-
Select request from the Pattern list (because the correlation property is set and validated on the outgoing BPEL message).
For BPEL 2.0, you can select response if the correlation applies to an inbound message, request if the correlation applies to an outbound message, or request-response if the correlation applies to both outbound and inbound messages.
For BPEL 1.1, you can select in if the correlation applies to an inbound message (response), out if the correlation applies to an outbound message (request), or out-in if the correlation applies to both inbound and outbound messages. (response and request).
-
-
Click the Aliases tab.
-
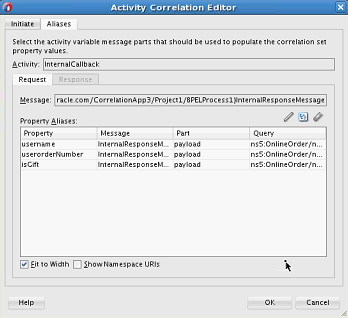
Repeat Step 4 through Step 7 to select a property and map the message part of the variable to the property.
When complete, the Alias dialog looks similar to that shown in Figure 9-11.
Figure 9-11 Activity Correlation Editor - Alias Tab
Description of "Figure 9-11 Activity Correlation Editor - Alias Tab" -
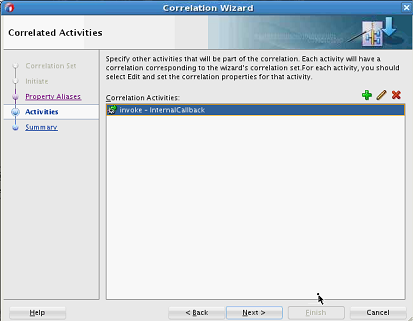
Click OK to return to the Correlation wizard - Correlated Activities page, which looks as shown in Figure 9-12.
Figure 9-12 Correlation Wizard - Correlated Activities Page (With Selected Activity)
Description of "Figure 9-12 Correlation Wizard - Correlated Activities Page (With Selected Activity)" -
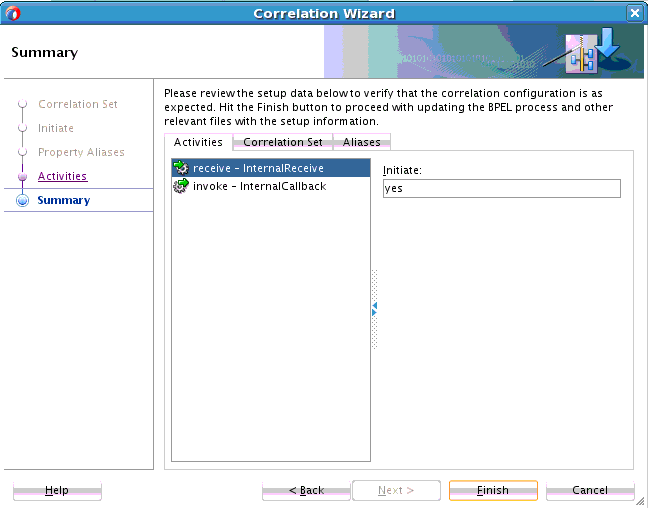
Click Next to review the correlation set details in the Activities, Correlation Set, and Alias tabs.
-
Activities: Displays the activities involved in the correlation and their roles (for example, the receive activity is the initiator and the invoke activity is the responder).
-
Correlation Set: Displays the name of the correlation set.
-
Aliases: Displays the property aliases defined for the activities in the correlation set.
Figure 9-13 provides details.
Figure 9-13 Correlation Wizard - Summary Page
Description of "Figure 9-13 Correlation Wizard - Summary Page" -
-
Click Finish.
The correlation set is created.
-
In the Structure window, view the correlation set, properties, and property aliases you defined in the Correlation wizard.
-
In Oracle BPEL Designer, click the Correlations tab of one of the participating activities to view the details you defined (for example, the receive activity). Figure 9-14 provides details.
Figure 9-14 Correlation Tab of Receive Activity
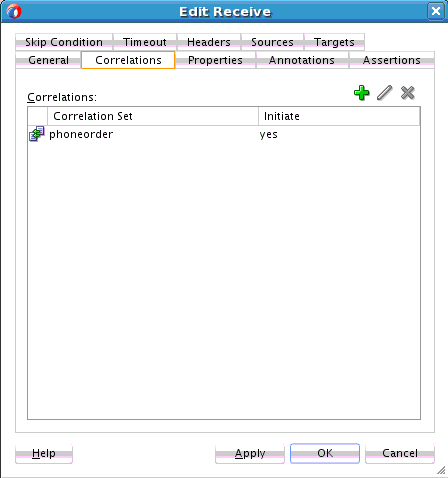
Description of "Figure 9-14 Correlation Tab of Receive Activity" -
If you want to find out which activities are used in a correlation set, perform the following steps.
-
Click the Search icon above Oracle BPEL Designer, and select Correlation Search.
The Correlation Set Chooser dialog is displayed.
-
Select the correlation set, and click OK.
-
In the Correlation Search dialog, click OK.
The activities using the correlation sets are displayed in the Log window.
-
-
If you want to add additional activities to an existing correlation set, right-click the activity, and select Setup Correlation.
The Correlation wizard - Define Correlation Set page is displayed.
-
Select Choose Existing Correlation Set.
-
From the Correlation Sets list, select the correlation set, and click OK.
-
Define the activity by following the pages in the Correlation wizard.
