Release 14c (14.1.2.0.0)
Part Number F92121-01
Contents
Previous
Next
| Oracle Fusion Middleware Oracle E-Business Suite Adapter User's Guide Release 14c (14.1.2.0.0) Part Number F92121-01 | Contents | Previous | Next |
Oracle E-Business Suite Adapter is deployed as JCA 1.5 resource adapter within the Oracle WebLogic Server container.
Although Oracle E-Business Suite Adapter is physically deployed as JCA 1.5 resource adapter, the logical deployment of the Adapter involves creating the connection entries for the JCA 1.5 resource adapter. This connection information is for tying up the database connection information provided when you create a partner link or service and is used by iAS at run time in the background.
For the logical deployment changes to take effect, the Oracle WebLogic Server container process must be restarted.
The following topics are included in this section:
Oracle WebLogic Server consists of a JCA container for hosting JCA resource adapters. JCA defines standard Java interfaces for simplifying the integration of a J2EE server with various back-end applications. All client applications run within the Oracle WebLogic Server environment.
The JCA resource adapter is a WebLogic Server component contained in a Resource Adapter Archive (RAR) file within the applications/directory. An RAR file contains a correctly formatted deployment descriptor. In addition, it contains declarative information about the contract between the Oracle WebLogic Server and resource adapter.
The weblogic-ra.xml file is the deployment descriptor for a WebLogic resource adapter. It contains deployment configurations for deploying resource adapters to Oracle WebLogic Server, which includes the back-end application connection information as specified in the deployment descriptor of the resource adapter, Java Naming and Directory Interface (JNDI) name to be used, connection pooling parameters, security identities, Work Manager properties, logging, and resource principal mapping mechanism and configurations.
Note: A WebLogic resource adapter also uses ra.xml descriptor that describes the resource adapter-related attributes type and its deployment properties using the standard XML schema specified by the JCA 1.5 Specification.
After successfully installing Oracle WebLogic Server, use the following steps to configure the data sources in the Oracle WebLogic Remote Console:
Note: For information on how to install Oracle WebLogic Server and create connection factory, see Oracle Fusion Middleware Installing and Configuring Oracle WebLogic Server and Coherence for details.
Navigate to http://servername:portnumber/rconsole.
In the WebLogic Remote Console, set up the connection to a WebLogic administration server by selecting Add Admin Server Connection Provider or clicking More from the Providers drawer and then selecting Add Admin Server Connection Provider from the options.
Enter appropriate values and connection settings to make sure that the WebLogic Remote Console is connected to your desired WebLogic administration server.
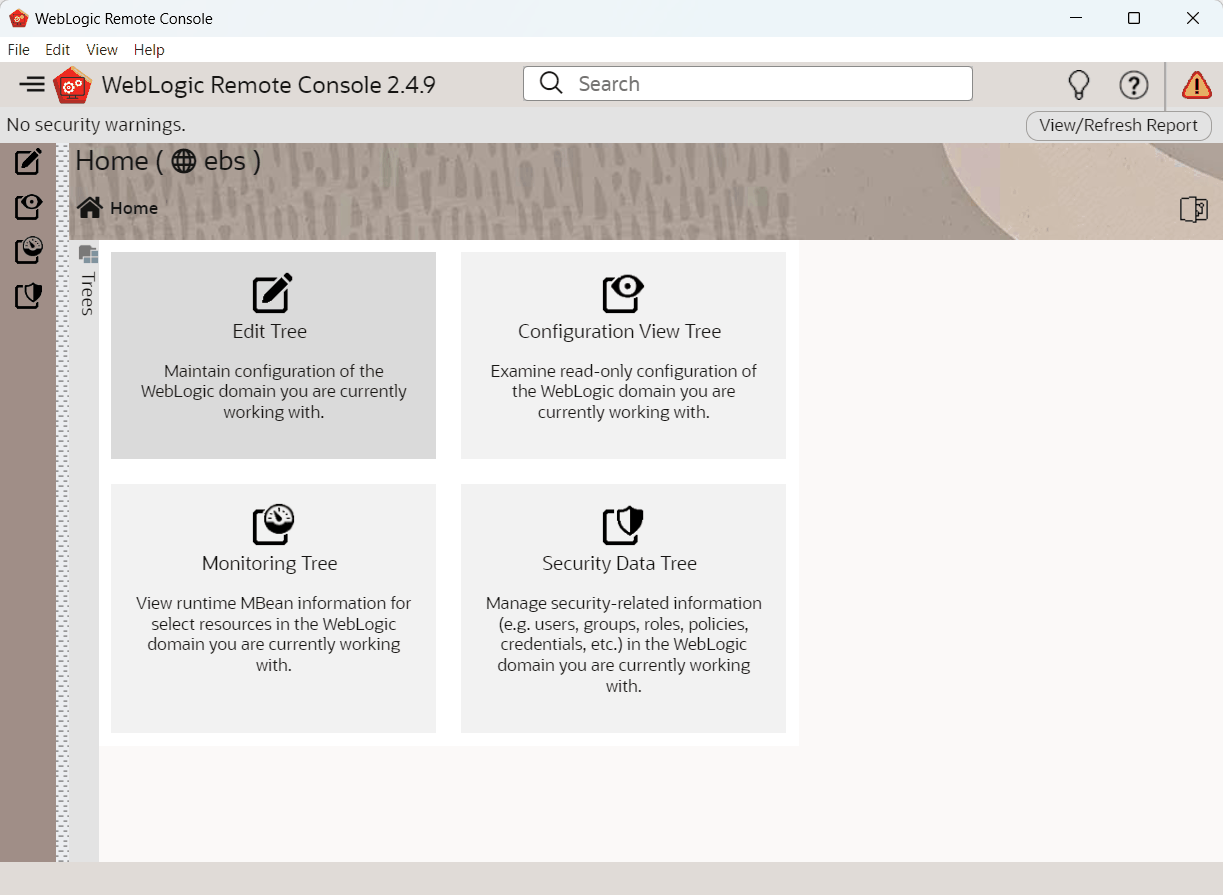
The Home page of the Oracle WebLogic Remote Console appears.
Oracle WebLogic Remote Console Home Page
In the Edit Tree, go to Services and then Data Sources.
The Summary of JDBC Data Sources page is displayed.
The Summary of JDBC Data Sources Page
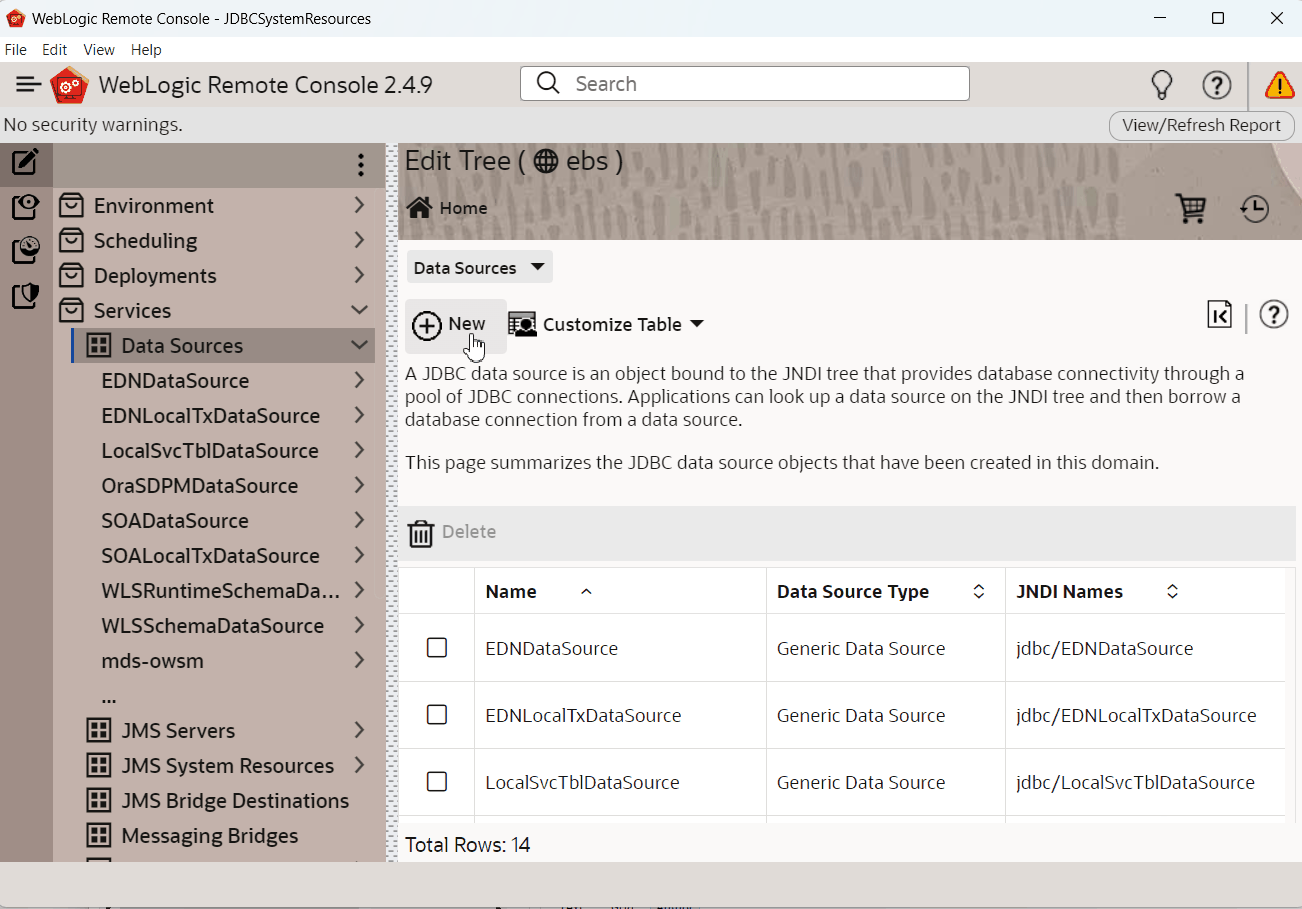
Click New. The Create a new JDBC System Resource page is displayed.
Enter the values for the properties to be used to identify your new JDBC data source.
Create a new JDBC System Resource Page
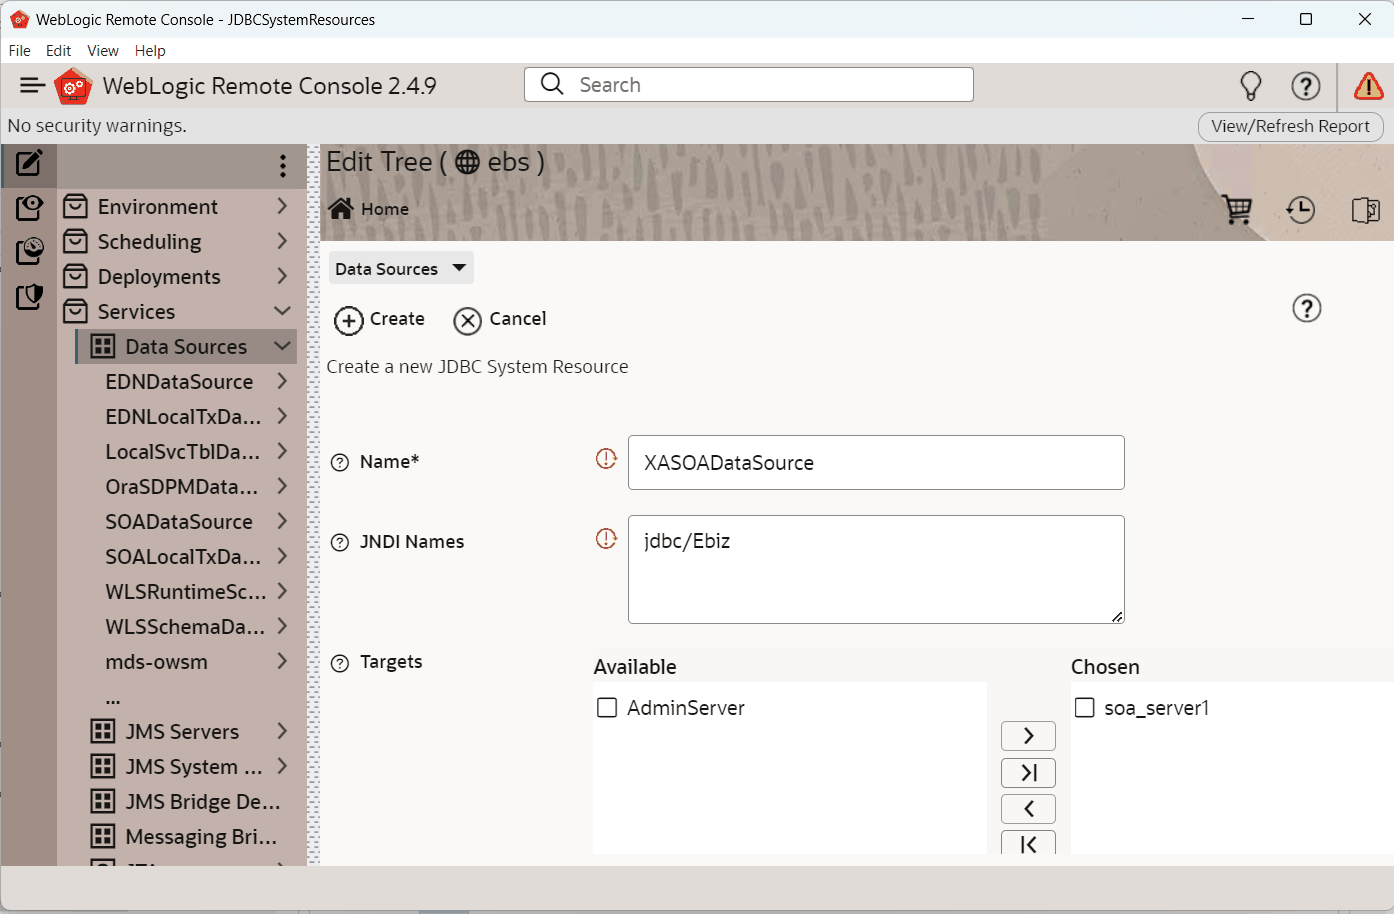
Name: Enter a desired new JDBC data source name.
JNDI Names: Enter a JNDI name that you like to assign to your new JDBC Data Source.
Targets: Select soa_server1 from the Available column and then the ">" key to move it to the Chosen column.
Data Source Type: Select Generic Data Source from the drop-down list.
Database Type: Select Oracle from the drop-down list.
Database Driver: Select Oracle's Driver (Thin XA) for Instance connections; Versions: Any) from the drop-down list.
Note: A driver name with '*' indicates that the driver is explicitly supported by Oracle WebLogic Server.
Important: For information about required Oracle E-Business Suite database version for Oracle E-Business Suite Adapter 14c, refer to My Oracle Support Knowledge Document 1594274.1, Oracle E-Business Suite Release 12.2: Consolidated List of Oracle Database Patches and Bug Fixes.
Database Name: Enter a database name that you would like to connect.
Host Name: Enter a host name or IP address of the database server.
Port: Enter a database port on the database server used to connect to the database.
Database User Name: Enter the database account user name that you want to use to create the database connections.
Password: Enter the database account password that you want to use to create the database connections.
If you want to verify the connection to the database, enable the Test Configuration option to test the database availability and the connection properties you provided.
Click Create.
The Summary of JDBC Data Sources page is displayed. This page summarizes the JDBC data source objects that have been created in this domain. The Data Source that you created appears in this list.
The deployment descriptor of the Oracle E-Business Suite Adapter must associate with the Java Naming and Directory Interface (JNDI) name with configuration properties required by the adapter to access the database.
Use the following steps to configure the JNDI and additional settings for Oracle E-Business Suite Adapter through the Oracle WebLogic Remote Console:
Navigate to http://servername:portnumber/rconsole.
In the WebLogic Remote Console, connect to a WebLogic administration server if it is not yet established.
To do so, click More from the Providers drawer and then select Add Admin Server Connection Provider from the options. Enter appropriate values and connection settings to make sure that the WebLogic Remote Console is connected to your desired WebLogic administration server. The Home page of the Oracle WebLogic Remote Console appears.
In the Edit Tree, go to Deployments, then App Deployments.
Locate an appropriate link for Oracle E-Business Suite Adapter (for example, OracleAppsAdapter) from the summary of deployment table first and then click the link.
Edit Tree - App Deployments
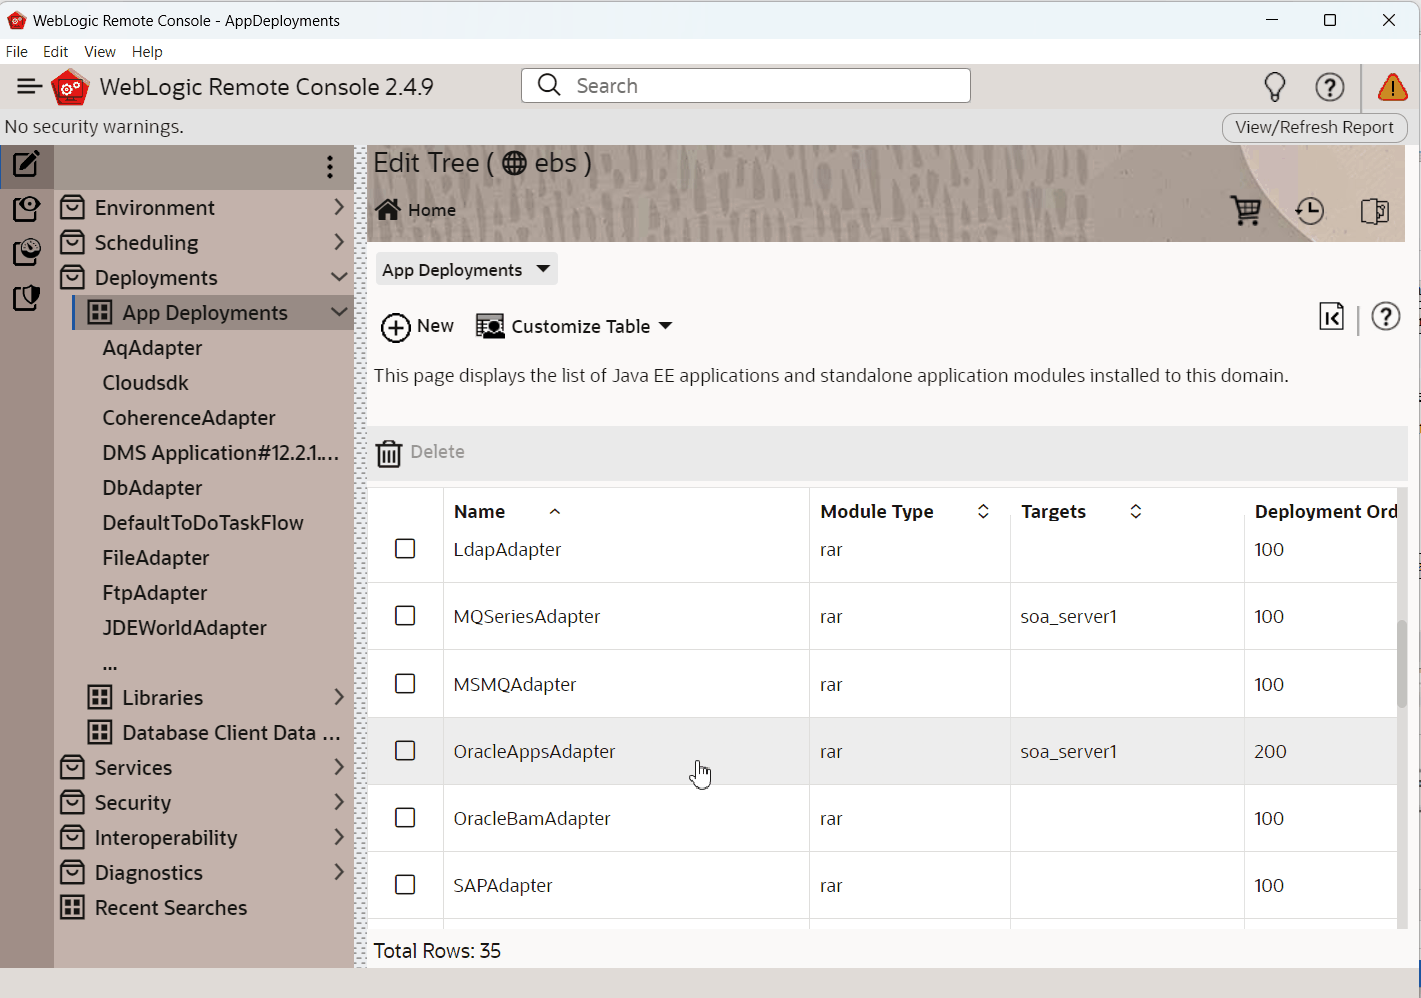
This displays the deployment information for the selected resource adapter, Oracle E-Business Suite Adapter.
Ensure that Oracle E-Business Suite Adapter is deployed with "Active" state.
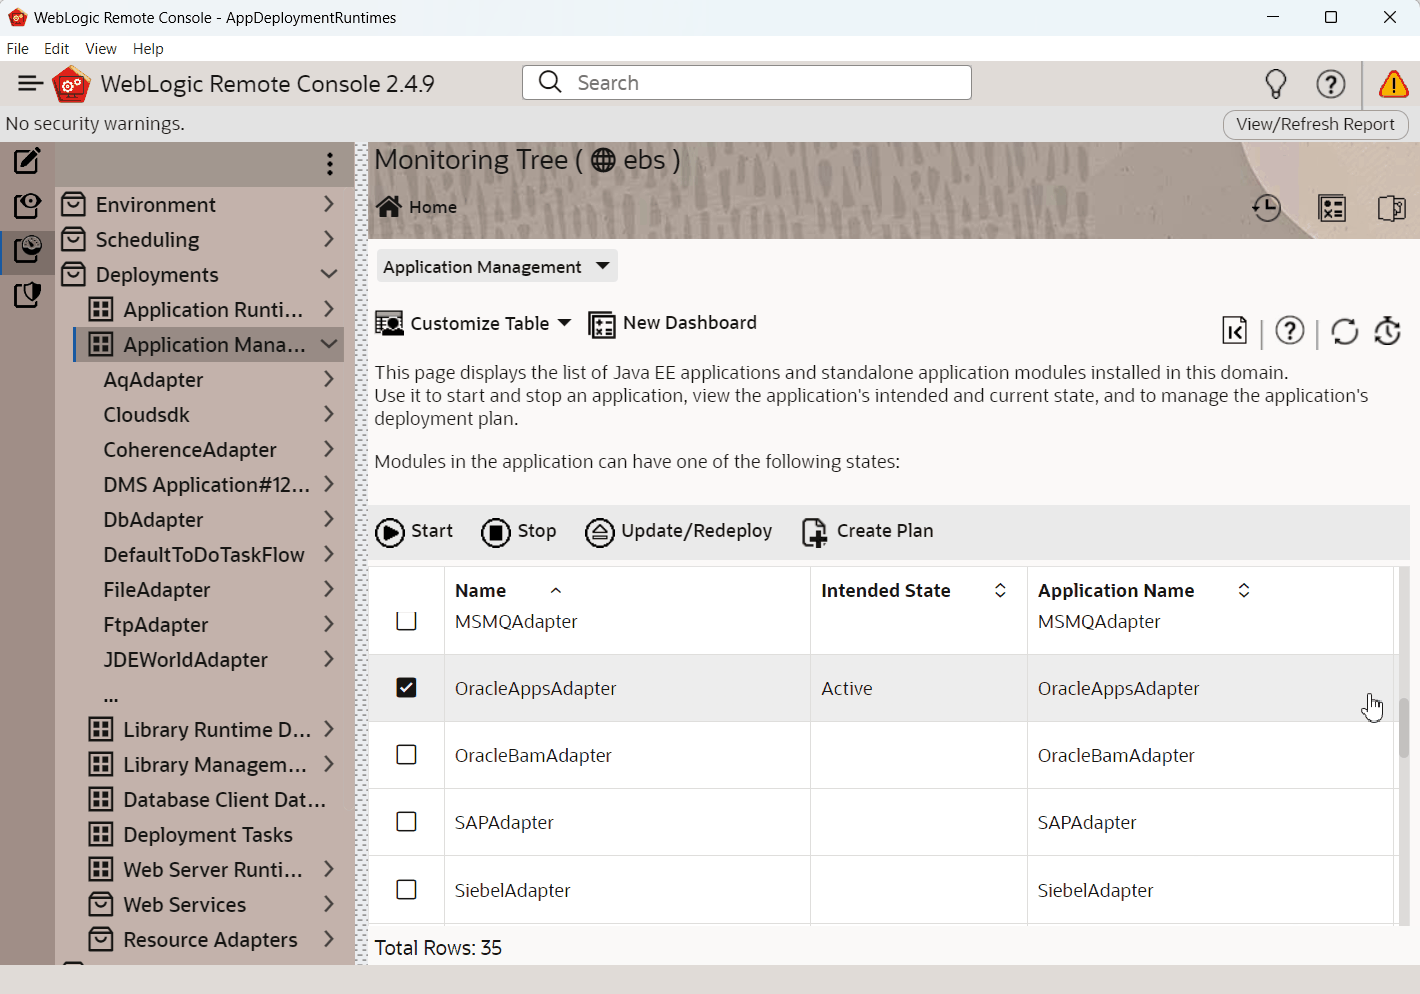
In the Monitoring Tree, go to Deployments, then Application Management.
Select OracleAppsAdapter. Notice that the "Active" is shown as the Intended State field for Oracle E-Business Suite Adapter.
Monitoring Tree - Application Management
If Oracle E-Business Suite Adapter is not deployed with "Active" state, select OracleAppsAdapter, then click Start. and then select either the Servicing all requests or Servicing only administration request option.
Set the deployment properties using the following steps:
In the Monitoring Tree, go to Deployments, then Application Management.
Select OracleAppsAdapter.
Click Create Plan.
In the Plan Path field, enter a file path for the new deployment plan, such as /home/user/fmwhome14/soa/soa/connectors/Plan.xml.
Click Done.
In the Monitoring Tree, go to Deployments, then Application Management, then OracleAppsAdapter, then Configuration. This displays the page with overview information about the OracleAppsAdapter or Oracle E-Business Suite Adapter.
Monitoring Tree - OracleAppsAdapter

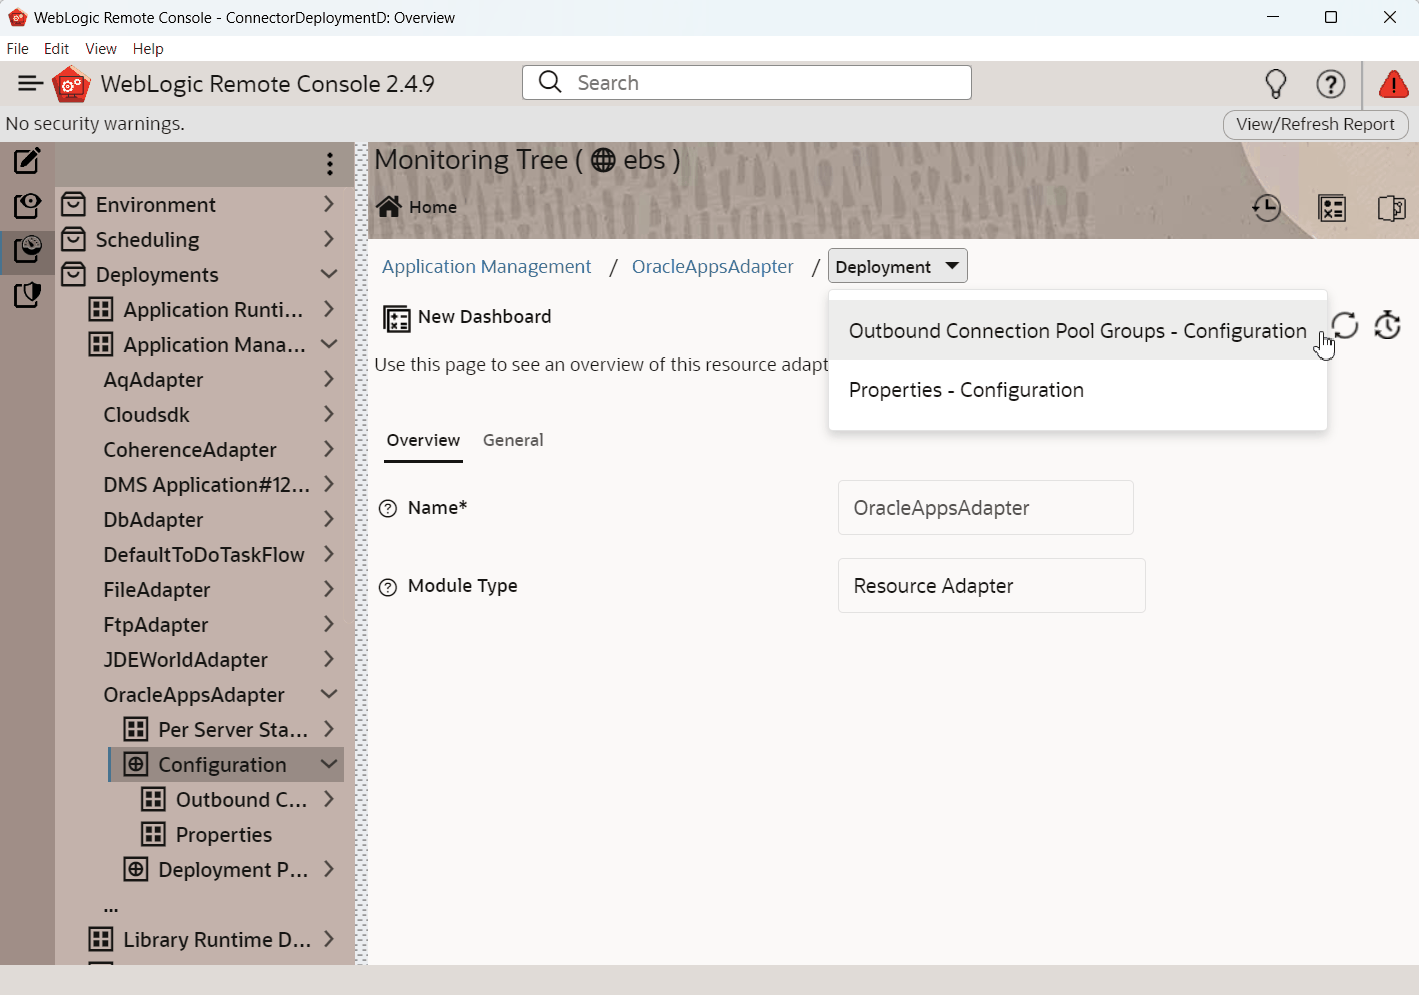
From the Navigation Tree structure or the Breadcrumb menu, click the Deployment and select Outbound Connection Pool Groups - Configuration to display the Outbound Connection Pool Groups page containing instances for this selected resource adapter, Oracle E-Business Suite Adapter.
Breadcrumb Menu to Select Outbound Connection Pool Groups - Configuration
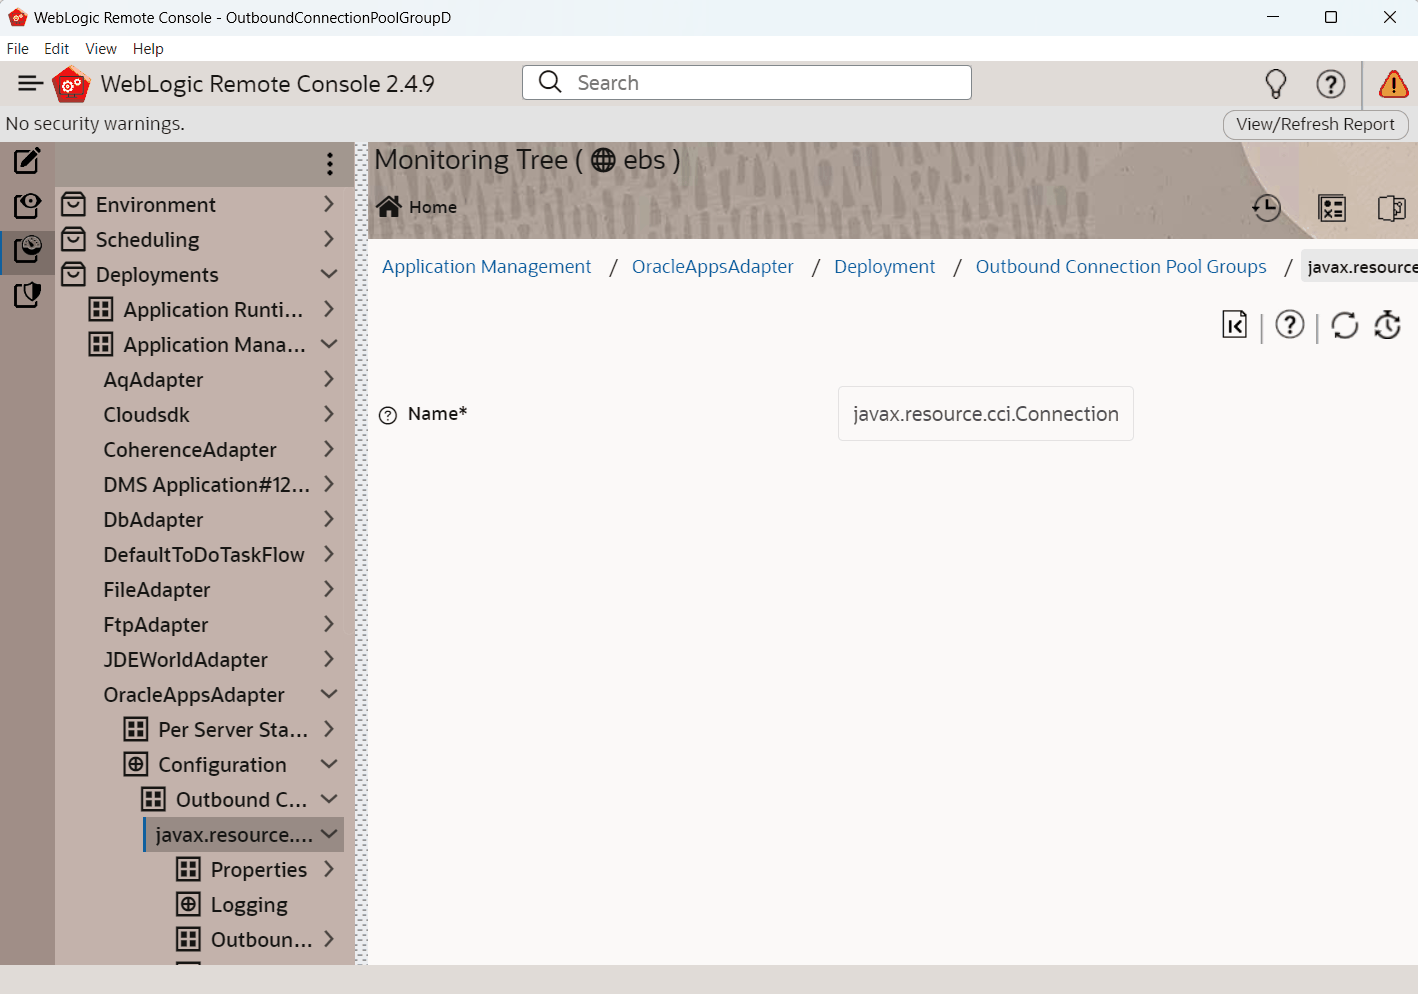
Click javax.resource.cci.ConnectionFactory to expand this group and obtain configuration information for a Connection Pool instance.
Outbound Connection Pool Group "javax.resource.cci.ConnectionFactory"
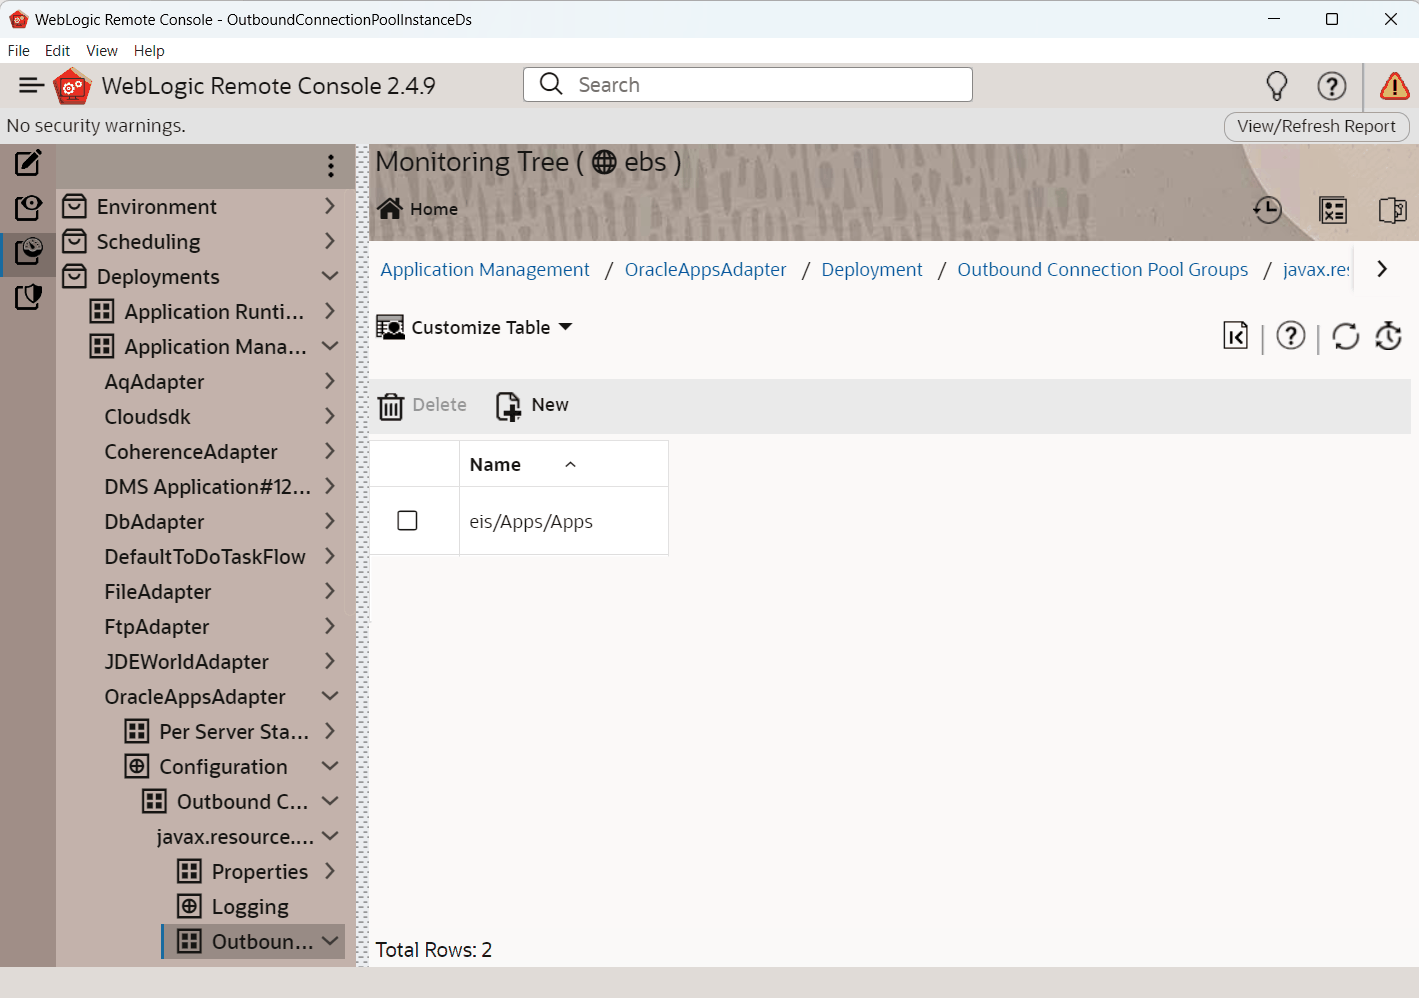
From the Navigation Tree structure or the Breadcrumb menu, click javax.resource.cci.ConnectionFactory and select Outbound Connection Pool Instances - javax.resrouce.cci.ConnectionFactory to expand this group and obtain configuration information for a Connection Pool instance.
Outbound Connection Pool Instances
Click New to create a new instance in this outbound connection pool. For example, enter eis/Apps/Ebiz as the instance name.
New Page
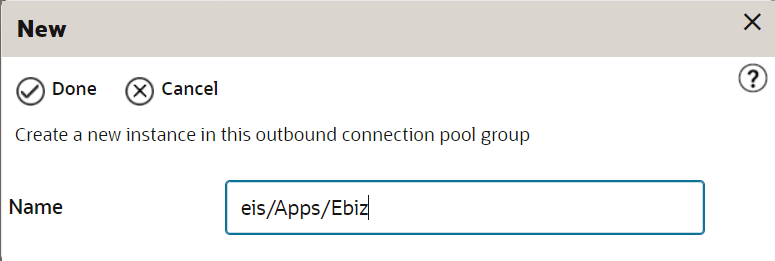
Click Done.
The Outbound Connection instance represents a connection pool. The JNDI name can be used to obtain the pool at run time.
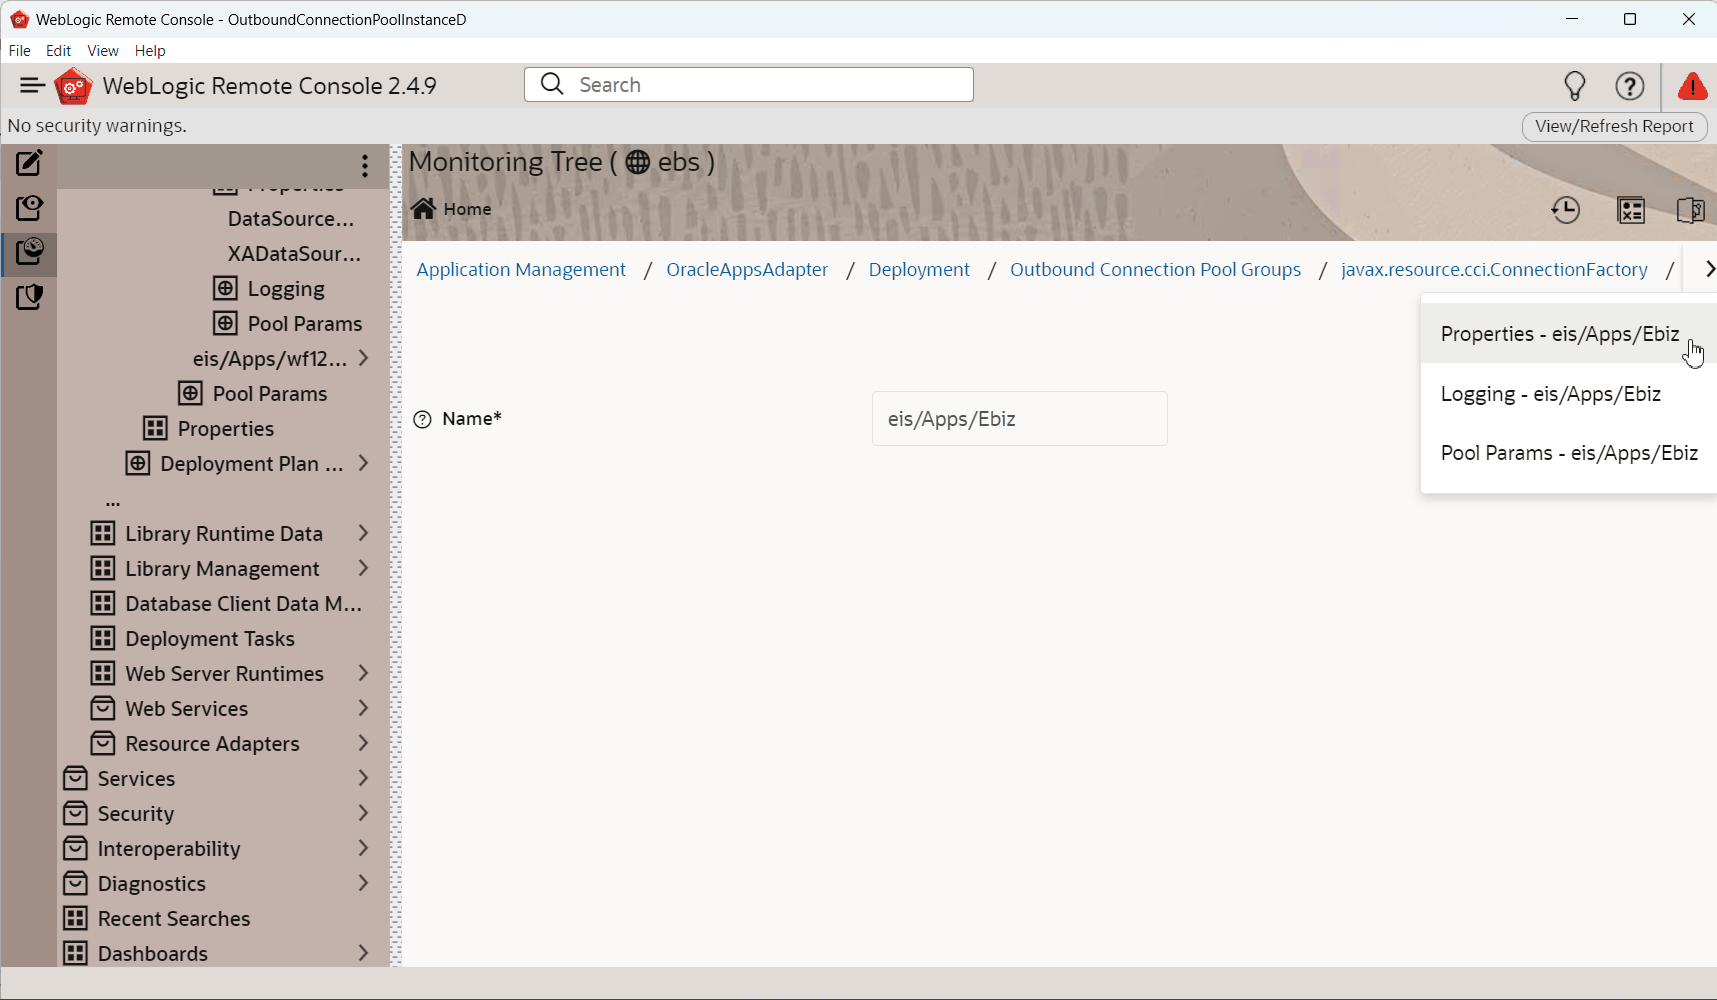
From the Navigation Tree structure or the Breadcrumb menu, click the newly-created instance eis/Apps/Ebiz and select Properties - eis/Apps/Ebiz.
Breadcrumb Menu to Select Properties - eis/Apps/Ebiz
Click "XADataSourceName" and then add the value of datasource JNDI name, such as jdbc/Ebiz against "XADataSourceName".
Breadcrumb Menu to Select Properties - eis/Apps/Ebiz
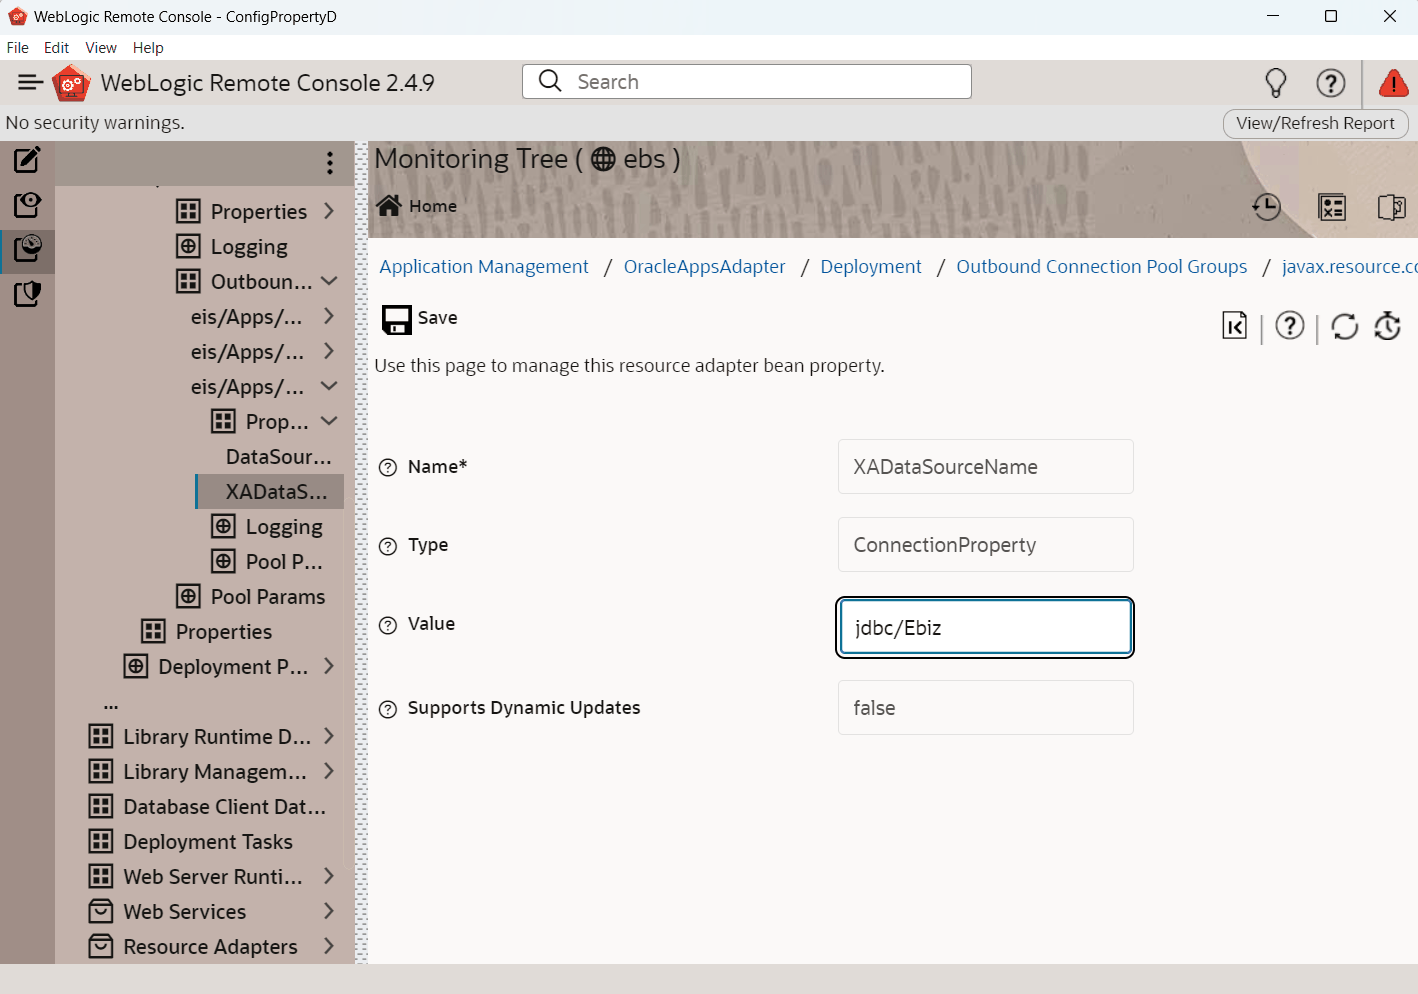
Click Save.
You may find some unexpected exception messages populated while processing the request. Use the following steps to resolve the issue:
Click the Adapter link that you selected earlier on the breadcrumb navigation path.
Click the Deployment and the Outbound Connection Pool Groups to display the Outbound Connection Pool groups and instances.
Click the javax.resource.cci.ConnectionFactory expand node to display the newly-configured JNDI (such as eis/Apps/Ebiz) for the outbound instance.
Click the outbound instance name (such as eis/Apps/Ebiz) to display the outbound connection properties.
Select the 'XADataSourceName' property name to enable the input text box.
Enter jdbc/AppsDataSource in the Value box, and then click Save to update the deployment plan.
You must establish a connectivity between the design-time environment and the server you want to deploy it to. In order to establish such a connectivity, you must create the application server connection.
Use the following steps to create the application server connection:
From Oracle JDeveloper, select Window > Application Servers to open the Application Servers tab.
Right-click on the Application Servers node and select New Application Server to open the Create Application Server Connection wizard.
In the Usage page, leave the default Standard Server selection unchanged.
Usage Page
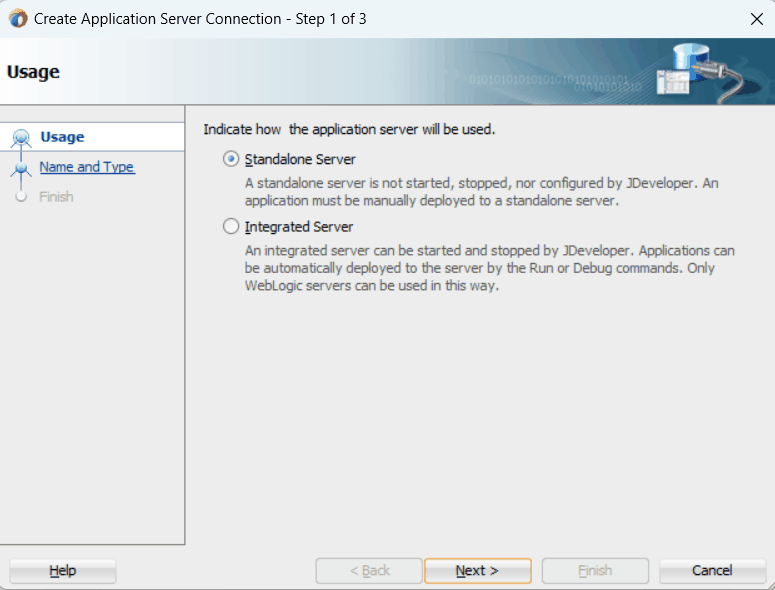
Click Next.
Enter an appropriate name in the Connection Name field. Select WebLogic 12.x as the connection type.
Name and Type Page
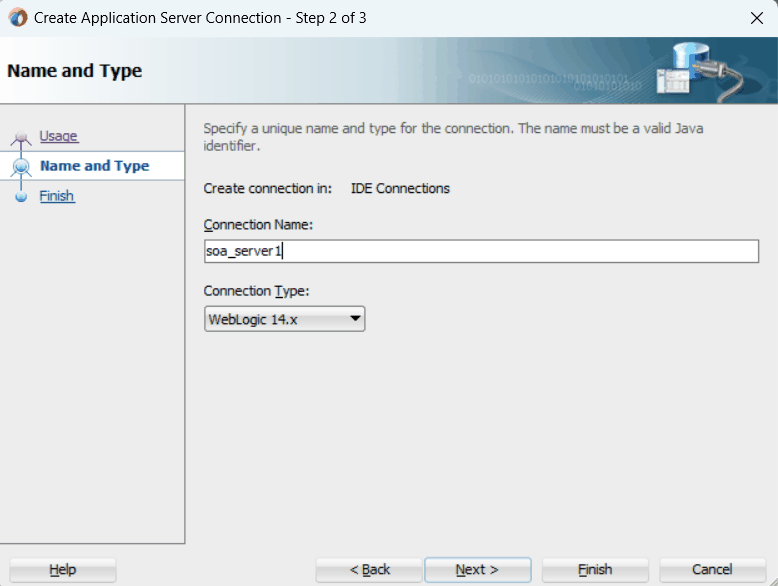
Click Next.
Enter the username (such as weblogic) and password specified during installation and click Next.
Authentication Page

Enter the WebLogic Server connection host name. Enter "soa" in the WebLogic Domain field.
Configuration Page
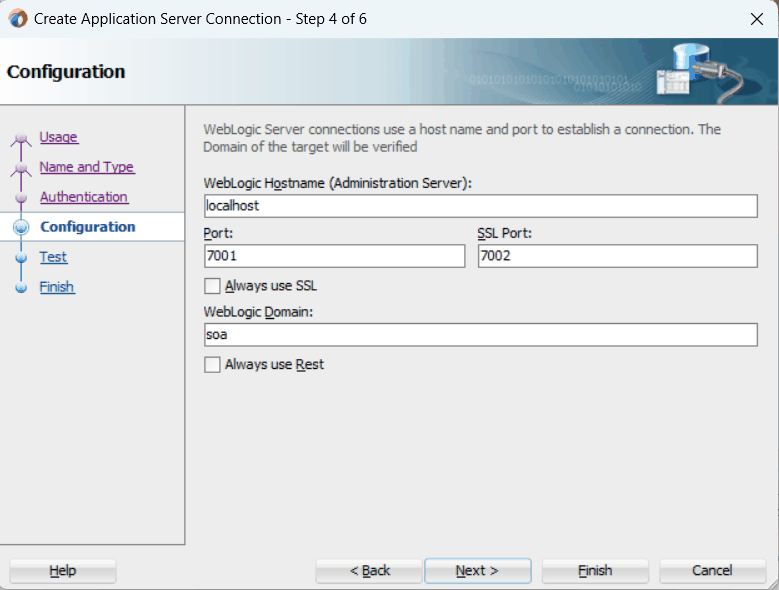
Click Next.
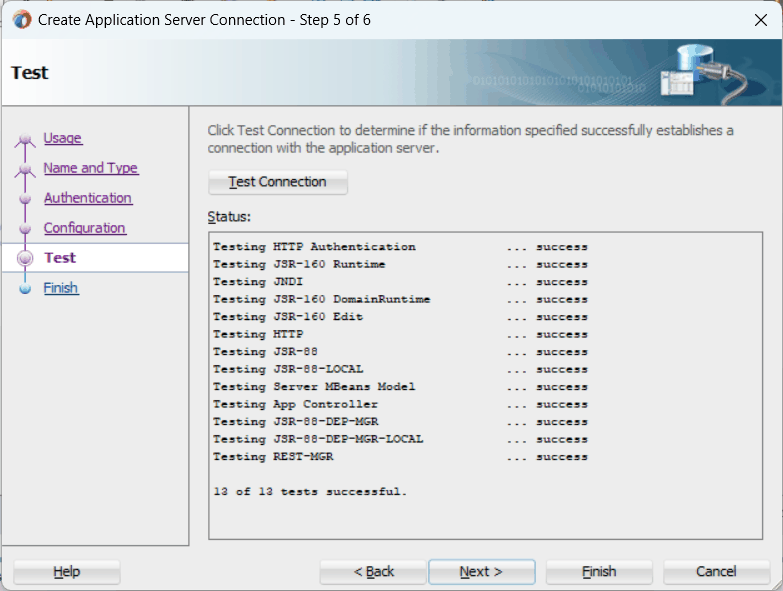
Click Test Connection to validate your server configuration. You should find success messages populated in the Status window.
Test Page
Click Next and Finish to complete the application server connection.