8.1 Configuring Workflow for Two-Way SSL in Oracle GoldenGate Veridata 23c
Prerequisites
- Ensure PATH environment variable contains the path to JDK 17 bin directory, where keytool is located.
- Keystore is also known as Identity Store in older releases.
- For HP NonStop, see Configuring Two-Way SSL for the NSK C-Agent on the Veridata Server.
- Enabling SSL in the Agent Properties File
- Generating Agent Keystore and Certificate
- Generating Server Keystore and Certificate
- Importing Agent Certificate to Server Truststore
- Saving Server Keystore/Truststore Passwords to Server Wallet
- Importing Server Certificate to Agent Truststore
- Saving Agent Keystore/Truststore Passwords to Agent Wallet
- Creating an Agent Connection in UI
Parent topic: Secure
8.1.1 Enabling SSL in the Agent Properties File
To enable SSL
in the Agent properties file:
- Open the
<AGENT_DEPLOY_LOCATION>/<AGENT
                            PROPERTIES>
file. The default<AGENT PROPERTIES>would beagent.properties. - Find the entry
server.useSsl, set it totrueand save the changes.
8.1.2 Generating Agent Keystore and Certificate
To generate agent keystore and certificate file:
- Go to
<AGENT_DEPLOY_LOCATION>/config/certsdirectory. - Build Agent Keystore with the following command, you will also need
the same unlock for later
step.
keytool -genkeypair -keyalg RSA -keystore vdtAgentKeystore.p12 -storepass <unlock-password> - Export Agent Keystore to a certificate with following
command:
keytool -exportcert -keystore vdtAgentKeystore.p12 -storepass <unlock-password> -file vdtAgent.crt
8.1.3 Generating Server Keystore and Certificate
Use the
following keytool commands to generate the server keystore and certificate:
- Go to
<Server_installation_location>/configdirectory. - Build Server Keystore with the following
command:
keytool -genkeypair -keyalg RSA -keystore vdtServerKeystore.p12 -storepass <unlock-password> - Export Server Keystore to a certificate with the following
command:
keytool -exportcert -keystore vdtServerKeystore.p12 -storepass <unlock-password> -file vdtServer.crt
8.1.4 Importing Agent Certificate to Server Truststore
To import agent
certificate to Server truststore:
- Go to
<Server_installation_location>/configdirectory, and copy<AGENT_DEPLOY_LOCATION>/config/certs/vdtAgent.crtto this directory. - Run the following command to create a server truststore and import
agent certificate into this truststore.
Note:
When importing multiple agent certificates into a server truststore, assign a unique-aliasvalue to each agent certificate.keytool -importcert -file vdtAgent.crt -alias vdtAgent.crt.<unique-id> -keystore vdtServerTruststore.p12 -storepass <unlock-password> - Delete
vdtAgent.crtin<Server_installation_location>/configdirectory.
8.1.5 Saving Server Keystore/Truststore Passwords to Server Wallet
Run the following script
configure_server_ssl.sh under
<Server_installation_location>/config
directory:./configure_server_ssl.sh OGGV-80056: Copyright (c) 2013, 2024, Oracle and/or its affiliates. All rights reserved. OGGV-80057: Veridata Server SSL Configuration Utility OGGV-80058: Notes: OGGV-80059: OGGV-80059: This utility allows Veridata to access keystore and truststore. When entering the passwords below, unlock password should match the one used in keytool -storepass option [OGGV-80060: Enter Server Keystore unlock password:] [OGGV-80062: Enter Server Truststore unlock password:]
8.1.6 Importing Server Certificate to Agent Truststore
To import
Server certificate to agent truststore:
- Go to
<AGENT_DEPLOY_LOCATION>/config/certsdirectory, and copy<Server_installation_location>/config/vdtServer.crtto this directory. - Run the following command to create an agent truststore and import
server certificate into this truststore.
Note:
When importing multiple Server certificates into an agent truststore, assign a unique-aliasvalue to each Server certificate. This is less common, because there is typically only one Oracle GoldenGate Veridata server.keytool -importcert -file vdtServer.crt -alias vdtServer.crt.<unique-id> -keystore vdtAgentTruststore.p12 -storepass <unlock-password> - Delete
vdtServer.crtin<AGENT_DEPLOY_LOCATION>/config/certsdirectory.
8.1.7 Saving Agent Keystore/Truststore Passwords to Agent Wallet
- Run the script
configure_agent_ssl.shunder<AGENT_DEPLOY_LOCATION>directory. The parameterAgentIDis the name of the agent properties file, without the.propertiesextension.:./configure_agent_ssl.sh AgentID 2024-08-30 11:21:25.782 TRACE OGGV-80018 Wallet messages are installed correctly. OGGV-80028: Copyright (c) 2013, 2024, Oracle and/or its affiliates. All rights reserved. OGGV-80029: Veridata Agent SSL Configuration Utility OGGV-80030: Notes: OGGV-80031: OGGV-80031: This utility allows Veridata to access keystore and truststore. When entering the passwords below, unlock password should match the one used in keytool -storepass option. [OGGV-80022: Enter Agent Keystore Store unlock password:] [OGGV-80024: Enter Agent Trust Store unlock password:] OGGV-80037: SSL Configuration of Veridata Agent is successful.
- Delete
vdtServer.crtin<AGENT_DEPLOY_LOCATION>/config/certsdirectory.
8.1.8 Creating an Agent Connection in UI
- Log in to the Veridata website, navigate to the Connections page, and click Create on the right side of the page.
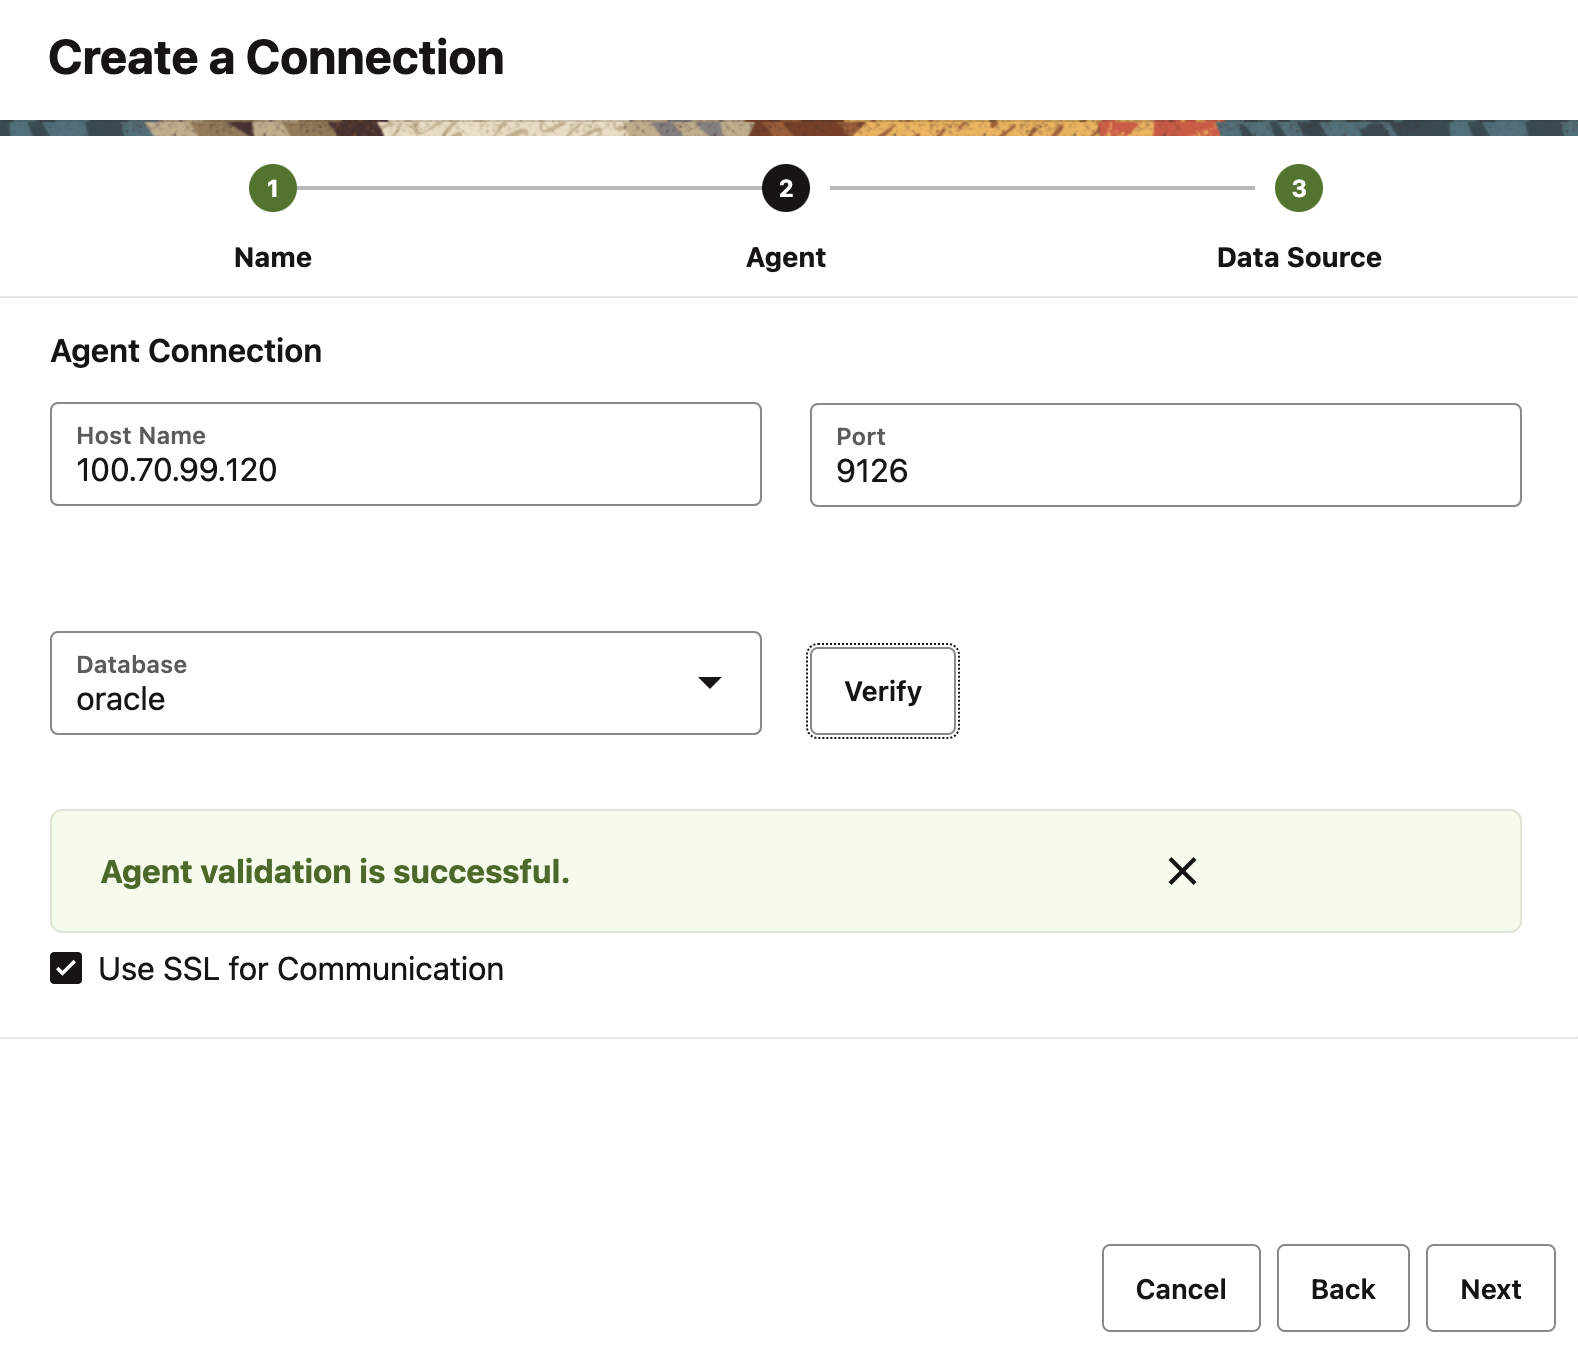
- Enter the required connection name and agent host machine address/port. Check
the Use SSL for communication checkbox to enable SSL for the connection, and
click Verify to verify the connection:
Figure 8-1 Create a Connection

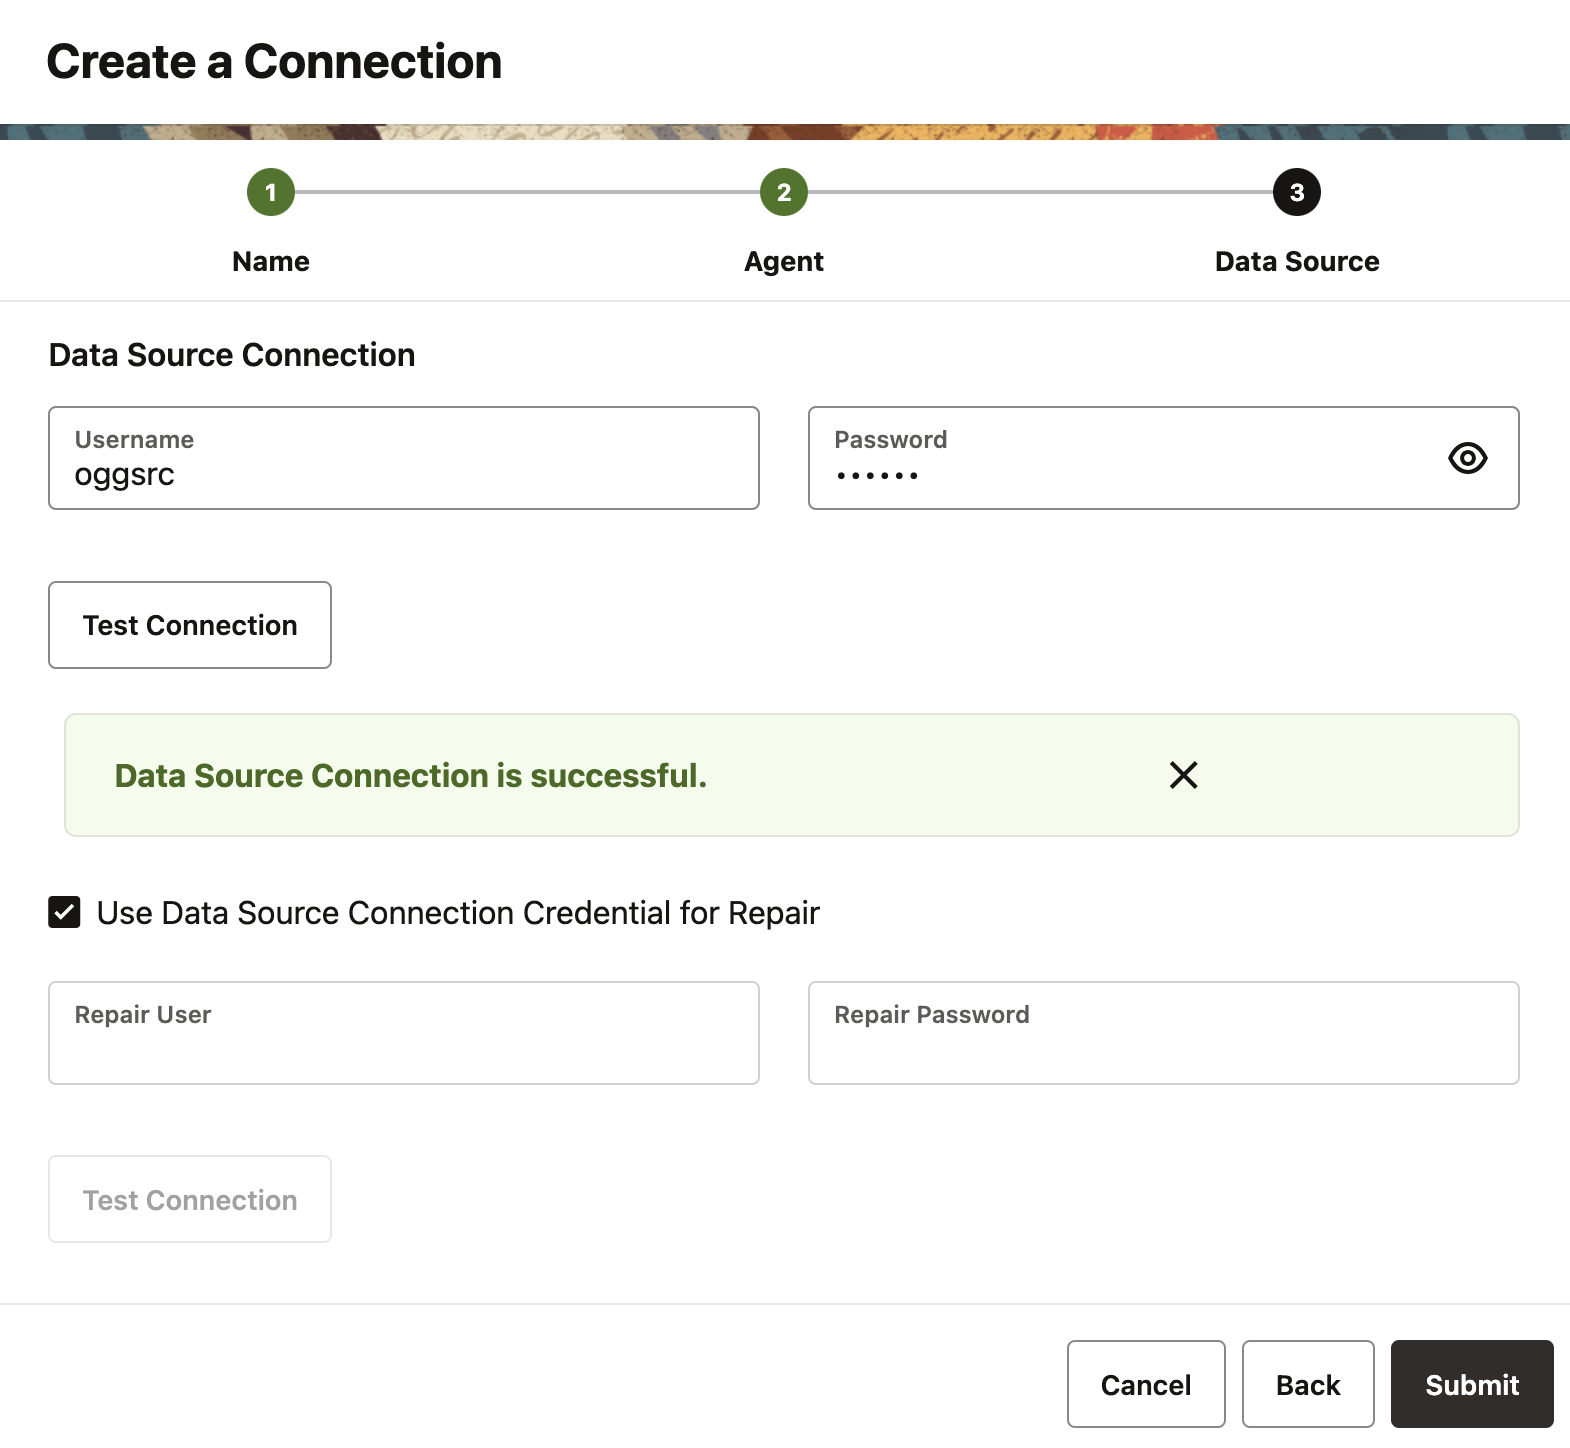
- Enter the database username and password, then click the Test Connection
to validate the credentials. If different credentials are needed for repair,
uncheck the Use Data Source Connection Credential for Repair checkbox and
enter the repair credentials.
Figure 8-2 Data Source Connection

- Click Submit to save the connection.