2 Setting Up Enterprise Manager Plug-In for Oracle GoldenGate
After deploying the Enterprise Manager plug-in, there are a number of tasks that you must complete before you begin to use the plug-in to monitor the Oracle GoldenGate instances.
This topic details the following:
2.1 Configuring Oracle GoldenGate Instances for Enabling Monitoring in the Oracle Enterprise Manager
-
Configure the Oracle GoldenGate monitoring agent to run with Oracle Enterprise Manager. See Installing and Configuring Oracle GoldenGate Monitor Agent to configure the agent for the Oracle Enterprise Manager.
You need to do this configuration only for Oracle GoldenGate classic instance and is not required for Oracle GoldenGate microservices architecture (MA). -
Create the Oracle Wallet to store passwords using the steps listed in Creating the Oracle Wallet.
2.1.1 Creating the Oracle Wallet
To create the Oracle Wallet:
2.2 Discovering Oracle GoldenGate Targets
After successfully deploying the Enterprise Manager Plug-In for Oracle GoldenGate, you must add the plug-in target to Enterprise Manager Cloud Control for central monitoring and management.
To discover Oracle GoldenGate targets:
2.3 Promoting Oracle GoldenGate Targets
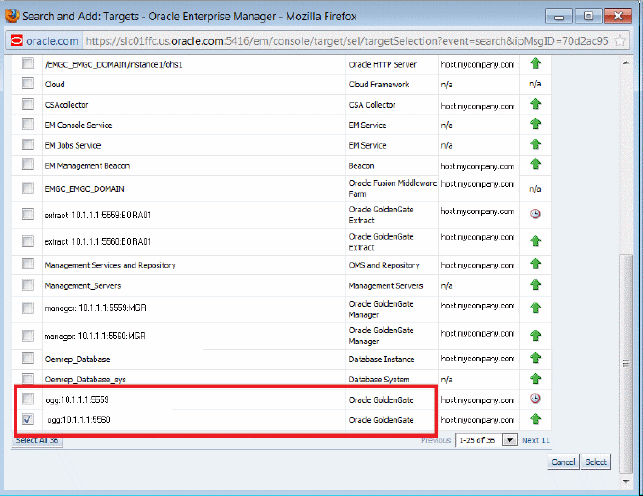
Once the targets are discovered successfully, you need to promote them in order to view and monitor the targets. After the targets are promoted, they are displayed on the OGG Home page.
To promote Oracle GoldenGate targets:
2.4 Verifying and Validating the Plug-in Deployment
Before verifying and validating the Enterprise Manager Plug-In for Oracle GoldenGate, you must promote the Oracle GoldenGate target that is found during auto-discovery.
For more details, see Discovering, Promoting, and Adding Targets.
After waiting a few minutes for the Enterprise Manager Plug-In for Oracle GoldenGate to start collecting data, use these steps to verify and validate that Enterprise Manager is properly monitoring the plug-in target:
- Click the Oracle GoldenGate target link from the All Target page to open theOracle GoldenGate Home Page.
- Select Target, Monitoring and then Metric Collection Errors to verify that no metric collection errors are reported.
- Select Target, Information Publisher Reports to view reports for the Oracle GoldenGate target type, and ensure that no errors are reported.
- Select Target, Configuration, Last Collected Ensure that configuration data can be seen. If configuration data doesn’t immediately appear, click Refresh on the Latest Configuration page.
2.5 How do I Configure Instance-Level Security
Enterprise Manager provides instance-level security flexibility to provide target-level privileges to administrators.
For example, if an Enterprise Manager Plug-In for Oracle GoldenGate is managing three Oracle GoldenGate (OGG) instances (for example, OGG1, OGG2, and OGG3), a user can be granted privileges to any of these instances and their sub-targets (that is, their OGG processes).
To grant target-level access:2.5.1 Authorizing Users with Permissions
As an administrator user, you can provide the following permissions to the users: Editing an Oracle GoldenGate parameter file, running an Oracle GoldenGate command, viewing the contents of any Oracle GoldenGate discard file, and viewing contents of any Oracle GoldenGate report file.
- Log in as a super admin (for example,
sysman). - Select Setup, Security, Administrators to open the Administrators page.
- Click Edit to modify access for an existing user.
- Click Next to display the Privileges applicable to all Targets page to view all the four permissions.
- Select the required permission and click Submit.
Note:
-
The buttons are disabled for the users if they don't have the required permission. For example, if the user doesn't have Edit Parameters permission, then the Edit button in the Configuration tab for all the targets is disabled.
-
If the users are already logged-in and their permissions are changed by the super administrator, then new permissions are reflected in the user interface (UI) once the logged-in user refreshes the page.
-
If you happen to remove permissions for a logged-in user who has the command privileges, then when the user clicks any of the command buttons, such as Start, Stop, Kill, or Resume, then an error message is displayed that says that the user doesn't have sufficient permissions.
2.6 Monitoring the High Availability Features
This topic explains the monitoring of High Availability features for Oracle GoldenGate Management Pack. For the High Availability feature to properly function with Oracle GoldenGate plug-in, virtual IP (not the physical IP) of the Oracle GoldenGate host must be provided at the time of Oracle GoldenGate target discovery.
There can be two scenarios where High Availability is required:
-
Oracle GoldenGate instance is failed over from one node to another in the cluster: In this scenario, the existing Master Agent continues monitoring the Oracle GoldenGate instance in a seamless manner and the Host Name parameter in the Oracle GoldenGate Manager page displays the physical host name of the new node.
-
Current Master Agent stops functioning: In this scenario, the EM Agents that are currently running, must be marked as Slave for this Oracle GoldenGate instance. When the current Master Agent stops functioning, one of the Slave agents is assigned as Master for the Oracle GoldenGate instance, and monitoring continues.
This procedure uses both the Oracle Enterprise Manager Cloud Control portal and a console connection.
