9 Creating a Rule-enabled Non-SOA Java EE Application
Use Oracle JDeveloper to create a rule-enabled non-SOA Java Enterprise Edition (EE) application. Check the sample application, a Java Servlet, which runs as a Java EE application using Oracle Business Rules (this describes using Oracle Business Rules without a SOA composite).
-
Creating an Application and a Project for Grades Sample Application
-
Creating Data Model Elements and Rules for the Grades Sample Application
-
Adding a Servlet with Rules SDK Calls for Grades Sample Application
The source code for Oracle Business Rules-specific samples and SOA samples are available online in the Oracle SOA Suite Samples and Tutorials page.
9.1 Introduction to the Grades Sample Application
The Grades application provides a sample use of Oracle Business Rules in a Java Servlet. The servlet uses Rules SDK Decision Point API.
This sample demonstrates the following:
-
Creating rules in an Oracle Business Rules dictionary using an XSD schema that defines the input and the output data, and the facts for the data model. In this case you provide the XSD schema in the file
grades.xsd. -
Creating a servlet that uses Oracle Business Rules to determine a grade for each test score that is input.
-
Creating a test page to supply input test scores and to submit the data to the grades servlet.
-
Deploying the application, running it, submitting test values, and seeing the output.
There is another example--for more information, see How to Open the Car Rental Sample Application and Project.
9.2 Creating an Application and a Project for Grades Sample Application
You can create Grades sample application by following the steps below.
Note:
The screen shots reflect a previous version, however, the content is applicable to the current release.
To create the application and the project for the grades sample application, do the following:
-
Create a Fusion Web Application (ADF)
-
Create a project in the application
-
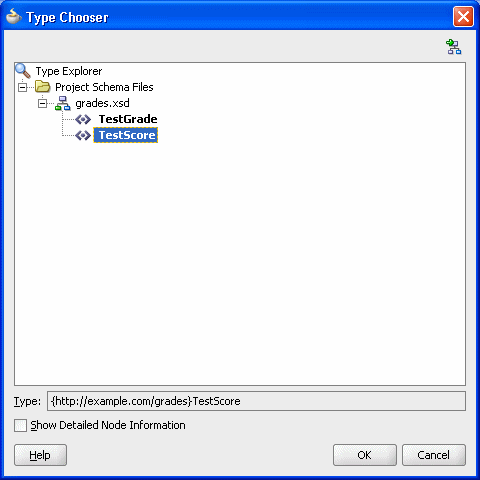
Add the schema to define the inputs, outputs, and the objects for the data model
-
Create an Oracle Business Rules dictionary in the project
9.2.1 How to Create a Fusion Web Application for the Grades Sample Application
To work with Oracle Business Rules and create a Java EE application, you first need to create the application in Oracle JDeveloper.
To create a fusion web application (ADF) for grades:
-
Create an application. You can do this in the Application Navigator by selecting New Application..., or from the Application menu list by selecting New Application....
-
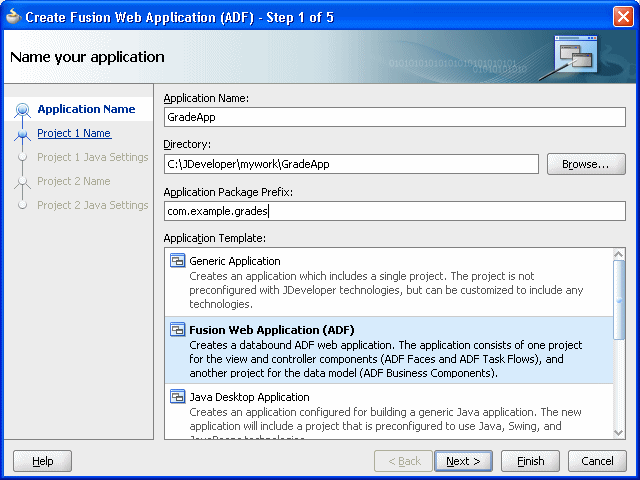
In the Name your application dialog enter the application options, as shown in Figure 9-1:
-
In the Application Template area, select Fusion Web Application.
-
In the Application Name field, enter an application name. For example, enter
GradeApp. -
In the Directory field, specify a directory name or accept the default.
-
In the Application Package Prefix field, enter an application package prefix. For example,
com.example.grades.The prefix, followed by a period applies to objects created in the initial project of an application.
-
-
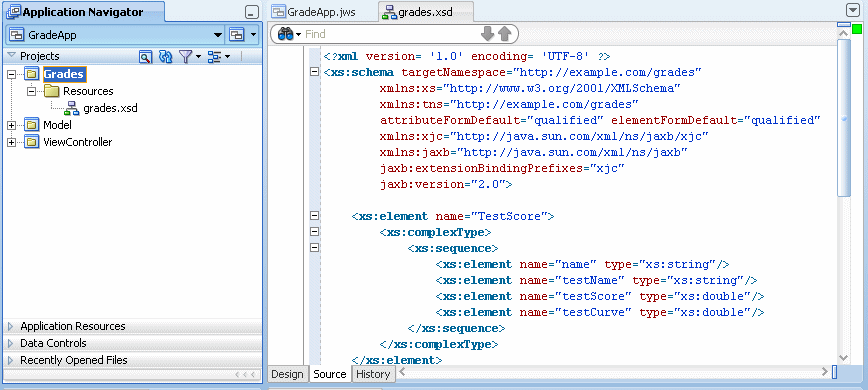
Click Finish. After creating the application Oracle JDeveloper displays the file summary, as shown in Figure 9-2.
Figure 9-2 New Grades Application Named GradeApp
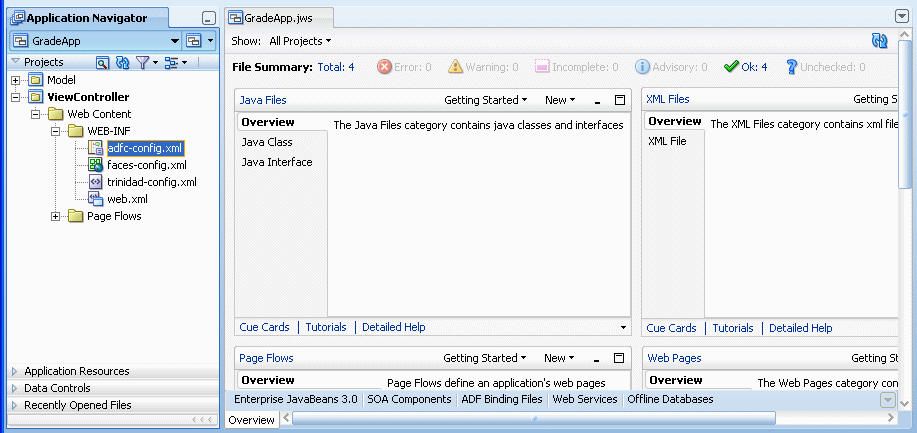
Description of "Figure 9-2 New Grades Application Named GradeApp"
9.2.2 How to Develop Accessible ADF Faces Pages
Oracle software implements the standards of the Web Content Accessibility Guidelines (WCAG) 1.0 Level AA using an interpretation of the standards at http://www.oracle.com/accessibility/standards.html
ADF Faces user interface components have built-in accessibility support for visually and physically impaired users. User agents such as a web browser rendering to nonvisual media such as a screen reader can read component text descriptions to provide useful information to impaired users. Access key support provides an alternative method to access components and links using only the keyboard. ADF Faces accessibility audit rules provide direction to create accessible images, tables, frames, forms, error messages and popup windows using accessible HTML markup.
For information on how to develop accessible ADF Faces pages, see Developing Accessible ADF Faces Pages in Developing Web User Interfaces with Oracle ADF Faces.
9.2.3 How to Create the Grades Project
In the Grades sample application you do not use the Model or ViewController projects. You create a project in the application for the grades sample project.
To create a grades project:
-
In the GradeApp application, in the Application Navigator, from the Application Menu select New Project....
-
In the New Gallery, in the Items area select Generic Project.
-
Click OK.
-
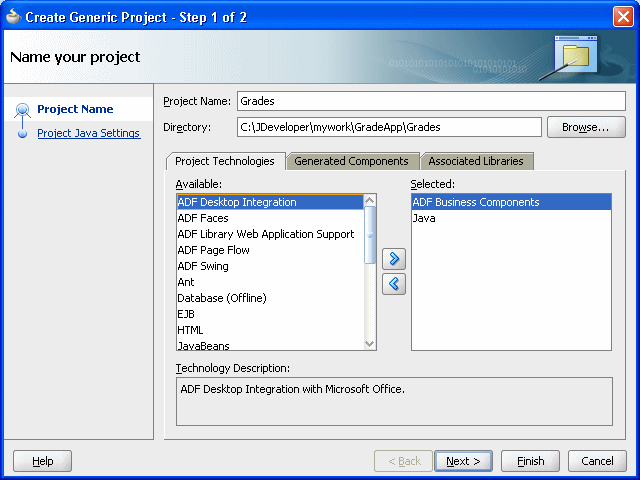
In the Name your project page enter the values as shown in Figure 9-3:
-
In the Project Name field, enter a name. For example, enter
Grades. -
Enter or browse for a directory name, or accept the default.
-
Select the Project Technologies tab.
-
In the Available area double-click ADF Business Components to move this item to the Selected area. This also adds Java to the Selected area as shown in Figure 9-3.
Figure 9-3 Adding Generic Project to the Grades Application
Description of "Figure 9-3 Adding Generic Project to the Grades Application"
-
-
Click Finish. This adds the Grades project.
9.2.4 How to Add the XML Schema and Generate JAXB Classes in the Grades Project
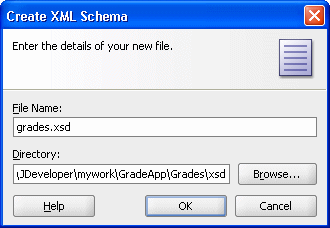
To create the Grades sample application you need to use the grades.xsd file, as shown in example grades.xsd schema below. You can create and store the schema file locally and then use Oracle JDeveloper to copy the file to your project.
<?xml version= '1.0' encoding= 'UTF-8' ?>
<xs:schema targetNamespace="http://example.com/grades"
        xmlns:xs="http://www.w3.org/2001/XMLSchema"
        xmlns:tns="http://example.com/grades"
        attributeFormDefault="qualified" elementFormDefault="qualified"
        xmlns:xjc="http://java.sun.com/xml/ns/jaxb/xjc"
        xmlns:jaxb="http://java.sun.com/xml/ns/jaxb"
        jaxb:extensionBindingPrefixes="xjc"
        jaxb:version="2.0">

    <xs:element name="TestScore">
        <xs:complexType>
            <xs:sequence>
                <xs:element name="name" type="xs:string"/>
                <xs:element name="testName" type="xs:string"/>
                <xs:element name="testScore" type="xs:double"/>
                <xs:element name="testCurve" type="xs:double"/>
            </xs:sequence>
        </xs:complexType>
    </xs:element>
    <xs:element name="TestGrade">
        <xs:complexType>
            <xs:sequence>
                <xs:element name="grade" type="tns:Grade"/>
            </xs:sequence>
        </xs:complexType>
    </xs:element>
    <xs:simpleType name="Grade">
        <xs:restriction base="xs:string">
            <xs:enumeration value="A"/>
            <xs:enumeration value="B"/>
            <xs:enumeration value="C"/>
            <xs:enumeration value="D"/>
            <xs:enumeration value="F"/>
        </xs:restriction>
    </xs:simpleType>
</xs:schema>
To add the XML schema to the grades project:
9.2.4.1 How to generate JAXB 2.0 content model from grades schema
To generate JAXB 2.0 content model from grades schema:
- In the Application Navigator, in the Grades project expand Resources and select grades.xsd.
- Right-click and in the context menu select Generate JAXB 2.0 Content Model.
- In the JAXB 2.0 Content Model from XML Schema dialog, click OK.
9.2.5 How to Create an Oracle Business Rules Dictionary in the Grades Project
After creating a project in Oracle JDeveloper create business rules within the Grades project.
To use business rules with Oracle JDeveloper, you do the following:
-
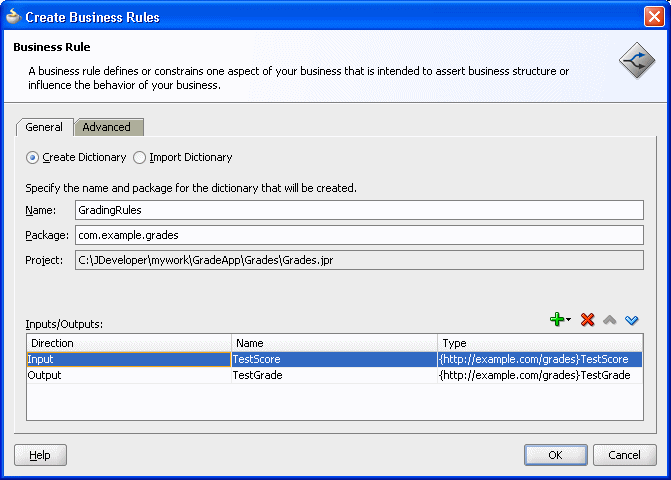
Add a business rule to the project and import
grades.xsdschema -
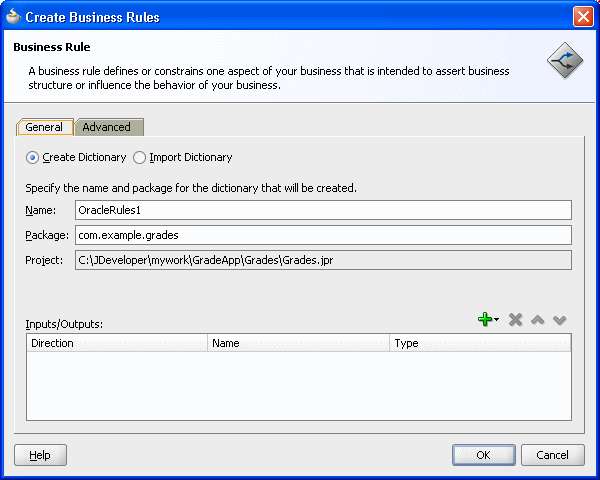
Create input and output variables
-
Create an Oracle Business Rules dictionary in the project
To create a business rules dictionary in the business tier:
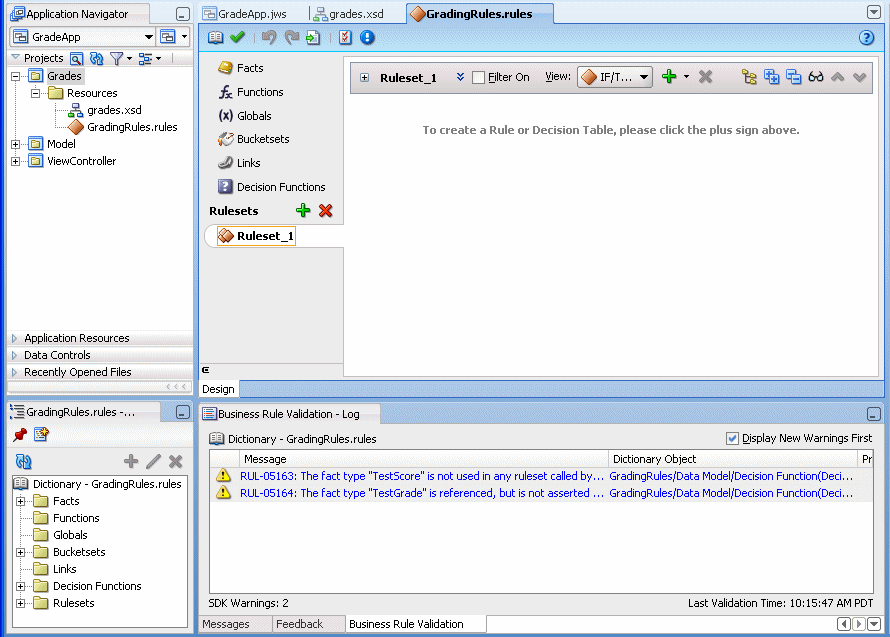
Figure 9-9 Shows the New Grading Rules Dictionary
Description of "Figure 9-9 Shows the New Grading Rules Dictionary"
Note that the business rule validation log area for the new dictionary shows several validation warnings. These validation warning messages are cleared as you modify the dictionary in later steps.
9.3 Creating Data Model Elements and Rules for the Grades Sample Application
Create data model elements and rules for the grades sample application by following the steps below.
To create the data model and the business rules for the Grades sample application, do the following:
-
Create value sets for grades
-
Create rules by adding a Decision Table for grades
-
Split the Decision Table and add actions for rules
-
Rename the default decision function
9.3.1 How to Create Value Sets for Grades Sample Application
In this example you associate a value set with a fact type. This supports using a Decision Table where you need value sets that specify how to draw values for each cell in the Decision Table (for the conditions in the Decision Table).
To create the value set for the grades sample application:
- In Rules Designer, select the Value Sets navigation tab.
- From the list next to the Create Value Set... button, select List of Ranges.
- For the value set, double-click in the Name field to select the default name.
- Enter
Grade Scale, and press Enter to accept the value set name. - In the Value Set table, double-click the icon for the Grade Scale value set to display the Edit Value Set dialog.
- In the Edit Value Set dialog, click Add to add a value and click Add three times to add three more values.
- In the Endpoint field, enter 90 for the top endpoint and press Enter to accept the new value.
- For the next value, in the Endpoint field enter 80 and press Enter to accept the new value. Similarly, for the next two values enter values in the Endpoint field, values 70 and 60.
- In the Included Endpoint field for each value select each check box.
- Modify the Alias field for each value to enter the values A, B, C, D, and F, for each corresponding range, (press Enter after you add each alias).
9.3.2 How to Associate a Value Set with a Fact Property
To prepare for creating Decision Tables you can associate a global value set with fact properties in the data model. In this way condition cells in a Decision Table Conditions area can use the value set when you create a Decision Table.
To associate a value set with a fact property:
- In Rules Designer, select the Facts navigation tab.
- In the Facts navigation tab select the XML Facts tab.
- Double-click the XML fact icon for the TestScore fact. This displays the Edit XML Fact dialog.
- In the Edit XML Fact dialog select the testScore property.
- In the Value Set field, from the list select Grade Scale.
- Click OK.
9.3.3 How to Add a Decision Table for Grades Sample Application
You create rules in a Decision Table to process input facts and to produce output facts, or to produce intermediate conclusions that Oracle Business Rules can further process using additional rules or in another Decision Table.
To use a Decision Table for rules in this application you work with facts representing a test score. Then, you use a Decision Table to create rules based on the test score to produce a grade.
To add a decision table for Grades application:
- In Rules Designer, select Ruleset_1 under the Rulesets list.
- In Ruleset_1, click Create from the Decision Table area on the Overview tab. This creates DecisionTable_1. You can ignore the warning messages shown in the Business Rule Validation log area. You remove these warning messages in later steps.
- In the Decision Table, DecisionTable_1, click the Add button and from the list select Condition.
- In the Decision Table, double-click <edit condition>. Then, in the variables navigator expand TestScore and select
testScore. This enters the expressionTestScore.testScorefor condition C1.
If you view the rules validation log, you should see warning messages. You remove these warning messages as you modify the Decision Table in later steps.
9.3.4 How to Add an Action to a Decision Table
To add an action to a decision table:
You add an action to the Decision Table to assert a new Grade fact.
Next you add rules to the Decision Table and specify an action for each rule.
9.3.5 How to Add Rules in the Decision Table for Grades Sample Application
You can use the Decision Table split operation to create rules for the value set associated with the conditions row in the Decision Table. This creates one rule for every value.
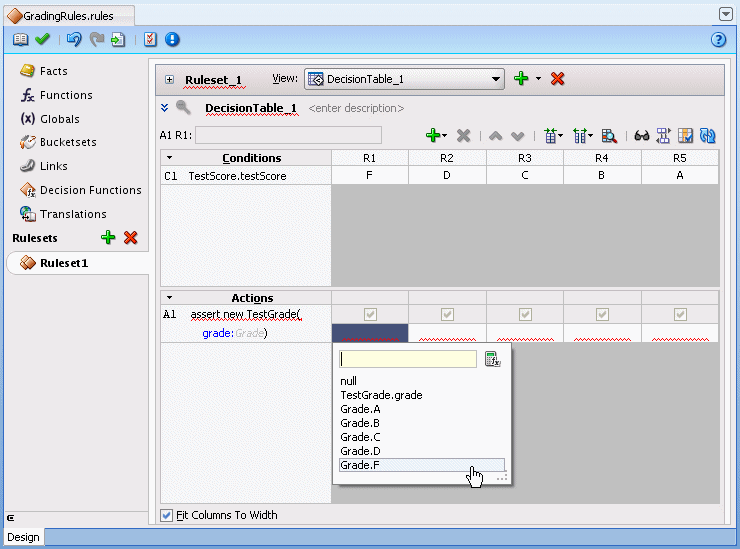
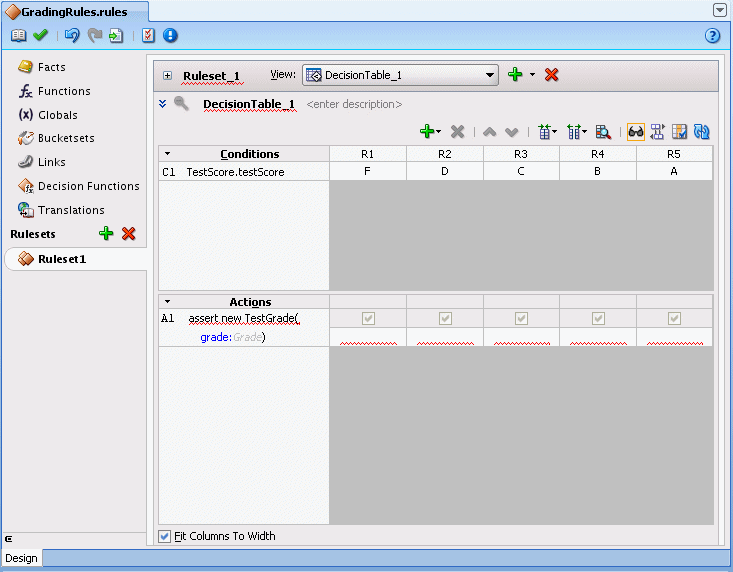
To split the decision table, from the Decision Table, click the Split Table button from the list select Split Table. The split operation eliminates the "do not care" cells from the table. The table now shows five rules that cover all ranges, as shown in Figure 9-10.
These steps produce validation warnings for action cells with missing expressions. You fix these problems in later steps when you define actions for each rule.
Figure 9-10 Splitting a Decision Table Using Split Table Operation for Grades
Description of "Figure 9-10 Splitting a Decision Table Using Split Table Operation for Grades"
To add actions for each rule in the decision table:
In the Decision Table you specify a value for the result, a grade property, associated with TestGrade for each action cell in the Actions area. The possible choices for each grade property are the valid grades. In this step you fill in a value for each of the rules. The values you enter correspond to the conditions that form each rule in the Decision Table.
9.3.6 How to Rename the Decision Function for Grades Sample Application
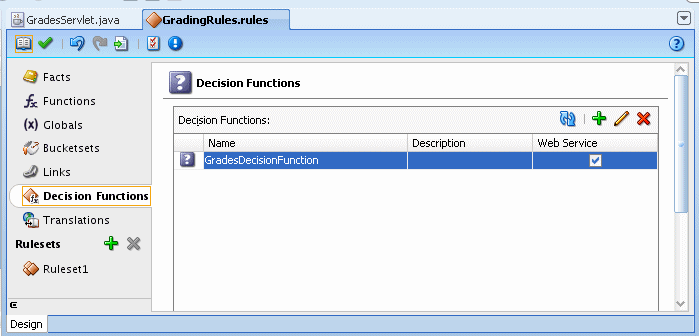
The name you specify when you use a decision function with a Rules SDK Decision Point must match the name of a decision function in the dictionary. To make the name match, you can rename the decision function to any name you like. Thus, for this example you rename the default decision function to use the name GradesDecisionFunction.
To rename the decision function:
- In the Application Navigator, in the Grades project, expand the Resources folder and double-click the dictionary GradingRules.rules.
- Select the Decision Functions navigation tab.
- In the Name field in the Decision Functions table edit the decision function name to enter the value
GradesDecisionFunction, and then press Enter, as shown in Figure 9-12.
Figure 9-12 Renaming Decision Function in Rules Designer
Description of "Figure 9-12 Renaming Decision Function in Rules Designer"
9.4 Adding a Servlet with Rules SDK Calls for Grades Sample Application
The Grades sample application includes a servlet that uses the Rules Engine.
To add this servlet with Oracle Business Rules you need to understand the important Rules SDK methods. Thus, to use the Oracle Business Rules dictionary you created with Rules Designer, you do the following:
-
Create initialization steps that you perform one time in the servlet
initroutine. -
Create a servlet
serviceroutine using the Rules SDK Decision Point API. -
Perform steps to add the servlet code in the project.
For more information on Rules SDK Decision Point API, see Working with Rules in Standalone (Non SOA/BPM) Scenarios.
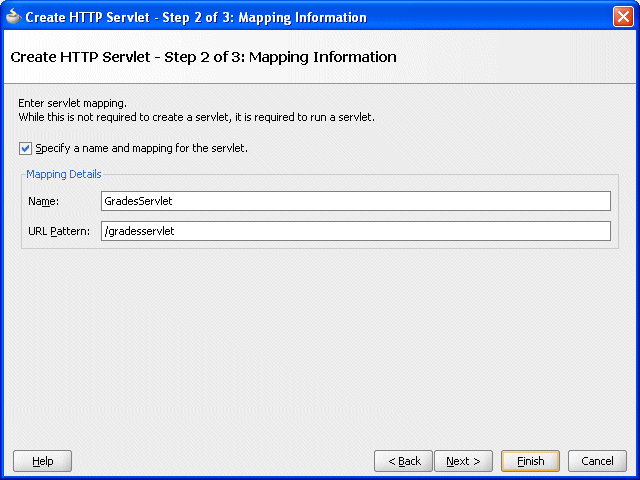
9.4.1 How to Add a Servlet to the Grades Project
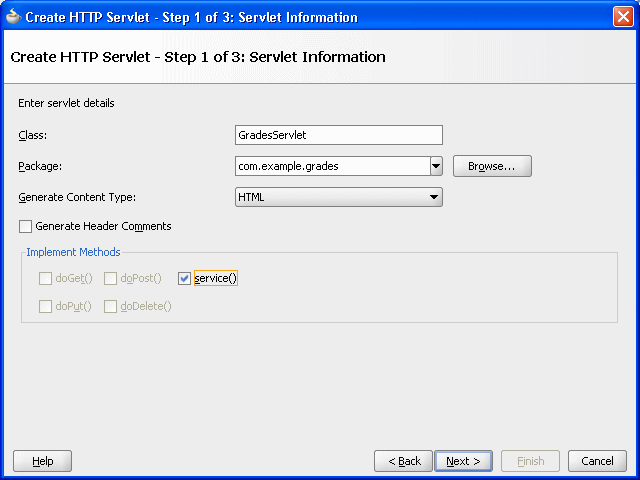
You add a servlet to the grades project using the Create HTTP Servlet wizard.
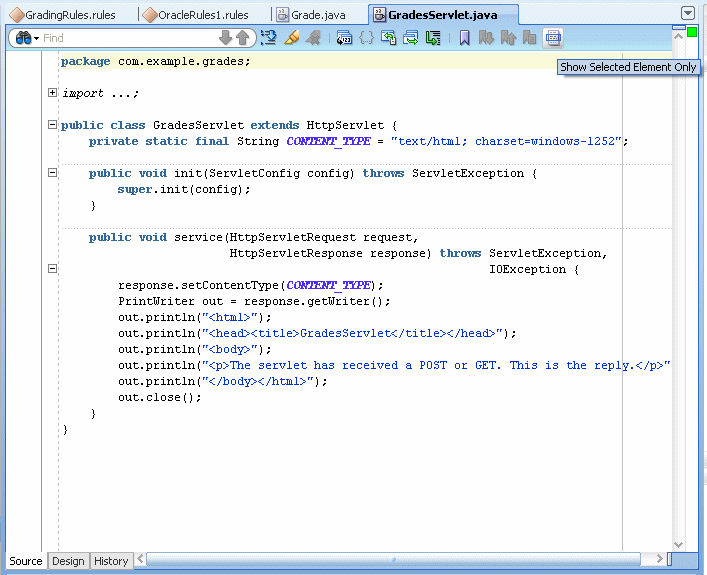
To add a servlet to the Grades project with Oracle JDeveloper:
The above example includes a Oracle Business Rules Decision Point, that uses an MDS repository to access the dictionary. For more information, see What You Need to Know About Using Decision Point in a Production Environment.
When you add the Servlet as shown in the grades application example, note the following:
-
In the
init()method the servlet uses the Rules SDK Decision Point API for Oracle Business Rules. For more information on using the Decision Point API, see Working with Rules in Standalone (Non SOA/BPM) Scenarios. -
The
DecisionPointBuilder()requires arguments including a decision function name and, in a production environment a dictionary FQN to access a dictionary in an MDS repository, as shown:m_decisionPoint = new DecisionPointBuilder() .with(DF_NAME) .with(DICT_FQN)For more information on using the Decision Point API, see Working with Rules in Standalone (Non SOA/BPM) Scenarios.
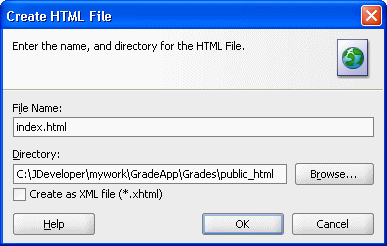
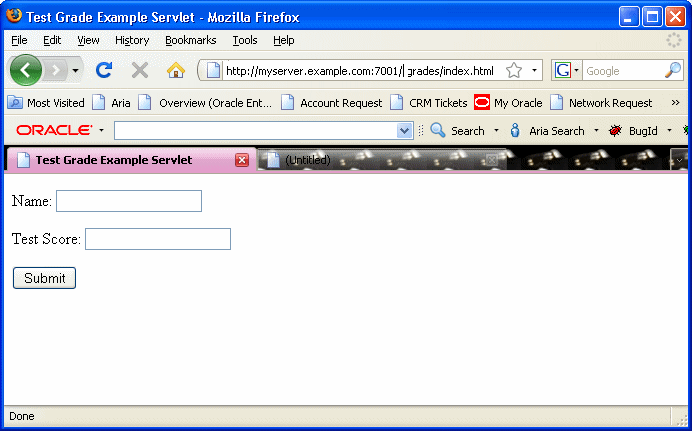
9.5 Adding an HTML Test Page for Grades Sample Application
Add an HTML test page for the grades application by following the steps below.
The Grades sample application includes an HTML test page that you use to invoke the servlet you created in Adding a Servlet with Rules SDK Calls for Grades Sample Application.
To add an HTML page to the servlet you use the Create HTML File wizard.
To add an HTML test page:
9.6 Preparing the Grades Sample Application for Deployment
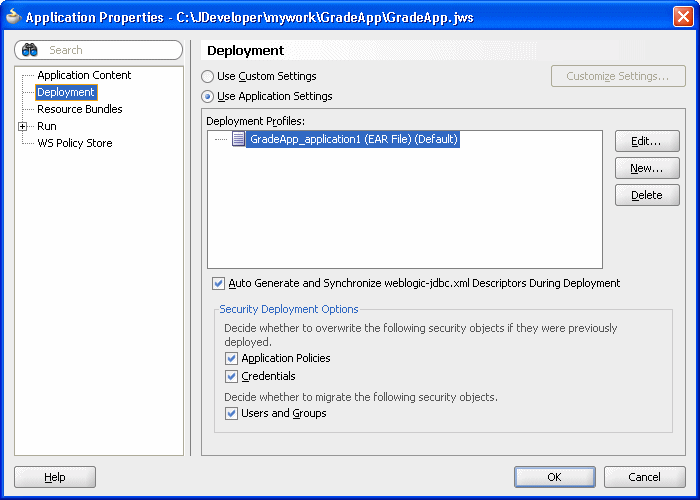
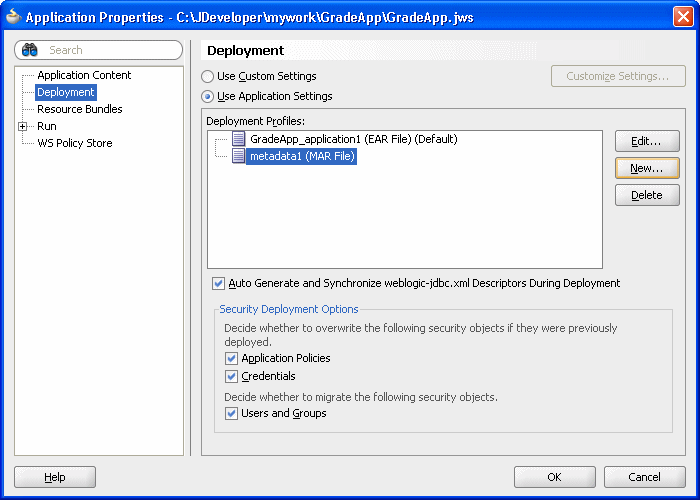
Business rules are deployed as part of the application for which you create a deployment profile in Oracle JDeveloper.
You deploy the application to Oracle WebLogic Server.
9.6.1 How to Create the WAR File for the Grades Sample Application
You deploy the GradeApp sample application using JDeveloper with Oracle WebLogic Server.
To create the WAR file for the grades sample application:
-
In the Application Navigator, select the Grades project.
-
Right-click the Grades project and in the context menu select Project Properties.... This displays the Project Properties dialog for the project.
-
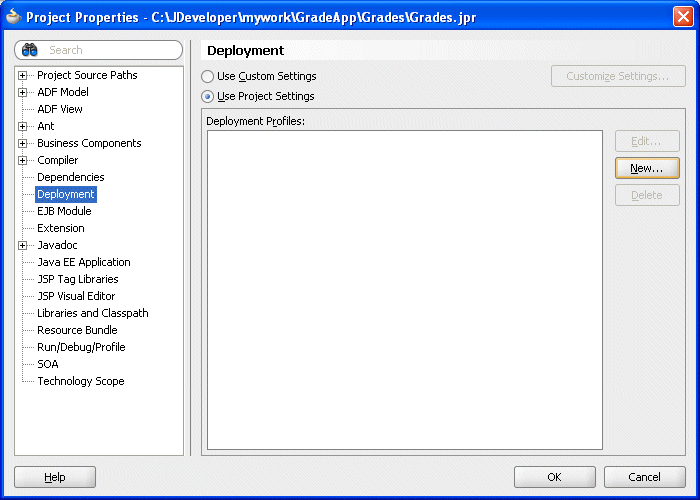
In the Project Properties navigator, select the Deployment item as shown in Figure 9-17.
Figure 9-17 Project Properties - Deployment
Description of "Figure 9-17 Project Properties - Deployment" -
In the Project Properties dialog, click New....
This displays the Create Deployment Profile dialog.
-
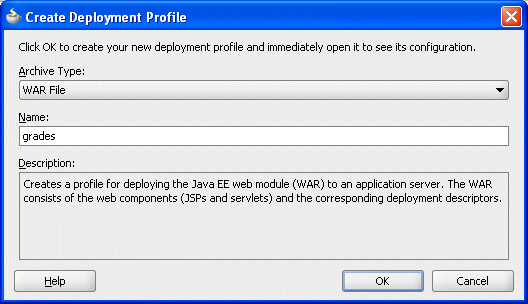
In the Create Deployment Profile dialog, in the Archive Type list, select WAR File.
-
In the Create Deployment Profile dialog, in the Name field enter
grades, as shown in Figure 9-18. Note the Name value uses the package value that you specified in theformelementactionattribute in step 8 of Adding an HTML Test Page for Grades Sample Application.Figure 9-18 Create Deployment Profile Dialog for WAR File
Description of "Figure 9-18 Create Deployment Profile Dialog for WAR File" -
Click OK.
This displays the Edit WAR Deployment Profile Properties dialog.
-
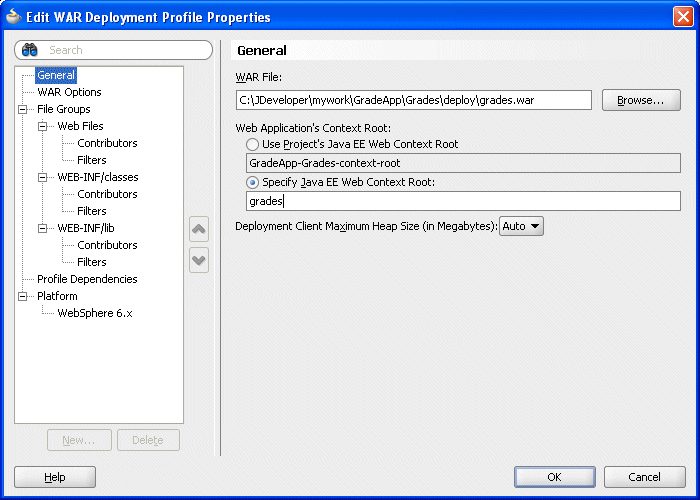
In the Edit War Deployment Profile Properties dialog, select General and configure the General page as follows, as shown in Figure 9-19:
-
Set the WAR File:
C:\JDeveloper\mywork\GradeApp\Grades\deploy\grades.war -
In the Web Application Context Root area, select Specify Java EE Web Context Root:
-
In the Specify Java EE Web Context Root: text entry area, enter
grades. -
In the Deployment Client Maximum Heap Size (in Megabytes): list select Auto
Figure 9-19 Edit WAR Deployment Properties - General
Description of "Figure 9-19 Edit WAR Deployment Properties - General" -
-
In the Edit WAR Deployment Profile Properties dialog, click OK.
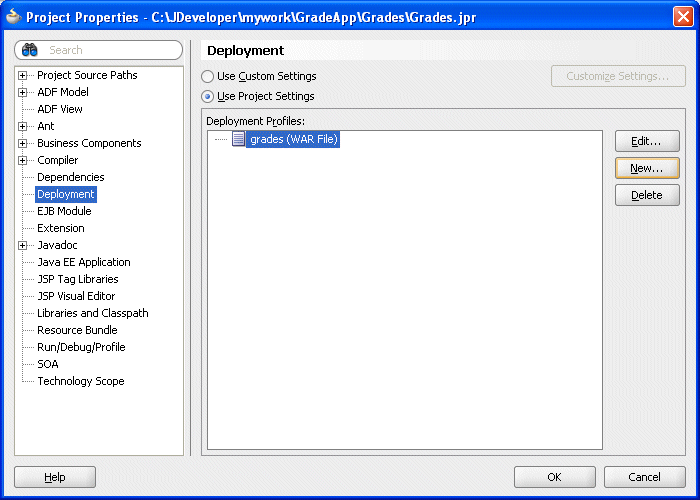
JDeveloper creates a deployment profile named
grades (WAR File)as shown in Figure 9-20.Figure 9-20 Project Properties - Deployment Profile Created
Description of "Figure 9-20 Project Properties - Deployment Profile Created" -
In the Project Properties dialog, click OK.
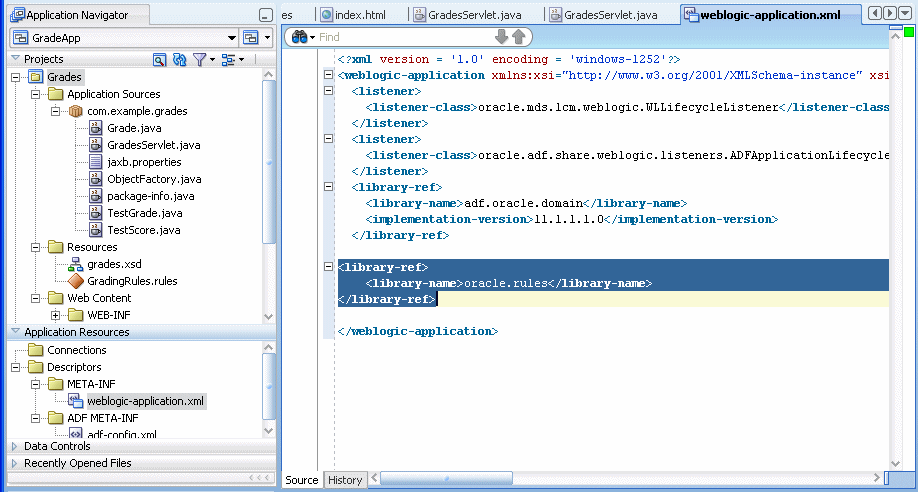
9.6.2 How to Add the Rules Library to the Grades Sample Application
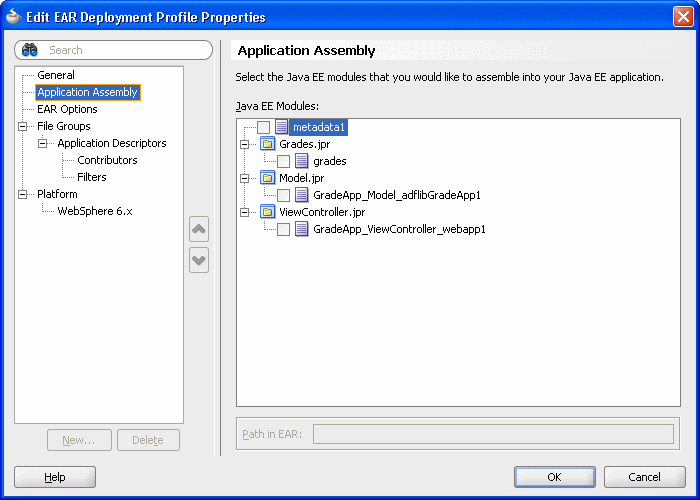
To add the rules library to the weblogic-application file:
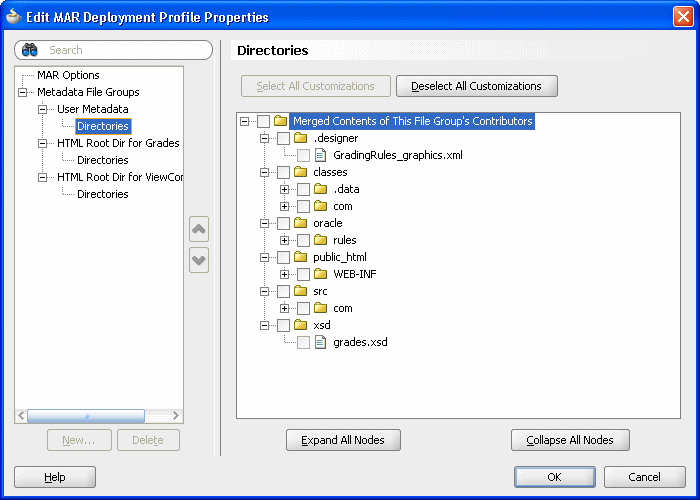
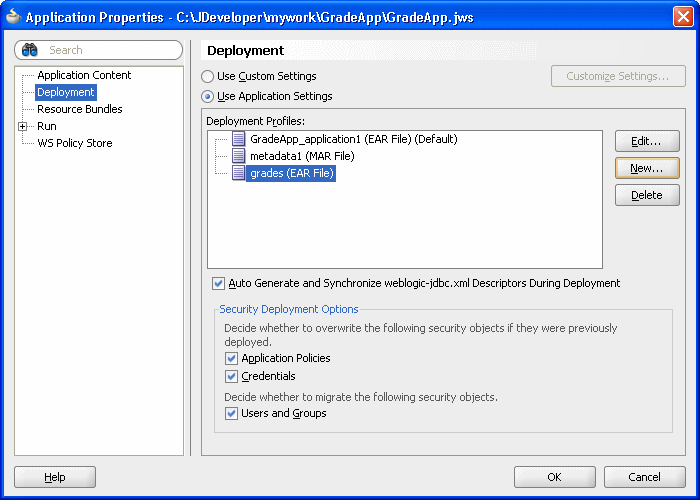
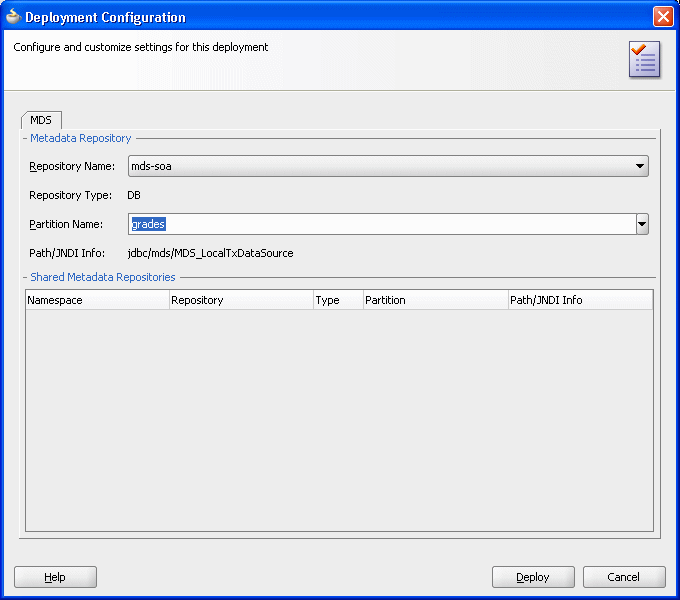
9.6.3 How to Add the MDS Deployment File to the Grades Sample Application
To add the MDS deployment file:
9.7 Deploying and Running the Grades Sample Application
You can now deploy and run the grades sample application on Oracle WebLogic Server.
9.7.2 How to Run the Grades Sample Application
After you deploy the grades sample application, you can run the application.
To run the grades sample application:
The first time you run the servlet there may be a delay before any results are returned. The first time the servlet is invoked, during servlet initialization the runtime loads the dictionary and creates a rule session pool. Subsequent invocations do not perform these steps and should run much faster.
Figure 9-33 Grades Sample Application Servlet with Results
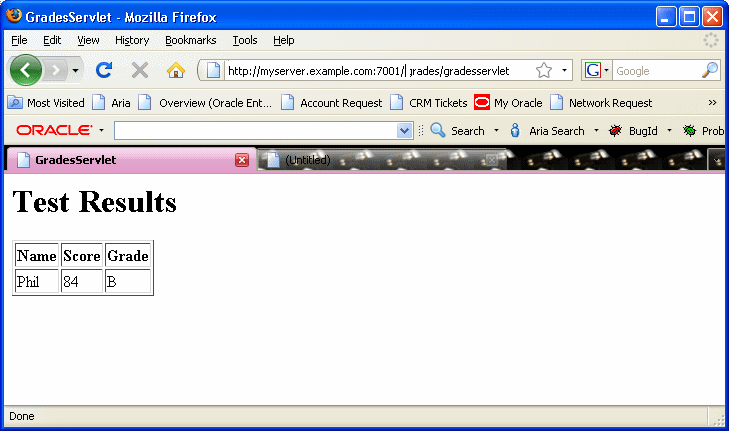
Description of "Figure 9-33 Grades Sample Application Servlet with Results"
