Manage Users and Groups Using the Default Authentication Provider
Managing a group is more efficient than managing a large number of users individually. Best practice is to first organize all Publisher users into groups that have similar system access requirements.
These groups can then be mapped to application roles that provide the correct level of access. If system access requires change, then you need only modify the permissions granted by the application roles, or create a new application role with appropriate permissions. Once your groups are established, continue to add or remove users directly in the identity store using its administration interface as you normally would.
To create a user in the default directory server:
-
If needed, launch Oracle WebLogic Server Administration Console.
-
Log in as an administrative user.
-
In the Administration Console, select Security Realms from the left pane and click the realm you're configuring. For example, myrealm.
-
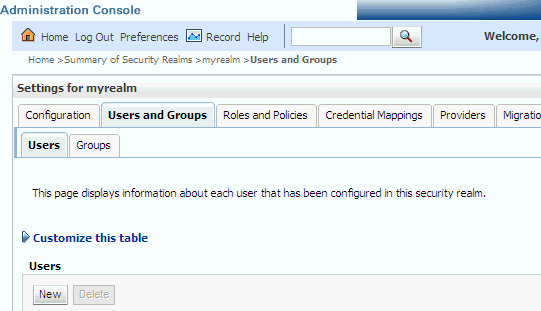
Select Users and Groups tab (shown below), then Users. Click New.
-
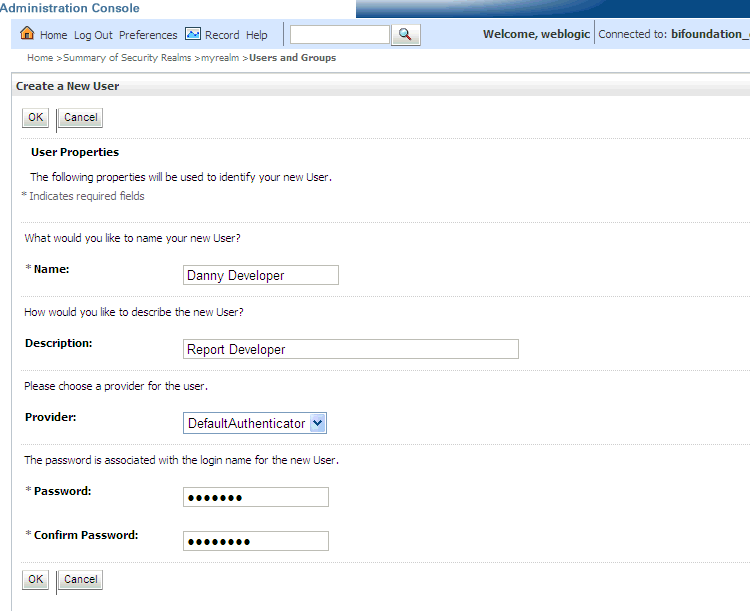
In the Create a New User page (shown below) provide the following information:
-
Name: Enter the name of the user. See online help for a list of invalid characters.
-
(Optional) Description: Enter a description.
-
Provider: Select the authentication provider from the list that corresponds to where the user information is contained. DefaultAuthenticator is the name for the default authentication provider.
-
Password: Enter a password for the user at least 8 characters long.
-
Confirm Password: Re-enter the user password.
-
-
Click OK.
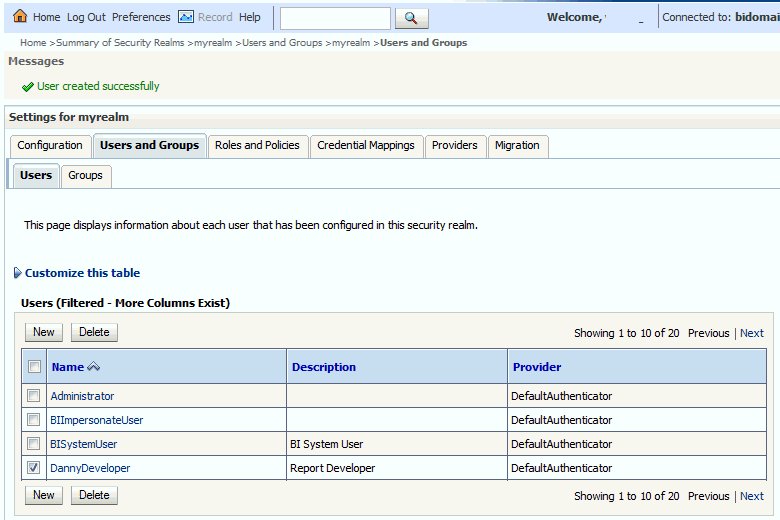
The user name is added to the User table.
To create a group in the default directory server:
-
If needed, launch Oracle WebLogic Server Administration Console.
-
Log in as an administrative user.
-
In the Administration Console, select Security Realm from the left pane and click the realm you're configuring. For example, myrealm.
-
Select Users and Groups tab, then Groups. Click New.
-
In the Create a New Group page provide the following information:
-
Name: Enter the name of the Group. Group names are case insensitive but must be unique. See the online help for a list of invalid characters.
-
(Optional) Description: Enter a description.
-
Provider: Select the authentication provider from the list that corresponds to where the group information is contained. DefaultAuthenticator is the name for the default authentication provider.
-
-
Click OK.
The group name is added to the Group table.
To add a user to a group in the default directory server:
-
If needed, launch Oracle WebLogic Server Administration Console.
-
Log in as an administrative user.
-
In the Administration Console, select Security Realm from the left pane and click the realm you're configuring. For example, myrealm.
-
Select Users and Groups tab, then Users, as shown in the figure below. Select the user from Name.
-
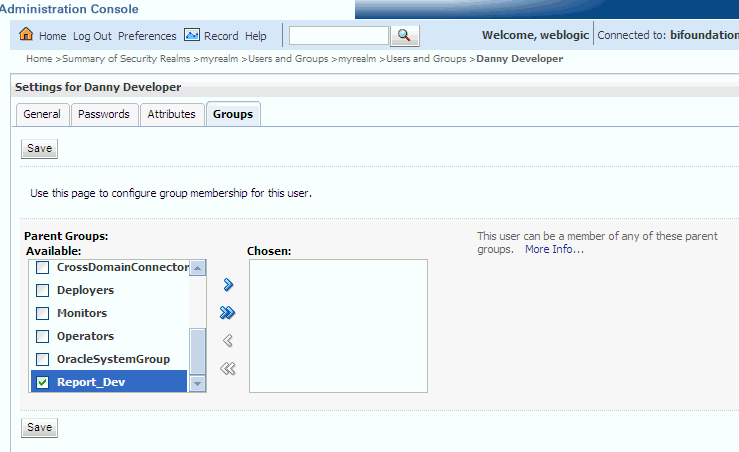
From the Settings page, select the Groups tab to display the list of available groups.
-
Select one or more groups from the Available list and use the shuttle controls to move them to the Chosen list, as shown below.
-
Click Save.
The user is added to the group.
To change a user password in the default directory server:
