6 Consumer Services
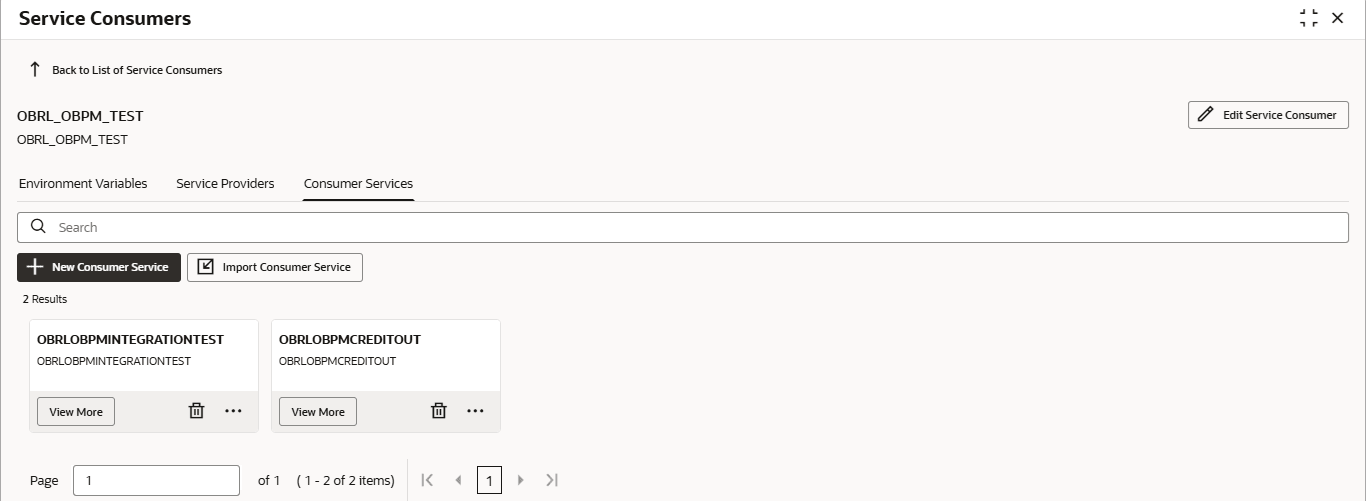
This topic describes the systematic instructions to configure the consumer services.
- On Service Consumers screen, click Consumer Services.The Consumer Services screen is displayed.
New Consumer Service
The user can create Consumer Service manually.
- On Consumer Services screen, click
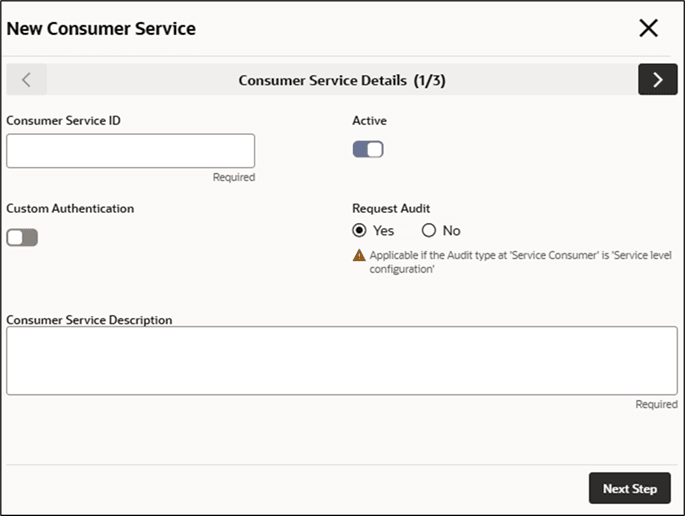
New.The New Consumer Service - Consumer Service Details screen is displayed.
Figure 6-2 New Consumer Service - Consumer Service Details
- On New Consumer Service - Consumer Service Details
screen, specify the fields.
Note:
The fields marked as Required are mandatory.For more information on fields, refer to the field description table.
Table 6-1 New Consumer Service - Consumer Service Details - Field Description
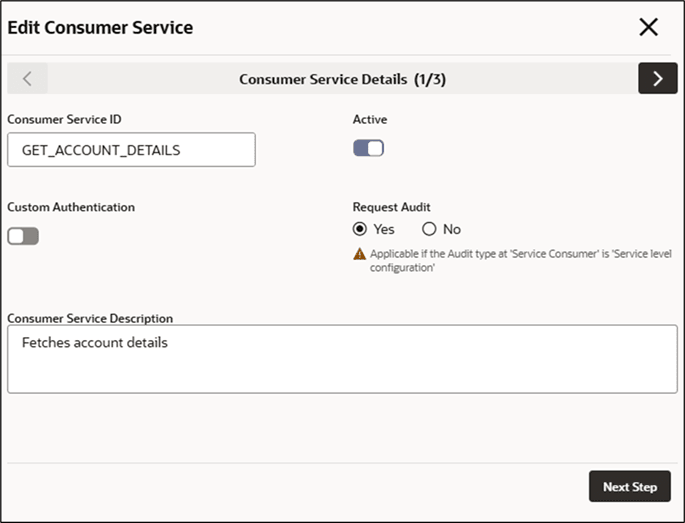
Field Description Consumer Service ID Specify the ID of the consumer service. Note:
- Enter 0 to maximum of 255 characters.
- No numeric value at beginning and no space allowed.
Active ON / OFF If this flag is toggled OFF, then all related routes will be stopped.
Custom Authentication This flag is to mark the consumer service which can be used as custom authentication service in implementation. Request Audit Select the Audit option for the consumer service. The available options are: - Yes-This option is for enabling the audit for consumer service.
- No-This option is for disabling the audit for consumer service.
Note:
This option is only applicable if Audit type at Service Consumer is Service level configuration'Consumer Service Description Specify the description of the consumer service. Note:
- Enter 0 to maximum of 1000 characters.
- No space allowed at beginning or ending of the characters.
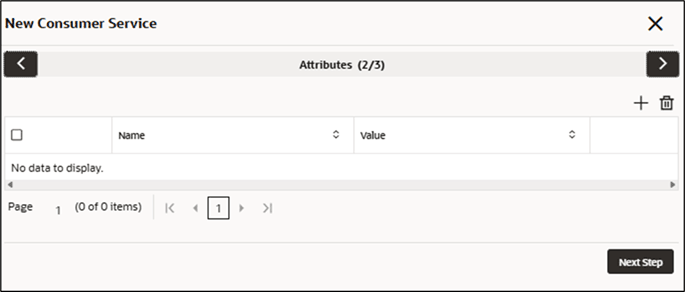
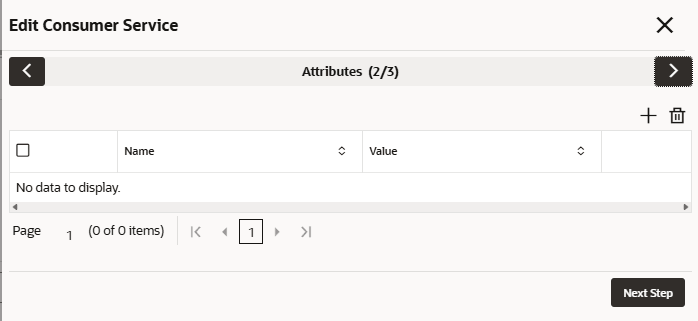
- To add Attributes, follow the below steps.
- Click Add icon.The Attributes screen is displayed.
- Specify the fields on Add Attribute screen.
Note:
The fields marked as Required are mandatory.For more information on fields, refer to the field description table.
Table 6-2 Add Header - Field Description
Field Description Name Specify the name of the attribute. Value Specify the value. Note:
- Using $.body, the user can access the request
body.
Syntax: $.body.fieldName
Example: $.body.branchCode
- Using $.headers, the user can access the request
headers.
Syntax: $.headers["fieldname "][0]
Example: $.headers["branchCode"][0]
- Using $.env, the user can access the
environment variables.
Syntax: $.env.group.variable
- Using $.body, the user can access the request
body.
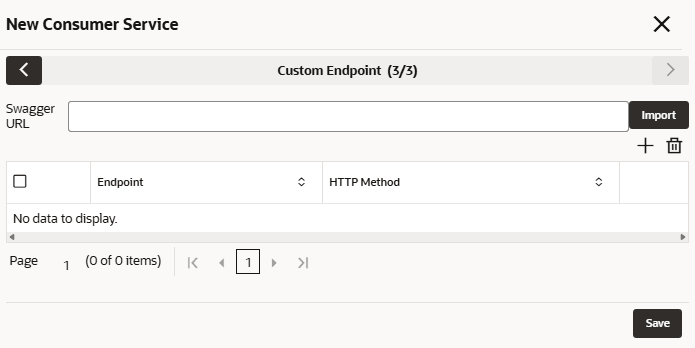
- Click Next Step.The Custom Endpoint screen is displayed.
- Click Add icon.
- Click Save to save the details.
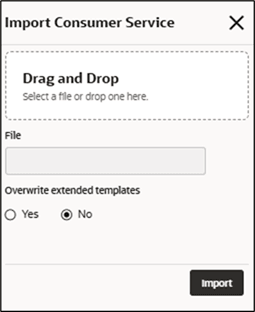
Import Consumer Service
The user can create a consumer service by importing the JSON file.
The user can also import zip file in order to import all the configuration JSON files together (except parent level configuration JSON files).
- On Consumer Services screen, click Import.The Import Service screen is displayed.
For more information on fields, refer to the field description table.
Table 6-3 Import Service - Field Description
Field Description File Select the file using Select button. Note:
Allows only to select one file and accepts only JSON file.Overwrite extended templates Select the respective radio button to overwrite the extended templates. The available options are:- Yes - This option overwrites the extended templates.
- No - This option retains the existing extended templates.
- Click Import to import the selected file.
View / Edit Consumer Service
The user can view or modify consumer service details.
- On Consumer Service tile, click View
More , and click Edit Consumer
Service.The Edit Consumer Service screen is displayed.
- Click Next StepThe Edit Consumer Service - Attributes screen is displayed.
Figure 6-7 Edit Consumer Service - Attributes
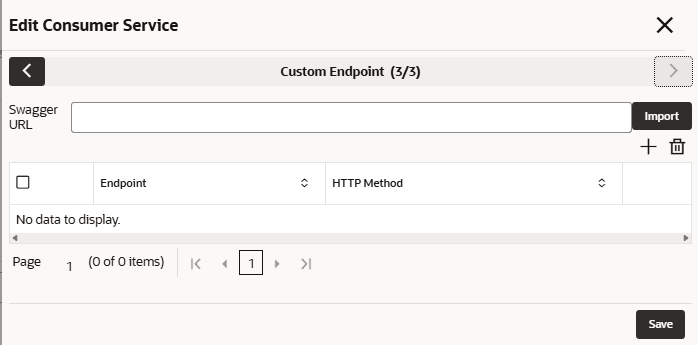
- Click Next StepThe Edit Consumer Service - Custom Endpoint screen is displayed.
Figure 6-8 Edit Consumer Service - Custom Endpoint
- Click Save save the modified consumer service details.
Delete Consumer Service
The user can delete the consumer service.
- On Consumer Service tile, click
Delete.The Confirmation screen is displayed.
Export Consumer Service
The user can export the consumer service configuration as JSON file.
- On Consumer Service tile, click Operation menu (3 dots button), and click Export.The Confirmation screen is displayed.
Consumer Service - Configuration
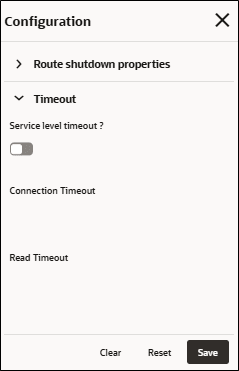
- On Consumer Service tile, click Operation menu (3 dots button), and click Configuration.The Configuration screen is displayed.
Figure 6-11 Consumer Service - Configuration
- Specify the fields on Consumer Service - Configuration
screen.
For more information on fields, refer to the field description table.
Table 6-4 Consumer Service - Configuration - Field Description
Field Description Service level timeout This property is used to override the global and provider timeout values. Note:
Default value is false.Connection Timeout This property is used to set the timeout in making the initial connection i.e. connection handshake. Note:
Value should be in milliseconds.Read Timeout This property is used to set the timeout on waiting to read data. Note:
Value should be in milliseconds.Note:
Refer to Configuration topic for the screen and field description of Route Shutdown properties.
Consumer Service - Request Audit
- On Consumer Service tile, click Operation menu (3 dots button), and click Request Audit.The Request Audit screen is displayed.
Note:
Refer to Request Audit topic for the screen and field description.
