- OFSLL TransactionBot Overview and Developer guide
- Developer Guide for BOT Customization
- Deploying war file on WebLogic Server
2.4 Deploying war file on WebLogic Server
release\<14_x.0.0.0>\ws_as\ChatBot\OracleFSLLChatBot.war.
- Login to Web Logic application server enterprise manager
(e.g.:http://hostname:port/em).For example, http://host01.example.com:8001/console
Note:
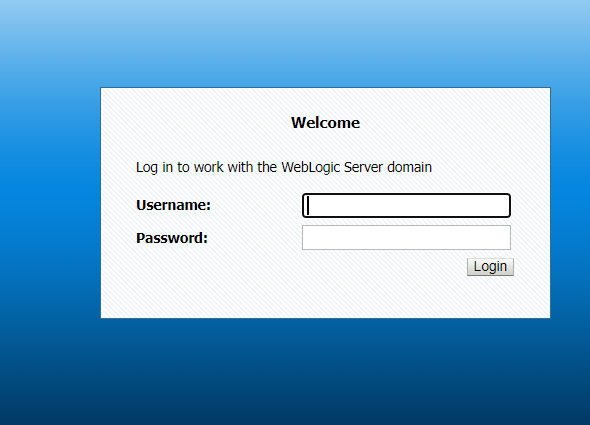
Use the host name and port of the administration server of your domain.Figure 2-10 Web Logic application server - Login
- Enter valid login credentials.
- Deploying an application is a change to the domain's configuration, so it must
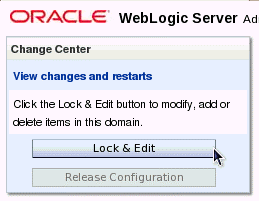
first be locked. In the Change Center. Click Lock &
Edit.
Figure 2-11 WebLogic Server - Change center
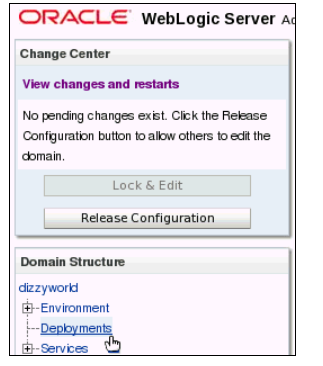
- Under Domain Structure, click Deployments.
- On the right, under Deployments, click Install.
- Find the Current Location field. Use the links to browse to the location in
which you placed the downloaded
OracleFSLLChatBot.warfile. - The
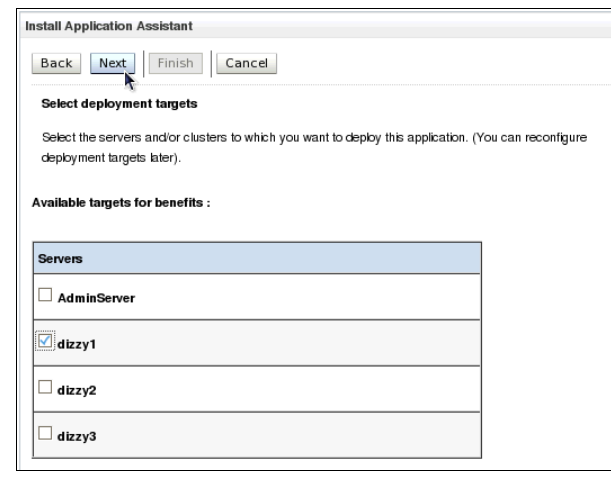
.warfile is available in the path -release\<14_x.0.0.0>\ws_as\ChatBot\OracleFSLLChatBot.war. Select the.warfile from the given path and click the radio button next to it. Using the links and the radio button, the console auto populates the Path fields. Alternatively, you can type in the path and file name in the Path field yourself. Click Next.Figure 2-14 Install Application Assistant 1
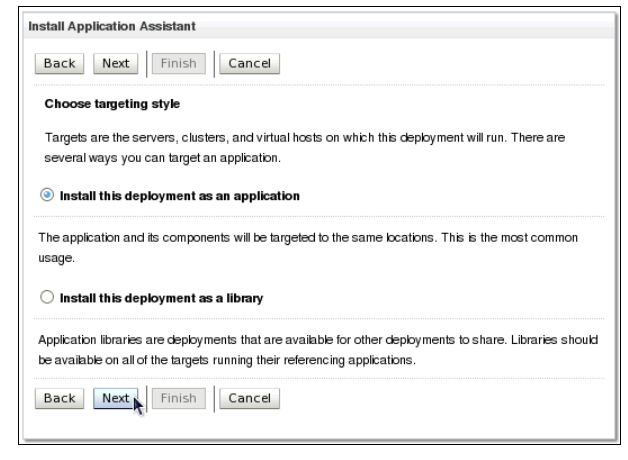
- Ensure that Install this deployment as an application
option is selected. Click Next.
Figure 2-15 Install Application Assistant 2
- In the below window, click Next.
Figure 2-16 Install Application Assistant 3
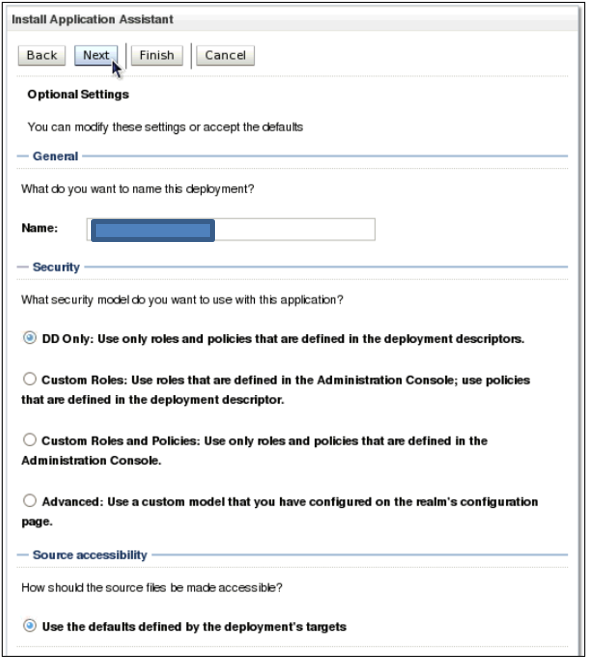
- Retain the default values and click Next.
Figure 2-17 Install Application Assistant 4
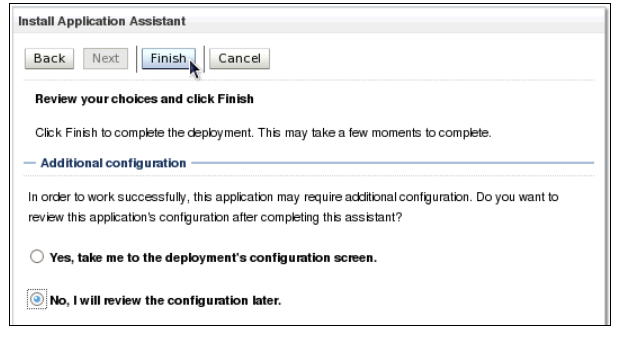
- In the below window, select the option No, I will review the
configuration later and click
Finish.
Figure 2-18 Install Application Assistant 5
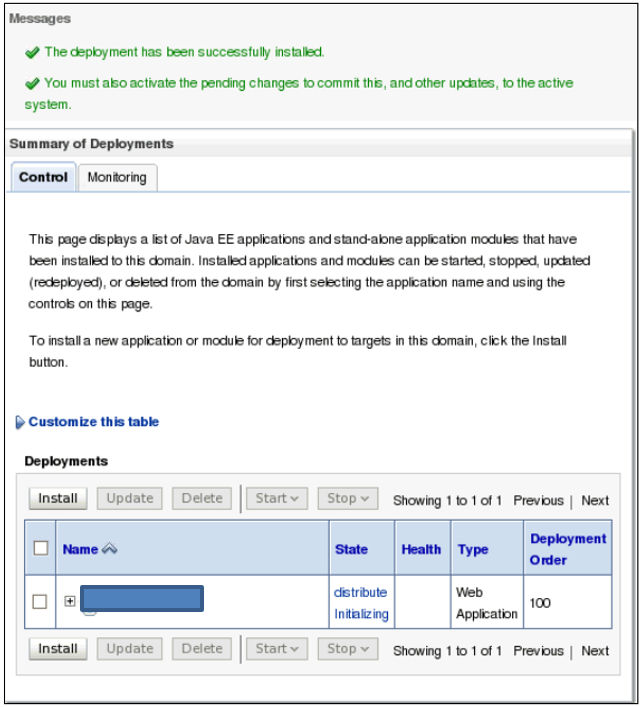
Once done view the messages indicating that the deployment was installed, but changes must be activated. In addition, notice the benefits application listed in the Deployments table.
Figure 2-19 Installed Deployment - message
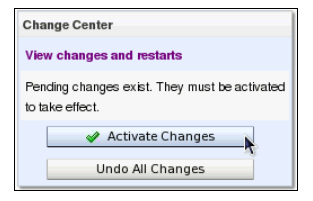
- In the Change Center, click the Activate Changes
button.
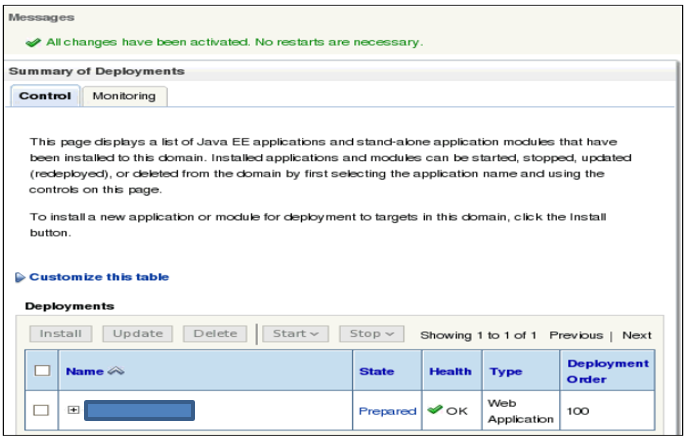
Notice the message indicating that the changes have been activated. In addition, notice the benefits application listed in the Deployments table is now in the Prepared state.
Figure 2-21 Deployments - changes activated
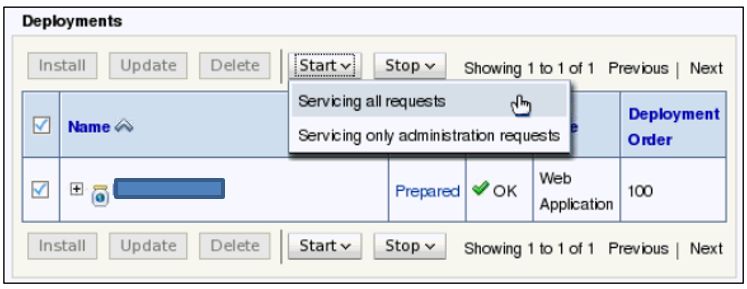
- Select the checkbox against the left of the benefits application in the
Deployments table. In the Start drop-down list, select Servicing all
requests option.
Figure 2-22 Checkbox - Servicing all requests
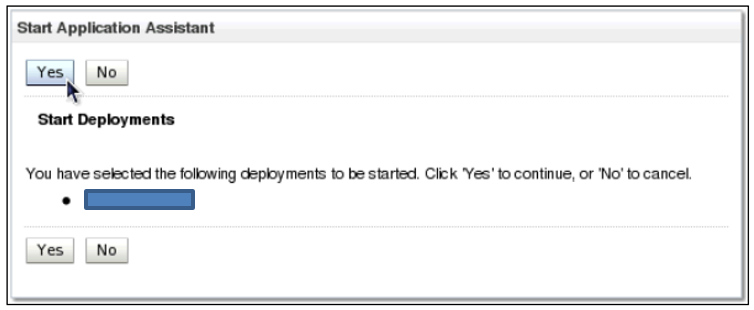
- Click Yes to continue.
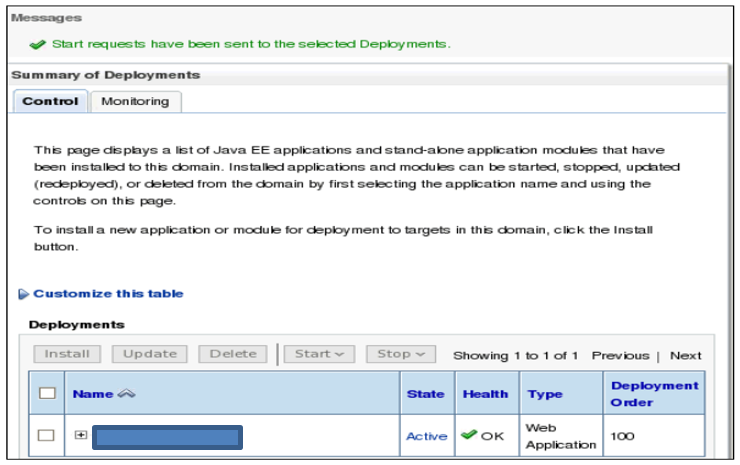
- A message is displayed indicating a start request was sent. Subsequently Notice
that the state of application is ‘Active’ indicating that the application
is accessible.
Figure 2-24 Deployments - start request sent message
Parent topic: Developer Guide for BOT Customization
