- OAS Installation Guide
- Create OA Publisher Datasource
- Creating Roles
- Creating WebLogic Application Policies
3.2.2 Creating WebLogic Application Policies
To Create WebLogic Application Policies
- Login to Enterprise Manager using the URL -
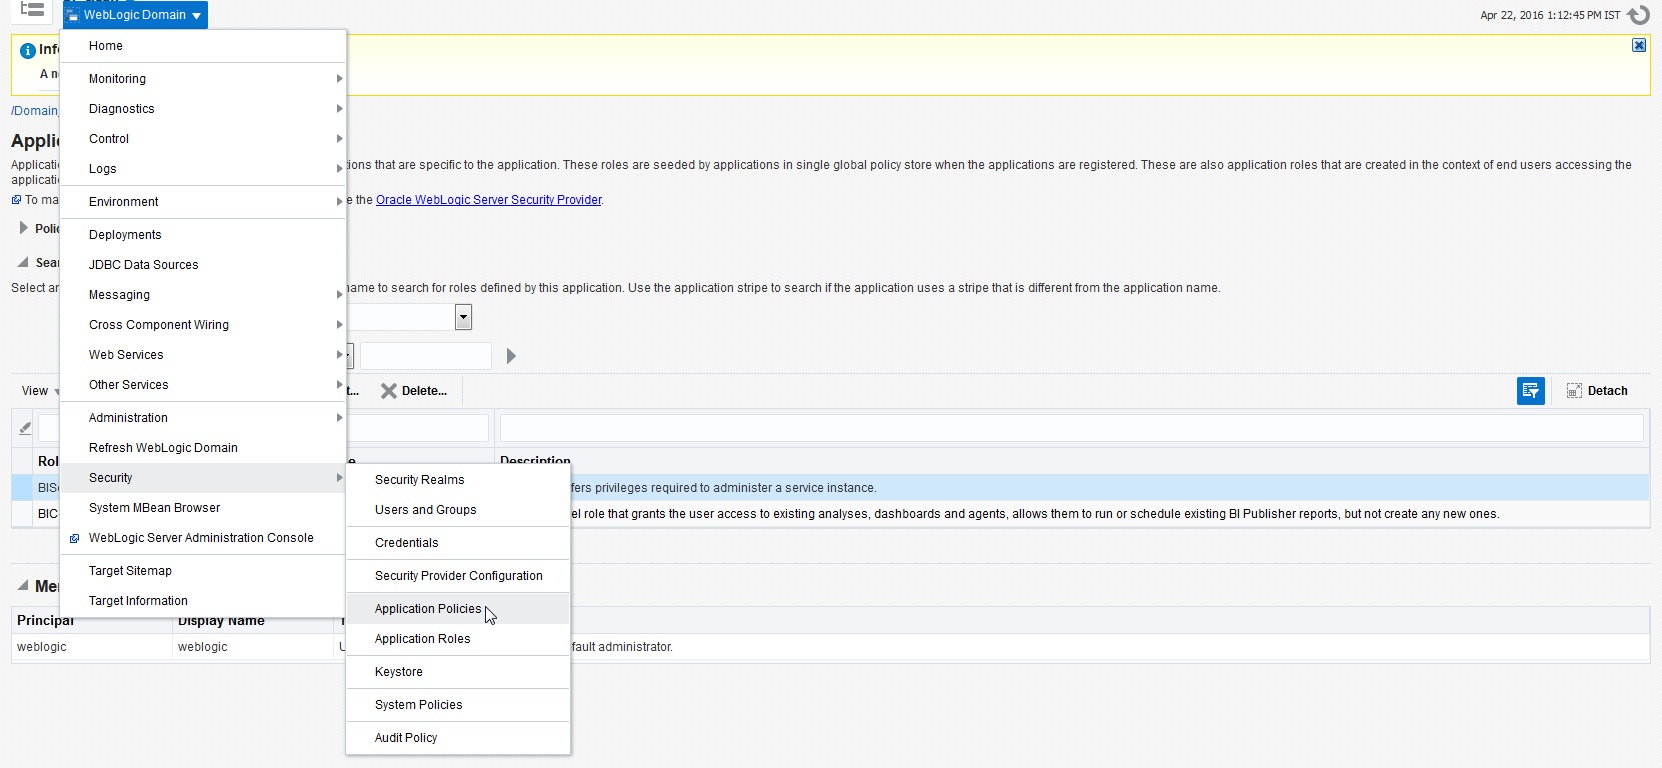
http://hostname:port/em. - Select Weblogic Domain > Security > Application Policies as indicated in
the following screen:
Figure 3-12 WebLogic Application Policies 1
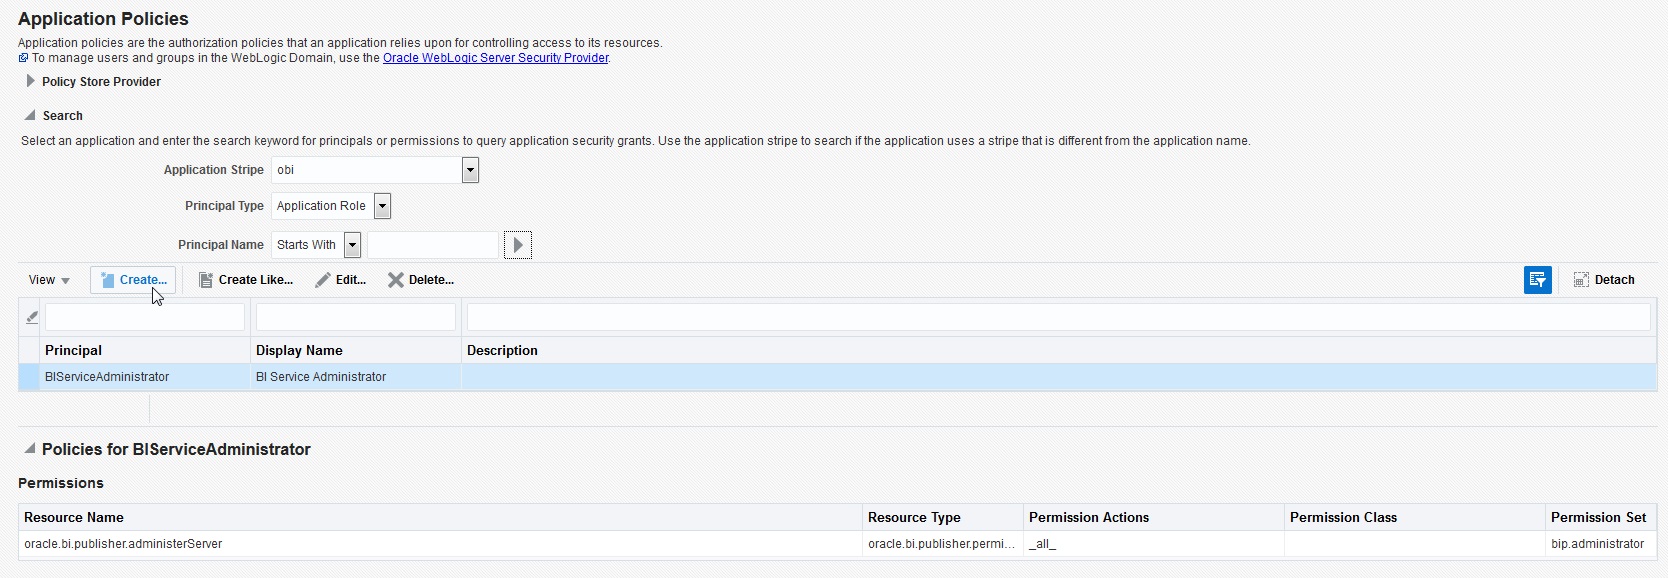
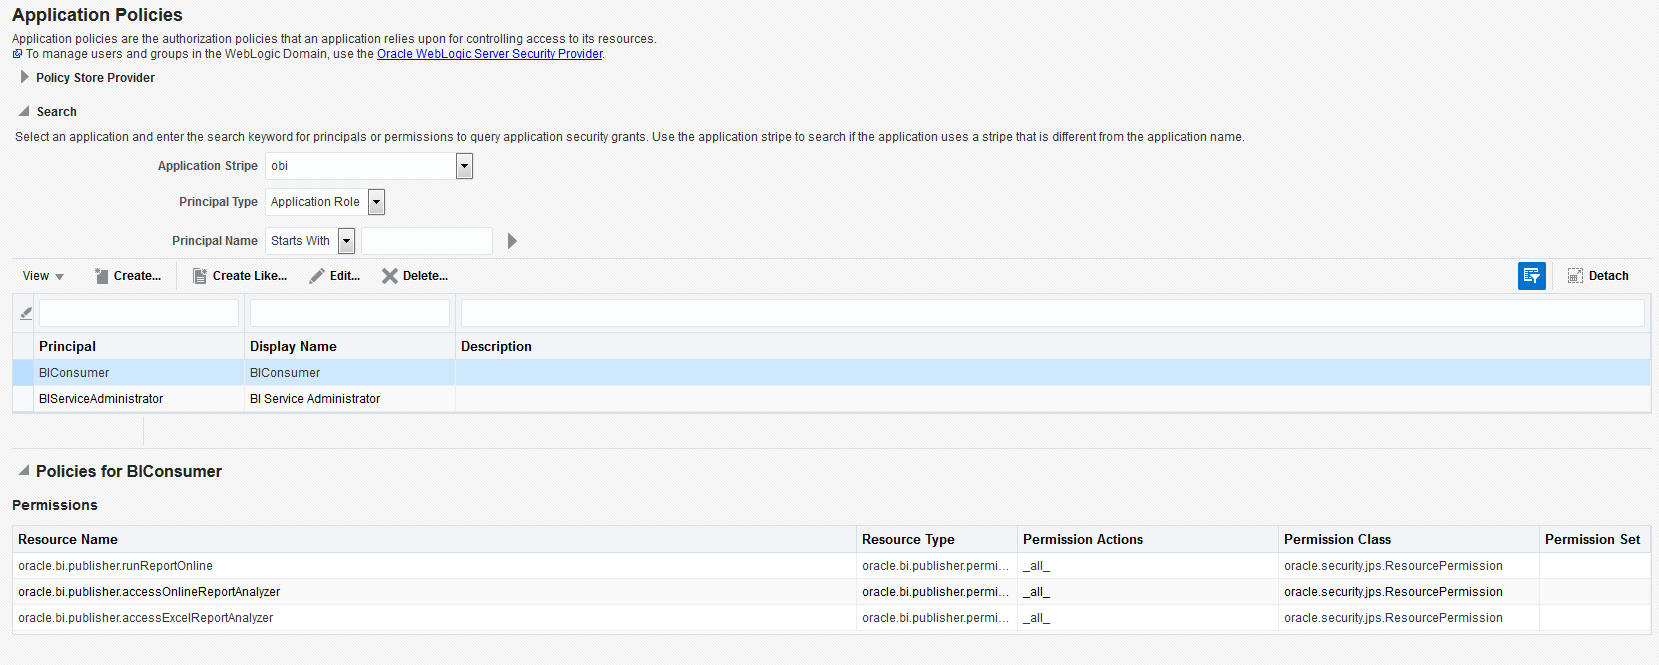
- In the Application Stripe field, select obi from the
drop-down list. Click Create.
Figure 3-13 WebLogic Application Policies 2
- In Create Application Grant screen, under the Grantee
section, click Add.
Figure 3-14 WebLogic Application Policies 3
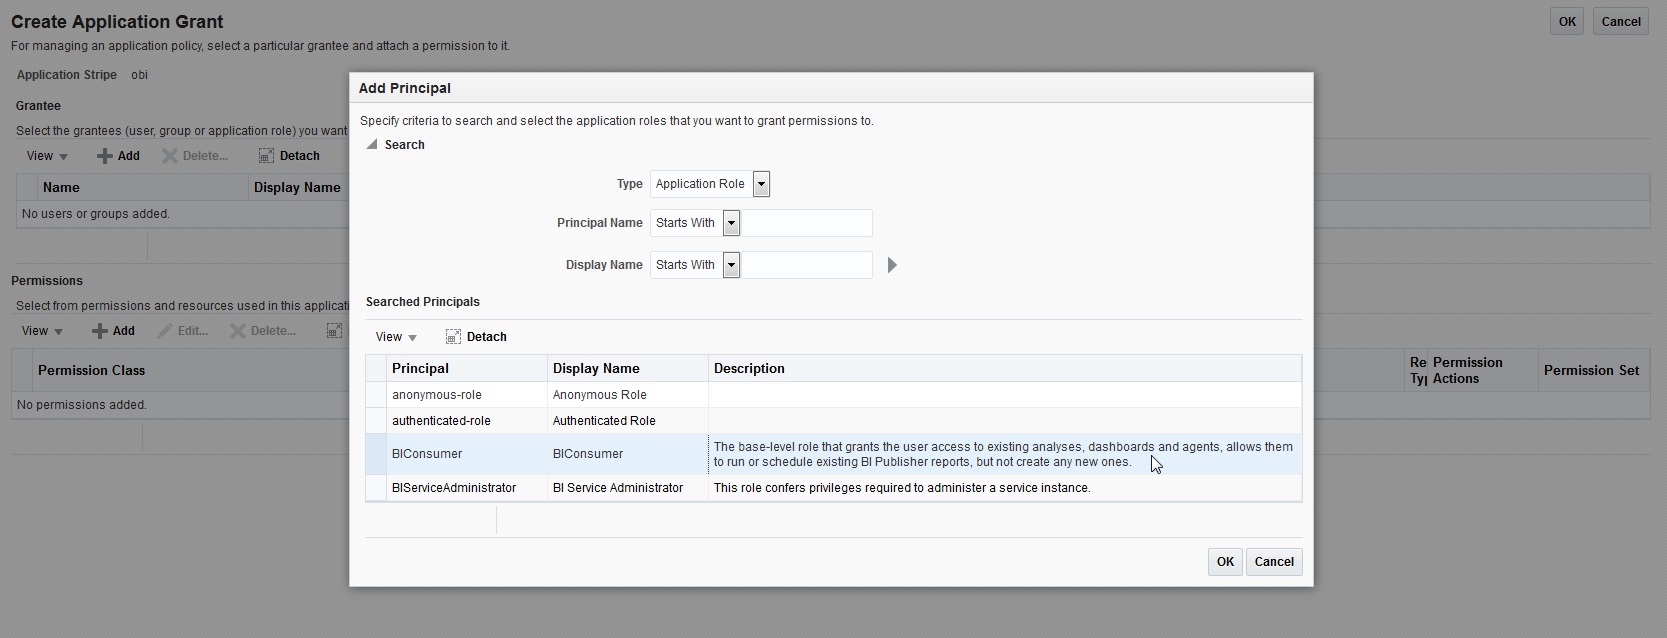
- Select the newly created application role from the list and click
OK. The new role is added to the list.
Figure 3-15 WebLogic Application Policies 4
- In the Permissions section, click
Add.
Figure 3-16 WebLogic Application Policies 5
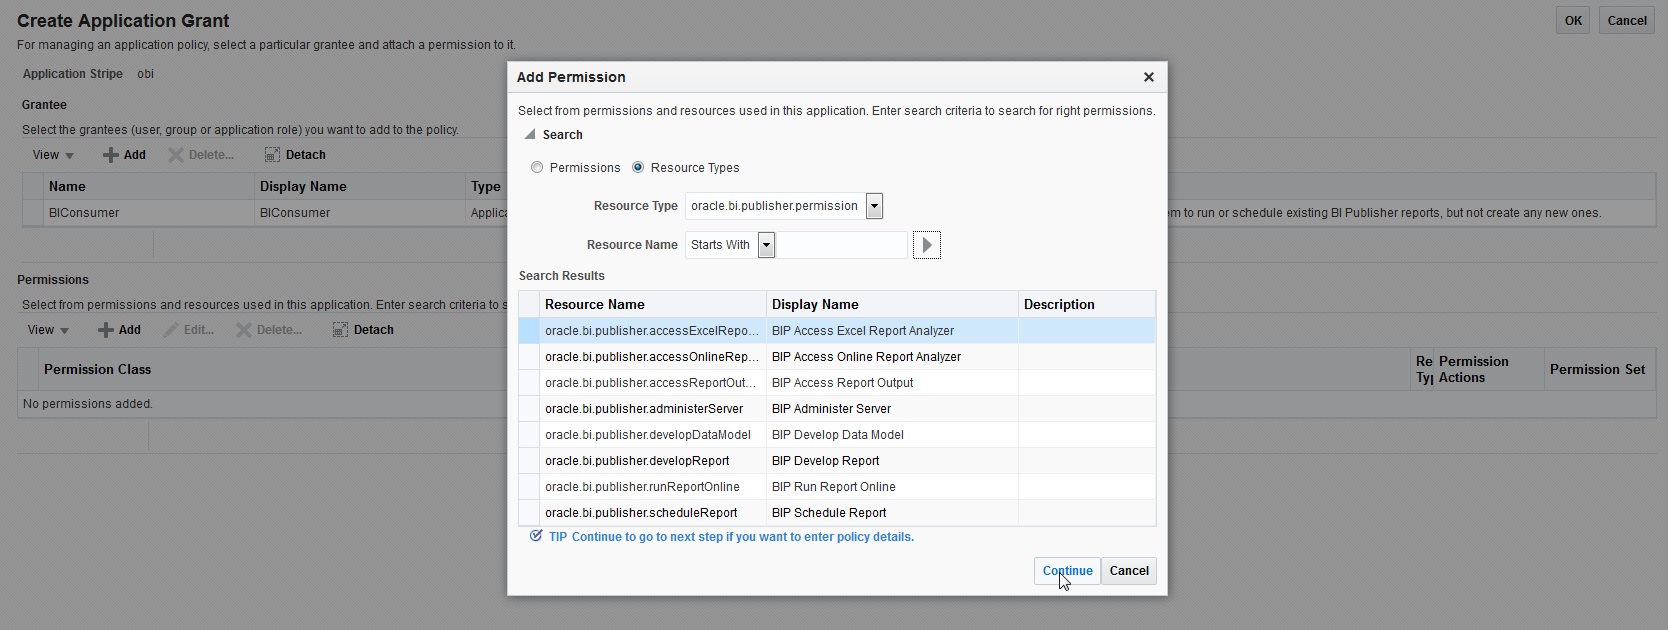
- In the search criteria, select Resource Type and select
the resource type from the drop-down list. Select the required resource from the
search results and click Continue.
Figure 3-17 WebLogic Application Policies 6
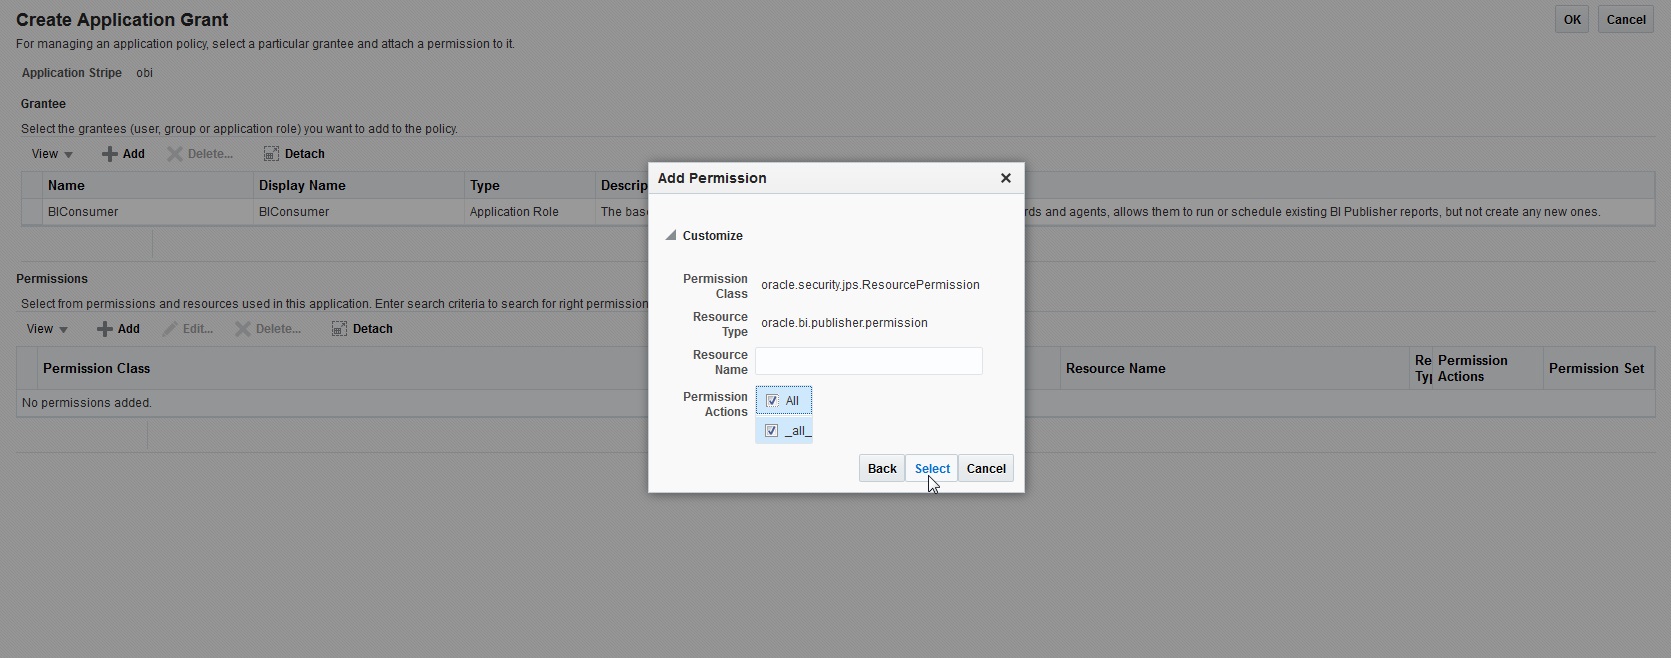
- Define the required permission(s) for the application role by selecting the
appropriate Permission Class and Permissions Actions check box. Click
Select.
Figure 3-18 WebLogic Application Policies 7
- The selected permissions are defined to the application role. Similarly you can
define the required permissions for other application roles.
Figure 3-19 WebLogic Application Policies 8
- Once done, click OK.
Figure 3-20 WebLogic Application Policies 9
Parent topic: Creating Roles
