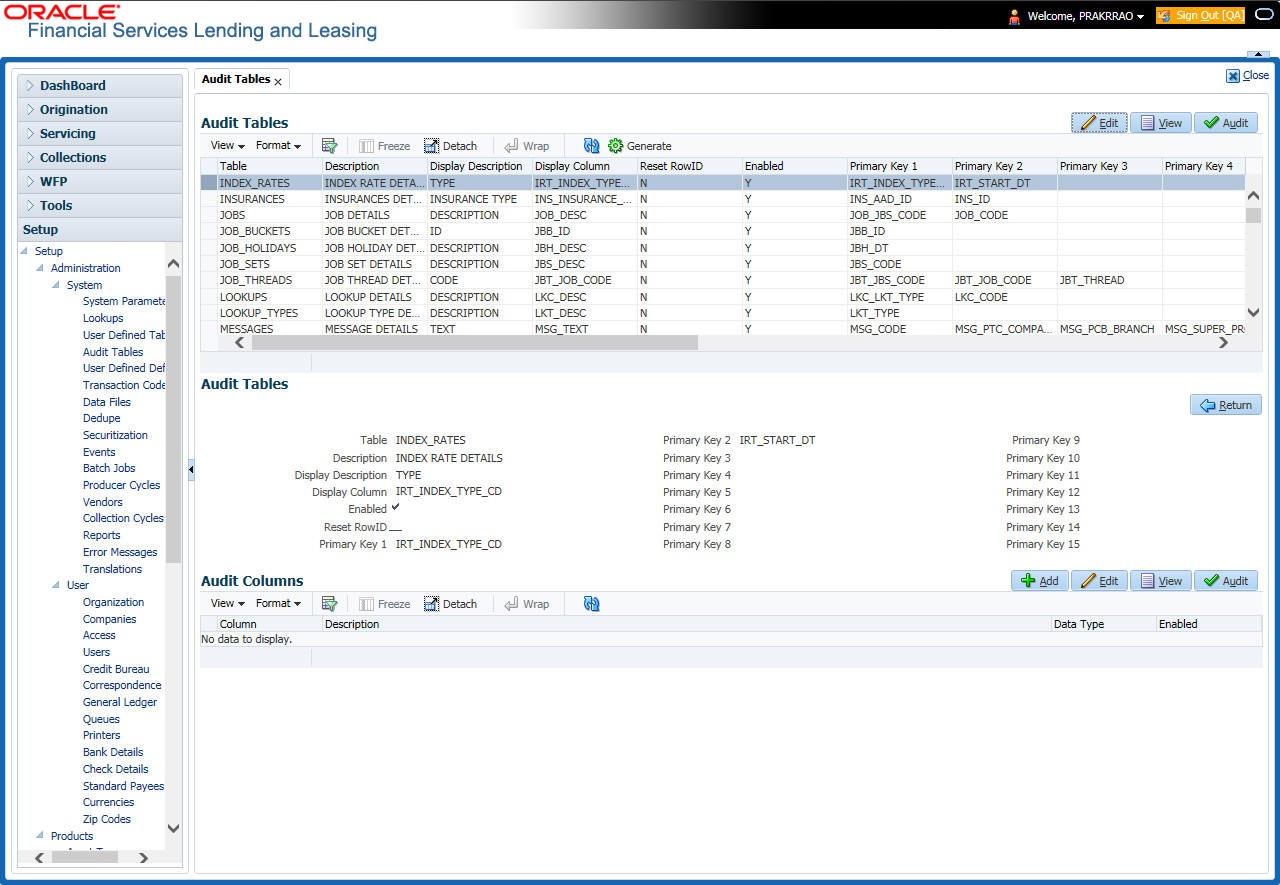
2.4 Audit Tables
The system allows you to track changes in the database during loan origination. This includes the tracking of:
- Account status history
- Audit history of specified fields
The Audit Tables Setup screen records the tables and columns requiring an audit. the
system stores the following details for the fields you want to audit for changes:
- Current value in field
- New value field
- User who changed the field’s content
- Date and time when the value was changed
IMPORTANT: The system recommends that only a database administrator perform the following steps.
To set up the Audit Tables
- Click Setup > Setup > Administration > System > Audit Tables. The system
displays the Audit Tables screen. The details are grouped into two:
- Audit Tables
- Audit Columns
- In the Audit Tables section, perform any of the Basic Operations mentioned in Navigation chapter.
A brief description of the fields is given below:
Table 2-10 Audit Tables
Field Do this Table The table name on which audit trigger needs to be created is displayed here (the system table being audited). Description Specify the table description. Display Description Specify the column description to be displayed on audit screen. Display Column Select the table column to be displayed on audit screen from the drop-down list. Enabled Check this box to enable the audit table so that it will be considered while generating the database triggers. Reset Row ID Check this box to allow resetting the row identifier. Primary Key 1 (unlabeled) The table primary key column 1 is displayed here. (These columns define how to access the data in the table.) Primary Key 2 (unlabeled) The table primary key column 2 is displayed here. Primary Key 3 (unlabeled) The table primary key column 3 is displayed here. Primary Key 4 (unlabeled) The table primary key column 4 is displayed here. Primary Key 5 (unlabeled) Table primary key column 5 is displayed here. Primary Key 6 (unlabeled) Table primary key column 6 is displayed here. Primary Key 7 (unlabeled) The table primary key column 7 is displayed here. Primary Key 8 (unlabeled) The table primary key column 8 is displayed here. Primary Key 9 (unlabeled) The table primary key column 9 is displayed here. Primary Key 10 (unlabeled) The table primary key column 10 is displayed here. Primary Key 11 (unlabeled) The table primary key column 11 is displayed here. Primary Key 12 (unlabeled) The table primary key column 12 is displayed here. Primary Key 13 (unlabeled) The table primary key column 13 is displayed here. Primary Key 14 (unlabeled) The table primary key column 14 is displayed here. Primary Key 15 (unlabeled) The table primary key column 15 is displayed here. - Perform any of the Basic Actions mentioned in Navigation chapter.
- In the Audit Tables Columns section, perform any of the
Basic Operations mentioned in Navigation chapter.
A brief description of the fields is given below:
Table 2-11 Audit Tables Columns
Field Do this Column Specify the column name on which the audit needs to be created from drop-down list (column in the table that is being audited) Description Specify the column description (description of the data contained in the column). Data Type The data type for the attribute is displayed here. Enabled Check this box to enable the audit column. - Perform any of the Basic Actions mentioned in Navigation chapter.
- Once the required fields data is created or updated, click Generate in Audit Tables section to initiate a trigger to update the details in the system.
Parent topic: Administration System
