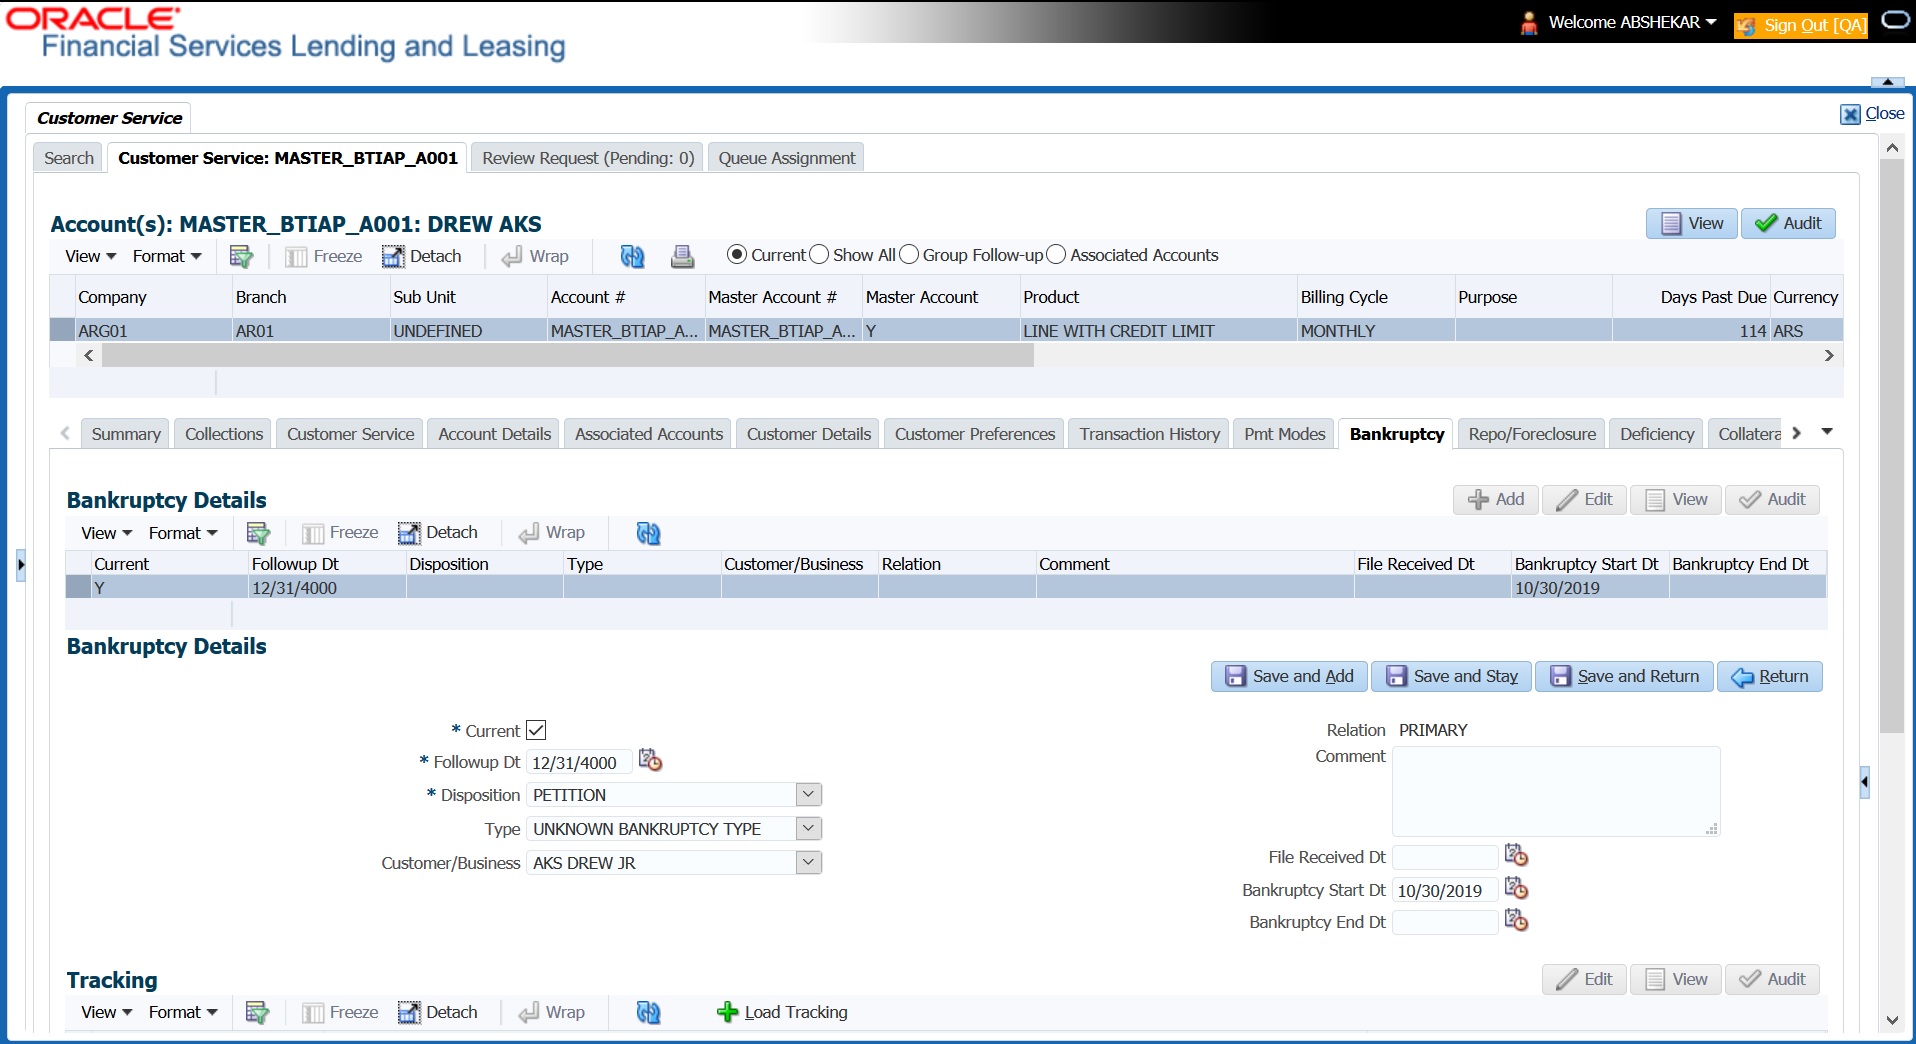
4.12 Customer Service screen’s Bankruptcy tab

The Bankruptcy screen enables you to record the details of a bankruptcy. This information usually is supplied from the customer/business or customer’s/business attorney. You can track each stage of the bankruptcy process based on its follow-up date and record information using the Details and Tracking sections.

As there are occasions when a borrower files bankruptcy more than once during tenure of the Line of credit, you can record information for multiple bankruptcies. The Add button enables you to create a new bankruptcy record with different start and end dates. You can also use the Bankruptcy screen to view previous bankruptcy record using Next and Previous buttons in Detail section. The Current box in Detail section indicates the current bankruptcy details.

When a Bankruptcy condition is opened on an account, the system defaults a detailed tracking record with Current field enabled and Follow up date defaulted to system date. The Disposition is defaulted as NEWLY RECEIVED. The system only adds a new detail tracking record. No processing will be done with respect to detail tracking record when the bankruptcy condition is closed.

To enter bankruptcy details for an account

  1. Open the Customer Service screen and load the account you want to work with.
  2. Click Bankruptcy tab.
  3. In the Bankruptcy Details section, select the bankruptcy record you want to work with.
    -or-
  4. Select Add to refresh the Bankruptcy screen to create a new record.
  5. In the Bankruptcy Details section, enter, view or edit the following information:

    Table 4-86 Bankruptcy Details

    Field Do this
    Current

    Select to indicate this is the current bankruptcy record.

    If selected, system disables the current indicator for any previous record for the same relation.

    Follow up Dt Enter the follow-up date for the bankruptcy.
    Disposition Select the bankruptcy disposition.
    Type Select the bankruptcy type.
    Customer/Business Select the customer/business from the drop-down list
    Relation Based on Customer/Business selected, system displays either the type of customer relation or as business relation associated to account.
    Comment Enter a comment.
    File Received Dt Select the file received date for the bankruptcy.
    Bankruptcy Start Dt Select the bankruptcy start date.
    Bankruptcy End Dt Select the bankruptcy end date.
  6. Click Save.
  7. In the Tracking section, click Load Tracking. The system loads the bankruptcy tracking parameters.
  8. If you want to reduce the list of parameters, select a sub attribute in the Sub Attribute field. If your system has been configured to use the Sub Attribute field, only attributes in a particular group appear in parameter display.
  9. Complete the Create Tracking section by entering information regarding bankruptcy in the Value field for each corresponding Parameter, click Save on the Bankruptcy screen.

This section consists of the following topics: