4.5.9 Correspondence sub tab

Ad-hoc correspondence enables you to include information from accounts in document templates you create yourself without manually transferring the data. Ad-hoc documents can be generated as either Microsoft Word or PDF files.
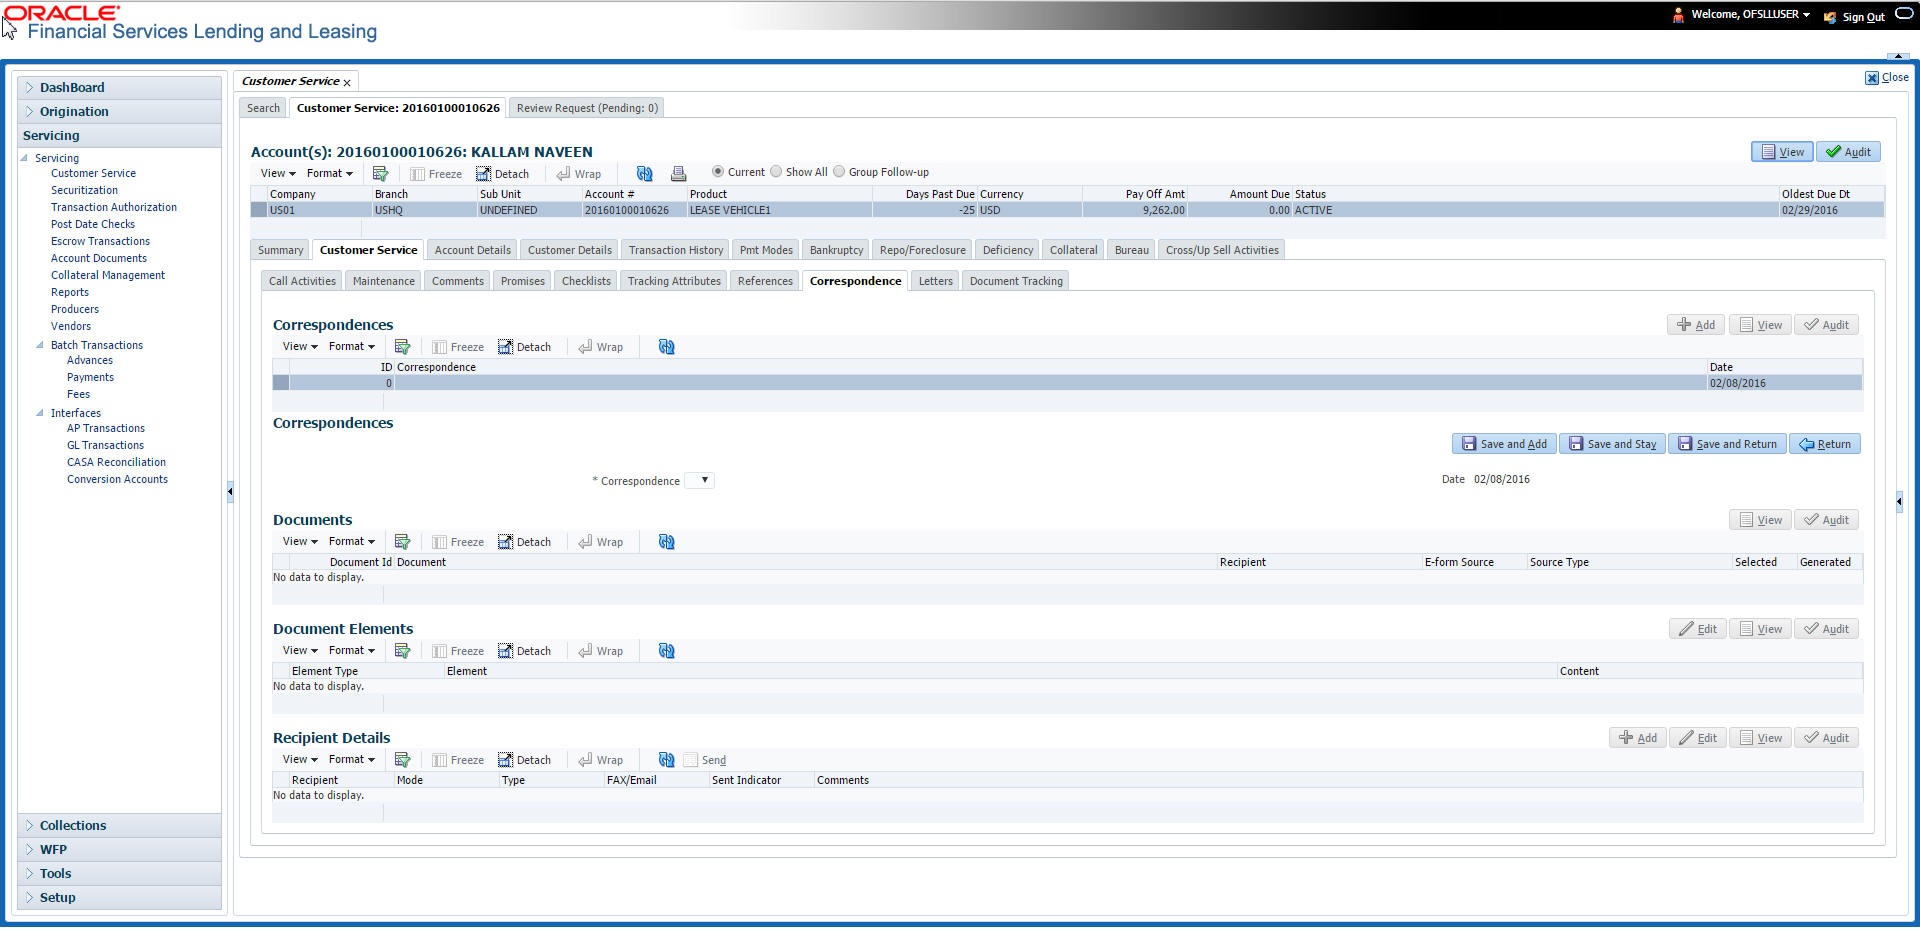
Ad-hoc correspondence can be viewed on the Correspondence screen when you have opened an account. The screen enables you to generate a new letter or view a previously generated letter.

To generate an ad-hoc correspondence

  1. Open the Customer Service screen and load the account you want to work with.
  2. Click the Customer Service tab, then click Correspondence sub tab.

    Figure 4-11 Customer Service - Correspondence


  3. In the Correspondence section, click Add. In the Correspondence section, use Correspondence field to select type of correspondence you want to generate. The system displays following information in the Correspondence screen for selected type of correspondence:

    Table 4-31 Correspondence

    In this field View this
    Id The correspondence id.
    Correspondence The correspondence which is to be generated.
    Date The correspondence generation date.
  4. In the Correspondence section, click Save. The Documents section displays all types of documents available for the type of correspondence you selected.
  5. In the Documents section, click View. View the following information for each document:

    Table 4-32 Documents

    In this field View this
    Document Id The document Id.
    Document The document description.
    Recipient The recipient description.
    E-Form Source The e-form source.
    Source Type The source type.
    Generated Y indicates that Oracle Financial Services Lending and Leasing generated the document.
    Selected Y indicates that this document is selected to be included in the correspondence.
  6. In the Documents section, select the correspondence you want to view.
  7. The Document Elements section displays elements of the system used to generate correspondence.
  8. Click All to view all elements in the correspondence.
    -or-
  9. Click User Defined, to view user-defined elements in the correspondence. In the Document Elements section, view the following information:

    Table 4-33 Document Elements

    In this field Do this
    Element Type View the document element type.
    Element View the element description.
    Content Enter/view value of the element.
  10. In the Document Elements section, click User Defined and complete Content fields for Element fields you want to include in the correspondence.
  11. In the Document Elements section, click Save.
  12. In the Document Elements section, click View.
The system displays a PDF of the ad-hoc correspondence.