6 Map Enterprise Group with Application Role
The following section details the steps to be followed to map enterprise group with application role.

6.1 Mapping Enterprise Group with Application Role
Follow the below steps to add an user to the group:
  1. Login to Oracle Enterprise Manager 12c console (http://hostname:port/em).
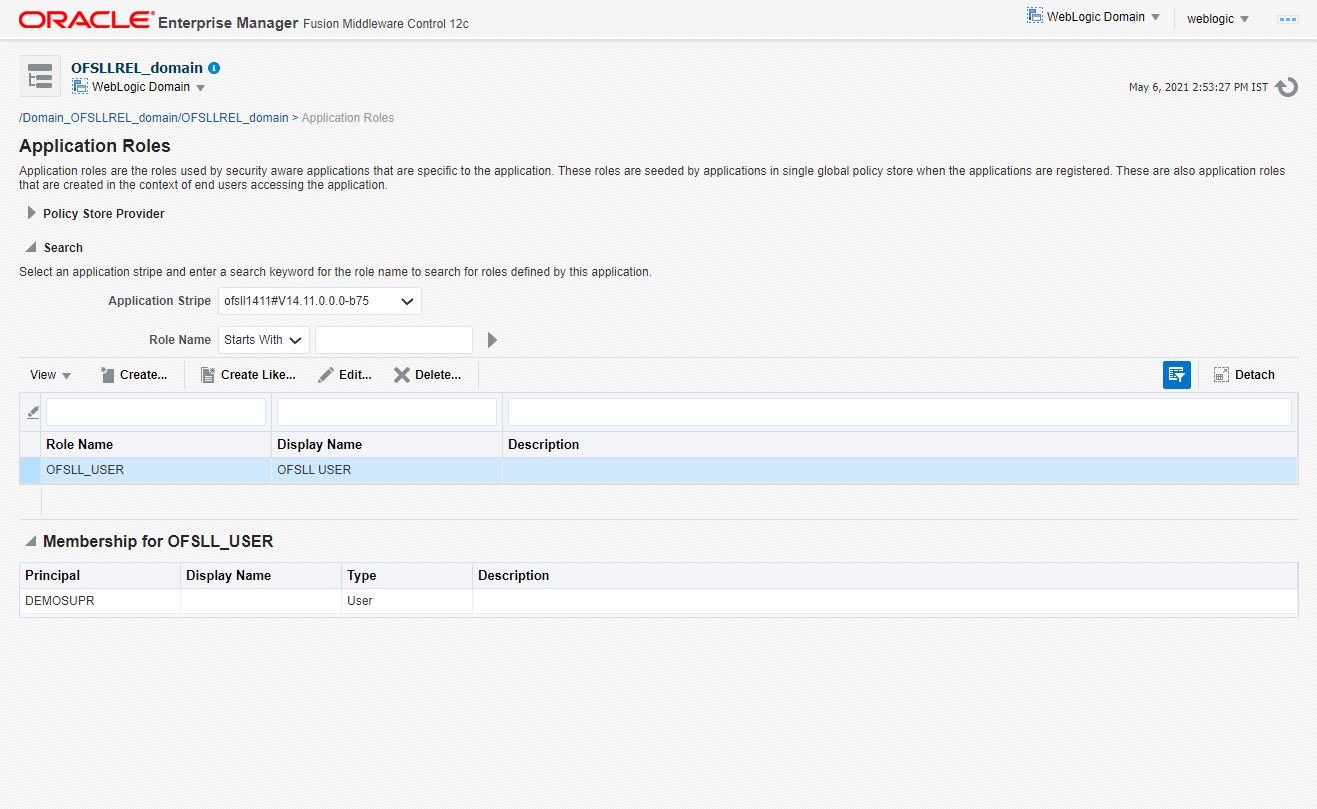
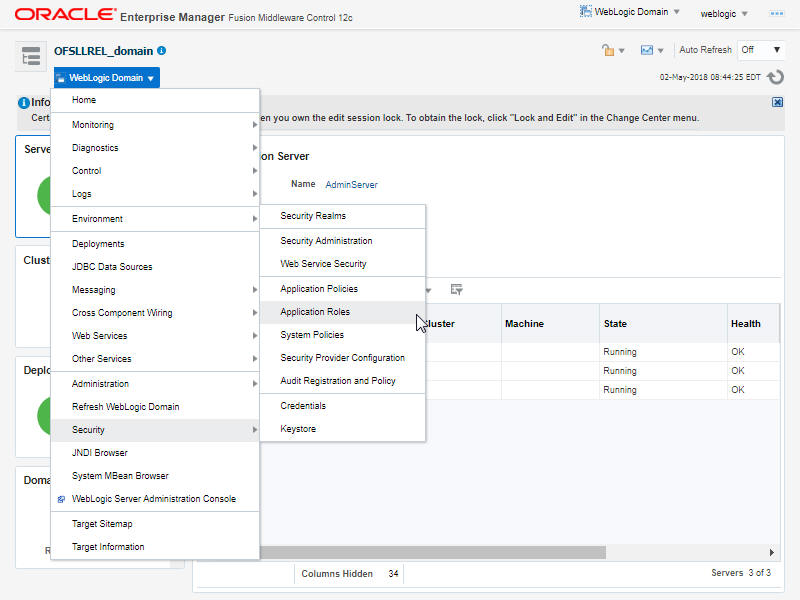
  2. Click WebLogic Domain > Security > Application Roles on the right panel.

    Figure 6-1 Mapping Enterprise Group 1


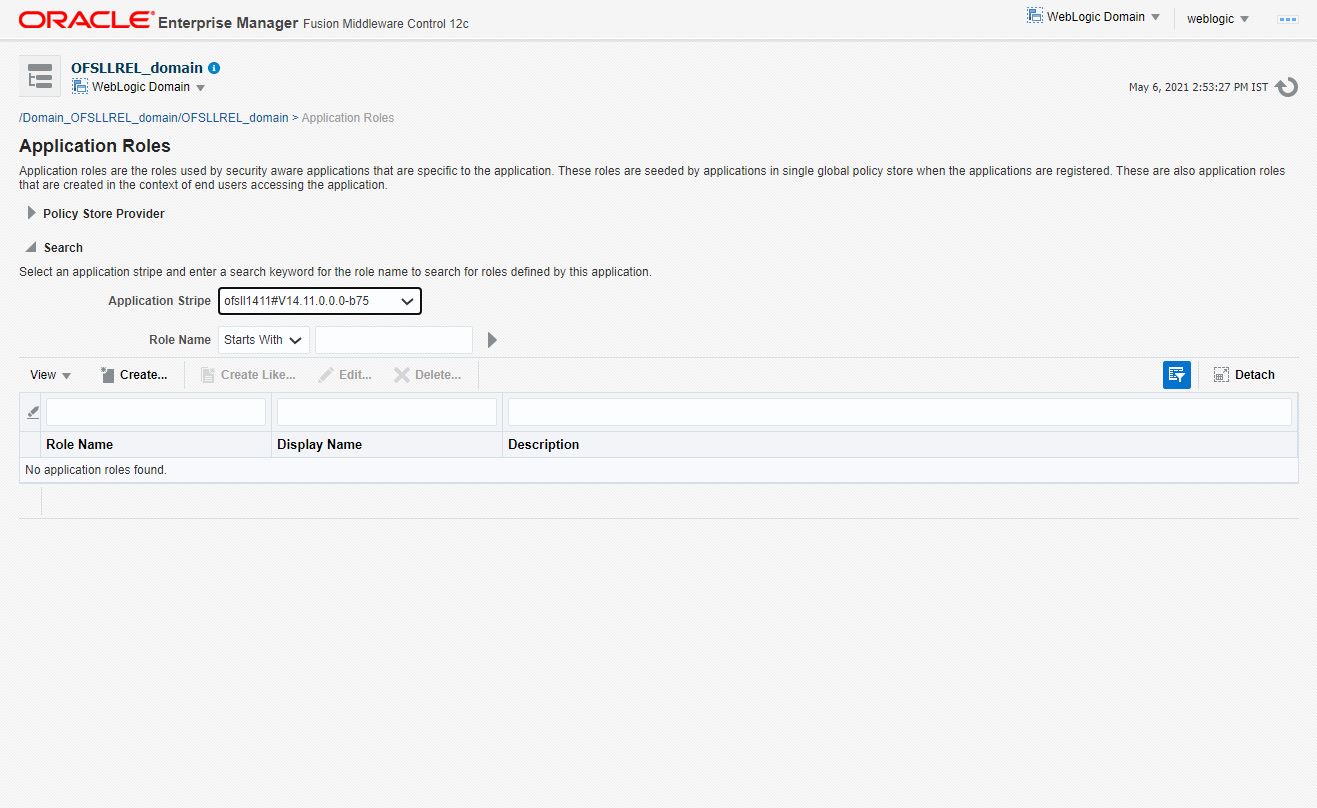
  3. Select Application Stripe from the drop-down menu.
  4. Click the arrow head button. Details of the existing Roles are displayed below:

    Figure 6-2 Mapping Enterprise Group 2


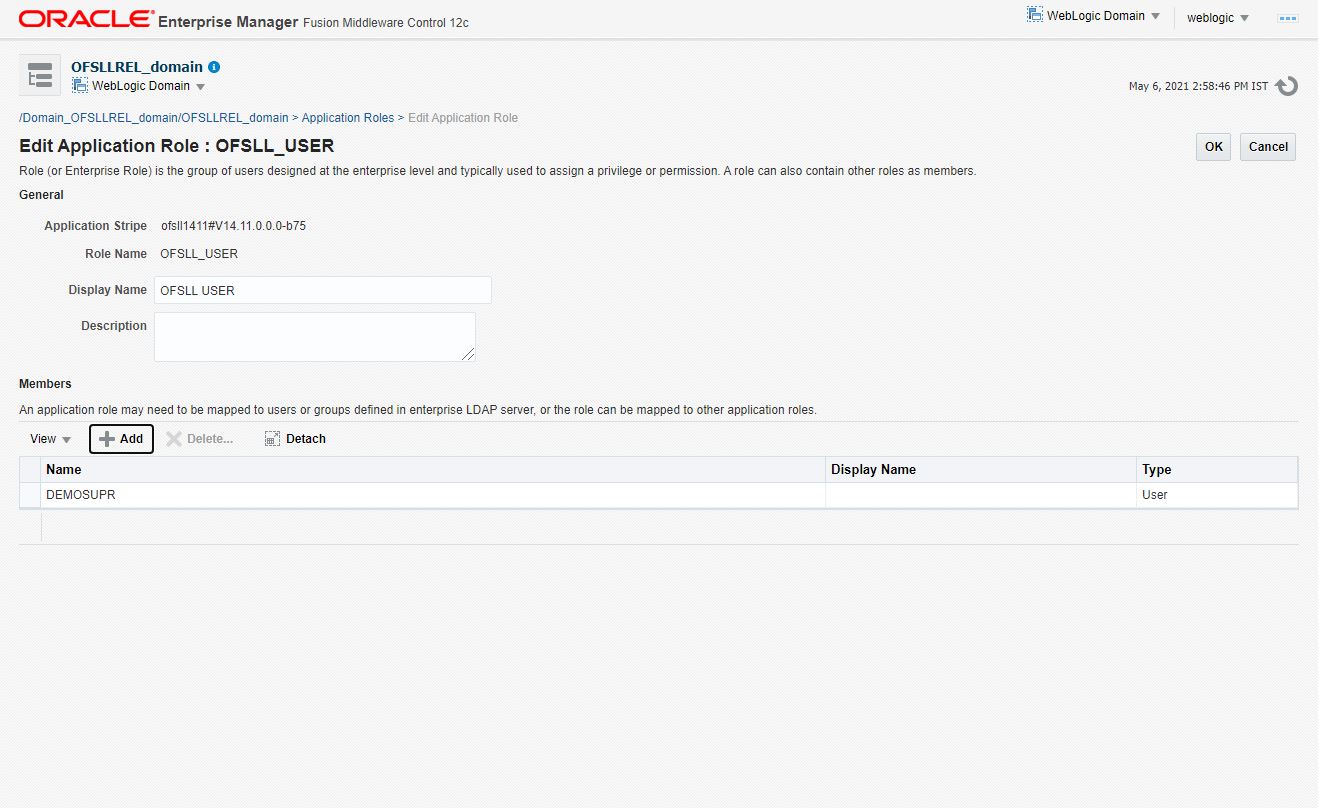
  5. Select the Role Name. Membership details of the selected Role Name are displayed under Membership for role_name.

    Figure 6-3 Mapping Enterprise Group 3


  6. Click Edit.
    The following window is displayed.

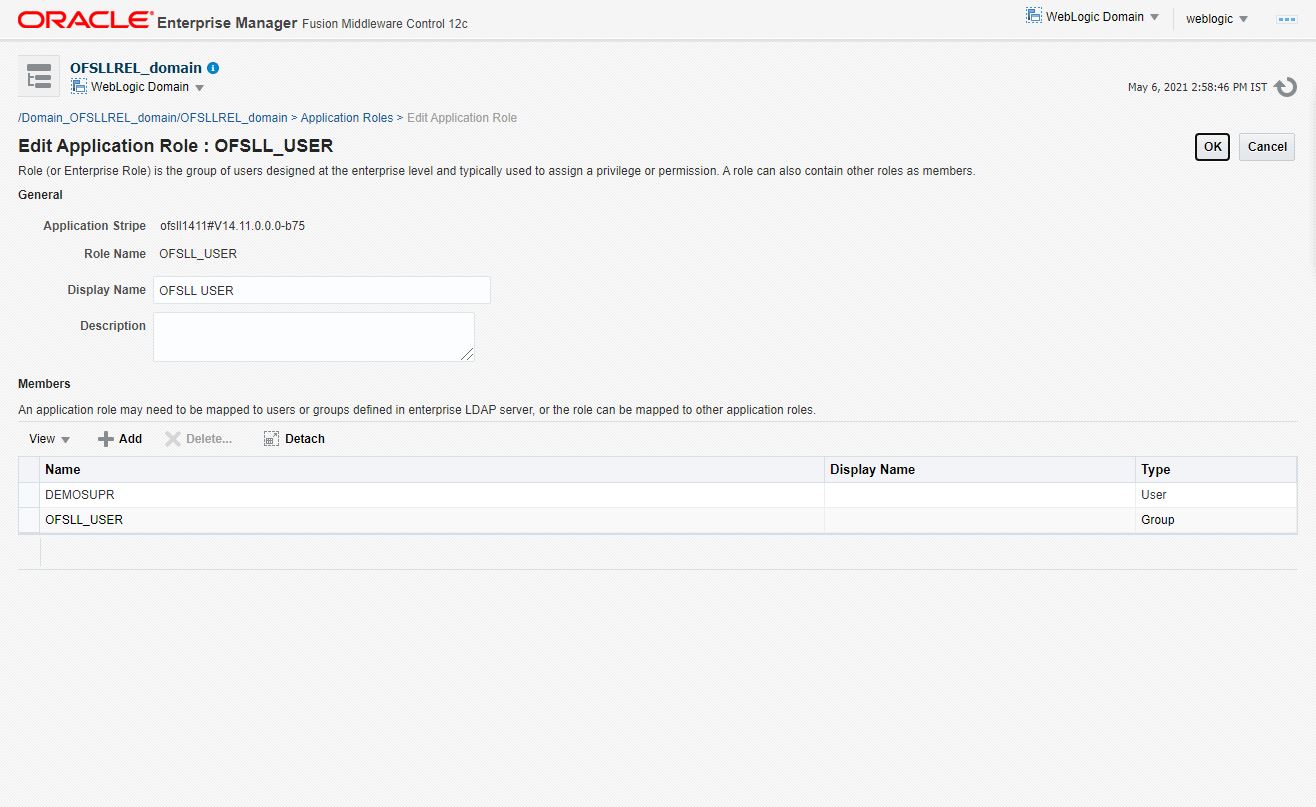
    Figure 6-4 Mapping Enterprise Group 4


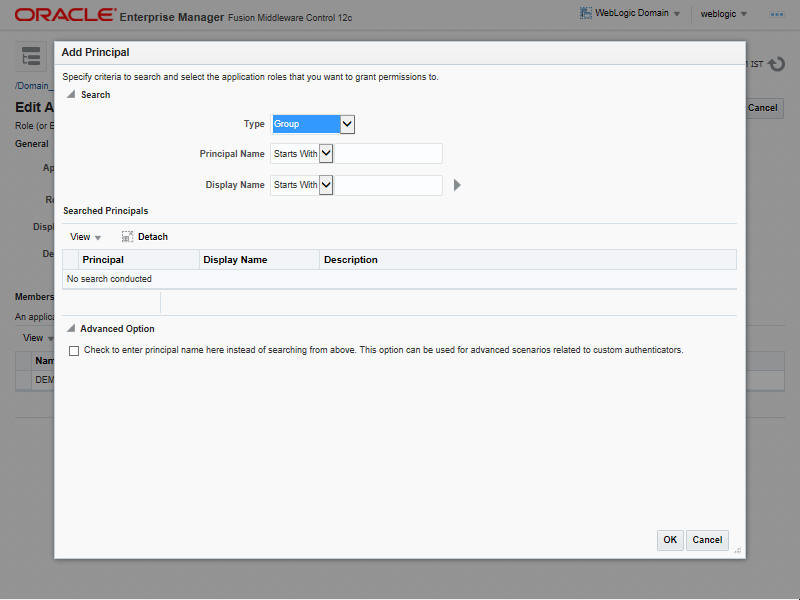
  7. Click Add. Select type as Group. Click on the arrow head button.
  8. Follow the given steps to select the Principal OFSLL_USER to add and click OK.
    The following window is displayed.

    Figure 6-5 Mapping Enterprise Group 5


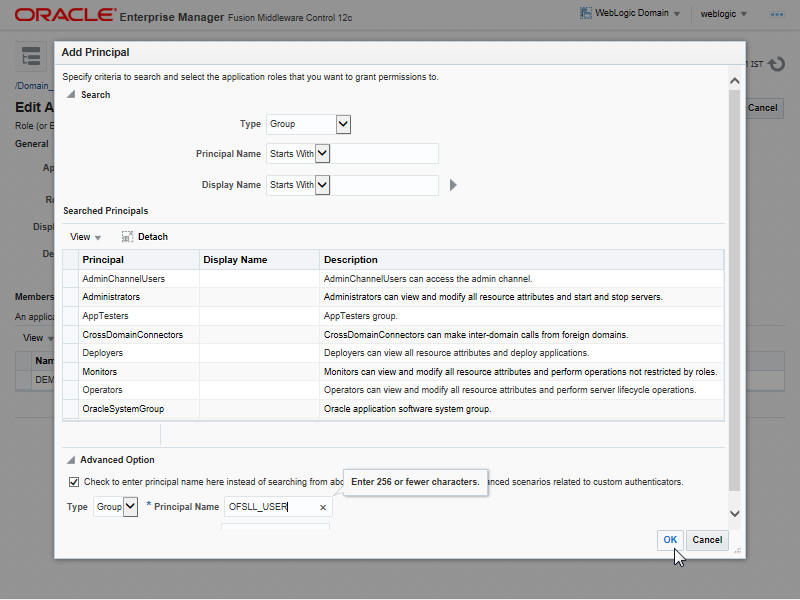
  9. Check the check box in Advanced options. Enter the name of Group manually.

    Figure 6-6 Mapping Enterprise Group 6


  10. Click OK.

    Figure 6-7 Mapping Enterprise Group 7


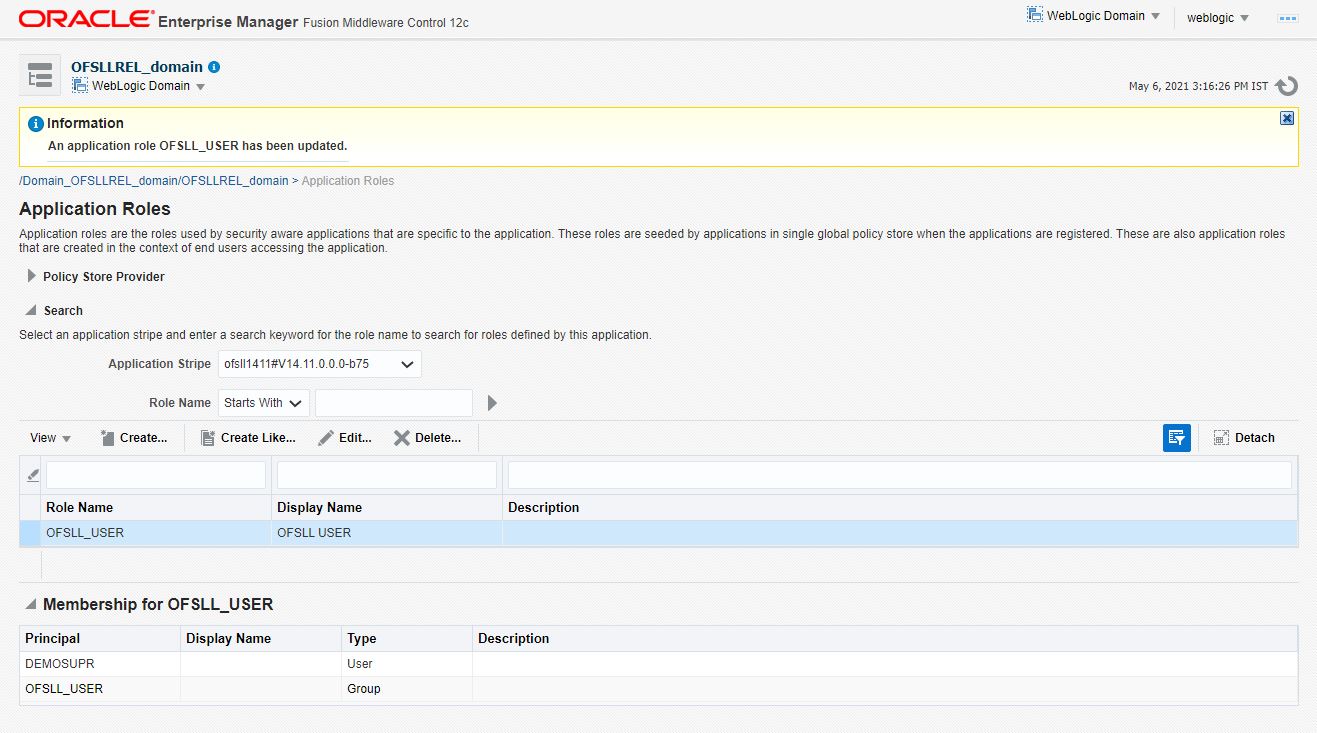
  11. The following window is displayed with the confirmation message as The Application role of 'group_name' has been updated.

    Figure 6-8 Mapping Enterprise Group 8