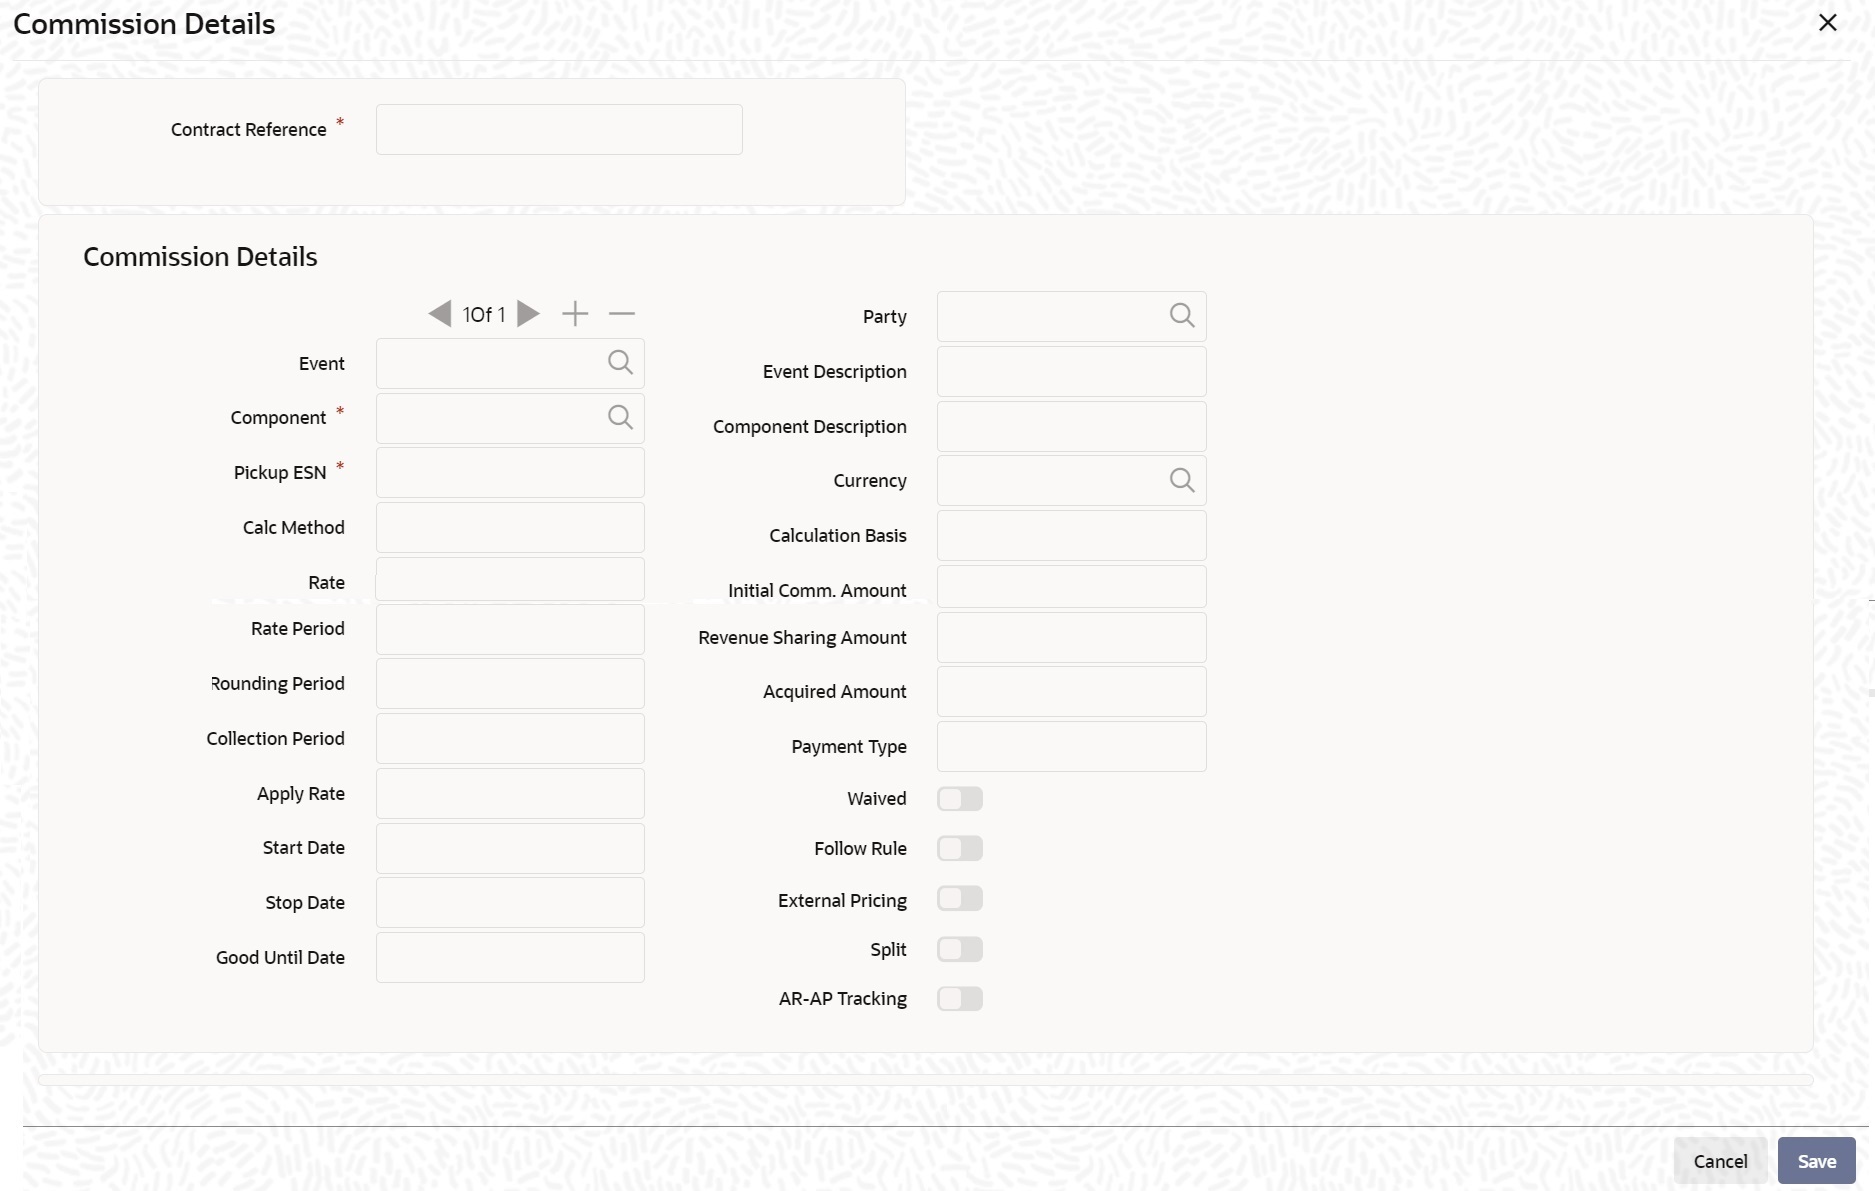
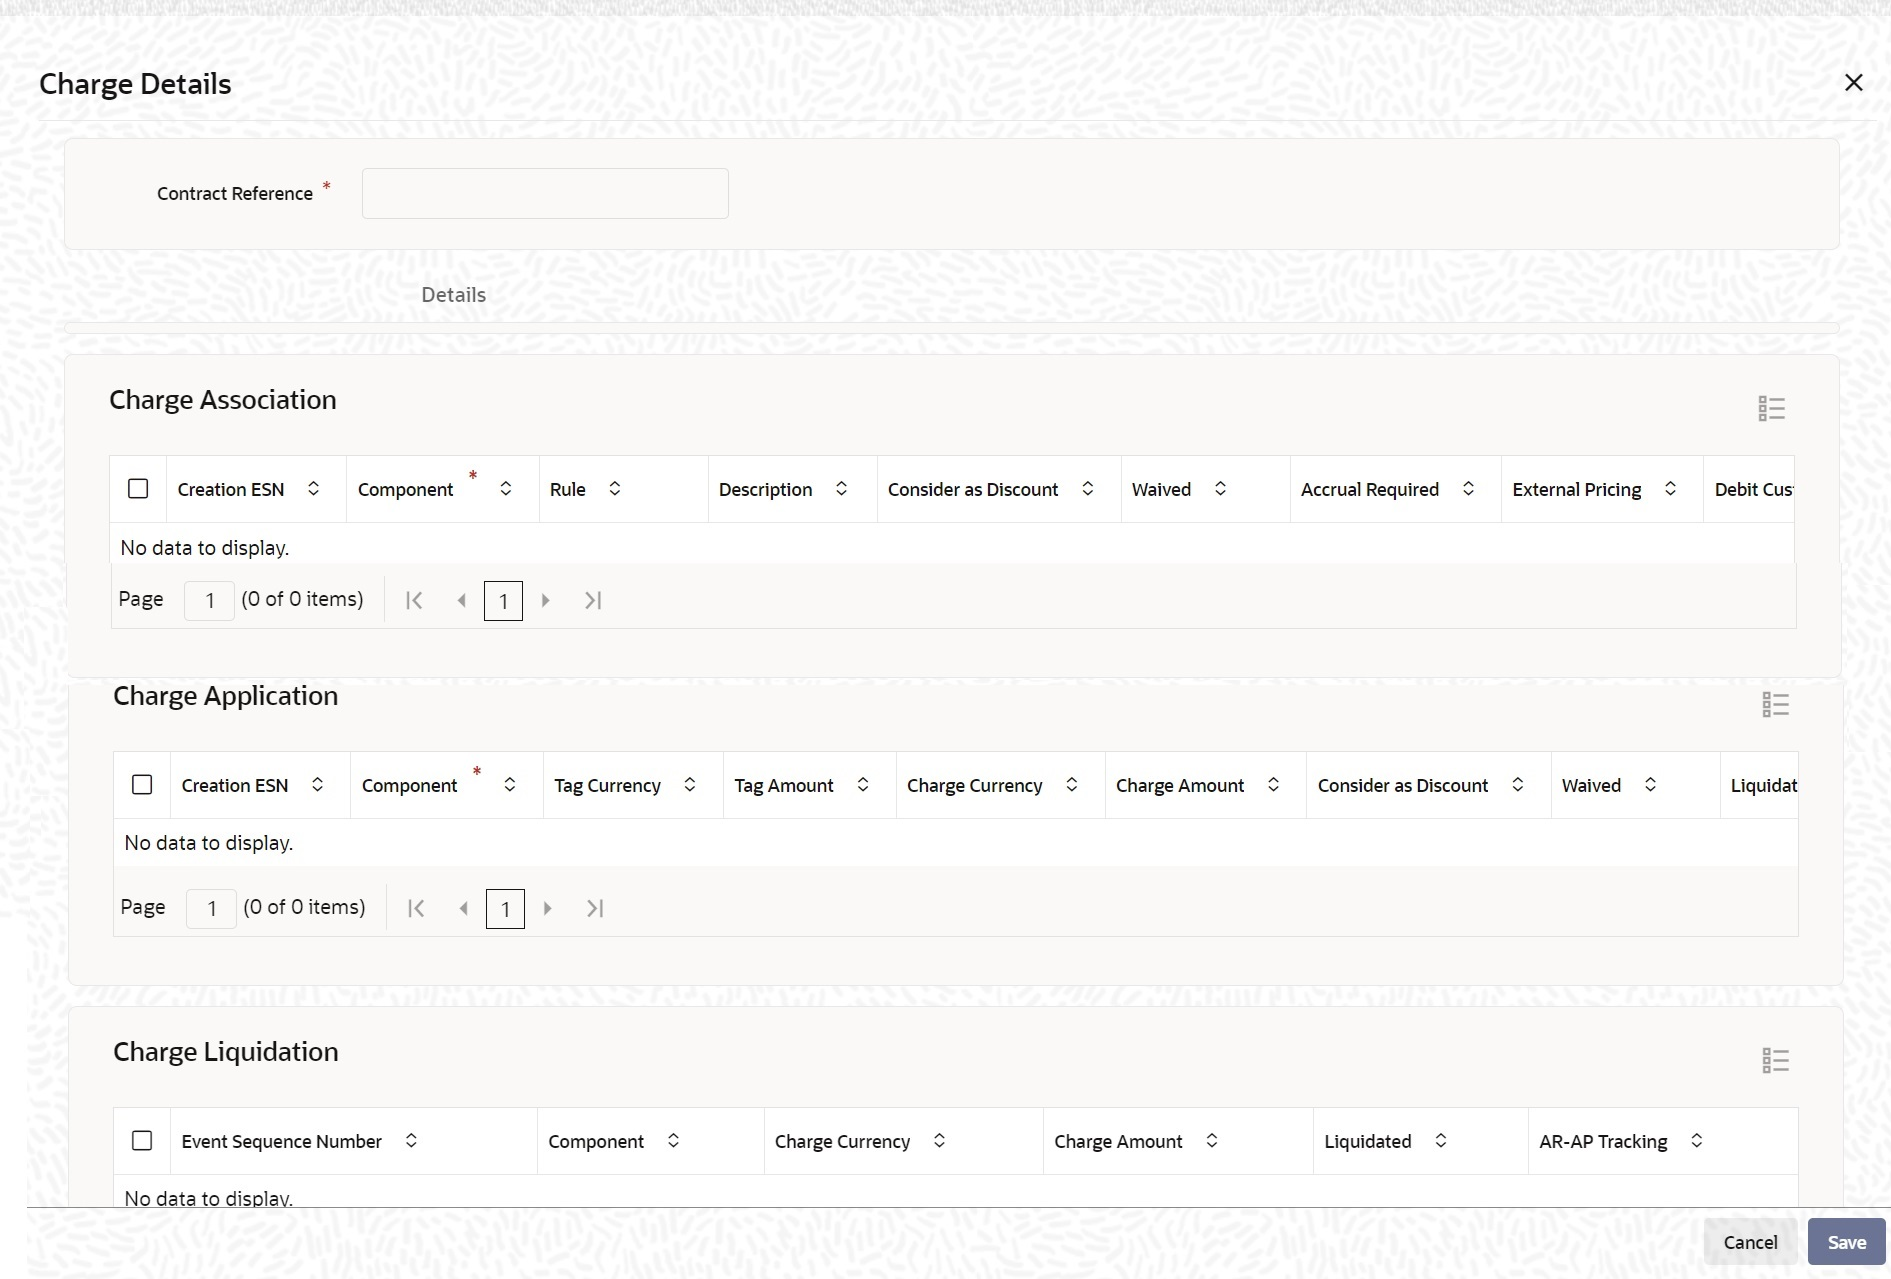
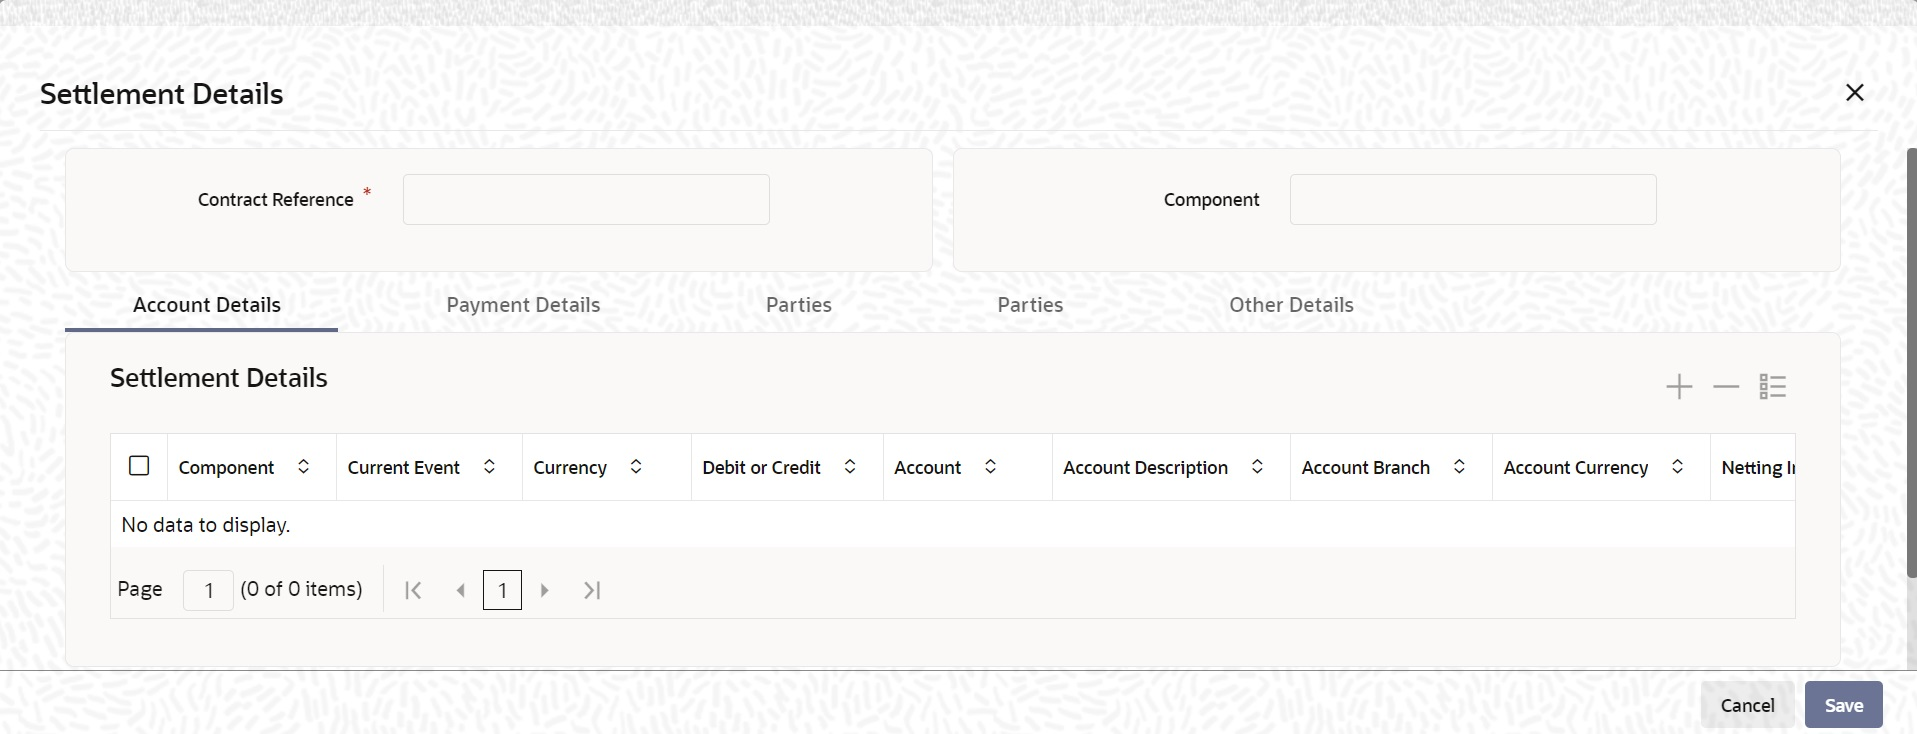
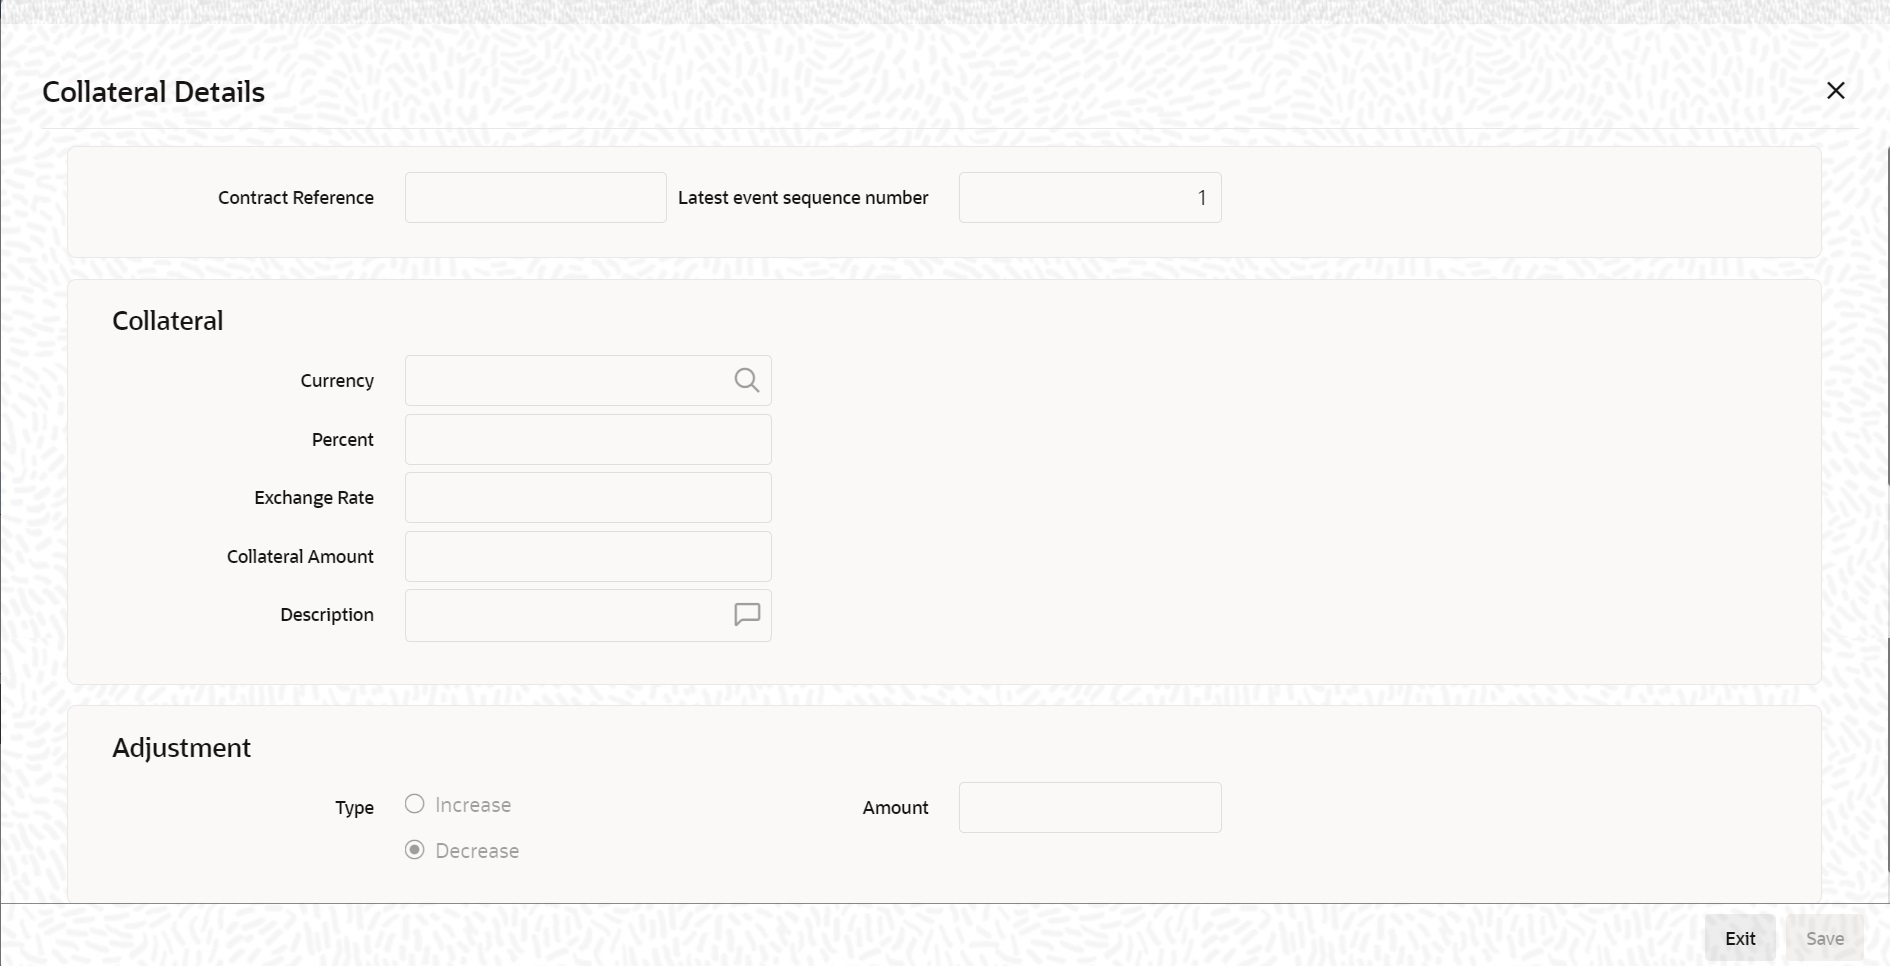
4.1.1 Capture LC Contract Details
This topic provides the systematic instruction to capture the LC contract details.
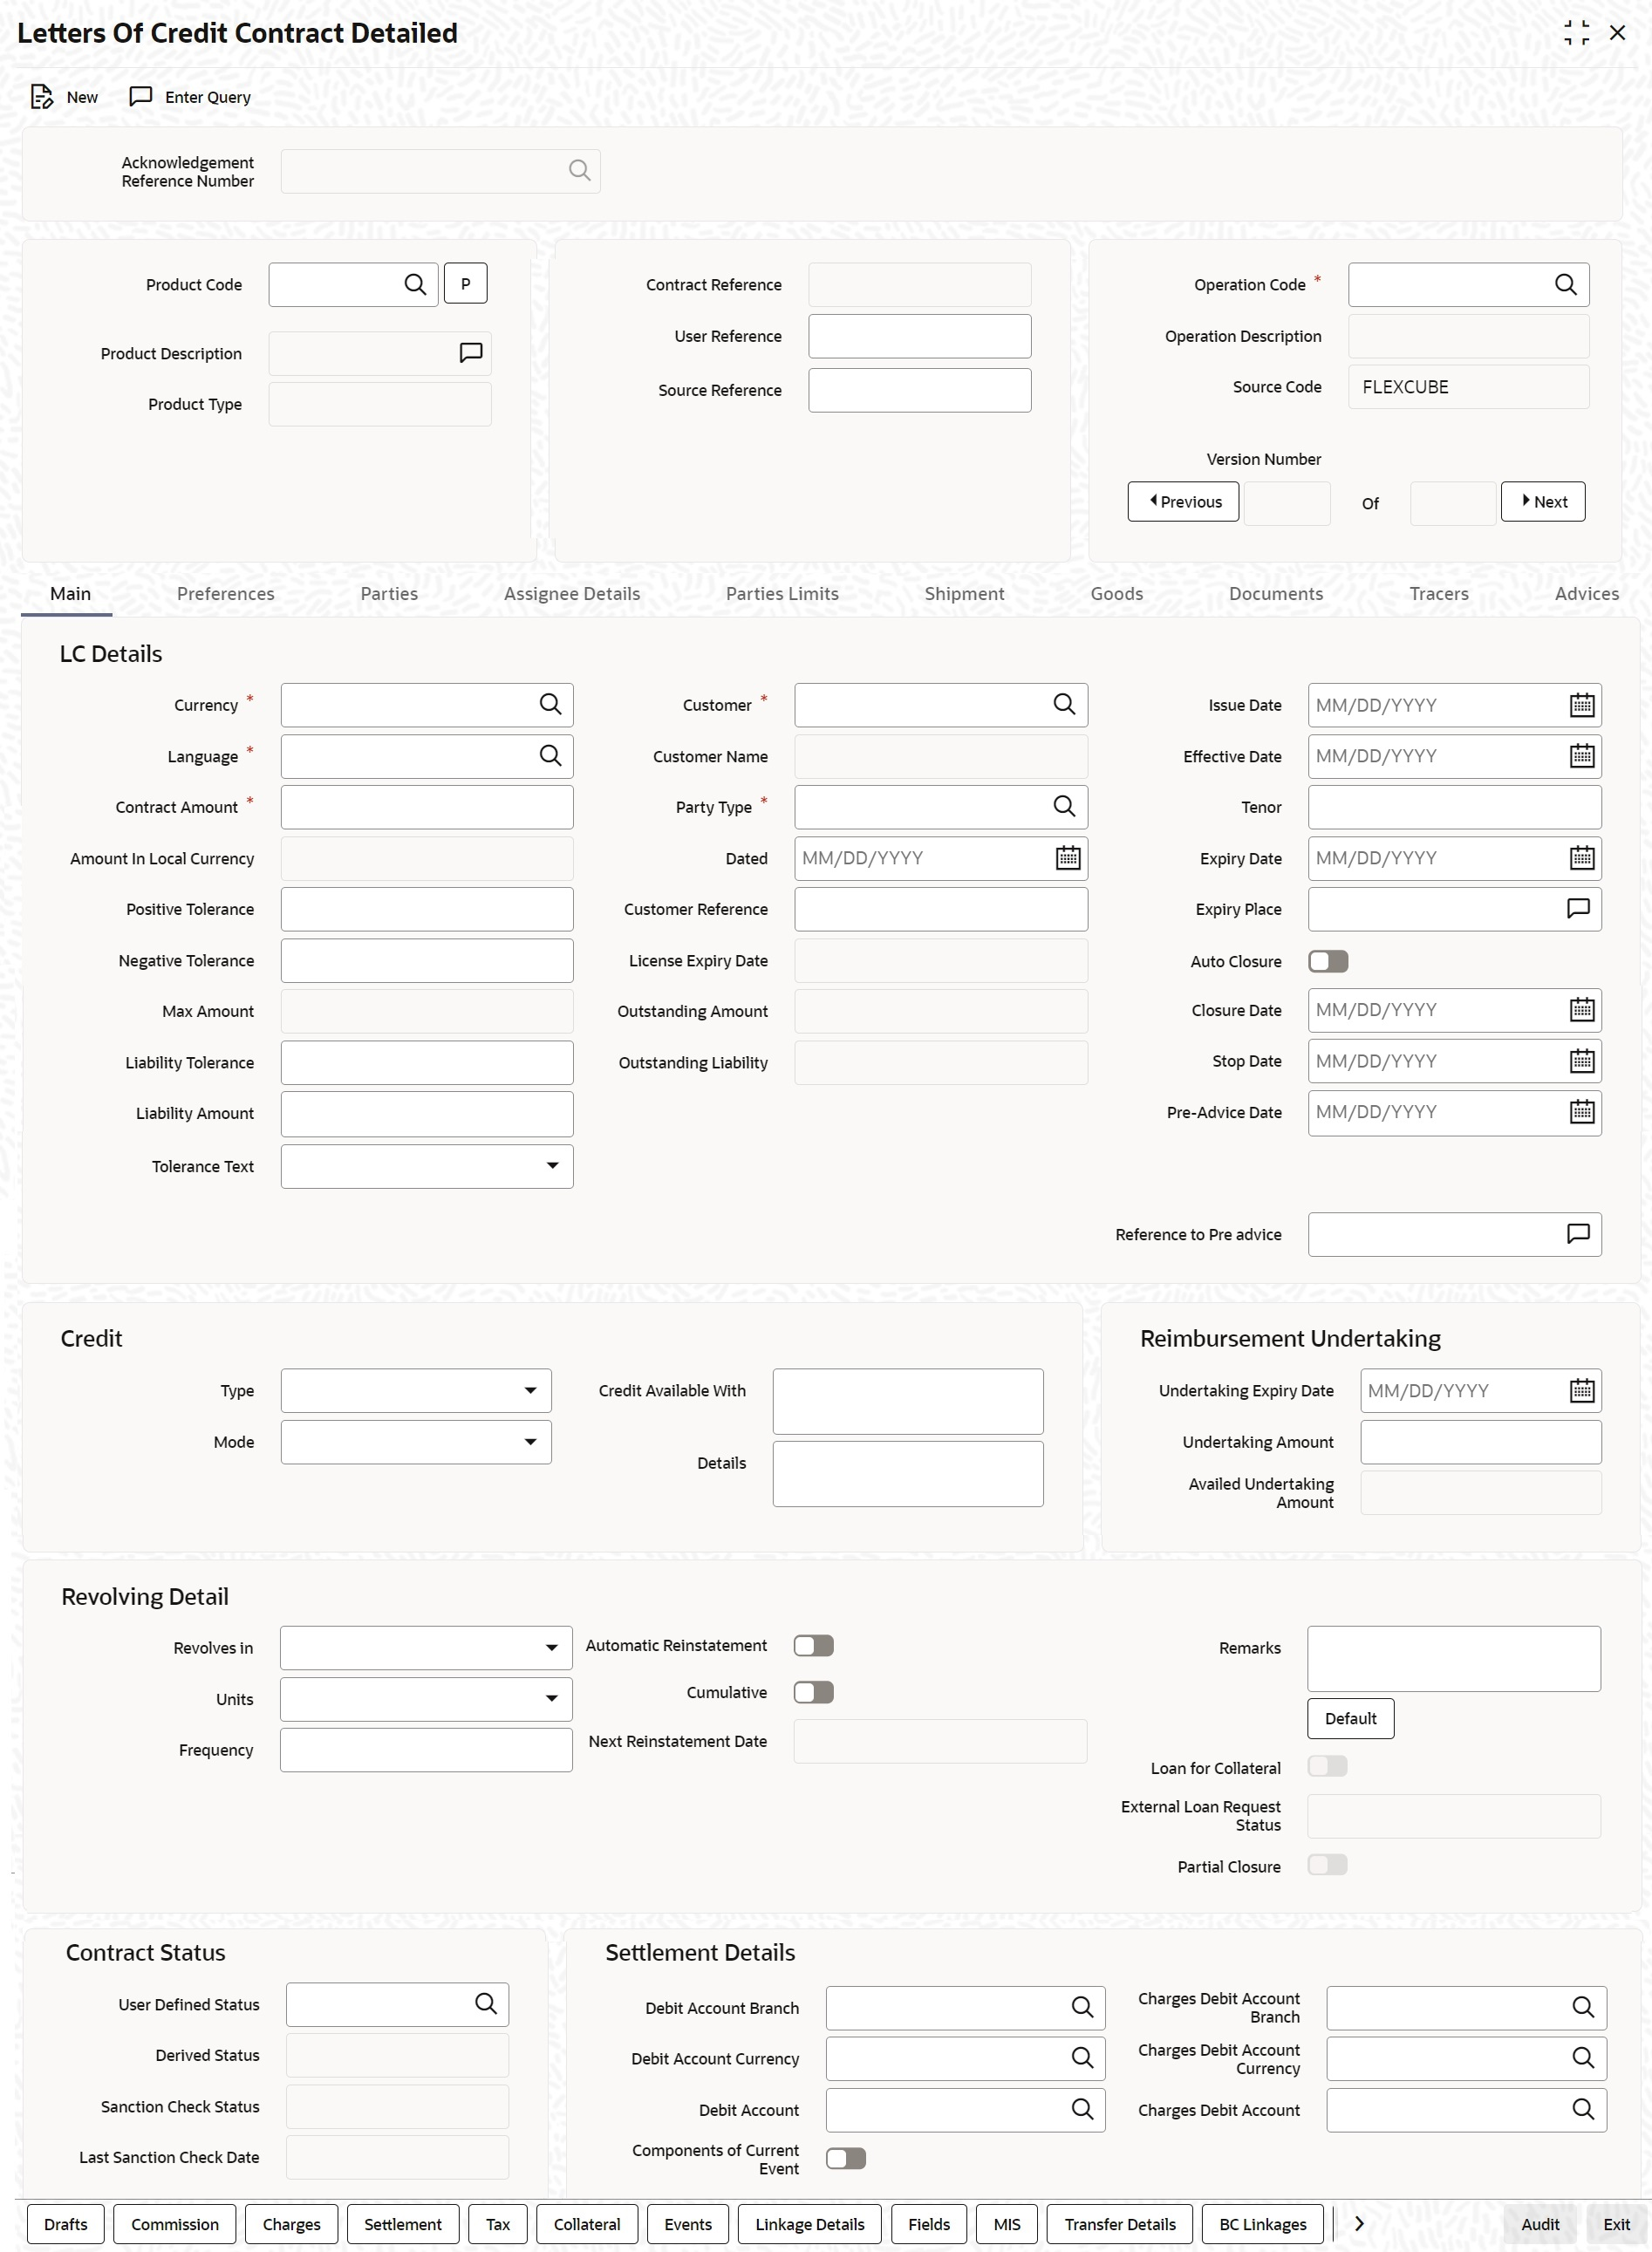
- On the home page, type LCDTRONL in the text box, click New.The Letters of Credit Contract Detailed screen is displayed with no values in the fields.
Specify the field details.
For more information on fields, refer the Field Description table given below:Figure 4-1 Letters of Credit Contract Detailed
This information is captured through the LC Contract Details Main screen. The following are the features of the contract details main screen.Table 4-1 Letters of Credit Contract Detailed - Field Description
Field Description Acknowledgement Reference Number Specify the acknowledgement reference number or you can select the reference number from the option list. The list displays all the acknowledgement reference numbers and type of registration maintained at LC registration screen which are authorized and unprocessed.
The system defaults the details captured in registration screen if acknowledgement is captured on clicking populate (P) button beside Product Code.
If Registration is for LC issuance and product code is selected BG Issue/SG issue, then the system displays configurable override on product default.Note:
System will update the status of registration as ‘Processed’ and contract reference no at registration screen, if acknowledgement reference number is captured at contract screen and (new) contract is created.This field is optional.
Product Code Select the product from the list of products created in the LC. Click populate button for details of this product to get defaulted from the Product screen.
This field is mandatory.Product Description Product description given for this product gets defaulted from the Product screen.
This field is optional.Product Type The type of product gets displayed here from the product screen, specifying if the product is of type import/export or revolving or non-revolving.
An arrangement, in which the continuing availability of the LC revolves upon shipment and/or presentation of documents and not upon specific amendment, is known as a Revolving LC.Following are the product types:- Import
- Export
- Standby (if SWIFT 2018 is enabled)
- Shipping Guarantee
Contract Reference Number The Contract Reference Number identifies a contract uniquely. It is automatically generated by the system for each contract. The contract reference number generation is based on the value of parameter REF_NUM_GEN_FORMAT in CSTB_PARAM level. If REF_NUM_GEN_FORMAT = 'O' (Old format), then contract reference number is a combinaion of the branch code(3 character), the product code(4 character), Julian date(5 digit) and a running serial number sequence(4 digit).
If REF_NUM_GEN_FORMAT = 'N' (New Format), then contract reference number is a combination of the product code(4 character), Julian date(5 digit), and a running number sequence(7 digit).
In both formats, the Contract reference number is of 16 Characters.
The Julian Date has the following format:
YYDDD Here, YY stands for the last two digits of the year and DDD for the number of day(s) that has/have elapsed, in the year.This field is optional.
User Reference Number A contract is identified by a unique User Reference Number. By default, the system generates the Contract Reference Number. This number is taken as the User Reference Number. But, you have the option to change the User Ref Number. Oracle Banking Trade Finance provides you the facility to generate the user reference number in a specific format. Refer to the Core Services User Manual for details on maintaining a sequence format.Note:
You can specify a format for the generation of the User Reference Number in the Sequence Generation screen available in the Application Browser.Source Reference The system automatically generates the Source Reference number. You can change it if required.
This message identification number is used to identify an incoming message coming from an external system. This is defined as the ICN number. On upload of an incoming message into Oracle Banking Trade Finance, this number, given by the external system, will be stored in Oracle Banking Trade Finance and passed on to the contract generated as a result of the incoming message. If the incoming message results in an outgoing message, the ICN number will be linked to the outgoing message also. This number will help you in creating a relationship between the incoming message, the resultant contract in Oracle Banking Trade Finance, and the outgoing message, if any. If an Incoming message results in an outgoing contract (outgoing message), Oracle Banking Trade Finance will store the source reference number (ICN Number) at the following levels.- Incoming Message Level
- Contract Level (Resulted due to the Incoming message)
- Outgoing message (As a result of the above contract)
Note:
The system will not allow to capture, the same source reference number for more than one advising or reimbursing contracts.This field is optional.
Operation Code The operations that you can perform on an LC are determined by the type of LC being processed. The operation that you specify will determine the accounting entries that are passed and the messages that will be generated. Select the operation code from the list based on Product Type. The type of operations that you can perform on an LC has been listed below: - Advice
- Advice and Confirm
- Confirm
- Open
- Open and Confirm
- Pre-advice
- Reimbursement
- Silent Confirmation
Note:
Silent Confirmation is applicable for export letters of credits, where the bank adds the confirmation to the letters of credit at the request of the beneficiary without the knowledge of issuing bank. Letters of credit with current operation as Advice can be modified to silent confirmation.This field is mandatory.
Version Number To navigate between the different versions, use the arrow buttons to view the previous and next version. While viewing the Detailed View screen for a contract, the latest version will be displayed. To navigate between the different versions, use the arrow buttons to view the previous and next version.Note:
When you enter a contract, it is allotted the version number, 1.Every amendment and reinstatement results in the next version of the contract being created.The LC contract will become effective in the system only after you Save the details and your supervisor authorizes it.
The system will display an override message if you save the contract with the drawee and applicant being the same. You may use your discretion to proceed or cancel the contract. You can also have this override configured as an error message in which case, the system will not allow you to proceed until you make the necessary changes.
You can view the changes made in a specific version of an LC contract. To do this, navigate to the version of the contract that you would like to view in the Contract Details screen. Click Change Log in the vertical array of buttons on the Contract Details screen. The fields that were modified in the version will be displayed along with the old (inherited) and the changed values.This field is optional.
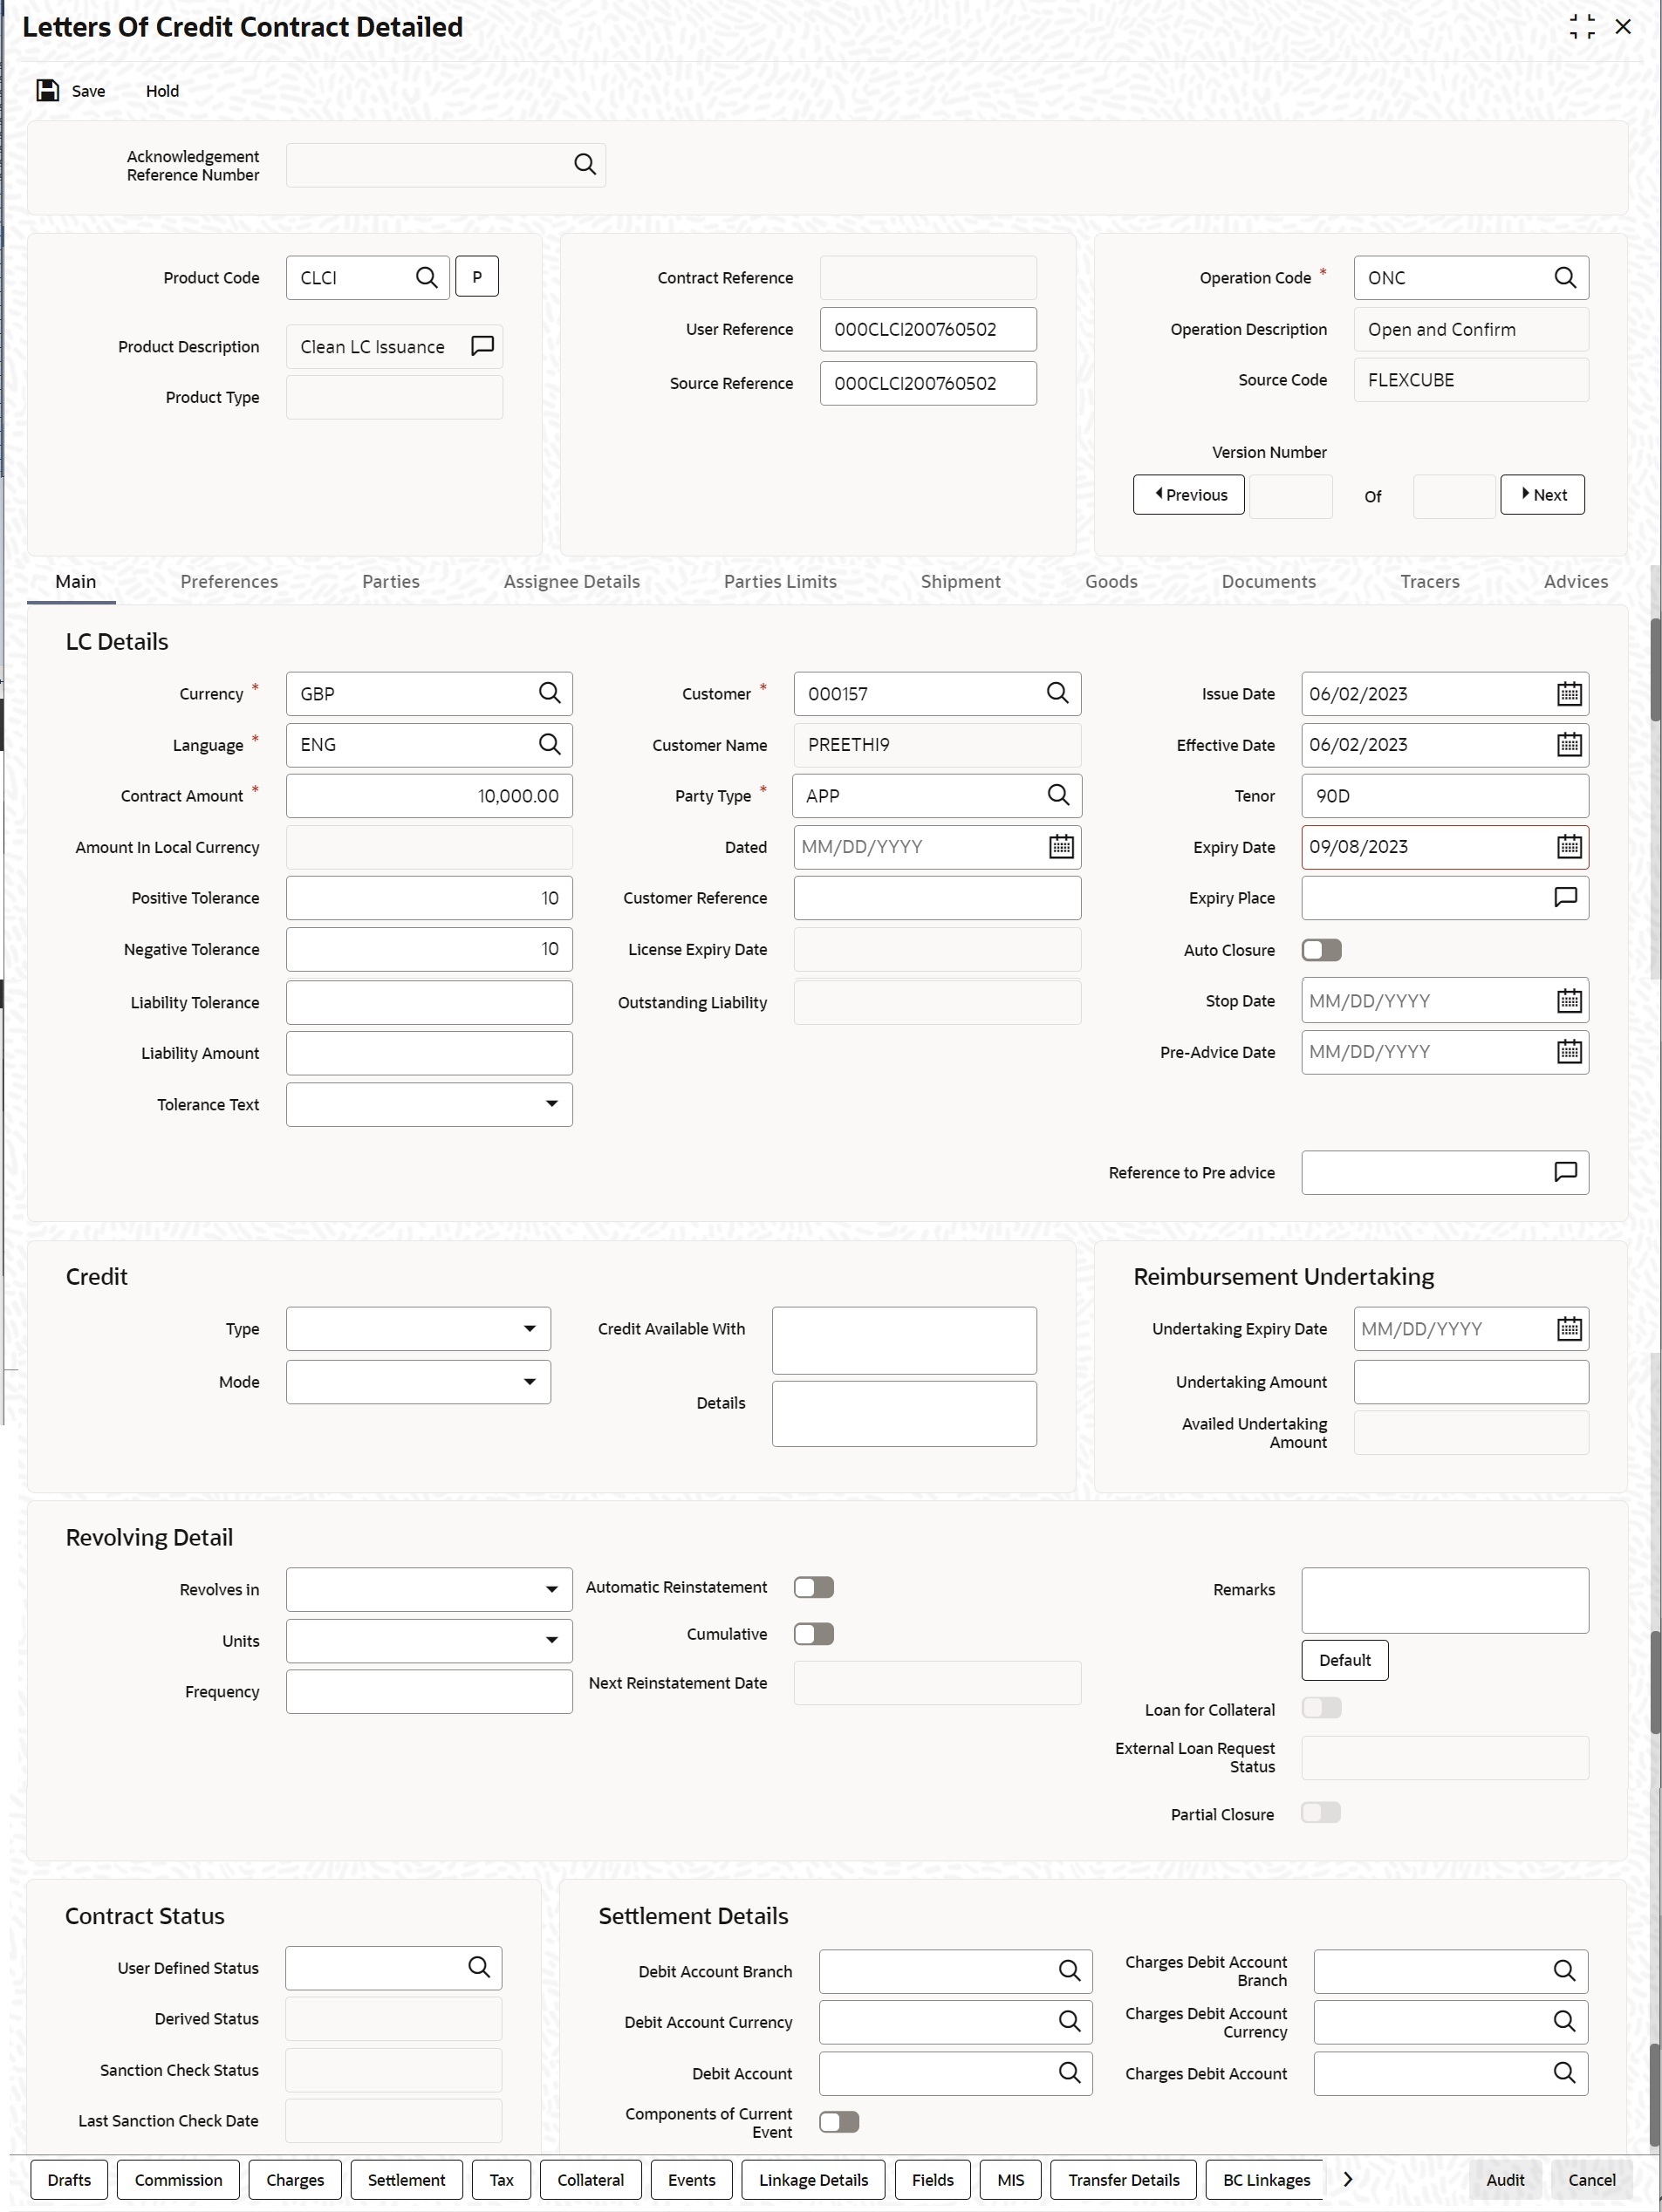
Figure 4-2 Letters of Credit Contract Input - Main
Table 4-2 Letters of Credit Contract Detailed - Main
Field Description LC Details The terms defined for an LC, form the basis on which the LC will be processed. This field is optional.
Currency The currency in which it is drawn. This field is mandatory.
Language The language to be used for the LC instrument. This field is mandatory.
Contract Amount Specify the amount for which the LC is drawn. If the contract is linked to an open insurance policy and the amount is greater than the available amount on the linked policy, the system will display an override/error message. Similarly, if the amount is greater than the limit specified for every conveyance of the linked policy, the system will display an override. This field is mandatory.
Amount in Local Currency When FCY amount is given in 'Contract Amount' field for LC, system converts in local currency and respective value is displayed in this screen. This field is mandatory for FCY contracts. Positive Tolerance The positive tolerance is the percentage that must be added to the LC amount, to arrive at the Maximum LC Amount. This amount will be considered as the LC outstanding LC amount. This field is optional.
Negative Tolerance The negative tolerance is the percentage that must be subtracted from the LC amount, to arrive at the Minimum LC Amount. The negative tolerance is captured for information purposes only. It will form part of the LC and amendment instruments. The positive and negative tolerance specified for the product associated with the LC is defaulted. If you change the defaulted Positive Tolerance, an override message is displayed.
This field is optional.
Maximum Amount The Maximum LC Amount indicates the maximum amount that can be availed under the LC. This amount is arrived at, by adding the positive tolerance to the LC amount.000 Max. LC Amount = LC Amount + Positive Tolerance If you have indicated the positive tolerance to be zero then: Max. LC Amount = LC Amount
A customer cannot, at any point in time, avail more than the Maximum LC amount.
This field is optional.
Liability Tolerance The liability percentage is used to track the maximum LC amount against a given percentage. A bank would like to limit its exposure to a new or existing customer as LC is a commitment given by the bank. Although the bank sanctions an LC limit (a maximum LC amount which includes tolerance) to a customer it may like to specify a percentage over and above this limit. This will result in the customer being shown to be liable or tracked for a higher amount. Specifying a liability percentage is from the perspective of risk management and provides a cushion to the bank. The liability amount is arrived at in the following manner:
Liability Amount = Maximum LC Amount + Liability % of the LC amount If you have indicated the liability percentage to be zero then,
Liability Amount = Maximum LC Amount This amount is computed by the system using the method indicated above, only if you have specified a liability tolerance. If a Liability tolerance has not been specified, you can enter a liability amount of your choice. However, the liability amount that you can enter should be at least equal to the maximum LC amount
Under the following circumstances, system will display an error message:- Latest shipment date of the import LC is greater than the latest shipment date of export LC.
- Expiry date of import LC is greater than expiry date of export LC.
- Import LC amount is greater than export LC amount
- If you check the option Back to Back LC for an export LC.
Liability Amount Based on the value you specify in Revolves In field, the LC Liability Amount is computed and displayed. This field is optional.
Tolerance Text Select the tolerance text from the option list. The available options are - None
- About
- Approximately
Reference to Pre-advice Specify reference to the pre-advice, if any, generated for the LC contract. A pre-advice is a brief advice of documentary credit sent by the Issuing Bank to the Advising Bank. This is to be followed by the LC instrument that contains all the details of the LC. It notifies the recipient that the named buyer has opened an LC for a specified amount on a named seller (beneficiary).
This field is optional.Note:
Modifications are not allowed after first authorization.Customer If the applicant is a customer of your bank, specify the CIF ID assigned to the customer, the related details of the customer will be automatically picked up. Specify the Customer for which you need to maintain. Select the Customer from the option list also. Third Party Customer will also be listed under list of values customer.
Note:
BIC Code appears next to the Customer only if the BIC Code is mapped with that Customer Number. If the BIC Code is not mapped with that Customer Number then the BIC Code will not appear next to the Customer in the list. If you are processing an Export LC, you must typically specify details of the beneficiary.This field is mandatory.
Customer Name If none of the parties in the LC is a customer of the bank, you must enter the CIF ID defined for the walk-in customer and give the details of one of the parties for it. The party type of the counterparty of the LC is defaulted based on the type of LC you are processing. If you process an import LC APP (indicating applicant) is defaulted. We can modify either APB or ACC for an import LC. So the accounting entires and advices will get generated for the counter party. If you process an export LC ‘BEN’ (indicating beneficiary) is defaulted. You can change the default.
This field is optional.
Party Type Indicate the party type of the customer who is the counter party of the LC. You can select the valid party type from the option list. The details of the other parties involved in the LC are captured in the Parties screen. The Customer Details specified in this screen will be defaulted to the Parties screen.
This field is mandatory.
Dated Enter the date of the Their Reference. This would normally be the date on which you have a correspondence from the party regarding the LC. This field is optional.
Customer Reference This is the reference of the party whose CIF ID you have provided. Customer Reference will be picked up appropriately in the correspondence sent for the LC. For an export LC, a reference for the Issuing Bank is mandatory. It is optional for other parties.This field is optional.
License Expiry Date By default, the Import License Expiry Date of the selected customer is displayed on the screen once you capture the CIF ID of the customer involved in the contract. The system does not do any validations based on the Expiry Date. It is used only for information purpose. This field is optional.
Outstanding Amount The balance amount available after the availment of an LC is displayed here. This field is optional.
Outstanding Liability The system displays the liability amount. This field is optional.
Issue Date Enter the date on which the LC is issued. This field is optional.
Effective Date In the LC Contract Details screen, you can capture the Effective Date of an LC. This field is optional.
Tenor All LC contracts will be associated with the standard tenor maintained for the product under which the contract is being processed. The tenor of the LC will be used in combination with the Effective Date to arrive at the Expiry Date of the LC, as follows:
LC Expiry Date = Effective Date + Tenor
In case both the tenor and the expiry date are specified, the system will ignore the tenor that is manually entered and recalculate it based on the expiry date.However, for a specific LC contract, you can choose to maintain a different tenor. The tenor of an LC can be expressed in one of the following units:- Days (D)
- Months (M)
- Years
When you change the tenor and move to the next field, the system automatically updates the expiry date based on the tenor specified.This field is optional.
Expiry Date Specify the date on which the LC contract expires. If you leave this field blank, the system will calculate the expiry date based on the tenor. Now, suppose that you have specified both the tenor and the expiry date. In that case, the system ignores the tenor and recalculates it based on the expiry date. You can modify the expiry date. When you change the expiry date and move to the next field, the system automatically updates the tenor based on the expiry date specified. The closure date, which is dependent on the expiry date, will also be recalculated. You can modify the expiry date. When you change the expiry date and move to the next field, the system automatically updates the tenor based on the expiry date specified. The closure date, which is dependent on the expiry date, will also be recalculated.
The system prompts override messages:- If the LC expiry date is later than any linked collateral’s expiry date
- If the LC expiry date extended as part of amendment is later than any limit line’s expiry date.
Note:
The system will validate when a new limit line is attached during actions other than New.This field is optional.
Expiry Place Specify the city, country, or the bank where the LC expires. This field is optional.
Auto Closure Check this option to indicate that the LC should be automatically closed. This field is optional.
Closure Date The date of closure is based on the Closure Days maintained for the product involved in the LC. The number of days specified as the Closure Days is calculated from the expiry date of the LC, to arrive at the Closure Date. LC Closure Date = LC Expiry Date + Closure Days If the ‘Closure Days’ are not maintained at the Product level, then the Closure Date is calculated as follows:
LC Closure Date = LC Expiry Date + 30 However, you can change the closure date, thus calculated, to any date after the expiry date.Note:
If the closure date falls on a holiday, the system will prompt you with an override message.This field is optional.
Stop Date This date will be defaulted to LC Expiry date. Stop date cannot be earlier than Issue date and later than expiry date. This field is optional.
Pre Advice Date Specify date on which the pre-advice was initiated using the calendar. The current date is defaulted as pre-advice date, if the operation is Pre-advice LC; however you can change to an earlier date This field is optional.Note:
Modifications are not allowed after first authorization.Credit Capture the following details Type Indicate the type of credit for which the LC is being processed. This field is optional.
Mode Indicate the mode of payment through which the LC will be settled. If you indicate the LC type as sight in the LC Product Definition screen, then you can select the credit mode as- Sight Payment
- Negotiation
- Acceptance
- Deferred Payment
- Mixed Payment
- Negotiation
This field is optional.
Credit Available With Specify details of the party with whom the credit will be available. This field is optional.
Details Specify the details of the credit. This field is optional.
Reimbursement Undertaking You can capture the following details. Undertaking Expiry Date Specify the undertaking expiry date. You can claim the reimbursement only till the undertaking expiry date, else, the system will display the following error message “The undertaking has been expired”.
This field is optional.
Undertaking Amount Specify the amount that can be reimbursed. It can be less than or equal to contract amount. The system will default the Undertaking Amount value with the Max LC Amount initially when it is created through the incoming MT740. However you can amend this field by adding the undertaking amount.
This field is optional.
Availed Undertaking Amount The system displays the availed portion of undertaken amount. - Undertaking Expiry Date and Undertaking Amount fields can be entered for reimbursement contracts only
- Undertaking Expiry date can be entered only when Undertaking Amount has been specified.
- Undertaking Expiry date cannot be earlier than the issue date or later than the LC Expiry date
- In case when LC Expiry date is not input then Undertaking Expiry date cannot be greater than the LC closure date.
This field is optional.
Revolving Detail You can capture the following details: Revolves In LCs can revolve in Time or in Value. Select the appropriate option from the drop-down list. This field is optional.
Units For LCs, which revolve in time, the maximum number of reinstatements is calculated based on the Reinstatement Frequency you specify. In the Units field, you can choose one of the following: - Months
- Days
Frequency For the letters of credit that revolve in time, you can specify the reinstatement frequency. This frequency represents the maximum number of reinstatements applicable to the LC. Based on the value you specify, the LC Liability Amount is computed and displayed. During LC reinstatement, the system calculates the next reinstatement date based on the units and the current reinstatement date. If the number of reinstatements exceeds the frequency set here, the system displays an override message when you save the LC. You need to ratify this override at the time of contract authorization.
This field is optional.Note:
Frequency is not applicable to the LCs that revolve in value. In such cases, once the LC is availed, the system reinstates it with the maximum contract amount during end of day operations. For this, the reinstatement option must be set to Automatic.Automatic Reinstatement The mode of reinstatement for a revolving LC can be either automatic or manual. Check against this field to indicate that the mode of reinstatement is automatic. This field is applicable only for an LC revolving in time.
This field is optional.
Cumulative Select cumulative check box to indicate that the LC is cumulative. Leave it unchecked to indicate otherwise. This field is optional.
Next Reinstatement Date The system computes and displays the date of next reinstatement based on the value in ‘Units’ field. This field is optional.
Remarks Specify remarks, if any. This field is optional.
Loan for Collateral Select Loan for Collateral check box to indicate that you need loans for collateral. This field is optional.
External Loan Request Status The system displays external loan request status. This field is optional.
Partial Closure The system displays partial closure status. You can check this box during the following conditions: - Unlock Operation
- If the product is not of Revolving type
- On or before the Expiry date of the LC
For Amendment of Expiry Date alone- Current Availability to be reversed to Availability before PCLS
- OS Liability to be reversed to OS Liability before PCLS
For Internal Amendment after Partial Closure,- OS Liability, Collateral and Limits to be reversed as before PCLS
- Partial Closure flag to be unchecked manually
Contract Status Specify the following details: User Defined Status Specify the status of the LC contract. The option list displays all valid statuses that are applicable. Choose the appropriate one. Derived Status The system displays the derived status of the LC contract. You cannot modify this. This field is optional.
Sanction Check Status The system displays the sanction check status once the sanction check is performed. Note:
For more information, refer the topic Process Sanction Check during Save of a Transaction The system displays any of the following statuses:- P - Pending
- A- Approved
- R- Rejected
- N - Not Required
This field is optional.
Last Sanction Check Date The system displays the last sanction check date. This field is optional.
Debit Account Branch The system defaults the details of debit account branch. The values can be modified. This field is optional.
Debit Account Currency The system defaults the details of debit account currency. The values can be modified. This field is optional.
Debit Account The system defaults the debit account. The values can be modified. This field is optional.
Charges Debit Account Branch The system defaults the details of charges debit account branch. The values can be modified. This field is optional.
Charges Debit Account Currency The system defaults the details of charges debit account currency. The values can be modified. This field is optional.
Charges Debit Account The system defaults the details of charges debit account. The values can be modified. This field is optional.
Components of Current Event System enhanced to show the amount tags pertaining to the current event in settlement screen for LC contracts. - During settlement pickup of LC contract input screen, current value of components of current event on contract input screen is considered to show the amount tags in ‘Settlements’ screen.
- If the flag is checked at contract input screen, the amount tags pertaining only to the current event will be available in settlement screen with ‘Current event’ checked.
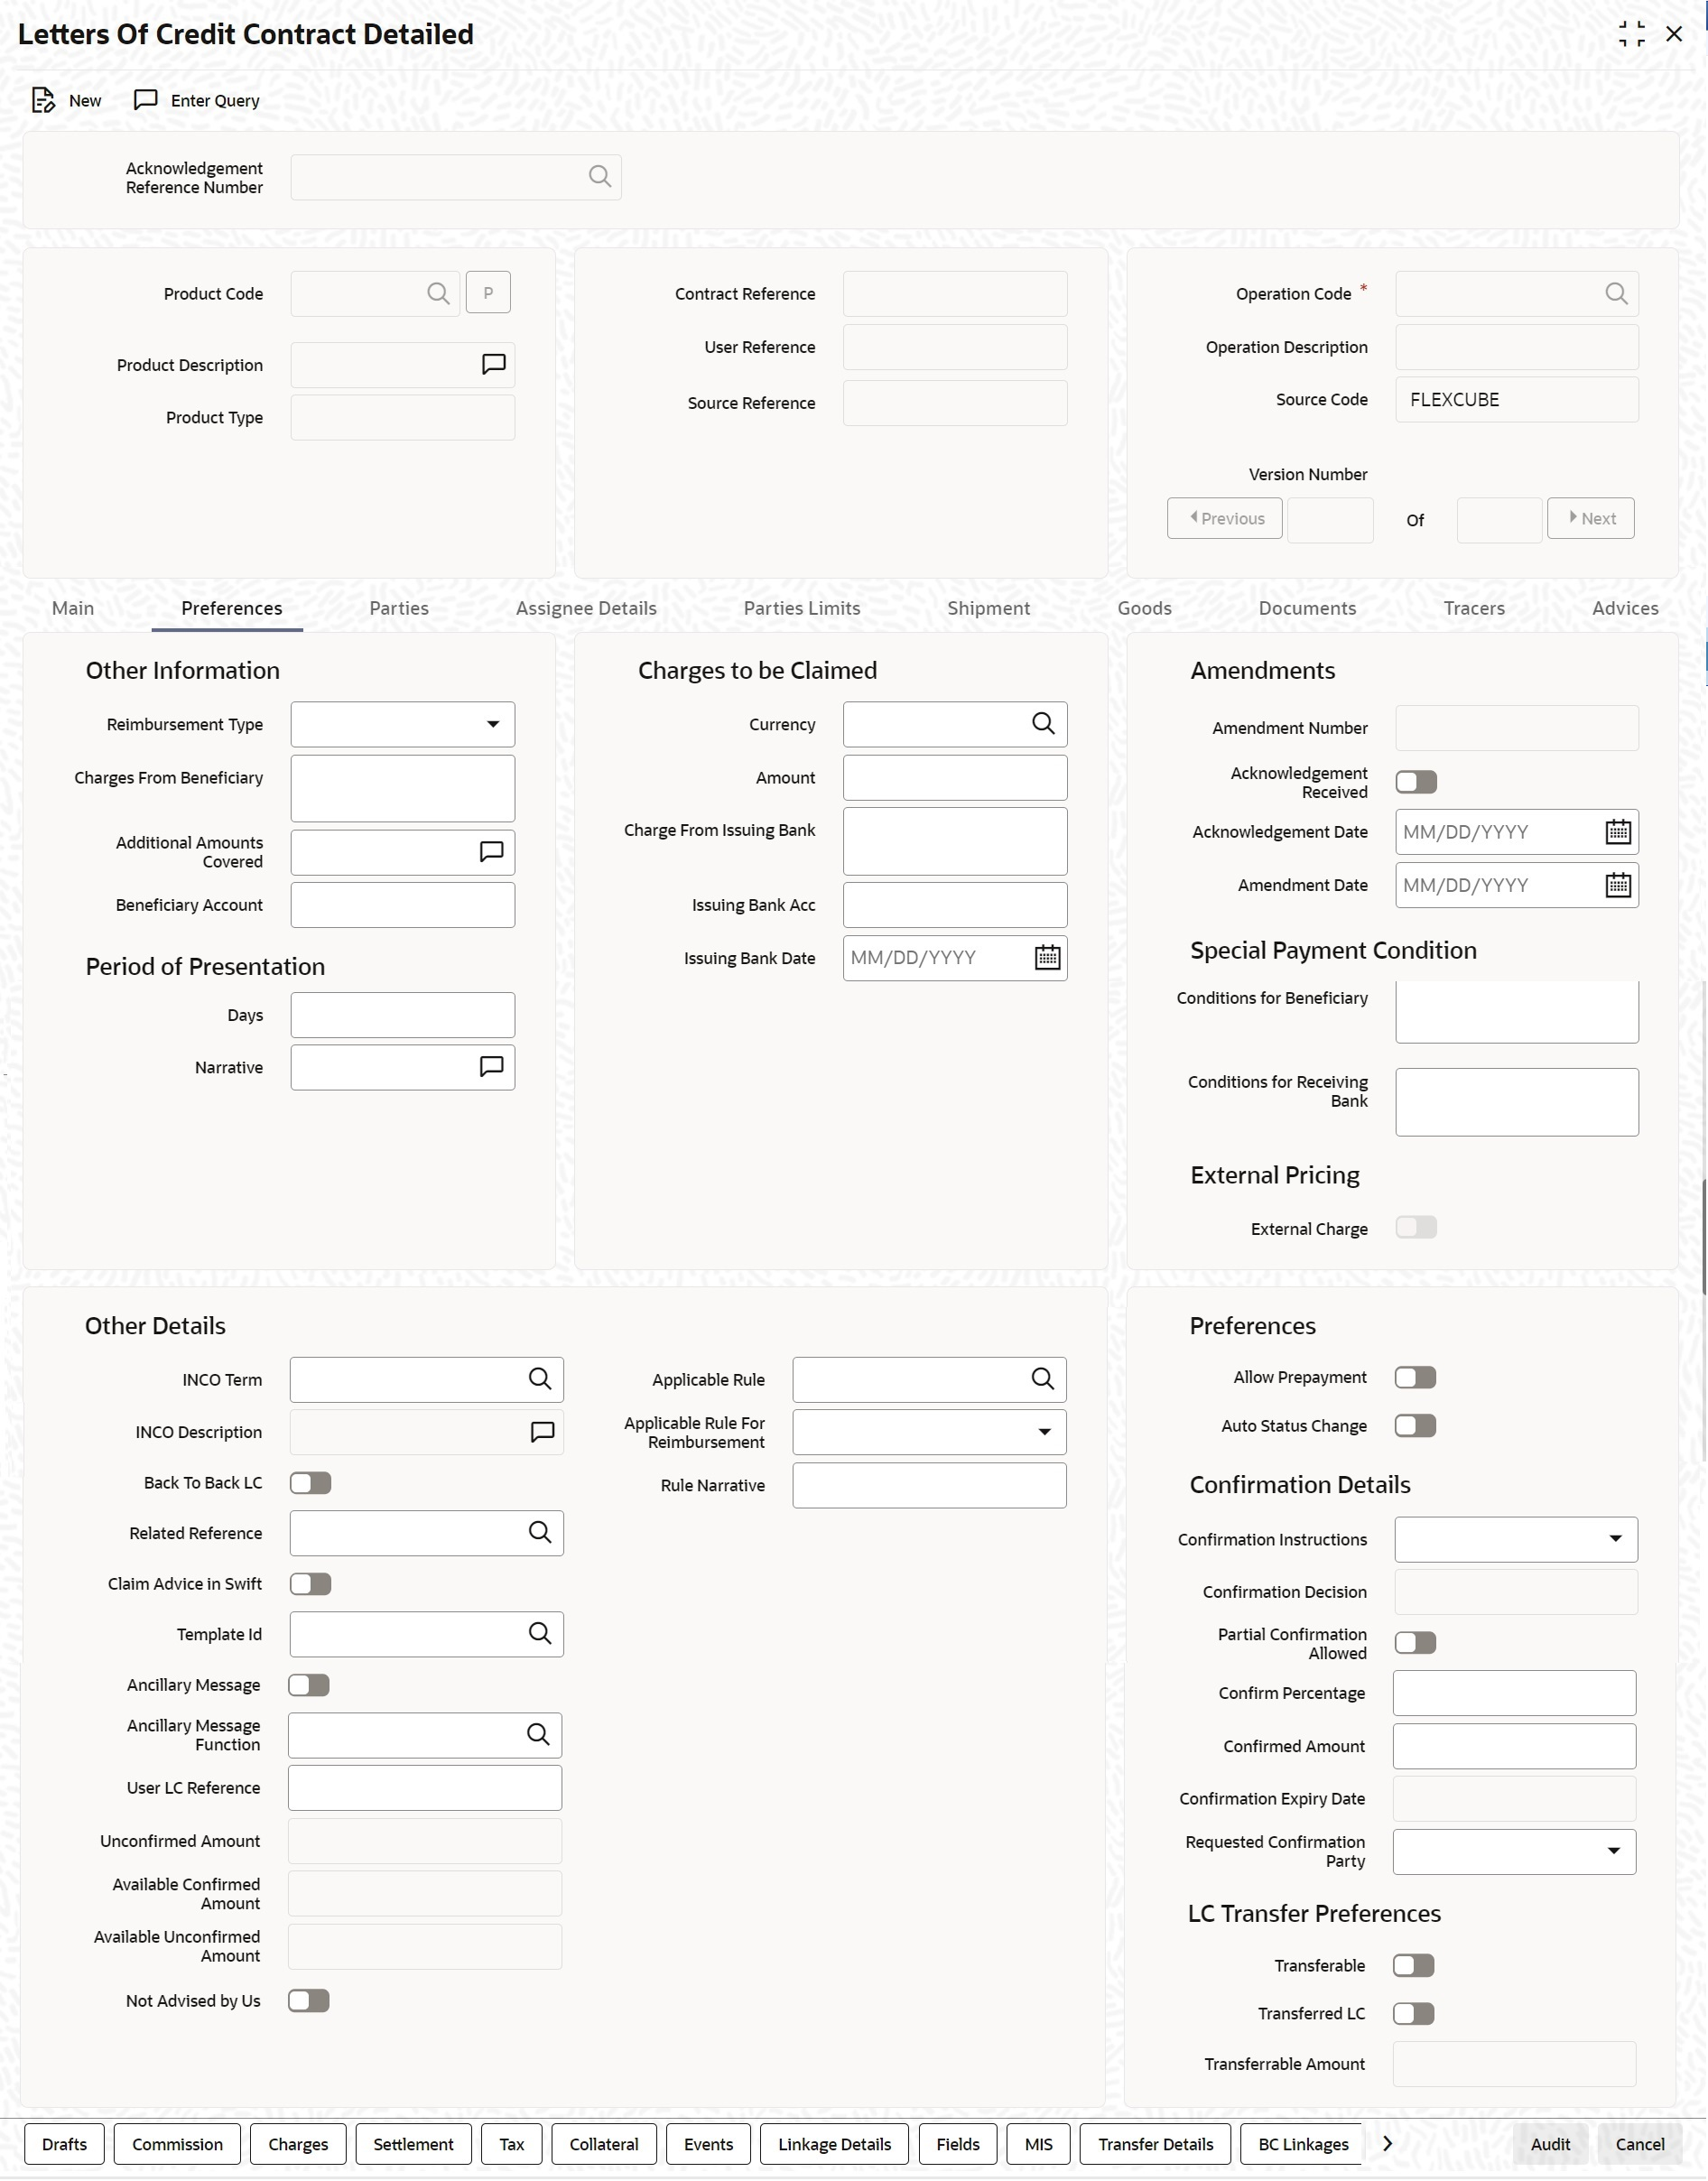
- On the Letters of Credit Contract Detailed screen, click the Preferences tab. The Other Information details is displayed.
Figure 4-3 Letters of Credit Contract Detailed - Preferences
- On the Preferences tab, specify the fields, and click Ok.You can specify certain details for SWIFT messages specific to LC and set the preferences.
Note:
The details that you specify in the fields of this screen are picked up for SWIFT messages. The SWIFT message that utilizes the information that you specify in this screen and the corresponding field of the SWIFT message which carries the input, has been listed below:For more information on these fields, refer the Field Description table given below:Table 4-3 SWIFT Messages specific to LC
Field in Oracle Banking Trade Finance SWIFT Message Field of the SWIFT message Charges From Beneficiary MT700 Field 71B Additional Amounts Covered MT 700 & MT 740 Field 39C Period For Presentation MT 700 Field 48 Charges From Issuing Bank MT 730 Field 71B Account For Issuing Bank MT 730 Field 57A Date MT 730 Field 32D Amendment Date MT707 Tag 30 Acknowledgement Received and Date MT768 Field 30 Template ID MT799 Field 79 Table 4-4 Preferences - Field Description
Field Description Other Information Capture the following details: Reimbursement Type Specify the type of reimbursement. Choose the appropriate one from the drop-down list. This field is optional.
Charges From Beneficiary The system displays the issuance charges from beneficiary. This field is optional.
Additional Amounts Covered Specify the additional amount covered. This field is optional.
Beneficiary Account Specify the account details of beneficiary. This field is read only
Charges to be claimed Specify the following details. Currency Specify the currency of the charge. This field is optional.
Amount Specify the charge amount. This field is optional.
Charge From Issuing Bank Give a brief description of the charge. This field is optional.
Issuing Bank Account Specify the account from which charge should be collected. This field is optional.
Issuing Bank Date Specify the date of charge collection. This field is optional.
Amendments Specify the following details. This field is optional.
Amendment Number The system displays the amendment number. This field is optional.
Acknowledgement Received Select this check box to indicate that the acknowledgment has received. This field is optional.
Acknowledgement Date Specify the date on which the acknowledgement is received. This field is optional.
Amendment Date The date of amendment is displayed here. This field is optional.
Period of Presentation The period of presentation defined for the product can be specified. The system uses the Expiry Date and the Last Shipment Date specified for the LC you are processing, and arrives at the period of presentation.
If the sum of the latest shipment date and period for presentation is greater that the expiry date of an import LC, the system will display an override message. This is true only in cases where the Latest Shipment Date field is not blank.
This field is optional.
Days Specify the number of calendar days after the date of shipment within which the documents must be presented for payment, acceptance or negotiation. This field is optional.
Narrative Specify the details of date of document submission. This field is optional.Note:
For details, refer the heading Specifying the Period of Presentation’ in chapter Creating Products, in the LC User Manual.Conditions For Beneficiary Specify the payment conditions for beneficiary. Specify the payment conditions for receiving bank. This field is optional.
Conditions for Receiving Bank Type the conditions for the receiving bank in the text box and click Ok. Specify the payment conditions for receiving bank. Note:
The typed text is displayed against the Conditions for Receiving Bank field.Other Details Specify the following details: INCO Term Specify the INCO term related to goods that are a part of the LC instrument. You can select one of the following values from the option list: - EXW - EX Works (…named place)
- FCA - Free Carrier (…named place)
- FAS - Free Alongside Ship (…named port of shipment)
- FOB - Free On-Board (…named port of shipment)
- CFR - Cost and Freight (…named port of destination)
- CIF - Cost Insurance Freight (…named port of destination)
- CPT - Carriage Paid to (…named place of destination)
- CIP - Cost Insurance Paid (…named place of destination)
- DAF - Delivered at Frontier (…named place)
- DES - Deliver Ex Ship (…named port of destination)
- DEQ - Delivered Ex Quay (…named port of destination)
- DDU - Delivered Duty Unpaid (…named place of destination)
- DDP - Delivered Duty Paid (…named place)
- DPU - Delivered at Place Unloaded
Once you choose the INCO Term, the documents and clause details will be displayed based on the maintenance for the chosen INCO term in the INCO Terms Maintenance screen. However, if you change the INCO term, the document and clause details will be not be updated automatically. You will have to manually change them if required. However, the system will check whether the document and clauses details are the same as those defined in the INCO Term Maintenance screen.The INCO term is picked up and displayed in field 45A of MT700.
This field is optional.Back to Back LC Check this option if you want to link an export LC to an import LC. This field is applicable only for import LCs. If you check this option, you will have to specify the export LC which you want to link to the import LC in the Reference Number field. All active and authorized export LCs of the same counterparty will be available for selection in the option list Reference Number. An export LC can be linked to only one import LC.
This field is optional.Related Reference Number Specify the related reference number. Choose the appropriate one from the option list. While issuing a guarantee, the option list displays all valid bill of lading reference numbers and import LCs. Similarly, while issuing a back to back LC, the option list displays all valid export LCs maintained in the system. You can choose the appropriate one.
This field is optional.Claim Advice in Swift Check this box to generate the charge claim advice in MT799 SWIFT format. This field is initially defaulted from product level. However, you can then check or uncheck it at the contract level.
This field is optional.Template ID Specify the template ID related to MT799 message types from the option list. This field is optional.Note:
You can enter the values only if the Claim Advice in Swift field is checked.Ancillary Message Check this box to generate MT 759 on contract authorization. This field is optional.
Ancillary Message Function Specify the ancillary message function. Alternatively, you can select the ancillary message from the option list. The list displays all valid options maintained in the system. Ancillary Message Function is mandatory if Ancillary Message is checked. This field is optional.
User LC Reference Number System displays the Contract User Reference as the User LC Reference Number. The reimbursement LC, under which the bill is availed, and the Export LC linked to the bill, should contain the same User LC Reference Number. This field is optional.
Applicable Rule The system defaults the applicable rule from the product level. However, you can modify this. Please refer to the section Specifying the Applicable Rules under chapter Defining Product Attributes in this user manual. This field is optional.
Applicable Rule For Reimbursement Select the applicable rule for reimbursement from the drop-down list. The available options are :- URR Latest Version
- Not URR
Rule Narrative This is enabled only if Applicable Rule is set to OTHR. The system defaults the rule narrative from the product level. However, you can modify this. Please refer to the section Specifying the Applicable Rules under chapter Defining Product Attributes in this user manual. Unconfirmed Amount The system displays the current maximum unconfirmed LC amount. This amount is derived by deducting the confirmed amount from the maximum LC amount. This field is optional.
Available Confirmed Amount The system displays the available confirmed portion of the maximum LC amount. This field is optional.
Available Unconfirmed Amount The system displays the available unconfirmed portion of the maximum LC amount. This field is optional.
Not Advised by Us Select this check box to indicate that contract is advised by other bank. This field is optional.
External Charge While booking a contract under a product for which External Charges is enabled at product level, it defaults the same value for contract also which fetches external charges from external pricing and billing engine. Preferences You can set the preferences for the following fields. Allow Prepayment Select Allow Prepayment check box to indicate that the customer can make a prepayment on the contract.
This field is optional.Confirmation Instructions Specify the confirmation option to indicate that the LC can have an associated confirmation message. You can select one of the following options from the option list: - Null
- May Confirm
- Confirm
Specify the type of the confirmation instruction that should be sent to the advising/confirming bank if you are issuing the LC (whether Field 49 of MT 700 should be ‘Null’, ‘Confirm’, or ‘May Confirm’).
This field is optional.Confirmation Decision Confirmation decision will be display only field, which will be defaulted with the value as, - Confirm - When the ‘Operation’ of LC is ‘CNF’ and ‘ANC'
- Silent Confirmation – When the operation of LC is SCF
- Blank – When the operation of LC is other than CNF, ANC and SCF.
Partial Confirmation Allowed Select Partial Confirmation Allowed check box to confirm the partial amount. The remaining amount can be confirmed after you receive the approval from the external agent. Note:
This field is initially defaulted from product level. However, you can then check or uncheck it at the contract level.Auto Status Change The system defaults the status of the checkbox based on the product maintenance. However, you can modify this. If you check this box, the system picks up the contract during EOD operations for status processing. If you do not check this, the system will not consider the LC contract for automatic status processing.
This field is optional.Confirm Percentage Specify the percentage of LC Amount to be confirmed or silent confirmed. If percentage is not specified, the system will calculate the percentage based on the confirm Amount specified.
Confirmation percentage will be defaulted to 100%
during silent confirmation change of operation.This field is optional.
Confirmed Amount Specify the amount to be confirmed or silent confirmed. If Confirm Amount is not specified, the system will calculate the confirmed amount based on the Confirm Percentage specified. If both Confirm Amount and Confirm Percent are specified then the system will display an override message as “Both Confirm Amount and Confirm Percent are entered. Confirm Percent is considered for calculation.”
The system will calculate and display the Confirm Amount based on the confirm percentage specified. Confirm Percentage and Confirm Amount can be changed or recalculated either on save or on pressing LC Default Button available in Main tab of LC Online screen.
During silent confirmation change of operation, confirm percentage and confirmed amount will be defaulted to 100% and LC outstanding amount respectively.
The system will display an error message for the following conditions:
- If Partial Confirmation Allowed check box is unchecked and if you specify the values in Confirmation Percentage and Confirmation Amount fields.
- If the value of the amount confirmed is greater than the unconfirmed unavailed amount.
- If the value of the confirm amount is lower than the availed confirmed amount.
- If Operation is confirm or advice and confirm and confirm or silent confirmation percent is greater than 100 or confirm Amount is greater than LC current availability.
- If the operation code is set to Advice or Pre-Advice and if you specify the Amount Confirmed and ‘Confirmation Percentage’.
- If the operation code is set to Confirm or Advice and Confirm and if you have not specified the values of the amount confirmed and the percentage of confirmation, then the system will default the percentage as 100, value of LC maximum amount.
- If Partial Confirmation Allow flag is checked for product other than Export.
- If Partial Confirmation Allow flag is checked when LC Operation is other than Advice, Pre-advice, Confirm or Advice and Confirm. Requested Confirmation Party.
- Null
- Advising Bank
- Advice Through Bank
- Confirming Bank
Requested Confirmation Party Select the Requested Confirmation Party from the drop-down list. The available options are: - Advising Bank
- Advice Through Bank
- Confirming Bank
LC Transfer Preferences You can set the preferences. Transferable Check this option to indicate that the LC is transferable. This field is optional. Transferred LC Check this option for indicating the given LC is transferred LC.
This field is optional.Transferable Amount This field displays the transferable amount calculated using the LC amount.
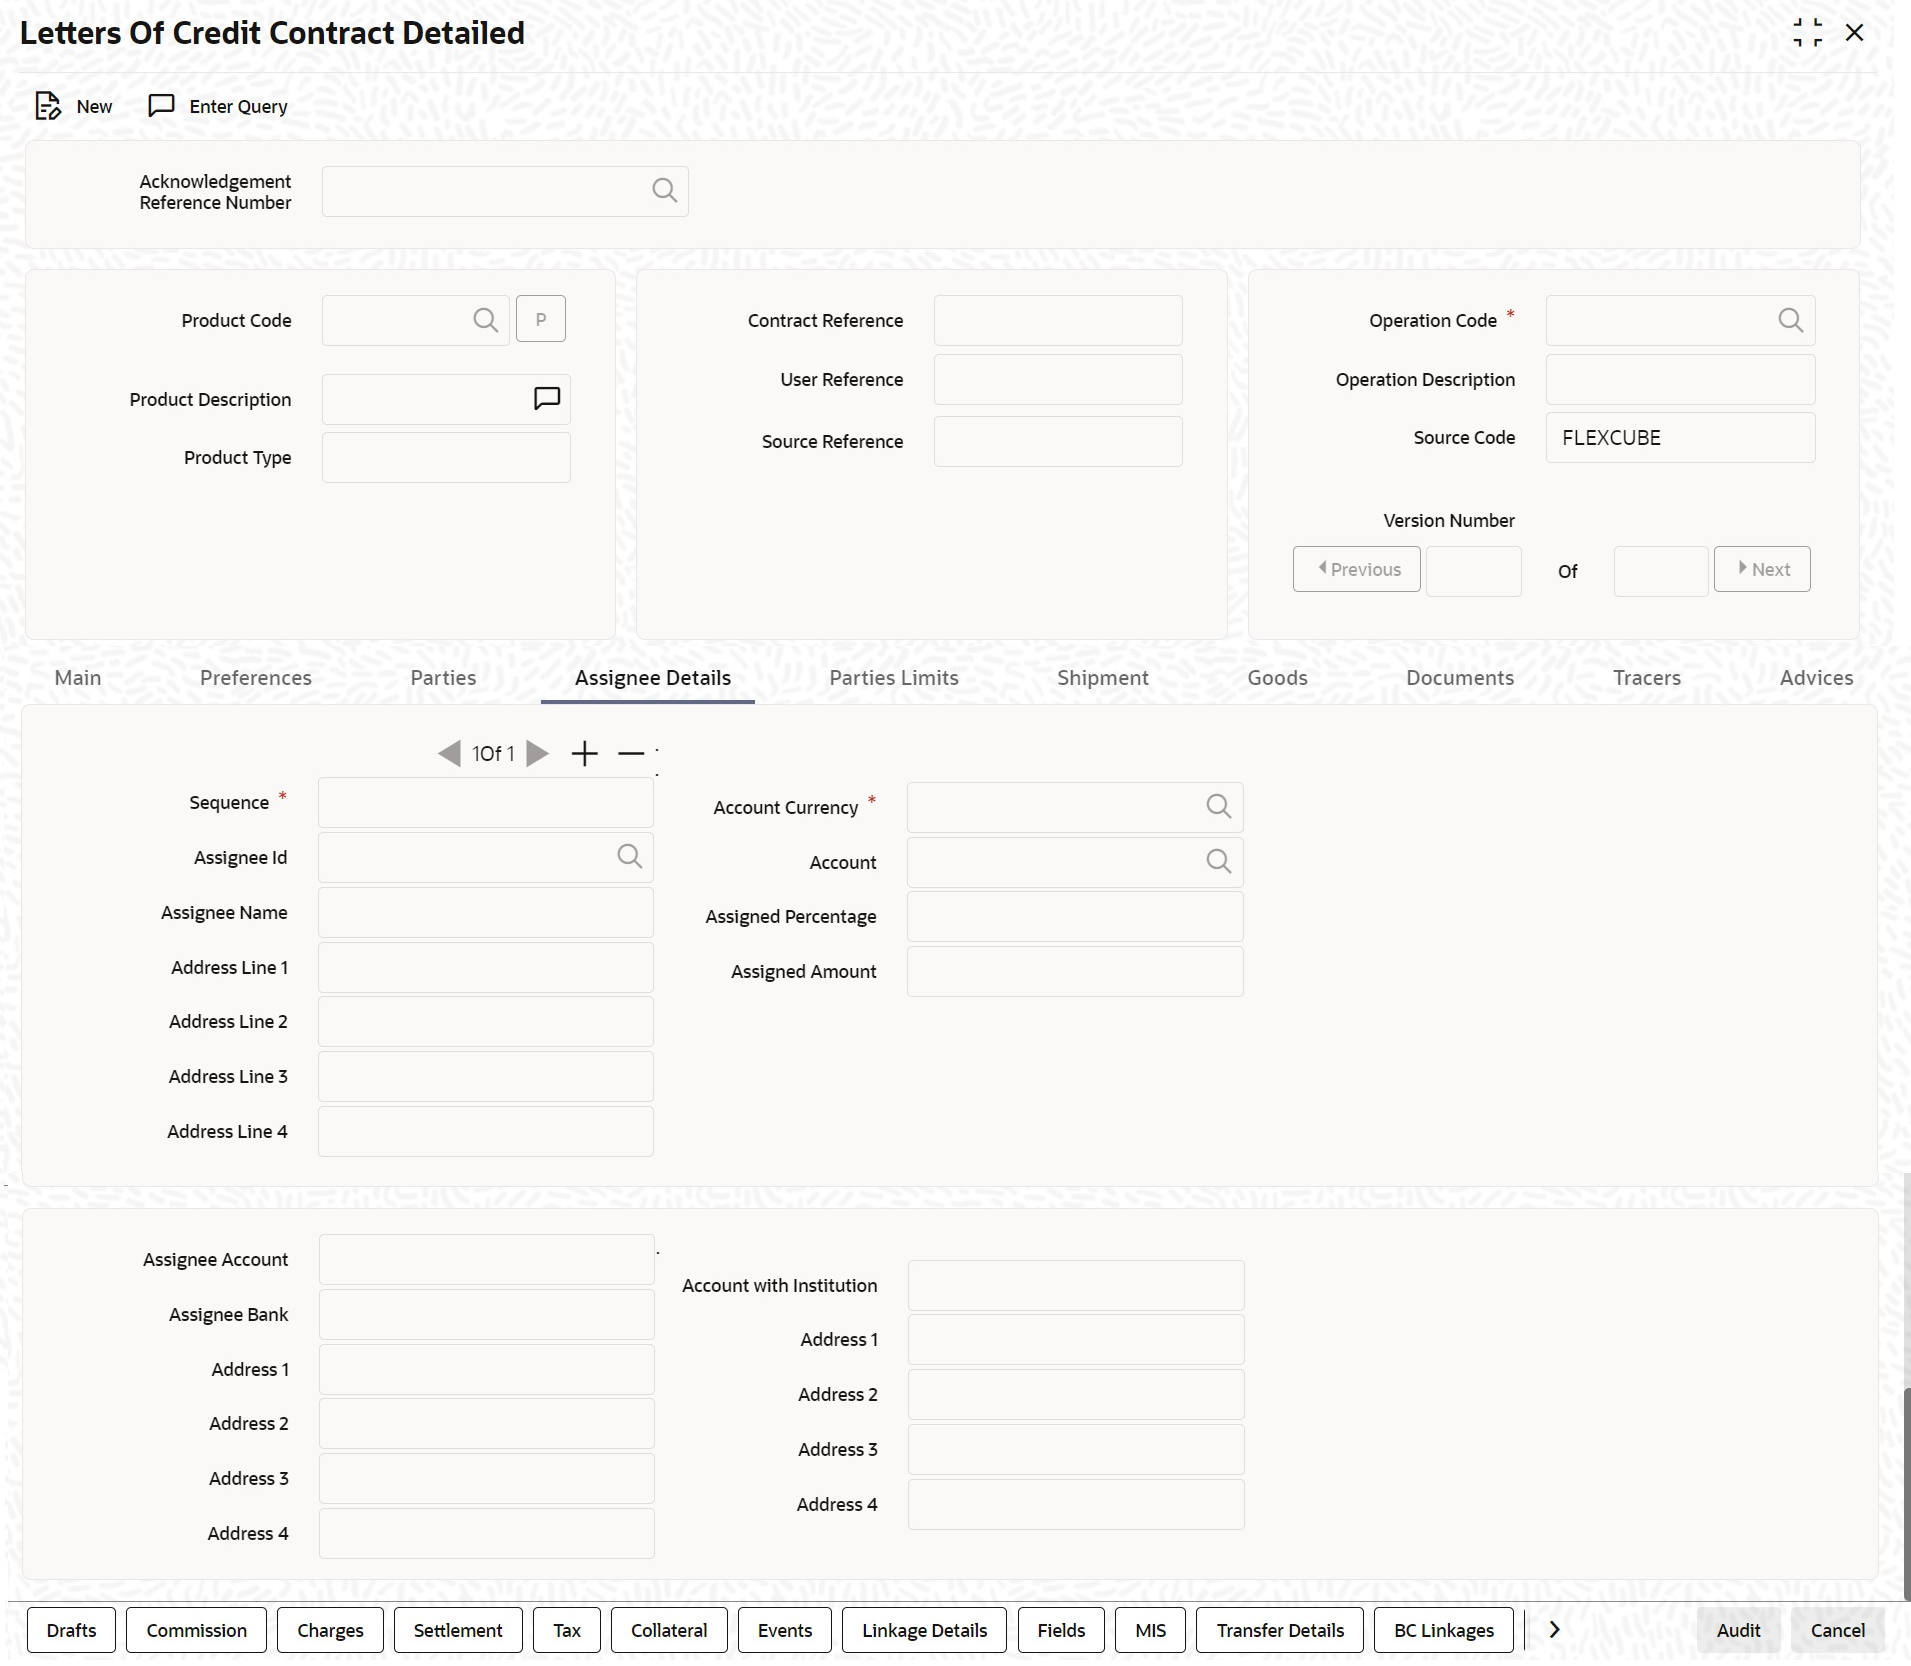
This field is optional.Assignee Details Assignee can be walk-in customers, Bank customers and Third Party customers. For Third Party Customers,user must maintain those parties in Third Party screen (TFDTPMNT) It will be possible to maintain assignee details in export type of letter of credit contract. Assignee can be added/modified/deleted in LC during internal amendment if Bill is not booked under LC with assignee details else system will provide appropriate error message. You can set the following assignee details: Sequence Sequence in which the assignee details are maintained. Value for this should be greater than or equal to zero. Sequence will not accept any decimal points. This should be unique.
This field is mandatory.Assignee Id To maintain the party ID. This will fetch all the parties maintained in Other Party screen. It will not be possible to maintain the same assignee multiple times.
This field is mandatory.Assignee Name Assignee name will be displayed based on the Assignee Id.
Assignee name can be modified only Walk-in Customer.
This field is optional.Assignee Address Line 1 Address Line 1 will be displayed based on the Assignee ID. Address Line 1 can be modified only for Walk in customer.
This field is optional.Assignee Address Line 2 Address Line 2 will be displayed based on the Assignee ID. Address Line 2 can be modified only for Walk in customer.
This field is optional.Assignee Address Line 3 Address Line 3 will be displayed based on the Assignee ID. Address Line 3 can be modified only for Walk in customer.
This field is optional.Assignee Address Line 4 Address Line 4 will be displayed based on the Assignee ID. Address Line 4 can be modified only for Walk in customer. This field is optional. Account Currency Specify the currency of the account of the assignee. This field is mandatory.
Account Specify the account to which the amount should be credited. This can be the account of the assignee with the bank if he is a customer of the bank. If he is not the customer of the bank then this can be the Nostro account of his bank maintained in the current bank. If Assignee is a bank customer ( Individual/Corporate/Bank customer) then Account LOV will provide customer accounts maintained in External Customer Account for the selected bank customer. If Assignee is a Third party or Walk in customer then Account LOV will display the NOSTRO accounts for the currency.
This field is mandatory.Assigned Percentage Specify the percentage of assignment to the assignee. Sum of assignee percentage should not exceed 100 percent. Either Assigned Percentage or Assigned Amount should be entered. If assigned percentage is provided and assigned amount is not provided, system will compute assigned amount based on assigned percent of contract amount. If assigned amount is provided and assigned percentage is not provided, system will compute assigned percentage based on assigned amount. If both assigned percentage and assigned amount is provided, system will compute assigned amount based on assigned percentage.
If both assigned percentage and assignment amount is not provided, system will provide error message.Assigned Amount Specify the amount of assignment to the assignee in LC currency. This should be greater than zero. Decimal points will be based on the LC currency. If assignment details are maintained for any product type other than export type, system will throw an error message. It will be possible to amend these values. If the amendment amount is reduced, there will be a validation to check whether it goes below from that used already in BC contract. If yes, system will throw an error. Also if the assignment details are already used in any BC contract, system will not allow to add or delete new assignees or amend party details such as Assignee Id, Account etc.
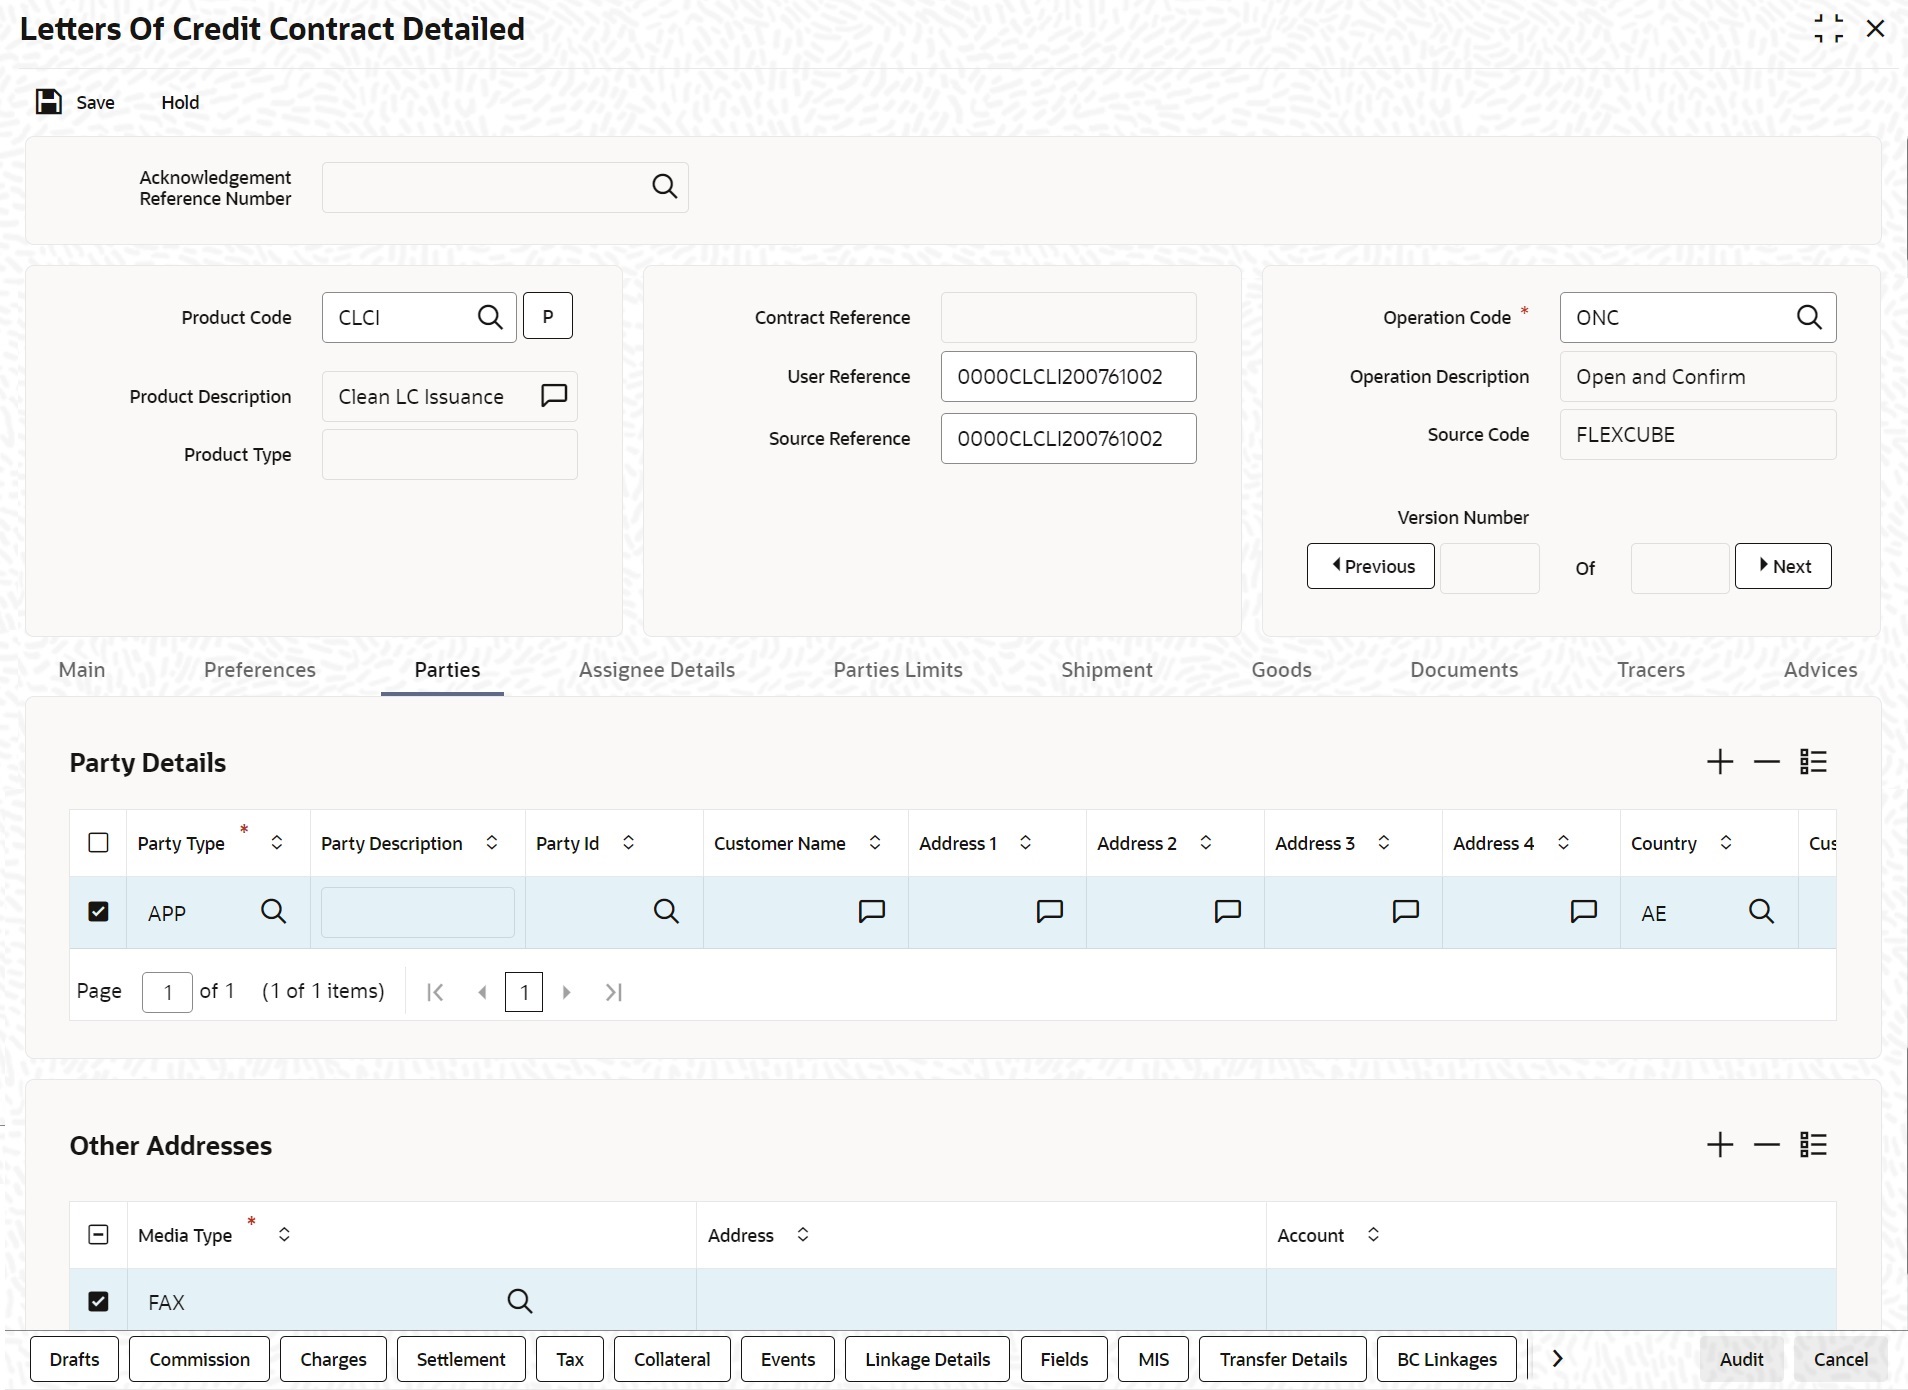
Assignment details can be added through excel upload. - On the Letters of Credit Contract Detailed screen, click the Parties tab.The Parties Details is displayed.
Note:
The Parties screen can be used to record the details related to all the parties involved in the LC.Figure 4-4 Letters of Credit Contract Detailed - Parties
- On the Parties tab, specify the fields, and click Ok.Based on the details you specify for the fields in this screen, the documents, tracers and messages are generated and is sent to the parties concerned.
For more information on the fields, refer the Field Description table given below:
Table 4-5 Parties - Field Description
Field Description Party Details Specify the following for each of the parties involved in the LC. Party Type Specify the party type (beneficiary, accountee, applicant, advising bank, issuing bank, reimbursing bank, advice through a bank, confirming bank, claiming bank). The option list displays all party types available for the LC. Select the appropriate party type from the list. If the operation code of the LC is ‘Reimbursement’ the system will default the CIF party type as ‘ISB’ (issuing bank). The party type ‘CLB’ (claiming bank) will be available only if the LC is linked to a ‘Reimbursement’ type of product.
Once the record has been saved, you can change party names by amending the record, provided the LC is not linked to a bill. Also, you cannot change party names for a transferred or an availed LC.Note:
You can change the following party types:- REB
- ABK
- BEN
For more information, refer Table 4-6
This field is mandatory.Party Description You can provide the description for the party type here. This field is optional.
Party ID Specify a Party ID for which you need to maintain. Alternatively, you can select the Customer No from the List of Values Party Id. . Third Party Customer details is also listed under List of Values Party Id. Oracle Banking Trade Finance validates ADB Member Status for a Bank, which is an ADB member, at each scenario with a different logic. The system will not validate ‘ADB Member Status’ when the changed ADB Member Status’ is maintained as Not applicable in the following scenarios:Note:
BIC Code appears next to the ‘Customer No’ only if the BIC Code is mapped with that customer number. If the BIC code is not mapped with that customer number then the BIC Code will not appear next to the ‘Customer No’ in the option list. Validations for ADB Member Status- When BIC is uploaded without maintaining initial status
- When a default value is maintained at BIC Code Maintenance level and initial status is not maintained
- When an initial status is changed from Yes to Not Applicable
- When an initial status is changed from ‘No’ to ‘Not Applicable’
The system validates and displays an override message when the changed ADB Member Status is maintained as No in the following scenarios:
This field is optional- When the initial status is changed from Not Applicable to No
- When the initial status is changed from No to Yes
This field is optional.Note:
If the Advising Bank or the Issuing Bank is not a customer of the Bank, then the system validates the BIC maintained in Address 1 field of the Advising Bank or the Issuing Bank.Customer Name Enter the name of the Customer. The party name can be 150 characters in length. However, please note that in the SWIFT messages that you generate only 35 characters will be included.
This field is optional.Address 1 to Address 4 Enter the address of the customer who has initiated the transaction. This field is optional.
Country Enter the country of the customer. This field is optional.
Customer Reference Specify the sender’s reference number. In case of an upload of MT768, the value in field 20 of the message is displayed here. Input to this field will be mandatory for the party type ISB.
This field is optionalDated Specify the date of transaction initiation. This field is optional
Language Specify the language in which advices should be sent to the customer. This field is optional
Issuer Check this option to indicate that the issuer is a bank.
The issuer of LC is a bank or an individual. This is enabled only for the party type ISB (issuing Bank). The party type is defaulted from CIF maintenance. However, you can amend the value before authorizing the contract.
If issuer of LC is a bank, tags 52A and 52D will be populated. The message Types supported by these tags are MT710/MT720. If issuer of LC is not a bank, 52B tag will be populated.
This field is optional.Template Id Specify the template ID. If you change REB party, then a template ID needs to be attached to send MT799 to Advising bank. This field is optional
Account Specify the account number.This field is optional Other Addresses It includes details about the following: - The media type
- The party’s mail address
- The account
The advices for a party will be sent to the default media maintained in the Customer Addresses table. If you want to send the advices through another medium, you should indicate it in the Parties screen. The address should be also indicated. The advices will be sent through the new medium, only if you indicate so in the Advices screen of contract processing. If not, the advice will continue to be sent to the default address defined for the party.
You can use this feature to send a one-off advice, through a different medium. For example, for a particular customer, you normally send all advices through mail and hence haven’t defined SWIFT or TELEX advices. For an LC involving a customer, you want to send the advices through SWIFT. In such a case, you can specify the medium as SWIFT and specify the address only for the LC you are processing.
The issuer of LC is a bank or an individual. This is enabled only for the party type ISB (issuing Bank). The party type is defaulted from CIF maintenance. However, you can amend the value before authorizing the contract.
If issuer of LC is a bank, tags 52A and 52D will be populated. The message Types supported by these tags are MT710/MT720.
If issuer of LC is not a bank, 52B tag will be populated.
This field is optional
Media Type Select the Media Type from the option list. The media type through which the advises must be routed and the respective address(es) The advices for a party will be sent to the default media maintained in the Customer Addresses table. If you want to send the advices through another medium, you should indicate it in the Parties screen. The address should be also indicated. The advices will be sent through the new medium, only if you indicate so in the Advices screen of contract processing. If not, the advice will continue to be sent to the default address defined for the party. You can use this feature to send a one-off advice, through a different medium. For example, for a particular customer, you normally send all advices through mail and hence haven’t defined SWIFT or TELEX advices. For an LC involving a customer, you want to send the advices through SWIFT. In such a case, you can specify the medium as SWIFT and specify the address only for the LC you are processing. This field is mandatory.
Address Type the party’s mail address. Account Specify the account number. Table 4-6 Message Details when there is change in Parties - Field Description
Changed Party Name Messages Beneficiary party (BEN)
(in case of import LC)MT707 will be sent to the advising bank. New party BEN will be sent in tag 79 of 707. If MT740 has been already sent to Reimbursing bank, then MT747 will be sent to the Reimbursing bank for intimating change of Beneficiary.
Reimbursing bank (REB) (in case of import LC) MT799 will be sent to Advising bank. MT747 will be sent to old Reimbursing Bank Party. MT740 is sent to new REB party. FFT code ‘CANC’ must be attached manually to advice ‘LC_AMND_AUTH_REIMB’ (747), at contract level.
Advising Bank (ABK) (in case of import LC) MT707 will be sent to the old Advising bank. MT700 will be sent to the new Advising bank. Also, FFT code ‘CANC’ must be attached to advices to 707 or 767 manually. BEN (in case of export LC) Counterparty will be changed and the limits, if any, for the old Beneficiary will be reinstated and will be tracked against the new Beneficiary. ABK (in case of export LC) You can change the ABK. BEN, REB, and ABK MT707 will be sent to the old Advising Bank intimating the change of Advising Bank.
MT700 will be sent to the new Advising Bank with the new parties for REB and BEN.
MT747 will be sent to old REB and MT740 will be sent to the new REB party.BEN and REB MT707 will be sent to the Advising bank intimating the change of Beneficiary and Reimbursing bank. MT700 will be sent to the new Advising Bank with new Beneficiary.
If MT740 has already been sent to the REB, MT747 will be sent to the REB for intimating change of BEN.REB and ABK MT707 will be sent to the old ABK intimating the change of ABK. MT700 will be sent to the new ABK.
MT747 will be sent to the old REB.
MT740 will be sent to the new REB.REB and ABK MT707 will be sent to the old ABK intimating the change of ABK. MT700 will be sent to the new ABK.
MT747 will be sent to the old REB.
MT740 will be sent to the new REB.
Reimbursing bank (REB) MT707 will be generated to the Advising bank. (Deletion of REB) MT747 will be sent to old Reimbursing Bank Party. MT740 will be automatically suppressed. FFT code ‘CANC’ must be attached manually to advice
‘LC_AMND_AUTH_REIMB’ (747), at contract level.
(Deletion of ATB) During Export LC amendment(AMNV or AMND based on Beneficiary Confirmation): MT707 to be sent to ATB.
Deletion of ATB details to be provided in 47B. Details should be input manually with FFT.
57A should not be available in MT707
System will display an override “Advise Through Bank Party has been deleted, Additional condition to be provided for advice LC_AMND_INSTR”.
Amendment to delete ATB is initiated and not confirmed then system should not allow further amendments with or without Beneficiary Confirmation. Error message to be displayed like "Previous unconfirmed amendments exists for ATB deletion. Cannot initiate a new amendment". Amendment to delete ATB is rejected, 57A should be available in subsequent amendments.
- On the Letters of Credit Contract Detailed screen, click the Assignee Details tab.The Assignee Details is displayed.
Figure 4-5 Letters of Credit Contract Detailed - Assignee Details
- On the Assignee Details tab, specify the fields, and click Ok.For more information on these fields, refer the Field Description table given below:Account details provided from External system to be mapped to Assignee Account field which is newly introduced.
Table 4-7 Assignee Details - Field Description
Field Description Assignee Details Assignee can be walk-in customers, Bank customers and Third Party customers. For Third Party Customers, user must maintain those parties in Third Party screen (TFDTPMNT) It will be possible to maintain assignee details in export type of letter of credit contract. Assignee can be added/modified/deleted in LC during internal amendment if Bill is not booked under LC with assignee details else system will provide appropriate error message. You can set the following assignee details: Sequence Sequence in which the assignee details are maintained. Value for this should be greater than or equal to zero. Sequence will not accept any decimal points. This should be unique. This field is mandatory.
Assignee Id To maintain the party ID. This will fetch all the parties maintained in Third party maintenance screen and walkin customer along with Bank customer. It will not be possible to maintain the same assignee multiple times other than walkin customer. This field is optional.
Assignee Name Assignee name will be displayed based on the Assignee Id. Assignee name can be modified only Walk-in Customer.
This field is optional.Assignee Address Line 1 Address Line 1 will be displayed based on the Assignee ID. Address Line 1 can be modified only for Walk in customer. This field is optional.
Assignee Address Line 2 Address Line 2 will be displayed based on the Assignee ID. Address Line 2 can be modified only for Walk in customer. This field is optional.
Assignee Address Line 3 Address Line 3 will be displayed based on the Assignee ID. Address Line 3 can be modified only for Walk in customer. This field is optional.
Assignee Address Line 4 Address Line 4 will be displayed based on the Assignee ID. Address Line 4 can be modified only for Walk in customer. This field is optional.
Account Currency Specify the currency of the account of the assignee. This field is mandatory.
Account Specify the account to which the amount should be credited. This can be the account of the assignee with the bank if he is a customer of the bank. If he is not the customer of the bank then this can be the Nostro account of his bank maintained in the current bank. If Assignee is a bank customer ( Individual /Corporate/Bank customer) then Account LOV will provide customer accounts maintained in External Customer Account for the selected bank customer. If Assignee is a Third party or Walk in customer then Account LOV will display the NOSTRO accounts for the currency. If Assignee id is not provided then Account LOV will provide customer Accounts and Nostro Accounts. Either Account or Assignee account is mandatory.
Assigned Percentage Specify the percentage of assignment to the assignee. Sum of assignee percentage should not exceed 100 percent. Either Assigned Percentage or Assigned Amount should be entered. If assigned percentage is provided and assigned amount is not provided, system will compute assigned amount based on assigned percent of contract amount. If assigned amount is provided and assigned percentage is not provided, system will compute assigned percentage based on assigned amount. If both assigned percentage and assigned amount is provided, system will compute assigned amount based on assigned percentage. If both assigned percentage and assignment amount is not provided, system will provide error message.
Assigned Amount Specify the amount of assignment to the assignee in LC currency. This should be greater than zero. Decimal points will be based on the LC currency. If assignment details are maintained for any product type other than export type, system will throw an error message. It will be possible to amend these values. If the amendment amount is reduced, there will be a validation to check whether it goes below from that used already in BC contract. If yes, system will throw an error. Also if the assignment details are already used in any BC contract, system will not allow to add or delete new assignees or amend party details such as Assignee Id, Account etc.
Assignment details can be added through excel upload.
Assignee Account Indicates Account of Assignee which is Ultimate Beneficiary Account. If user provides Invalid Accounts then system will assign walkin customer to Assignee id and Nostro Account to Account field.
Assignee Bank Indicates Bank of Assignee Address Line 1 Indicates Assignee Bank address details. Address Line 2 Indicates Assignee Bank address details. Address Line 3 Indicates Assignee Bank address details. Address Line 4 Indicates Assignee Bank address details. Account with Institution Indicates Account with Institution. Address Line 1 Indicates Assignee Bank address details. Address Line 2 Indicates Assignee Bank address details. Address Line 3 Indicates Assignee Bank address details. Address Line 4 Indicates Assignee Bank address details. Assignee ID, Account and Assignee Account derivation will be as below:During Bill liquidation, assignee details to be defaulted to Settlement subsystem as below:Table 4-8 Table Assignee Details
Assignee Id Account Assignee Account Processing on Save Customer selected from LOV Customer Account selected from LOV Not provided Assignee account to be defaulted with Account on Save Not provided Customer Account selected from LOV Not provided Customer id to be derived and Assignee Account to be defaulted with Account Not provided Not provided Valid Customer account provided Customer id to be derived and Account to be defaulted with Assignee Account Not provided Not provided Valid Customer account provided Walk in customer and Nostro account of the walk in customer to be defaulted Table 4-9 Assignee Details
Assignee Details Settlement Subsystem Assignee Account Ultimate Beneficiary 1 Assignee Name Ultimate Beneficiary 2 Assignee Address 1 Ultimate Beneficiary 3 Assignee Address 2 Ultimate Beneficiary 4 Assignee Address 3 Ultimate Beneficiary 5 Assignee Bank Beneficiary Institution 1 Assignee Bank Address Line 1 Beneficiary Institution 2 Assignee Bank Address Line 2 Beneficiary Institution 3 Assignee Bank Address Line 3 Beneficiary Institution 4 Assignee Bank Address Line 4 Beneficiary Institution 5 Account with Institution Account with Institution 1 Address Line 1 Account with Institution 2 Address Line 2 Account with Institution 3 Address Line 3 Account with Institution 4 Address Line 4 Account with Institution 5 - Click Save to save the details or Cancel to exit from the screen.
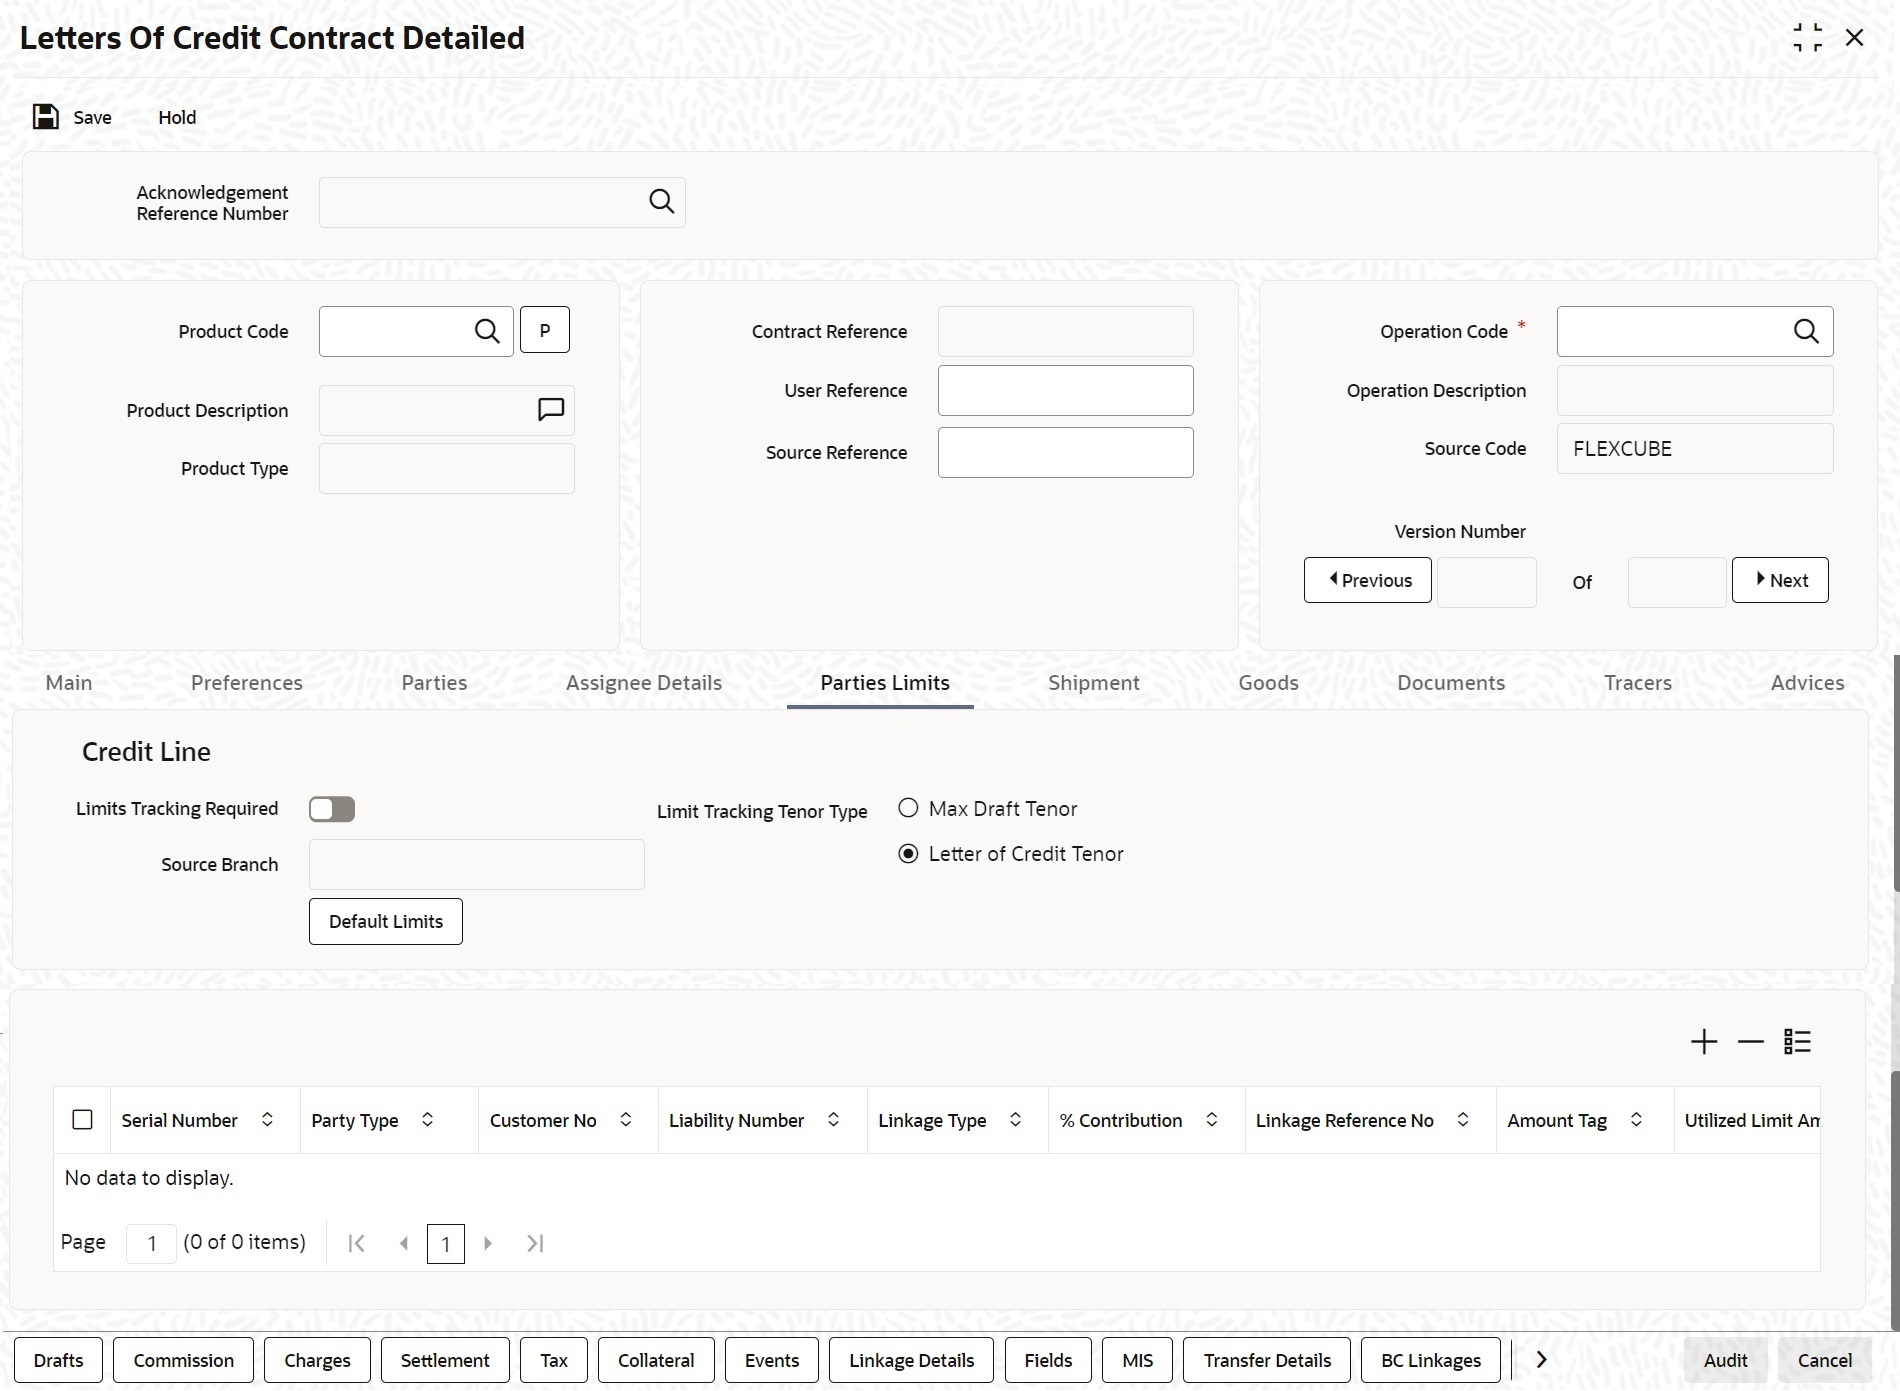
- On the Letters of Credit Contract Detailed screen, click the Parties Limits tab.The Parties Limits is displayed.
- On the Parties Limits tab, specify the fields and click Ok.You can track the limits of multiple credit lines in an LC contract.For more information on the fields, refer the Field Description table given below:
Note:
You can add new records or delete the defaulted record for limits and then click the save button. The details are saved.Table 4-10 Parties Limits - Field Description
Field Description Limits Tracking Required Select the Limits Tracking Required check box to indicate that limit tracking is required for the parties to the LC contract. If you check this box, the system will let you set the limits for multiple credit lines in the contract. If you do not check this box, the system will not track the parties limits.
On checking this box, the system enables Default Limits button. You can use this button to get the default values for the parties in the credit lines.
This field is optional.Default Limits Click the Default Limits button. The system displays the default values for the parties limits: Limit Tracking Tenor Type Click the Limit Tracking Tenor Type either as Max Draft Tenor or Letter as Credit Tenor. This field is optional.
Serial Number On click of Save button, the system displays the serial number. This field is optional.
Party Type The system displays the Party Type of the counterparty of the contract by default. This field is optional.
Customer No The system defaults the CIF Id or Customer No. of the counterparty. This field is optional.
Liability Number The system defaults the Liability Number of the counterparty. This field is optional.
Linkage Type The system defaults the fy the linkage type as Facility. This field is optional.
% Contribution The system defaults the % Contribution as 100. This field is optional.
Linkage Reference No Select the Linkage Reference Number from the list. Specify the reference number that identifies the facility, collateral pool or collateral. The option list displays all valid facilities and collateral pools specific to the liability. Choose the appropriate one. In case you choose the same linkage reference for more than one record in the list, the system displays an override message. You may choose to cancel or proceed with the selection. This field is optional.
Amount Tag The system displays the Liability Amount by default. Limit Amount The system calculates and displays the limit amount for each credit line on click of save button. The amount is derived based on the amount tag specified above. You can add more rows to the list of credit lines using add button. Remove a selected row from the list using delete button. Once you have specified the details, save the contract. In case the limit for a credit line has been completely exhausted, the system displays a configurable override message
This field is optional.
JV Parent When you click ‘Default Limits’ button, the system defaults the joint venture customer number of the party. This customer number is defaulted based on the details maintained in ‘Joint Venture’ sub-screen of ‘Customer Maintenance’ screen.
If limits Earmarking is done by an External system. OBTF can release the Earmarking details by following below steps:- Enable the flag “Release ELCM Earmarking” at Trade Finance Bank Preference Maintenance.
- External system has to send the Earmarking details to OBTF through the service – OBTFIFService and Operation – CreateLmtEARDtls, before calling handoff request.
- When OBTF initiates utilization service call to limits system, we will send the Earmarking reference received from external system in block reference no tag to release the earmarking details.
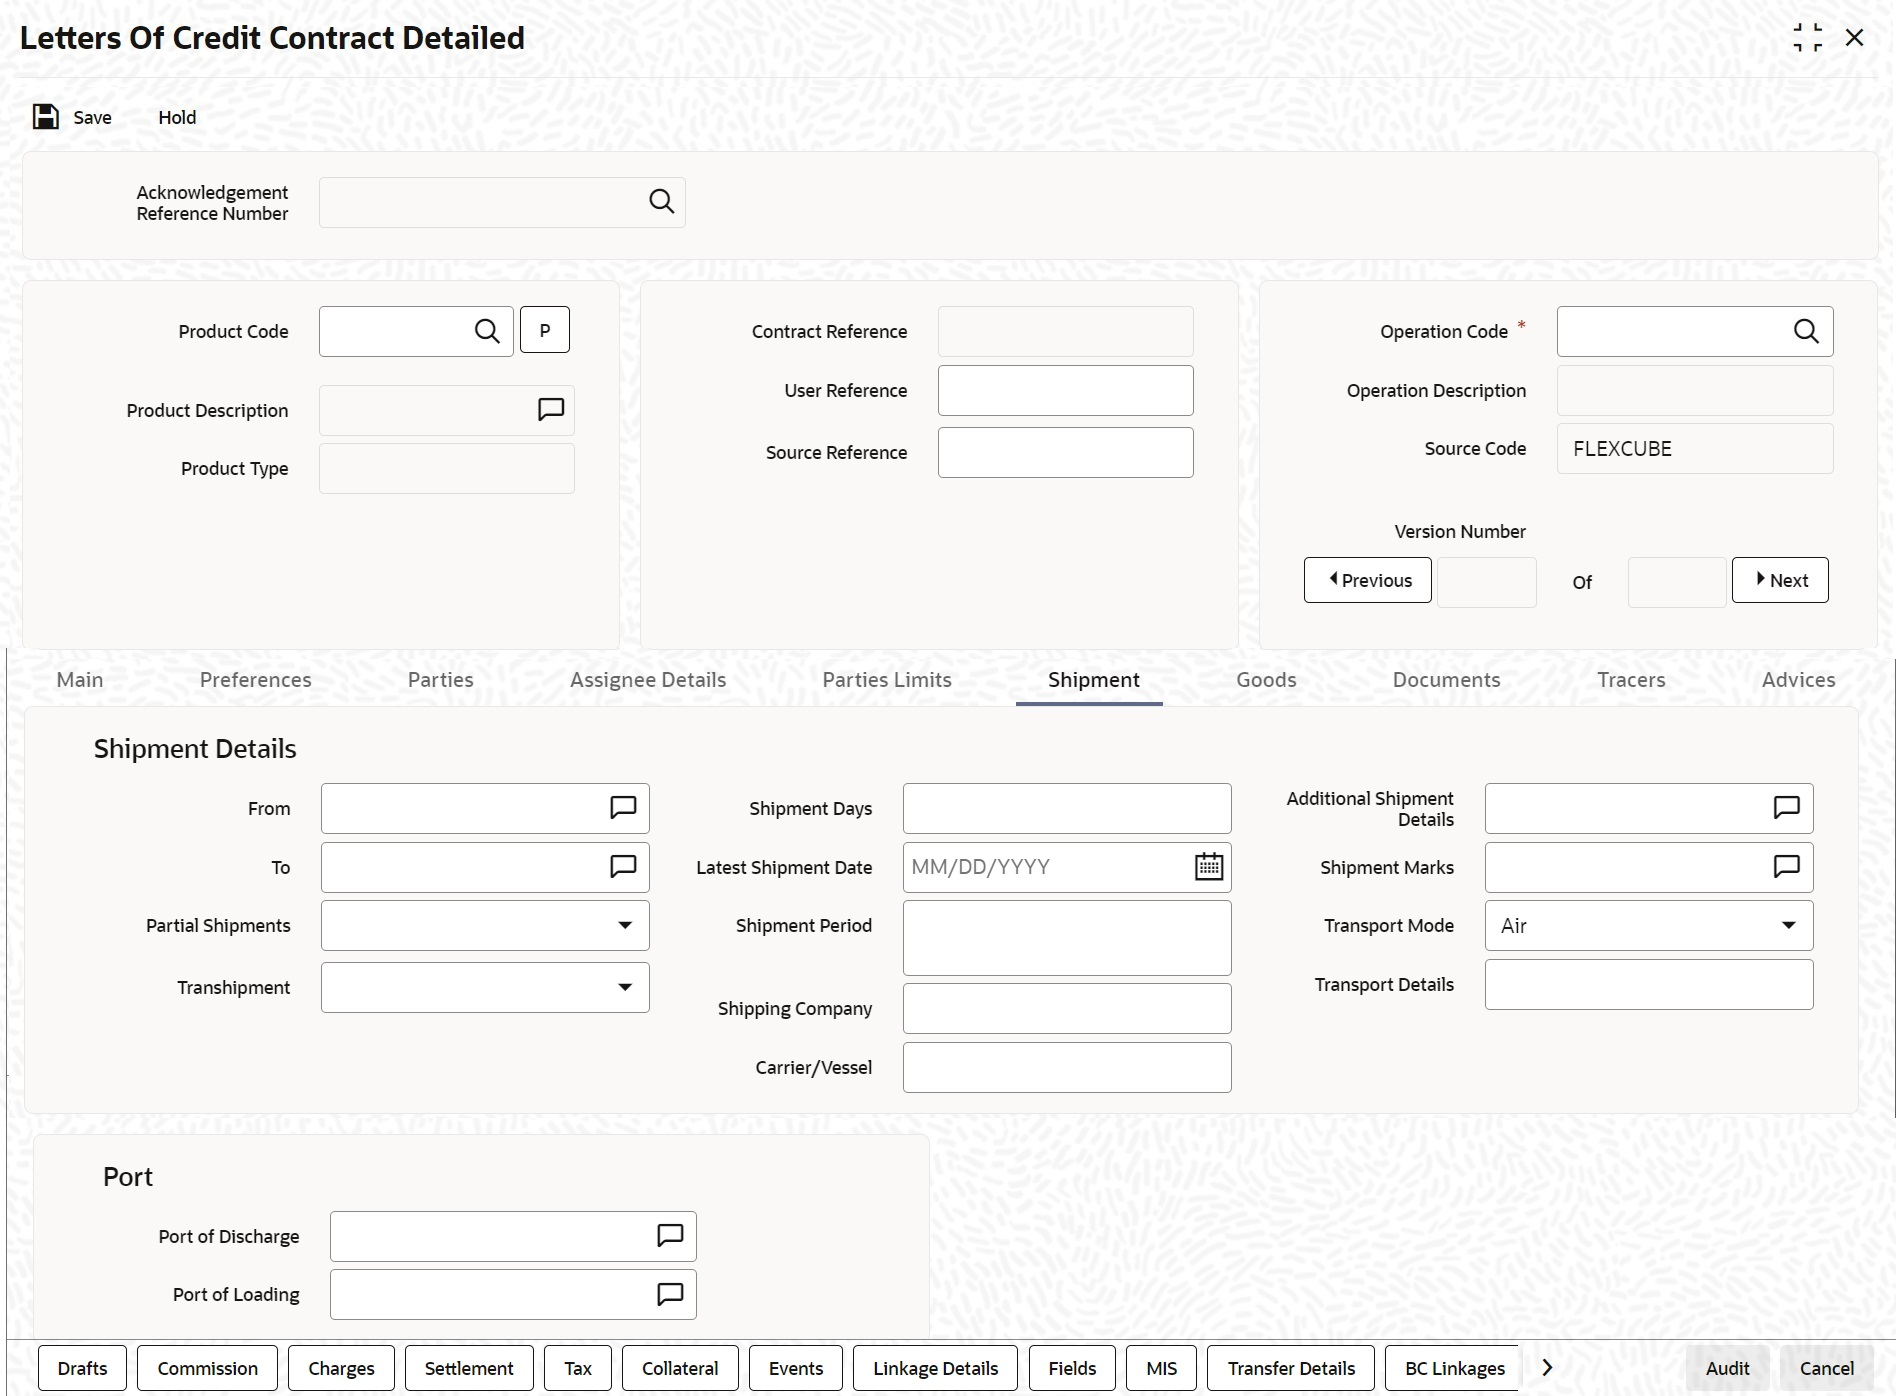
- On the Letters of Credit Contract Detailed screen, click the Shipment tab.The Shipment Details is displayed.
- On the Shipment tab, specify the fields and click Ok.An LC instrument, which is an instrument of trade finance, involves details of merchandise. Hence, you will need to specify the following details for the LC:
- Details of the merchandise
- Details of the mode of transportation
Note:
You will not be able to save shipment and goods related details for an LC under the operation code ‘Reimbursement’.There are certain standard clauses and conditions, associated with the shipment of the merchandise traded under an LC. You can specify the following shipping details for an LC that you process.
For more information on the fields, refer the Field Description table given below:Table 4-11 Shipment - Field Description
Field Description From The location from which the goods transacted under the LC should be shipped. In international trading parlance, this is called the Loading on board/Dispatch/Taking in charge at/from. This field is optional.
To The destination to which the goods transacted under the LC should be sent. In international trading parlance, this is called the ‘For transportation’ to. Shipment From and Shipment To are linked to the tags 44A and 44 B respectively. These tags are applicable to the following message types:
- MT700
- MT705
- MT707
- MT710
- MT720
Partial Shipments Select an option for partial shipment of the goods allowed under the LC from the drop-down list. The options available are: - Allowed
- Not Allowed
- Conditional
- Blank
By default Partial Shipment will be blank. If Partial Shipment Allowed is blank, then the tag 43P is not applicable for SWIFT messages.
This field is optional.Transhipment Select an option for Transhipment under the LC from the drop-down list. The options available are: - Allowed
- Not Allowed
- Conditional
- Blank
By default, the Transhipment will be blank. If ‘Transhipment’ is blank, then the tag 43T is not applicable for SWIFT messages.
This field is optional.Shipment Days Specify the number of shipment days. If you enter the shipment days and leave the field Latest Shipment Date blank, on saving the contract, the system calculates the latest shipment date based on the number of shipment days and the effective date. However, if you specify the latest shipment date, the system ignores the shipment days specified here. Instead, it recalculates the shipment days based on the latest shipment date and the effective date.
This field is optional.Latest Shipment Date Specify the latest date for loading on board/despatch/taking in charge. If this date is greater than the linked policy expiry date, the system will display an override/error message. This corresponds to the field 44C in MT 700 and is a conditional field. Either field 44C (Latest Shipment date) or 44D (Shipment Period) will be present in the message, but not both. In case you do not specify the latest shipment date, the system automatically calculates the date based on the number of shipment days and the effective date specified above.
Now, suppose that you have specified both the shipment days and the latest shipment date. In that case, the system ignores the shipment days and recalculates it based on the latest shipment date and the effective date.
If you modify the latest shipment date during amendment, the system recalculates the number of shipment days.
This field is optional.Shipment Period Specify the period of time during which the goods are to be loaded on board/despatched/taken in charge. This corresponds to field 44D in MT 700 and is a conditional field. Either field 44C (Latest Shipment date) or 44D (Shipment Period) will be present in the message, but not both. This field is optional.
Shipping Company Indicates the name of the shipping company. Carrier/Vessel Indicates Carrier / Vessel Name. Additional Shipment Details Specify additional shipment details. This field is optional.
Shipment Marks Specify shipping marks. This field is optional
Transport Mode Select the mode of transport from the drop-down list. This field is optional.
Transport Details Specify the details of transport. Port of Discharge You can also specify the name of the destination port to which the goods transacted under LC should be sent. This is called the Port of Discharge. ‘Port of Loading and ‘Port of Discharge’ are linked to the 44E and 44F tags respectively. These tags are applicable to the following message types: - MT700
- MT705
- MT707
- MT710
- MT720
Port of Loading You can specify the name of the airport from where the goods transacted under the LC are loaded for shipping. This is called the Port of Loading. This field is optional.
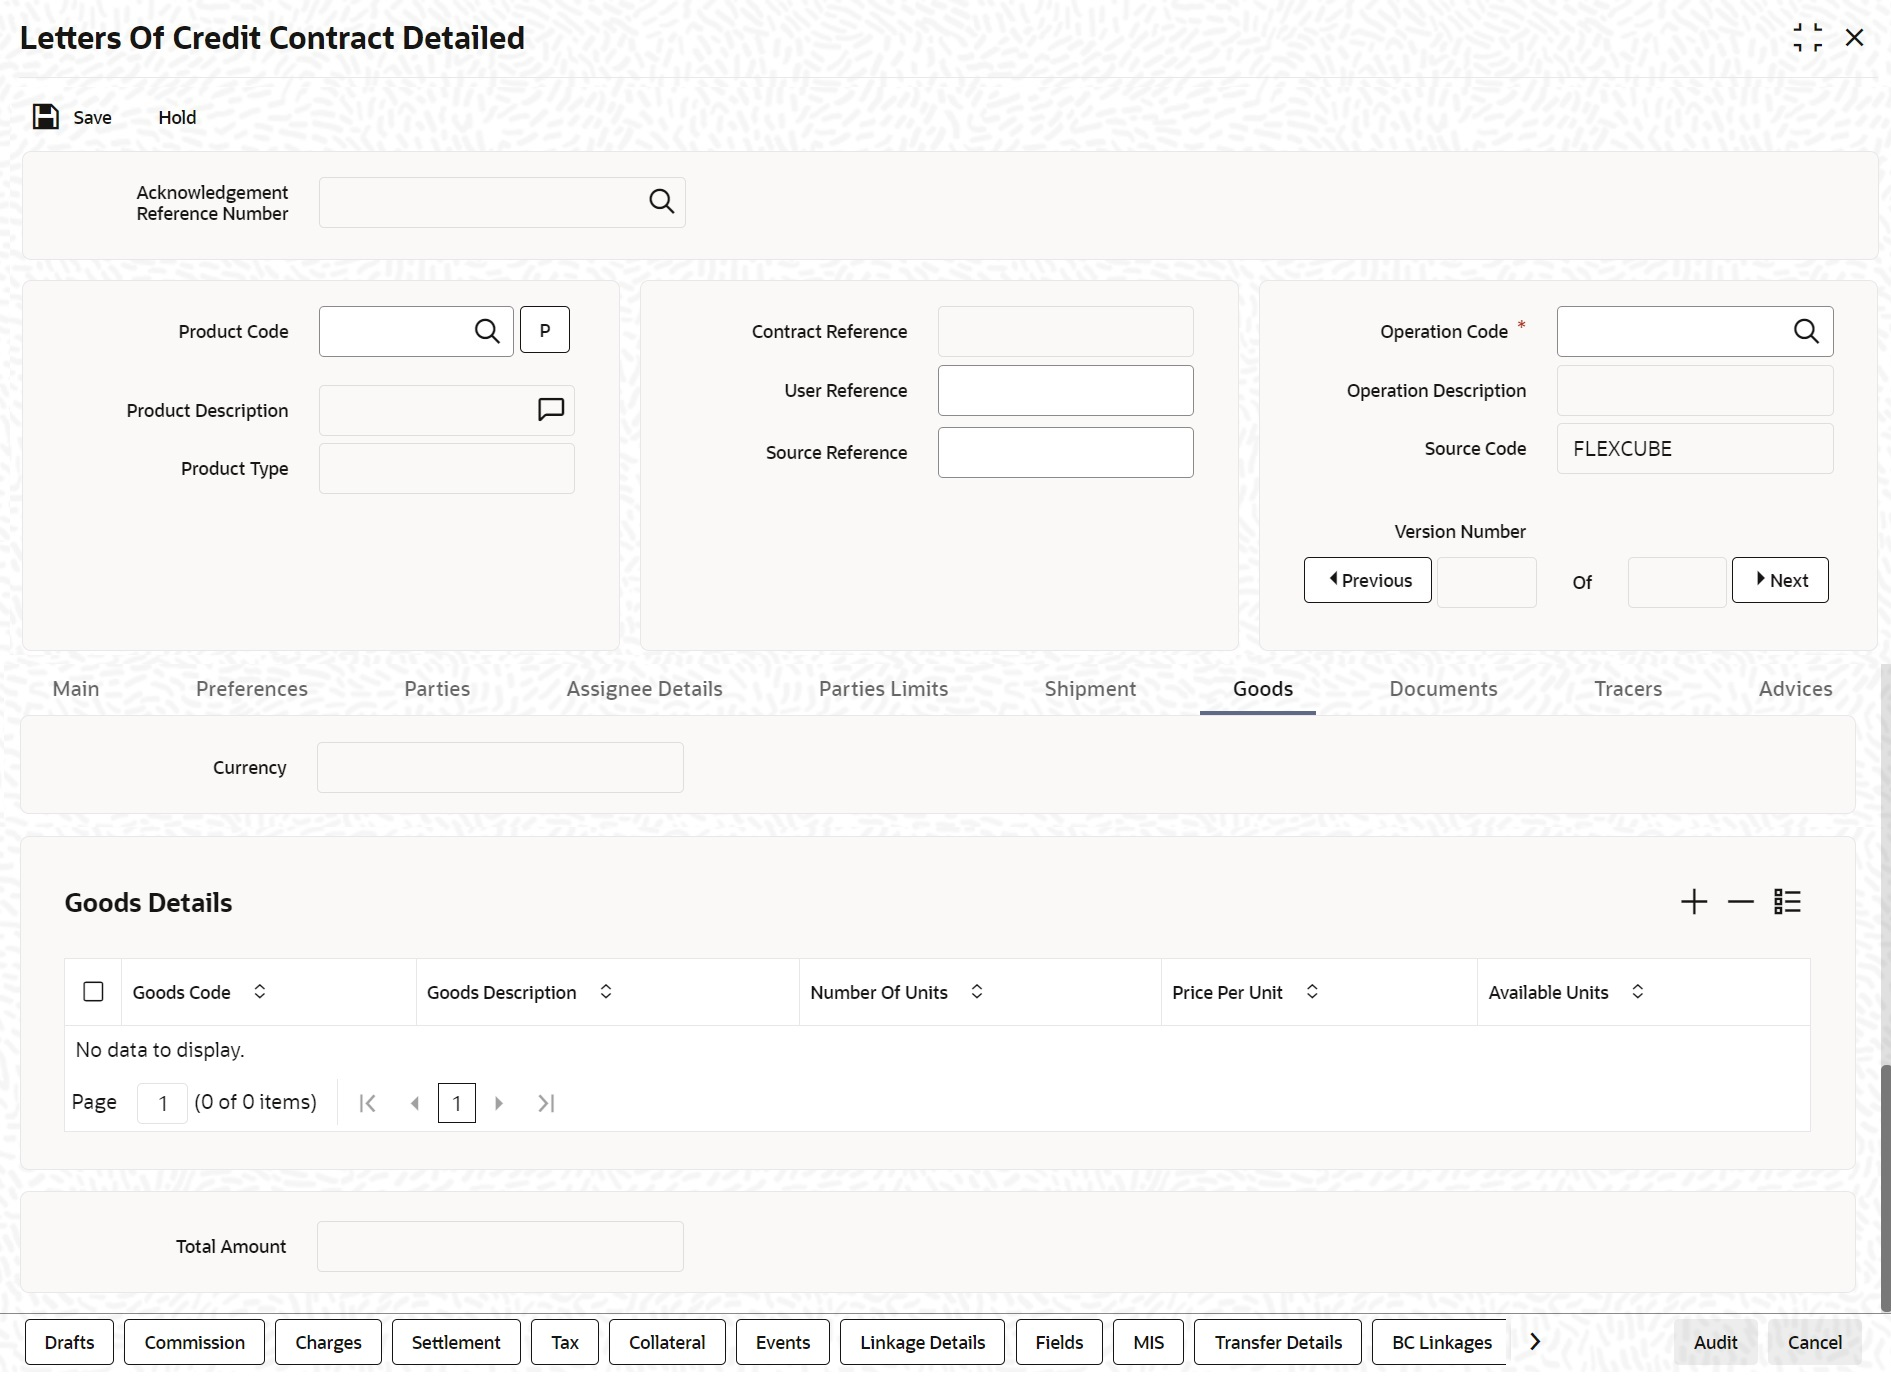
- On the Letters of Credit Contract Detailed screen, click the Goods tab.The Goods Details is displayed.
- On the Goods tab, specify the fields, and click Ok.For more description on the fields, refer the Field Description table given below:
Table 4-12 Goods - Field Description
Field Description Currency The system displays the currency by default. Goods Code Select the Goods Code from the option list. Goods Description The goods description is displayed here based on the goods code you select. Number of Units Type the number of units. Price Per Unit Type the price per unit. Available Units The system displays the available units of the goods. Total Amount The total contract amount must match with the total goods value during contract amendment. Note:
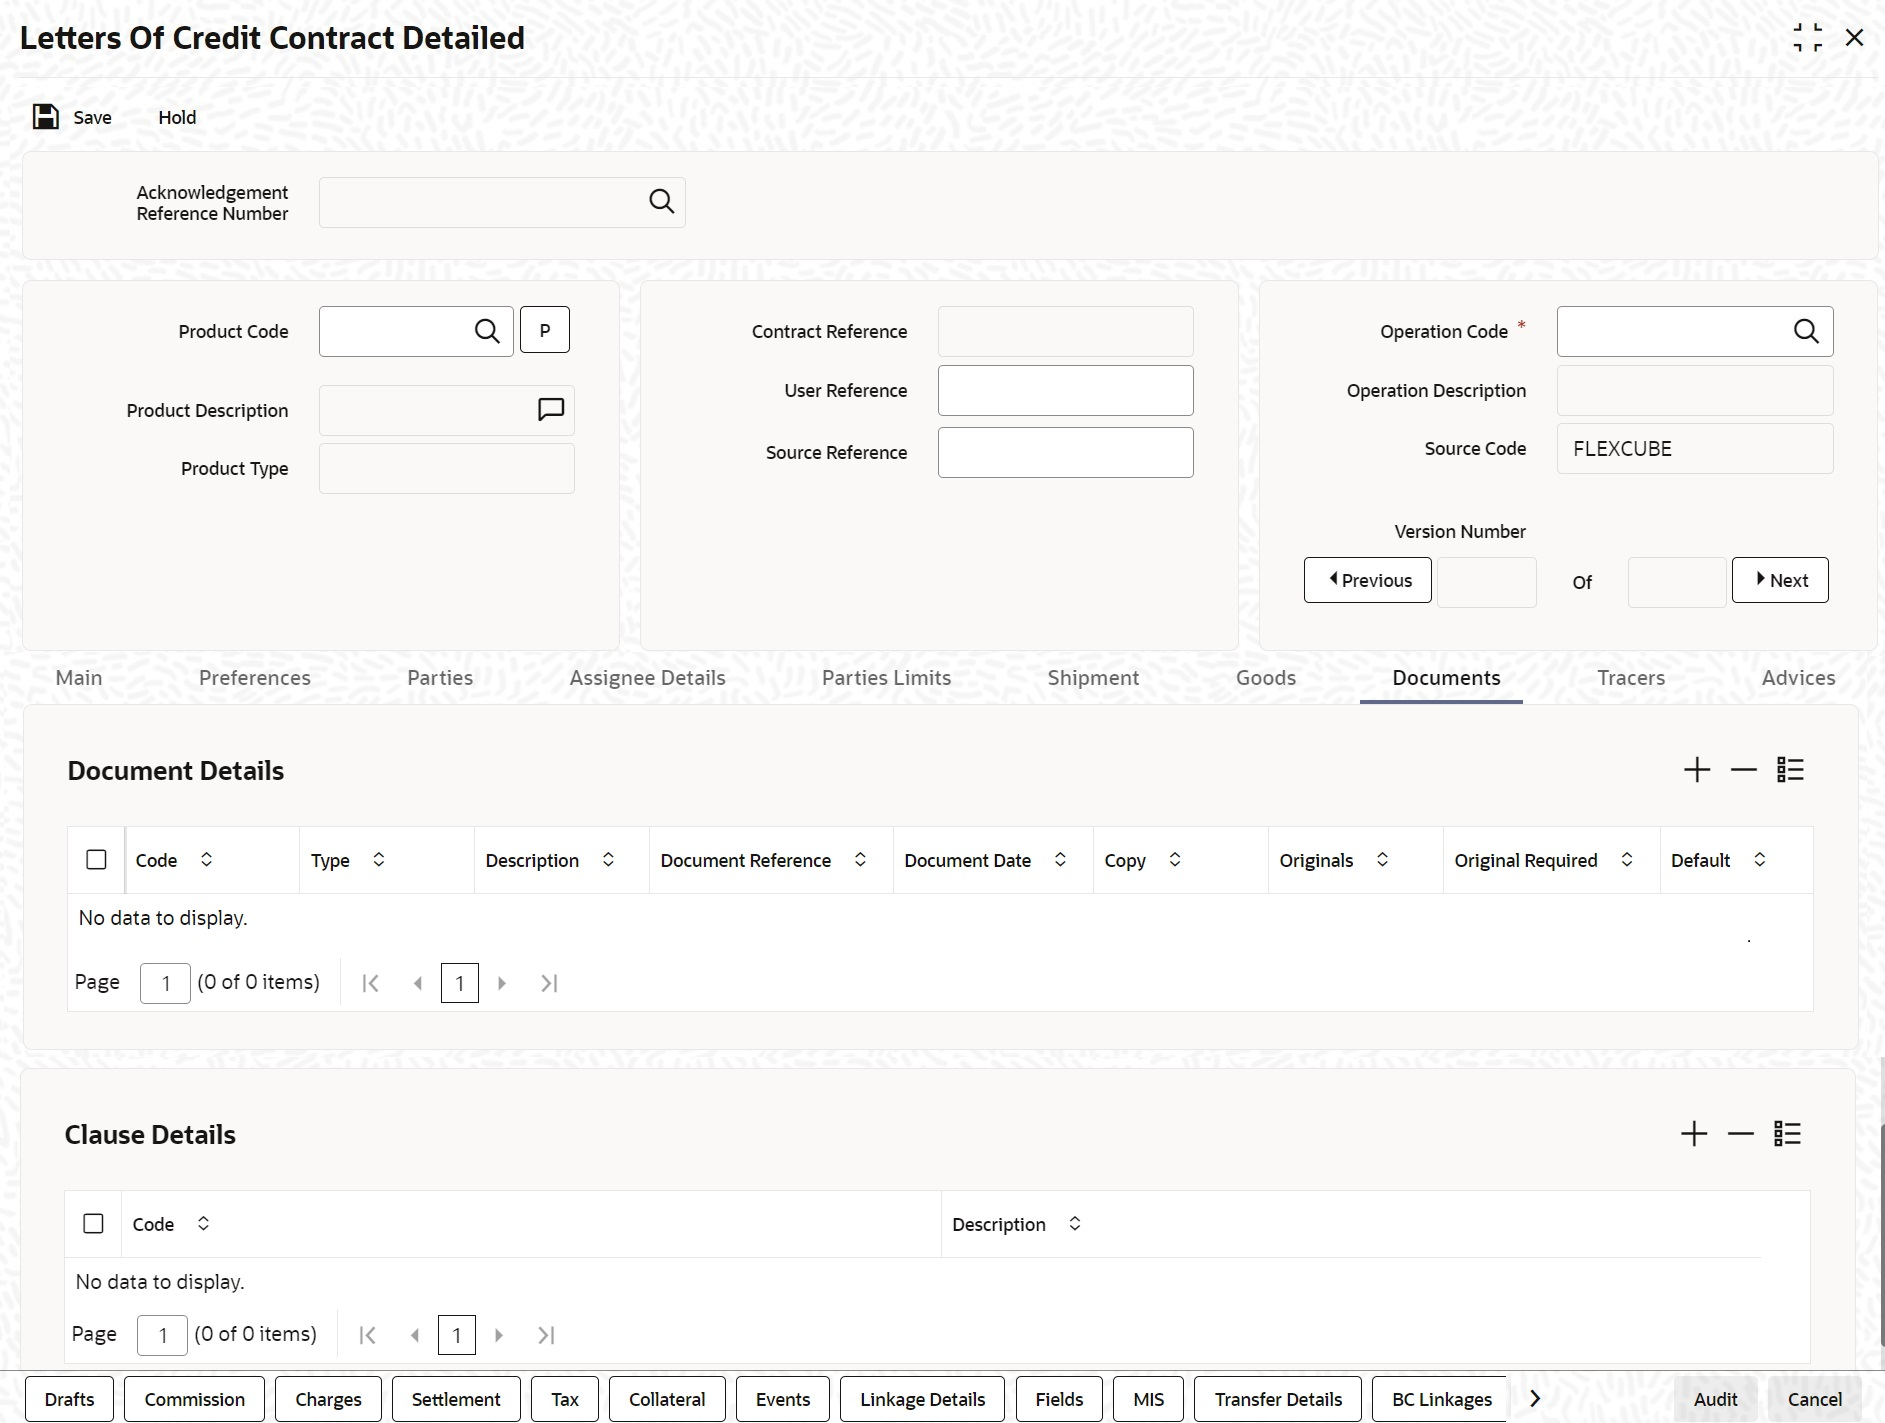
Check the total contract amount to match with the total goods value during contract amendment. - On the Letters of Credit Contract Detailed screen, click the Documents tab.The Document Details is displayed.
Note:
There are some standard documents required under a documentary LC. In this screen, you can specify the documents that are required under the LC being processed. - On the Documents tab, specify the fields, and click Ok.
All the documents specified for the product to which the LC is linked is defaulted to this screen.
For more description on fields, refer the Field Description table given below:Note:
These details will be a part of the LC instrument sent to the advising bank, the advice through bank or the beneficiary.Validation for Shipping Guarantee:Table 4-13 Documents - Field Description
Field Description Code Enter the document code. This field is optional.
Type Enter the document type This field is optional.
Description Enter the document description of the document that is defaulted to suit the LC you are processing. This field is optional.
Reference Enter the document reference number based on which the Shipping Guarantee issued. This field is optional.
Copy Enter the number of copies of the document. This field is optional.
Originals Enter the number of Original documents here. This field is optional.
Original Required Select Original Required check box if original document is required.
You can add to or delete from the list of documents that are defaulted. To add a document for the LC, click add icon and then on option list positioned next to the Code field. Select the code of the appropriate document from the list of document codes maintained in the Documents Maintenance screen. The other details of the document will be defaulted to this screen.
To delete a document that is not required for the LC, highlight the document code and click on the delete icon. Type the price per unit.
This field is optional.Clauses Details In addition to the other details, the clauses specified for a document while defining the product, are also defaulted to this screen. This field is optional.
Code When you highlight a document code, all the clauses defined for the document are displayed in the Clauses window. You can add to or delete from, the list of clauses that are defaulted. To add a clause to a document for the LC, click add icon. Then, click adjoining option list. Select the code of the applicable clause from the list of clause codes maintained, in the Clause Maintenance screen. This field is optional.
Description By default, you can view the description of the clause code based on the clause code that you have selected. This field is optional.Note:
To delete a clause that is not required for the LC, highlight the Clause code and click delete icon.If No document is attached in the document section, then override message ‘Bill of Lading document to be attached for Shipping Guarantee’ should get displayed while saving the contract.
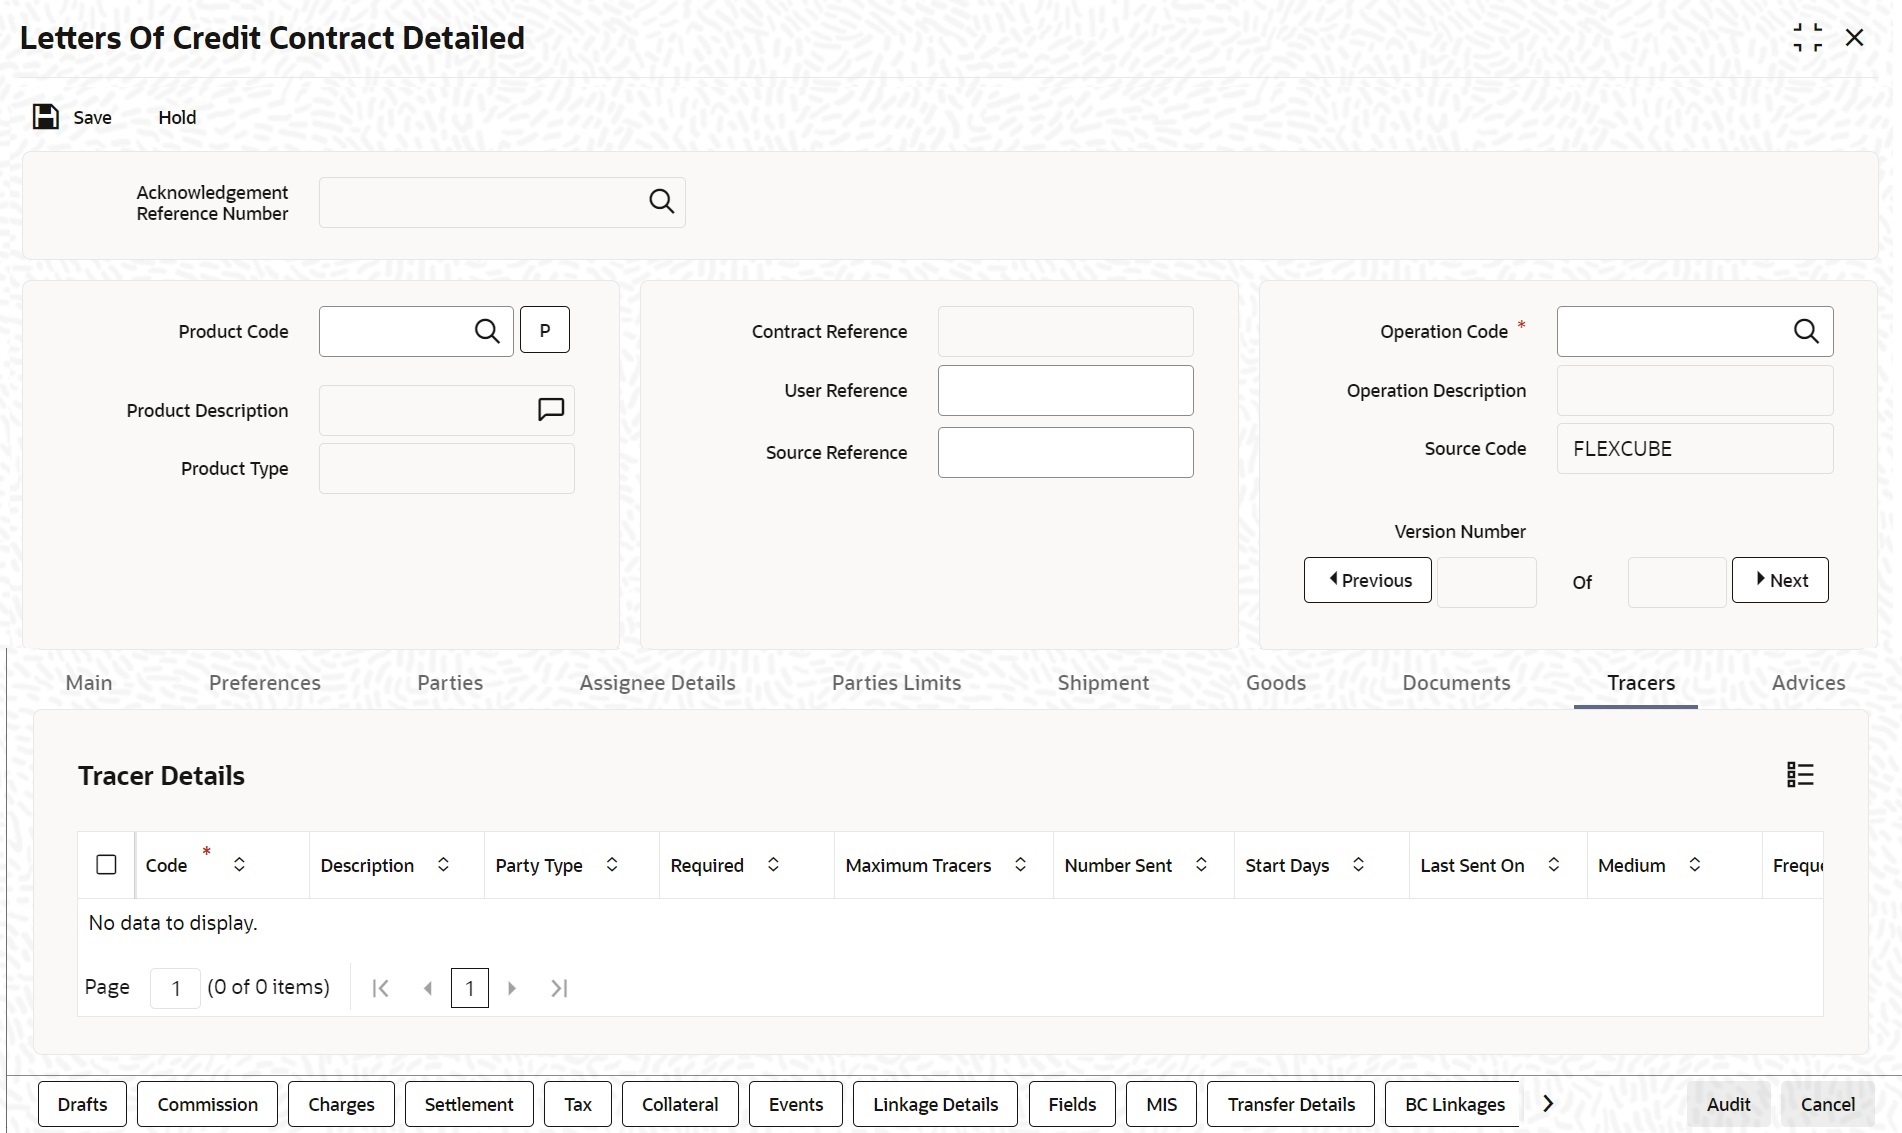
If document is attached but none of them are bill of lading type document in the document section, override message ‘Bill of Lading document to be attached for Shipping Guarantee’ should get displayed while saving the contract. If multiple documents are attached in that at least one document belongs to Bill of lading type, then above-mentioned override message should not get displayed while saving the contract. - On the Letters of Credit Contract Detailed screen, click the Tracers tab.The Tracer Details is displayed.The list of tracers that you can send for an LC is predefined (hard coded in the system) and can be classified into the following types:
Note:
Tracers are reminders that can be sent to various parties involved in an LC.- The acknowledgement tracer (sent to the advising bank when an import LC is issued and an acknowledgement is sought
- The charge-commission tracer (sent to the party who has to bear the commission or charges for an LC, pending the payment of the charge or commission)
- The confirmation tracer (sent to the confirming bank, seeking a letter of confirmation).
- On the Tracer tab, specify the fields, and click Ok.By default, you can view the tracers specified for an LC.For more description on fields, refer the Field Description table given below:
Table 4-14 Tracers - Field Description
Field Description Code For the tracer code that is highlighted, the details are defaulted from the product and can be changed to suit the LC you are processing.
This field is mandatory.Description Enter the document description of the document that is defaulted to suit the LC you are processing.
This field is optional.Party Type Enter the document reference number based on which the Shipping Guarantee issued.
This field is optional.Required You can stop the generation of a tracer at any point during the life cycle of an LC contract.
For instance, you had specified that an acknowledgement tracer is to be generated for a contract. When you receive the acknowledgement from the concerned party, you can disable its generation. At a later stage when you wish to generate the tracer again, you only need to enable it for the LC by using this facility.
If this box is checked, it means that the tracer should be applied for all new LCs involving the product. If not, it means that it should not be applied for new LCs involving the product. Amen If for some reason you want to stop generating the tracer for a product, uncheck this box through the product modification operation. The tracer will not be generated for new LCs involving the product.
This field is optional.Maximum Tracers You can specify the maximum number of tracers that should be sent for the LC. The value is defaulted from the product under which you are processing the LC.
This field is optional.Number Sent Number of tracers sent to the party. This field is optional.
Start Date The tracers that you specify for an LC can be generated only after it has been authorized. Specify the default number of days that should elapse after an LC has been authorized, on which the first tracer should be sent.
By default, the first tracer for an authorized LC contract will be sent, after the number of days prescribed for the product under which it is processed.
This field is optional.Last Sent On Date on which the tracer was last sent to the party.
This field is optional.Medium If you have specified that tracers should be generated for an LC, you should also specify the medium through which it is to be generated. A tracer for an LC can be sent through Mail, Telex or other compatible media.
This field is optional.Frequency You can specify the frequency (in days) with which the tracer should be re-sent, for the LC you are processing.
This field is optional.Template ID Specify the template ID for the SWIFT message type.
If the medium is SWIFT, then the system will generate the tracers in the SWIFT MT799 format based on the template ID mentioned at the LC Contract level for populating the tag 79.
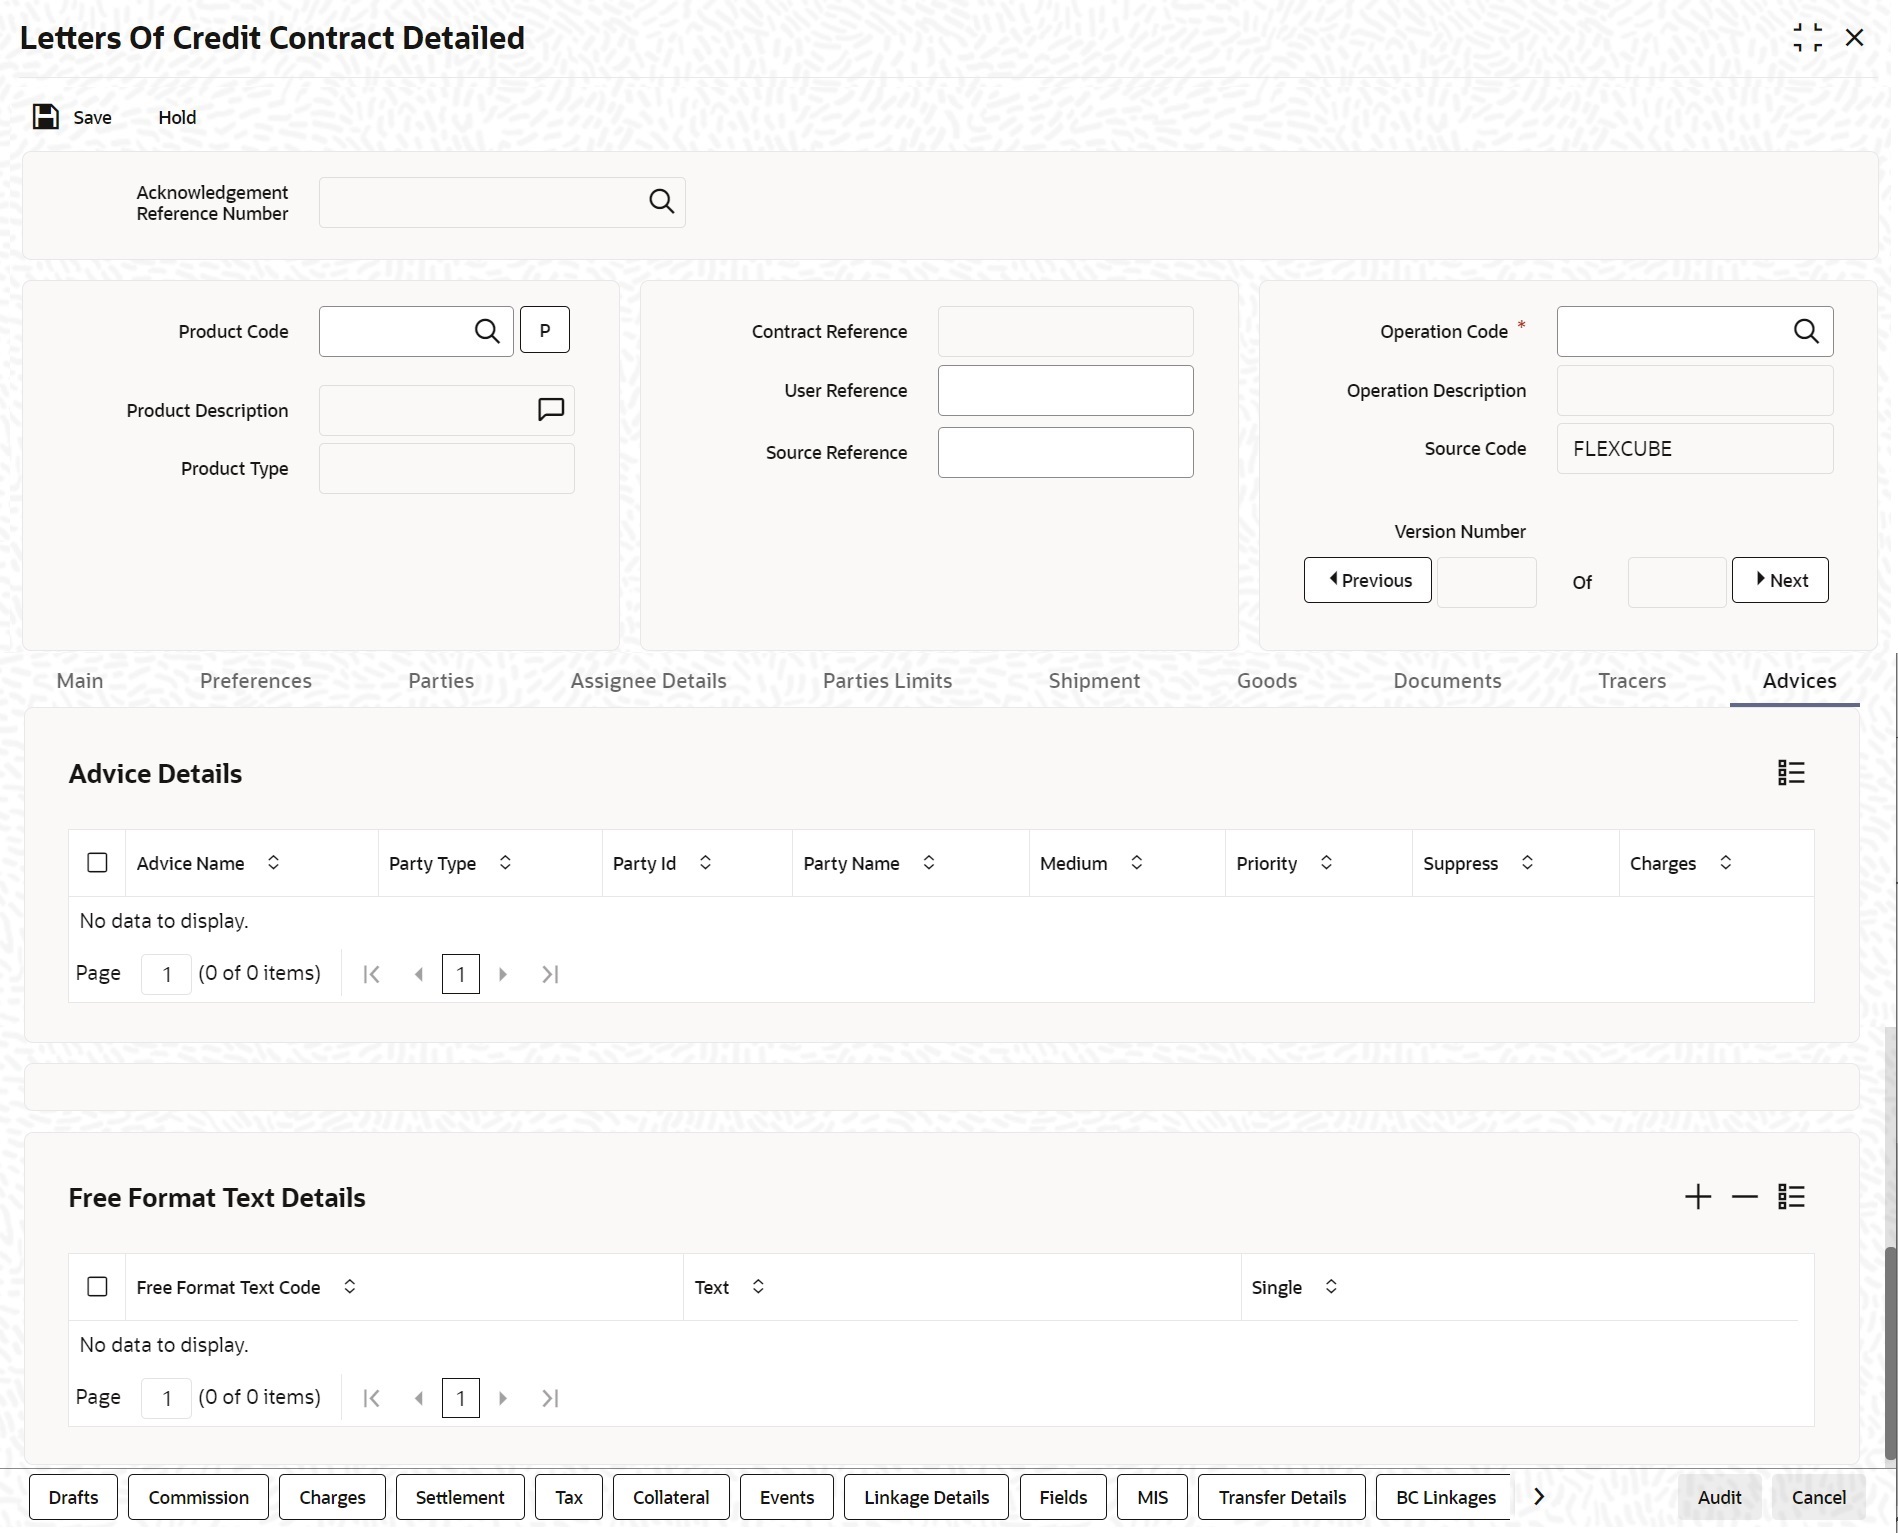
This field is optional. - On the Letters of Credit Contract Detailed screen, click the Advices tab.The Advices Details for an event is displayed.The advices that can be generated for the events that occur during the lifecycle of an LC are defined for the product, to which the LC is linked. For example, you may have specified the following advices for a product:
- Issue of an import LC: pre-advice by SWIFT and LC instrument by mail to the advising bank, the authorization to reimburse to the reimbursing bank.
- Advice of an export LC: the acknowledgement advice to the advising bank.
- On the Advices tab, specify the fields, and click Ok.The party type to whom a specific advice must be sent is picked up automatically based on the type of LC being processed and the parties involved. For more description on fields, refer the Field Description table given below:
Table 4-15 Advices - Field Description
Field Description Advice Name Specify the advice name. This field is optional.
Party Type The system displays the party type for which the message is generated. This field is optional.
Party Id The system displays the Party ID for which the message is generated. This field is optional.
Party Name The system displays the name of the party for which the advice is generated. This field is optional.
Medium The medium by which an advice will be transmitted and the corresponding address will be picked up based on the media and address maintenance for a customer. You can, however, change either of these while processing the LC. Typically, if changed, both of them will be changed.
After selecting the advices to be generated for the LC, click on Ok to save it. Click Exit or ‘Cancel’ button to reject the inputs you have made. In either case, you will be taken to the Contract Main screen.
This field is optional.Priority For a payment message by SWIFT, you also have the option to change the priority of the message. By default, the priority of all advices is marked as Normal. The priority of a payment message can be changed to one of the following: - Low
- Medium
- High
Suppress By default, all the advices that have been defined for a product will be generated for the LCs involving it. If any of the advices are not applicable to the LC you are processing, you can suppress its generation by Checking against the suppress field. This field is optional.
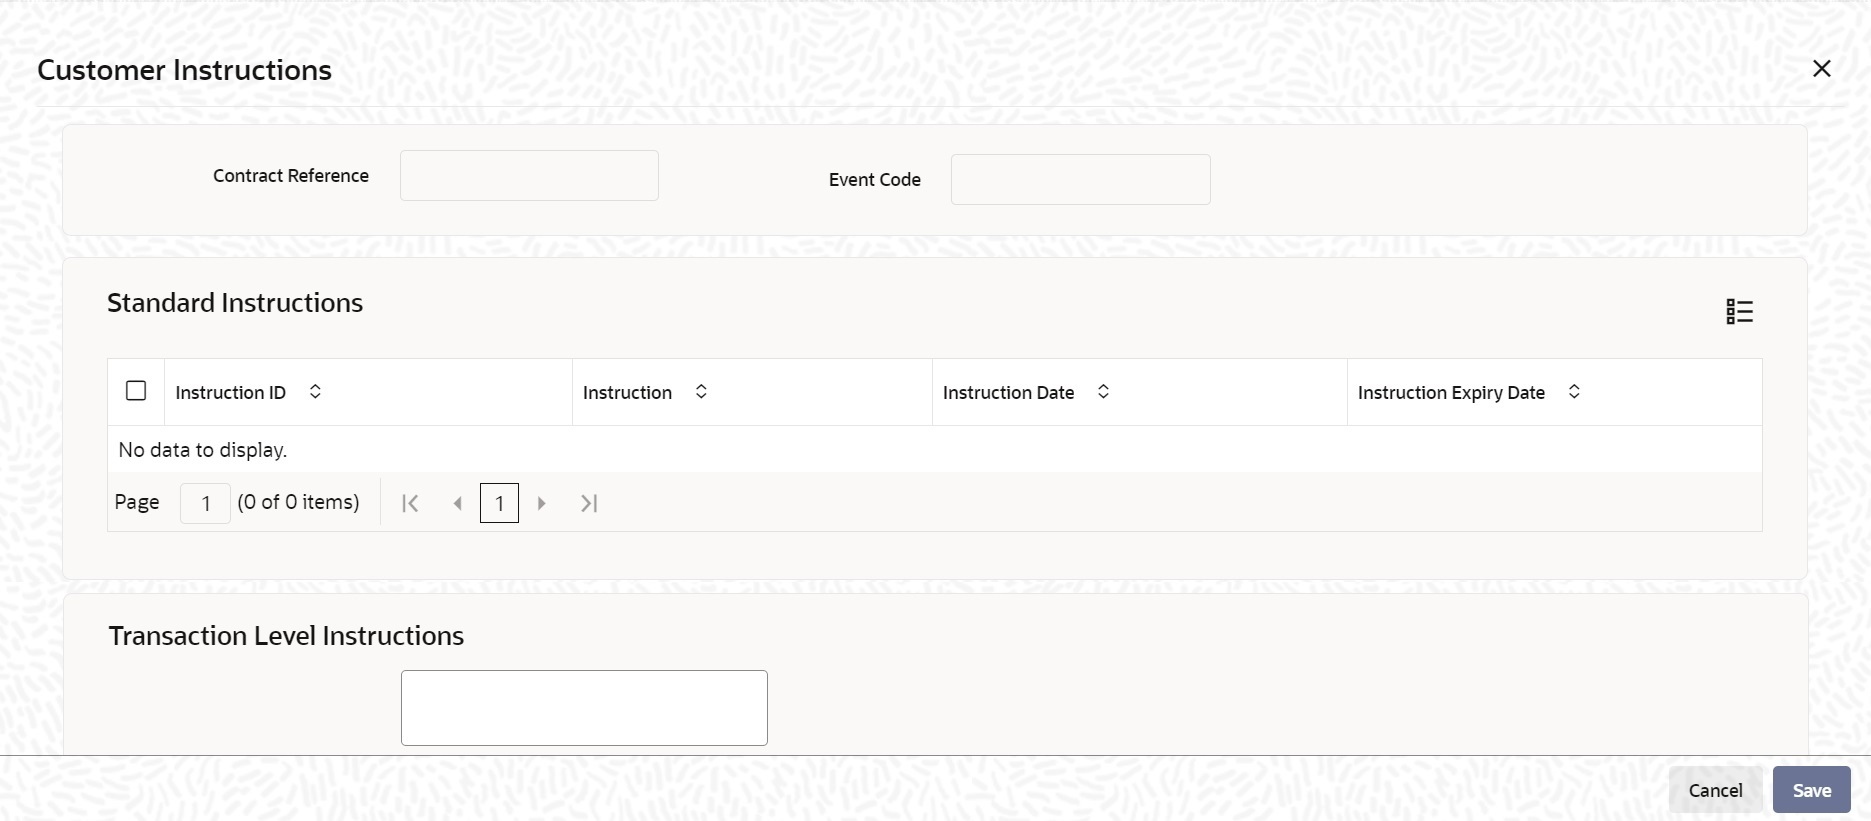
Charges The system displays the charges configured. This field is optional.
Free Form Text Details Free Format Text instructions (FFTs) are a set of instructions or statements that are applicable to the LC that you process. It can be used to enter additional details related to the LC you are processing. In the LC Contract - Advices screen you can specify the FFTs that should accompany an advice, generated for an LC. When you select an advice code on this screen, the advice code together and the party type, to which it is to be sent, is displayed in the FFT section. This indicates that the FFTs that you specify will appear on the advice, which is displayed and will be sent to the party type that is displayed. All the FFTs defined for the advice, at the product level will also be displayed. You have the option to add to or delete from the list of FFTs defaulted for an advice.
This field is optional.Free Format Text Code To add an FFT to the list, click add icon. Select an FFT code from the option list that is displayed. This field is optional.
Text After selecting the code that identifies the FFT you wish to attach to the advice, its description is automatically picked up and displayed. The FFT description can be changed to suit the requirements of the LC you are processing. This field is optional.
Single Check this option to indicate that the FFT is a single message. This field is optional.
- On the Letters of Credit Contract Detailed screen, click the Drafts button.The Draft Details screen is displayed.For more information on the fields, refer the Field Description table given below:
Note:
You can capture the details of draft drawn for the LC. Specify the name of the insurance company that is covering the goods traded under the LC.Table 4-16 Draft Details - Field Description
Field Description Draft Serial Number Specify the draft serial number.
This field is mandatory.Draft Tenor Specify the tenor of the draft.
If the LC Type of an LC product is selected as 'Sight', then:- During LC contract creation, on save, system validates the value entered for Draft Tenor in Drafts sub-system as either 0 or null. If the validation fails, system displays an override message. This validation is also performed on save of LC amendment using LC contract online function
- During LC contract creation, on save, the system validates whether the values entered for draft tenor in drafts sub-system is between minimum and maximum draft tenor values defined for the product. If the validation is not successful, the system displays a configurable override message. This validation is also performed on save of LC amendment using LC contract online function.
- If multiple drafts are captured for an LC contract, the system validates that the 'Draft Tenor' entered for each individual draft is within the minimum and maximum range defined for the product. If minimum and maximum draft tenor value is not defined for an LC product, then on save of an LC contract, the system will not perform this validation as the range is not defined at the product level
If either 'Minimum Draft Tenor' or 'Maximum Draft Tenor' is defined for the LC product, then on save of both LC contract creation and amendment, the value defined for the 'Draft Tenor' of LC contract will be validated against the 'Minimum Draft Tenor' (if 'Minimum Draft Tenor' is defined) or will be validated against 'Maximum Draft Tenor' (if 'Maximum Draft Tenor' is defined). If the validation fails, the system displays an override message.
This field is optional.
Percentage Amount Specify whether the draft is a percentage of the LC amount or a Flat amount. Subsequently, specify the Amount or the Percentage (based on your selection). This field is optional.
Draft Amount Specify the draft amount once you have selected the amount option in percentage amount. This field is optional.
Draft percentage Specify the draft percentage amount once you have selected the percentage option in percentage amount. This field is optional.
Credit Days From The Date from which the tenor of the draft begins. Drawee Specify the party on whom the draft is drawn. You can select the drawee’s CIF from the list. This will contain a list of all the open and authorized CIF maintained in the Customer Directory. This information is captured from the BIC directory. Address 1 to Address 3 Specify the address of the drawee. Insurance Details Specify the insurance details: Company Code You can select the appropriate company code from the option list. The list will display all authorized and active company codes. If you have specified an open insurance policy in the ‘Insurance Policy Number’ field, the option list will display the company code associated with the chosen insurance policy number. Upon selection of the company code, the following details will be automatically displayed by the system: - Company Name
- Address of the company
- Telephone Number
- Fax Number
- Policy Utilized Amount
- Cover Date
- Insurance Amount
- Telex Address
- Warehouse Address
Company Name Upon selection of the company code, the system displays the company name automatically. Address 1 to Address 4 Upon selection of the company code, the system displays the address 1 to 4 details automatically. Expiry Date Enter the expiry date of the Policy. This field is optional.
Policy Number Specify the insurance policy number here. The option list displays all insurance policy codes maintained in the system. If you check the option Open Policy the option list will display the open insurance policies maintained in the system. You can select the appropriate one. If you have checked the Open Policy’ option and the policy number is specified here is invalid (i.e. not maintained in the Open Policy Maintenance screen) or blank, the system will display an error message.
This field is optional.Telephone Number Upon selection of the company code, the system displays the telephone number automatically. This field is optional.
Fax Number Upon selection of the company code, the system displays the fax number automatically. This field is optional.
Open Policy Select open policy check box to link an open insurance policy to the LC. This field is optional.
Policy Utilized Amount Upon selection of the company code, the system displays the policy utilized amount automatically. This field is optional.
Cover Date Upon selection of the company code, the system displays the cover date details automatically. This field is optional.
Insurance Amount Upon selection of the company code, the system displays the insurance amount details automatically. This field is optional.
Telex Upon selection of the company code, the system displays the telex address details automatically. This field is optional.
Warehouse Address Upon selection of the company code, the system displays the warehouse address details automatically. This field is optional.
Amount Name This field is mandatory.Note:
You can also choose to associate an Insurance Company that is not maintained in the system. When you are specifying a company code that does not exist, the system will display an override (based on your requirement, you can configure the override to be a warning or an error message). On confirmation of the override, the company code will be automatically changed to ‘XXXXXXXXX’. Subsequently, you can specify any company name to be associated with the contract. The system will not perform any validations. The remaining fields in the screen will be disabled in this case.Amount The breakup details of the draft will be displayed here as follows: Note:
The draft amounts for the different components (Insurance, Interest, Invoice, Freight) This field is optional. - On the Letters of Credit Contract Detailed screen, click the Commission button.The Commission Details screen is displayed.
Besides the LC amount, the other components of an LC include the commissions that you collect and the charges that you levy on the parties involved in an LC.
While defining Accounting Roles for a product you must specify the internal accounts that should be picked up when commissions are collected and when charges are levied.
For an LC having the operation code Reimbursement, you will not be able to save commission related details. While saving the contract, the system will display an error message if you enter details in the ICCF screen.
While creating or amending an authorized contract, you can modify the percentage of commission to be charged. Enter the rate and click Re-compute button to recalculate the commission percentage to be charged.Note:
The details of the commissions that can be collected and the procedure of making them applicable to the LC you are processing has been detailed in the chapter Processing Commissions in the Modularity User Manual. The Processing Commissions manual, details the procedure for maintaining commission rules. It also deals with the linking of a commission rule to a product and the application of the rule on an LC. - On the Letters of Credit Contract Detailed screen, click the Charges button.The Charge Details screen is displayed.
Note:
The ICCF rate, amount, currency and the waive charge parameter can be specified. The Processing Charges and Fees manual, details the procedure for maintaining charge rules. It also deals with the linking of a charge rules to a product and the application of the rule on an LC. - On the Letters of Credit Contract Detailed screen, click the Settlement button.The Settlement Details screen is displayed. Based on the details that you enter in the settlement screens the LC will be settled. Besides the account details, you can specify:
- Current Event:
Current event of settlements will be checked for the amount tags pertaining to the current event and will be unchecked for the amount tags not pertaining to the current event.
- The currency in which the component is expressed.
- The payment account and its currency.
Note:
If you have specified an account that uses an account class that is restricted for the product, an override is sought.- The branch of your bank to which the account belongs.
- The exchange rate (in the case of the component currency being different from the account currency).
- The ERI Currency
- The ERI Amount.
Note:
Refer to the chapter titled ‘LC Availment’ in this user manual for details. - Current Event:
- On the Letters of Credit Contract Detailed screen, click the Tax button.The Tax Details screen is displayed. The Processing Tax manual details the procedure for maintaining tax rules and schemes. It also deals with the linking of a tax scheme to a product and the application of the scheme on an LC.
Note:
Refer the Tax User Manual under Modularity for further details on tax processing.Figure 4-16 Tax Details
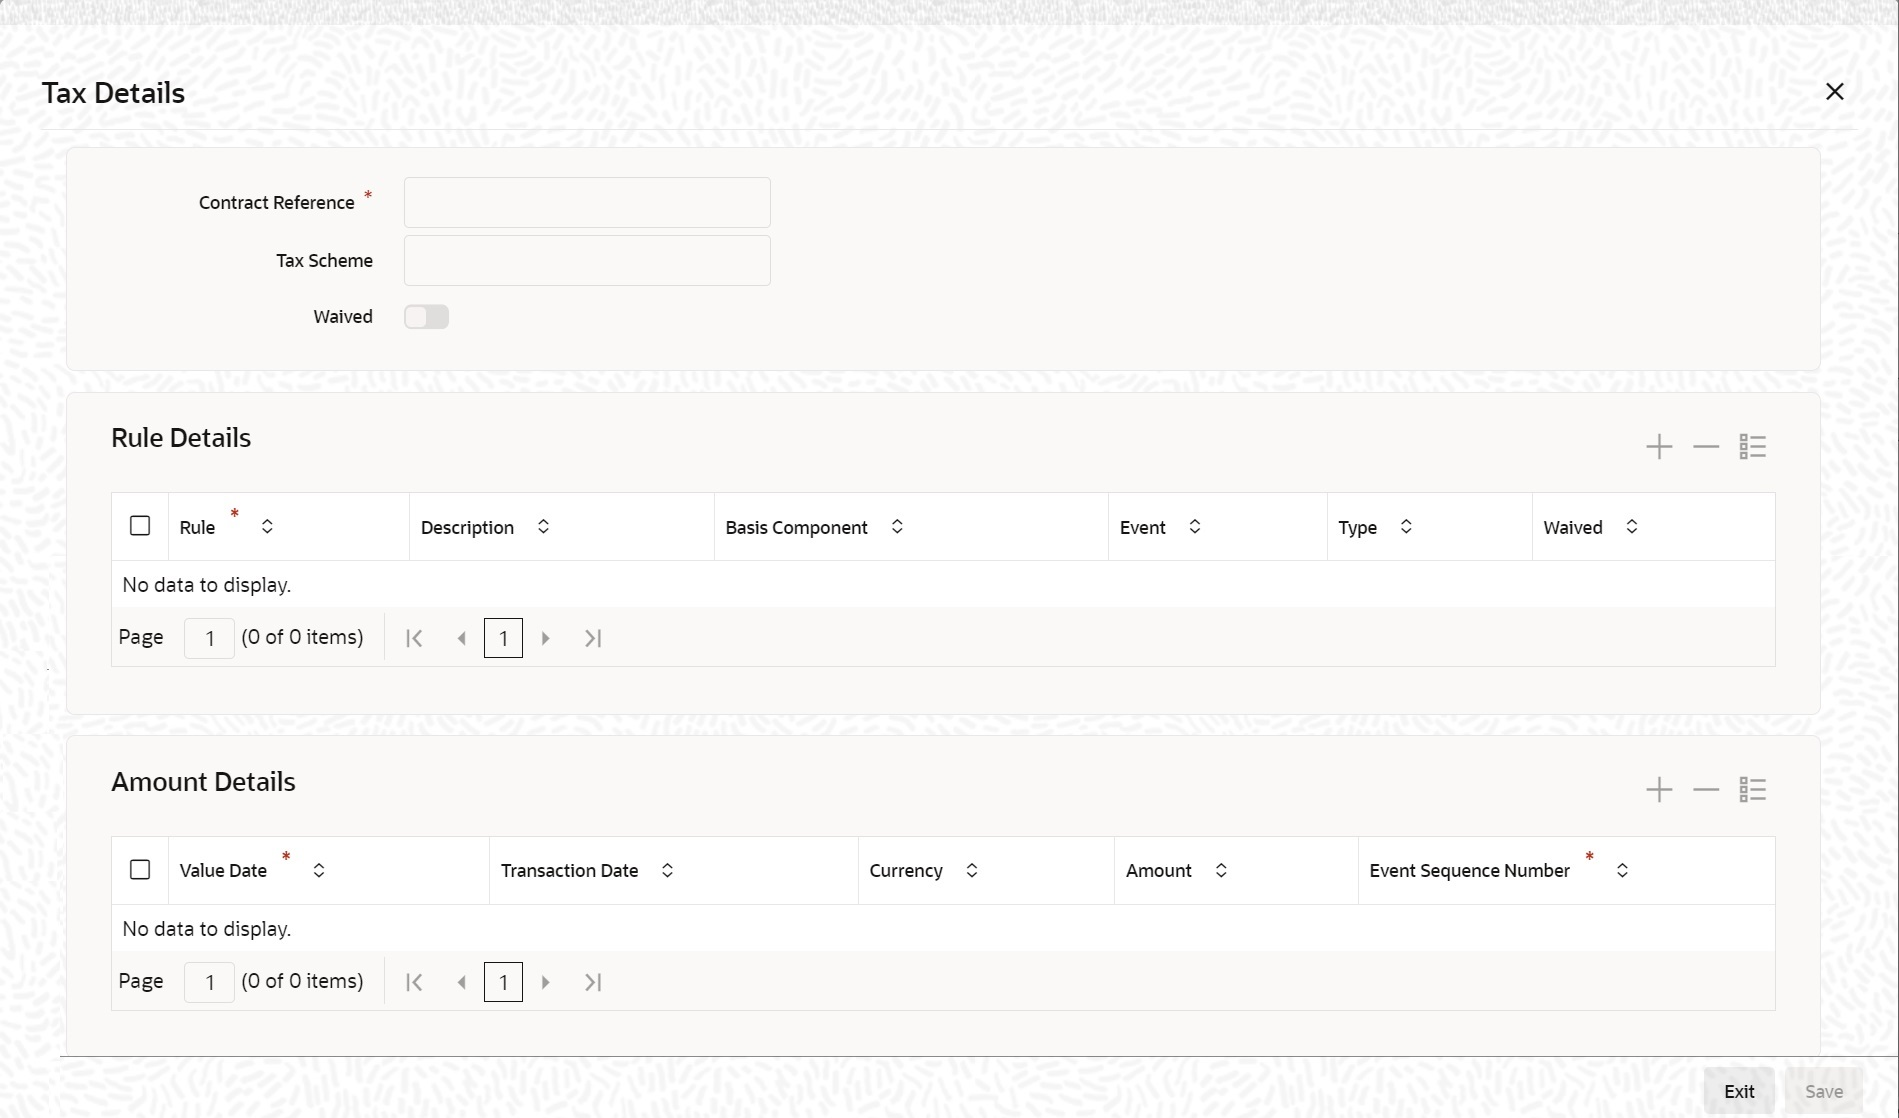
Description of the illustration 5.1.1_lcdavmnt_cvs_taxdetails.png - On the Letters of Credit Contract Detailed screen, click the Collateral button.The Collateral Details screen is displayed. You can specify details of the cash that you collect as collateral form a customer for the LC that you process. The details of this screen are discussed under the head specifying collateral details for an LC.
LCs that are issued or confirmed is often processed with cash collateral. In cases like a in a Guarantee, you may even take a 100% cash collateral. This is when an applicant is not a customer of your bank and the credit worthiness of the applicant is not known. Details of such cash collateral can be maintained in the LC Contract - Collateral Details screen.
The cash collateral percentage is defined for the product under which an LC is processed. This percentage is picked up by default for the LC being processed.
The value of collateral can be expressed either as an amount or as a percentage of the LC amount.
Figure 4-17 Collateral Details
For more information on the fields, refer the Field Description table given below:The cash collateral percentage is defined for the product under which an LC is processed. This percentage is picked up by default for the LC being processed.Table 4-17 Collateral Details - Field Description
Field Description Contract Reference Specify the contract reference number. Collateral Currency Specify the currency of the collateral. This field is optional.
Percentage If you specify the cash that is to be collected as collateral as a percentage of the LC amount, the equivalent amount is displayed. This amount is taken to be in the currency, defined as the collateral currency. This field is optional.
Collateral Amount You can specify the cash collateral as an amount. In this case you do not need to specify a percentage. However if you specified the collateral as a percentage of the LC amount, the actual amount is computed in the collateral currency by the system. This field is optional.
Exchange Rate If the collateral currency and the currency in which the LC is issued are different, you should also specify an exchange rate to be used in the conversion. The value of the collateral is determined based on this exchange rate. This field is optional.
Description Give a brief description of the collateral. This field is optional.
Specify Adjustment Details for a Collateral At any time during the lifecycle of an LC, you may want to increase or decrease the value of the cash, accepted as collateral on LC. This is done by way of an amendment to the LC. The cash collateral can be increased or decreased, without changing the LC amount. On the other hand, a change in the LC amount may necessitate a change to the collateral amount. This field is optional.
Type If you wish to increase the collateral amount, indicate ‘Increase’ on this screen. If you wish to decrease the collateral amount that you have collected while issuing an LC, indicate ‘Decrease’ on this screen.
This field is optional.Amount Enter the amount by which you want to increase or decrease the cash accepted as collateral. The collateral deposit account will automatically increase or reduce based on the specifications you make.
This field is optional.Note:
If at the time of Availment, you want to pay from the collateral account, you can include it in the accounting entries for the event, Availment. - On the Letters of Credit Contract Detailed screen, click the Events button.The Trade Finance Events screen is displayed.
Note:
The event details screen of contract processing will show the details of the accounting entries generated for an LC. The details of events that have already taken place on the contract will be displayed, along with the date on which the event took place. - On the Trade Finance Events screen, click the Accounting Entries to view the accounting entries for the event that is highlighted.The Trade Finance Accounting Entries screen is displayed.
Figure 4-18 Trade Finance Accounting Entries
The following information is provided for each event:Note:
The accounting entries that are passed depend on the type of LC that you are processing.- Event
- Branch
- Account
- Account Description
- Debit or Credit
- Amount Tag
- Account Currency
- Foreign Currency Amount
- Rate
- Local Currency Amount
- Date
- Value Date
- Txn Code
- All the overrides that were given for an event will also be displayed
Figure 4-19 Trade Finance Accounting Entries - Overides
- Click Exit or Cancel to navigate to Trade Finance Events screen.
- On the Letters of Credit Contract Detailed screen, click the Linkage Details button.The Linkage Details screen is displayed.
In the Linkage Details screen, specify the type of linkage
- Contract Linkage
For export LC, note the following:
Figure 4-20 Linkage Details-Contract Linkage
- Export type of LC is the only option displayed in the option-list.
- The system allows Export LC for linkage only for bills under reimbursement type of LC.
- An overriding message is displayed if any outstanding advising charges are collected at the time of bill lodgement or liquidation. This override message is only for Import Bills under LC. Link the export LC from the Linkages Details screen and perform the charges transfer.
- CASA/Deposit
Linkage type grouped under CASA/ Deposit linkages are:
- CASA
- CD
- Loans
Linkage type grouped under Loans linkages are:
- OL
- Buyers Credit Reference
Table 4-18 Linkage Details - Contract Input Linkages - Field Description
Field Description Linkage Sequence The Linkage Sequence number of a linked type. Type In the Contract Linkages screen, you can specify the type of linkage. The possible values are:
Linkage Type grouped under contract linkages are:
- Shipping Guarantee
- LC
- LI
- EL
- CASA
- CD
- OL
- CL
- CI
- Buyers Credit Reference
Linked To Reference Number/Account Specify the contract/account to which you wish to link the LC. Currency The currency of the linkage type to which the LC is linked is displayed once the linkage details are specified. Available Amount The system displays the amount available against the linked contract or account. Linked Amount Specify the linked amount linked to trade contract Exchange Rate Exchange rate denotes the rate applied to convert the linked amount in trade currency. Converted Linked Amount If the linked contract is in a different currency (than that of the bill), the system will convert the account/contract amount into the billing currency and display it here. Account/Deposit The system displays the amount linked to each contract or account. This displays only for CASA/Deposit.
Uncovered Amount The system displays the contract amount that has not been linked, in the case of a partial linkage.
This displays only for CASA/Deposit- Create Deposit/Create amount block request is send on linking the Deposit contract or CASA accounts
- Close Deposit/Close amount block request is send on delinking the deposit contracts or CASA accounts.
- Linkages will be delinked automatically during Closure/Cancel/Rollover/Contract reversal.
- Close Deposit /Close amount block followed by Create Deposit/Create amount block is send when there is change in linked amount either manually or proportionate change based on events(availment/amendment/ claim lodgement of LC/Guarantee)
- Contract Linkage
- On the Letters of Credit Contract Detailed screen, click the Fields button.The Fields screen is displayed.
Note:
The User Defined Fields (UDFs) maintained for the linked function id are displayed here. You can specify values for them. Refer the User Manual titled User Defined Field for details about defining UDFs. - On the Letters of Credit Contract Detailed screen, click the MIS button.The MIS screen is displayed.
Note:
Refer the MIS User Manual for further details on capturing MIS details.A new common screen STDCRCMI (External Customer Composite MIS) is introduced to capture the Customer Composite MIS at customer level. If the following is maintained in this screen then the same will be defaulted while creation of a contract. If it is not maintained, then the same will be defaulted from the generic existing MIS Screen which happens to be the existing behavior.Figure 4-25 External Customer Composite MIS
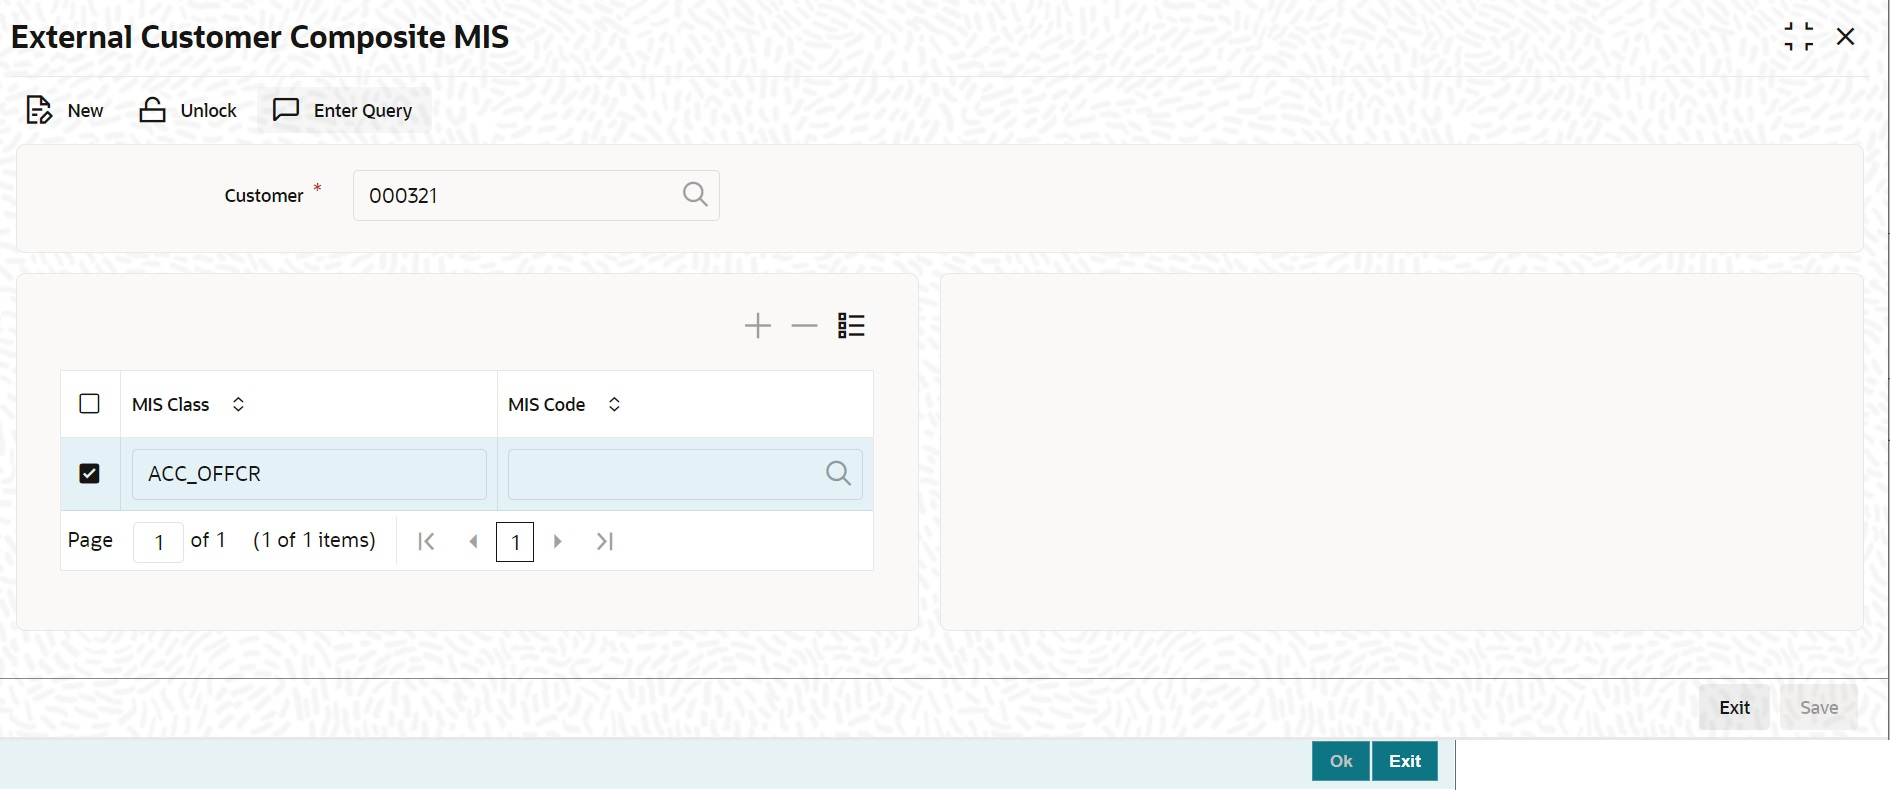
Description of "Figure 4-25 External Customer Composite MIS" - On the Letters of Credit Contract Detailed screen, click the Transfer Details button.The Transfer Details screen is displayed. For more information, refer the Field Description table given below:
Table 4-19 Transfer Details - Field Description
Field Description From Letter Of Credit Reference Specify the destination from which the goods transacted under the LC should be sent by selecting the appropriate option from the list of values. This field is optional.
To Letter Of Credit Reference Specify the destination to which the goods transacted under the LC should be sent by selecting the appropriate option from the list of values. This field is optional.
Transfer Amount Specify the amount that should be transferred from the original LC. You can only transfer an amount that is less than or equal to the amount available under the original LC. This field is optional.
Transfer Date The system date is displayed as the date of the transfer. This cannot be modified. This field is optional.
Expiry Date The expiry date is the date up to which the transferred LC is valid. The expiry date of the original LC is displayed here. You can modify this, provided that the expiry date is not earlier than the LC issue date or the system date. This field is optional.
Shipment Date This is the latest date by which the shipment of the goods specified for the transferred LC can take place. The latest shipment date of the original LC is displayed here. You can modify this, provided that the date you enter is neither earlier than the Issue Date of the LC, nor later than the expiry date. This field is optional.
Transfer Status The system displays the transfer status. This field is optional.
- On the Letters of Credit Contract Detailed screen, click the BC Linkage button.The BC Linkage screen is displayed. For more information on the fields, refer the Field Description table given below:
Table 4-20 BC Linkage - Field Description
Field Description Contract Reference The system displays the Contract Reference number of the LC. Bill Reference The system displays the BC reference number booked for the LC. Bill Currency The system displays the bill currency booked for the LC. Bill Amount The system displays the bill amount booked for the LC. Loan Account The system displays the loan account booked for the BC. Loan Currency The system displays the loan currency booked for the BC. Loan Amount The system displays the loan amount booked for the BC. - On the Letters of Credit Contract Detailed screen, click the Split Settlement button.Split Settlement Master details get populated for the Cash collateral. User needs to provide the split details for the Split Master Basis Amount. During Cancel or Close, the outstanding collateral will be refunded to the customer accounts.Split Settlement Master and Split Settlement Details get populated for the Charges and Commission component if split flag is checked in the respective subsystems. System will default the split settlement details with two splits for a charge/commission component one for counterparty and another one for Other party. System will default split amount 50% of charge/commission component between parties. User can modify the amount and percentage will be derived based on modified amount. If AR-AP is unchecked for a component then Split account will default with settlement instructions of Customer and Split Account can be modified to another valid account of the Customer. If AR-AP is checked then Split account will be defaulted with AR-AP GL and Split account cannot be modified. Maximum of two splits is allowed for Charges and Commission components.
Table 4-21 Party Type Derivation for Charges and Commission
Category Counter Party Other Party Other Party Resolution Import LC Issuance APP/APB/ACC BEN/ABK If Beneficiary is a bank customer else Advising bank. Export LC Advise BEN APP/ISB If Applicant is a bank customer else Issuing bank. The Split Settlement screen is displayed. For more information on the fields, refer to Table 4-22:Table 4-22 Split Settlement - Field Description
Field Description Specify Settlement Split Master You can specify the details of the settlement split master in the following fields: Basis Amount Tag Specify the amount tag involved in the contract. The option list displays all valid amount tags maintained in the system. You can choose the appropriate one. For example, on booking a new contract, the only tag allowed is PRINCIPAL. This is referred to as the basis amount tag.
This field is optional.Currency The system displays the currency associated with the amount tag. This field is optional.
Basis Amount The system displays the basis amount associated with the amount tag. For example, the amount involved in the contract would be displayed against the amount tag PRINCIPAL. The amount is in terms of the currency associated with the amount tag.
You can use Get Exchange Rate button to get the original exchange rates defaulted in the screen.
This field is optional.Specify Settlement Split Details For each split amount tag, you need to specify the following details:
This field is optional.Amount Specify the amount for the split amount tag. This amount should not be greater than the amount of the corresponding basis amount tag. The split amount is in the currency of the basis amount tag. This is a mandatory field and you will not be allowed to save the details if you do not specify the amount. This field is optional, if percentage of proceeds is provided. Amount will be derived based upon the percentage.
Branch Specify the branch. The list displays all valid values. This field is mandatory.
Account Currency Specify the account currency. This field is mandatory.
Account Specify the account. This list displays all the accounts. For Cash Collateral the account should be account of the counterparty. If the account selected is other than counterparty account, then system will throw error. This field is mandatory.
Loan/Finance Account Check this box to indicate that the specified account should be the loan account. This field is optional.
Exchange Rate Specify the exchange rate that must be used for the currency conversion.
Specify the destination to which the goods transacted under the LC should be sent by selecting the appropriate option from the list of values.
This field is optional.Original Exchange Rate The base or the actual exchange rate between the contract currency and collateral currency gets displayed here. Party Type System defaults this field for Charges and Commission components if split flag is checked in respective components.
This field is applicable only for charges and commission components.
AR-AP Tracking System defaults this field for charges and commission components based upon the AR-AP tracking selection in charges and commission component when split flag is checked in respective components.
This field is applicable only for Charges and Commission components.
Customer Select the customer number from the list. Percentage of Proceeds Specify the percentage of proceeds. Negotiated Rate Specify the negotiated cost rate that should be used for foreign currency transactions between the treasury and the branch. You need to specify the rate only when the currencies involved in the transaction are different. Otherwise, it will be a normal transaction. The system will display an override message if the negotiated rate is not within the exchange rate variance maintained at the product.
This field is optional.Negotiated Reference Specify the reference number that should be used for negotiation of cost rate, in foreign currency transaction. If you have specified the negotiated cost rate, then you need to specify the negotiated reference number also. This field is optional.Note:
Oracle Banking Trade Finance books then online revaluation entries based on the difference in exchange rate between the negotiated cost rate and transaction rate. - On the Letters of Credit Contract Detailed screen, click the Loan Preference button.The Loan or Finance Preference screen is displayed. For more information on the fields, refer the Field Description table given below:
Table 4-23 Loan or Finance Preference - Field Description
Field Description Contract Reference The contract reference number is displayed here. This field is optional.
Latest Sequence Number The system generates a sequence number and displays it here. This field is optional.
Product The loan product is displayed here. However, you can change the loan product if required. Specify the loan product that should be used for loan contract creation. The adjoining option list gives a list of loan products maintained in the Consumer Lending module. Choose the appropriate one. This field is optional.
Counterparty The system displays the customer ID (CIF) of the shipping guarantee. This field is optional.
Currency Specify the currency in which the loan should be initiated. The option list gives a list of valid currency codes maintained in the system. Choose the appropriate one. This field is optional.
Tenor Specify the loan tenor. By default the system displays the OL product tenor. However, you can change it. This field is optional.
Units Specify the loan tenor. By default the system displays the LC tenor. However, you can change it. This field is optional.
Contract Reference Number The contract reference number is displayed here. This field is optional.
Event Sequence Number The system displays the event sequence number. This field is optional.
Bill Outstanding Amount The bill outstanding amount is displayed here. This field is optional.
Rate You can capture the exchange rate details here. This field is optional.
Middle Rate Select the rate to be applied for conversion. The options available are Middle rate and Buy/Sell Rate. This field is optional.
Exchange Rate For a customer availing any Relationship Pricing scheme, the customer specific exchange rate derived by adding the original exchange rate and the customer spread maintained for the relationship pricing scheme gets displayed here. If Relationship Pricing is not applicable, Exchange Rate will be the same as the Original Exchange Rate.
For more details on customer specific exchange rates, refer the section titled ‘Specifying Pricing Benefit Details’ in Relationship Pricing user manual.
This field is optional.Rate Type Specify the rate type used for exchange rate. The list gives a list of rate types. Choose the appropriate one. The default rate type is Standard. This field is optional.
Original Exchange Rate The base or the actual exchange rate between the contract currency and collateral currency gets displayed here. This field is optional.
Party Type System defaults this field for Charges and Commission components if split flag is checked in respective components.
This field is applicable only for charges and commission components.
AR-AP Tracking System defaults this field for charges and commission components based upon the AR-AP tracking selection in charges and commission component when split flag is checked in respective components.
This field is applicable only for Charges and Commission components.
Payment Mode Specify the mode of payment. This field is optional.
Loan Value Date The system displays the debit value date. However, you can change it. This field is optional.
Maturity Date The system computes the maturity date based on loan tenor and displays it here. However, you can change it. This field is optional.
Credit Product Account Specify the credit settlement account of the loan. This field is optional. Debit Product Account Specify the debit settlement account of the loan. This field is optional. User Defined Element Id Interest Components of Loan Product will be defaulted. This is optional field
UDE Description Interest Component description of Loan Product will be defaulted. This is optional field.
Rate Code Specifies Floating Rate Code for interest components of Floating Rate type. Floating Rate Code will be defaulted. LOV will be provided will floating rate codes. User can modify the same. This is optional field.
Usage Specifies Rate Code Usage for Floating Rate Codes. Rate Code Usage can be Auto or Periodic. This is optional field.
UDE Value Specifies Interest Rate for Rate Codes of Fixed Type. This is optional field. Limits The following are limits entries.
Serial Number Specify the serial number. Liability Number The system displays multiple liabilities that are attached to the Customer. Linkage Type The system displays the linkage type. Linkage Reference Number Select the linkage reference number from the option list. Linked Percentage Specify the linked percentage. Limit Amount The system displays the limit amount. - On the Letters of Credit Contract Detailed screen, click the Brokerage button.The Brokerage screen is displayed. You can capture brokerage details for the LC contract and set your preferences for sharing the brokerage amount among multiple brokers. For more information on the fields, refer the Field Description table given below:
Table 4-24 Brokerage Details - Field Description
Field Description Contract Reference The system displays the reference number of the contract. Contract Currency The system displays the currency of the bills contract. You cannot modify the contract currency. Brokerage Percentage Specify the percentage of the contract amount that should be paid as brokerage. Based on the percentage set here, the system calculates the brokerage amount. The brokerage amount calculation takes place at the Bills contract level. In case of Bills contracts, you may directly enter the brokerage amount. However, if you specify the brokerage percentage as well as the amount, the system ignores the amount and calculates it afresh based on the percentage specified here.
Brokerage Amount Specify the brokerage amount to be paid. However, if you have entered the brokerage percentage, the system ignores the amount mentioned here and calculates it afresh based on the brokerage percentage.
You can directly enter the contract amount for Bills contracts only. In case of LC contracts, the system displays the amount based on the brokerage percentage and contract amount. You cannot modify the brokerage amount in that case.
This field is optional.Brokerage Details You can share the brokerage amount among multiple brokers. Click add button to add more brokers to the list. You can define the percentage of brokerage amount to be paid to each broker selected under this list. Broker Specify the broker ID. The option list displays all valid broker IDs maintained in the system. Choose the appropriate one.
You can maintain multiple records for the same broker ID.
This field is mandatory.Broker Name Based on the broker ID selected, the system displays the name of the broker.
This field is optional.Broker Account Specify the broker account. The option list displays all valid accounts maintained for the selected broker along with the Nostro accounts and GLs for which posting is allowed. Choose the appropriate one.
This field is optional.Broker Currency The system displays the currency of the selected broker account. This field is optional.
Percentage Specify the percentage of total brokerage amount that should be paid to the selected broker. This will make the selected broker eligible for that percentage of the total brokerage amount shown above. You can allot a specific percentage of the brokerage to each broker selected here. The system will verify whether the percentages allotted for all brokers together equals to 100 or not.
This field is optional.Amount in Account Currency The system displays the portion of brokerage amount allotted to the selected broker in terms of local currency.
This field is optional.Exchange Rate The system displays the exchange rate between the local currency and the account currency. This rate is used to convert the brokerage amount into the account currency. You can modify the exchange rate. This field is optional.
Amount in contract currency The system calculates and displays the portion of brokerage amount allotted to the selected broker in terms of contract currency.
This field is optional.Original Exchange Rate The system displays the actual exchange rate. This rate is inclusive of all available customer spreads.
This field is optional.Negotiated Rate Specify the rate of exchange agreed upon after the negotiations with the broker. The system will display an override message if the negotiated rate is not within the exchange rate variance maintained at the product.
This field is optional.Negotiation Reference Number Specify the negotiation reference number. Once you have captured the details, save the contract. The system allows modification of brokerage details until its liquidation. The system will default the brokerage details to the bill contracts associated with this LC. You may modify the brokerage details at the bills contract level. You can use Exchange Rate button to get the exchange rates between the broker account currency and bill currency for all the brokers listed in the screen.
The system defaults the brokerage details in Split Settlements screen. Those details are then used in settlements. You can enter the routing details for the messages in case the settlement takes place through Nostro account. If you modify the default brokerage details in Split Settlements screen, the system displays an error message.
During liquidation of the brokerage, the system generates credit advices for each of the brokers involved.
This field is optional.Remarks Specify the remarks, if any. Liquidation status This fields displays the liquidation status. - On the Letters of Credit Contract Detailed screen, click the All Messages button. The Trade Finance View Message screen is displayed. For more information on the fields, refer the Field Description table given below:
Table 4-25 Trade Finance View Message - Field Description
Field Description Contract Reference Number Displays Contract Reference Number of the contract, for which messages are generated.
This field is optional.Message Date Displays the message generation date or received date.
This field is optional.Direction Displays whether the message is an incoming or outgoing message.
This field is optional.DCN Displays document reference number of a contract. This field is optional.
Media Displays whether the message is swift message or mail message.
This field is optional.Message Type Displays the type of message.
This field is optional.SWIFT Message Type Displays the Swift MT number of the message sent or received.
This field is optional.Receiver/ Sender Displays Receiver or Sender ID.
This field is optional.Name Displays the name of the Sender or Receiver.
This field is optional.Message Status Displays current status of message.
This field is optional.Test Status Displays the test status.
This field is optional.Authorized System displays whether the status is authorized or unauthorized.
This field is optional.Acknowledgement Status Displays the Ack/Nack Status of a message.
This field is optional.PDE Flag Displays the PDE flag.
This field is optional. - On the Letters of Credit Contract Detailed screen, click the Documents button.
The Document Upload screen is displayed.
- On the Document Upload screen, click Upload button. You can to capture the customer related documents in central content management repository.
- Specify the document field details and click Ok.You can capture the customer related documents in central content management repository through the Document Upload screen.
For more information on the table, refer the Field Description table given below:
Table 4-26 Document Upload - Field Description
Field Description Document Category Specify the category of the document to be uploaded. This field is mandatory.
Document Type Specify the type of document that is to be uploaded. This field is mandatory.
Document Reference The system generates and displays a unique identifier for the document. This field is mandatory.
Document Date Specify the Document Date. Document date should be less than or equal to issue date.
Remarks Specify the additional information, if any. This field is optional.
- Specify the corresponding document path and click the Submit button. Once the document is uploaded through the Upload button, the system displays the document reference.
- Click View to view the document uploaded.
- On the Letters of Credit Contract Detailed screen, click the Message Preview button. For the contract, you can view the following details of the messages:
- The document number generated for the message/advice
- Type of message generated for the event
- Customer ID of the receiver of the message/advice
- Name of the receiver of the message/advice
- Media of transmitting the message/advice (Mail/SWIFT)
- SWIFT message type of the message
- Status of the message/advice
You cannot preview the message after the authorization of the contract.
For preview of SWIFT MT700 and MT760 messages on hold, you need to view the Advices/ Settlement/ Commission/Charges/Interest or Collateral sub-screen after contract input. The system performs the required validations and after that, you can keep the contract on hold and view the message in ‘Message Preview’ sub-screen.
Message preview functionality is available on save for all the LC module transactions and preview available for MT700 and MT 760 for hold transactions also. Along with the preview option, you will also be allowed to print the required message/advice from the preview screen.
- On the Letters of Credit Contract Detailed screen, click View button.The Trade Finance Message screen is displayed. You can preview the messages/advices. You can view the following details:
- Reference number of the message/advice
- Document number generated for the message/advice
- Version number of the message/advice
- Receiver/sender of the message
- Type of the message
- Type of the SWIFT message
- Complete text of the message/advice
- Remarks, if any
- Reject reason, if any
- Message trailer
- On the Letters of Credit Contract Detailed screen, click the Import License button. The Import License screen is displayed.
Note:
You can capture import license details. You can link the import license to an import LC contract and update the utilization amount or quantity for the linked import licenses. You can utilize multiple import licenses for an import LC. - Specify the field details and click Ok.You can view the field values against the field names.
For more information on the table, refer the Field Description table given below:
Table 4-27 Import License - Field Description
Field Description Import License No Select the import license number from the option list. The import licenses maintained for the party type Applicant in the Import License Maintenance screen is displayed in the option list. This field is optional.
Goods Code Select the goods code from the option list. This field is optional.
Goods Short Description The system displays the goods short description maintained in the Bills and Collections Commodity Code Maintenance screen. This field is optional.
UoM/Currency The system displays the unit of measurement or currency captured for the goods code of import license. This field is optional.
Note:
If the basis is Quantity, then the system displays the UoM maintained for the goods code. If the basis is Amount, then the system displays the currency maintained for the import license.Qty/License Amount The system displays the Quantity or License Amount captured for the goods code of import license. This field is optional.
Qty/License Amt Already Utilized The system displays the sum total of Quantity or License Amount already utilized for the goods code. This field is optional.
Qty/License Amt Already Reinstated The system displays the sum total of Quantity or License Amount already reinstated for the goods code. This field is optional.
Available Qty/License Amt The system displays either the Available Quantity or Available License Amount for the goods code. This field is optional.
Qty/License Amt Utilized Specify the quantity or the license amount utilized. This field is optional.Note:
If the license utilization basis is Quantity, then the system defaults the License Amount Utilized as Quantity Utilized * Rate/Unit.Qty/License Amt Reinstated Specify the quantity or the license amount reinstated. Note:
If the License Amount Utilized is maintained for an goods code of an import license, then the system allows reinstatement of the license amount.- The ‘Qty/License Amt Reinstated’ should be less than or equal to the sum total of Qty/License Amount Utilized - Qty/License Amt Reinstated.
- You can enter either Qty/License Amount Utilized or Qty/License Amt Reinstated for a goods code.
After authorization, you cannot modify or delete import licenses linked to a LC contract. The utilizations and re-instatements maintained for an import license in Import License Utilization Screen and Import License sub-system will be differentiated by the system based on the ‘Transaction Reference Number’.
On authorization of reversal of a contract, the utilizations of all linked import licenses will also be reversed i.e. the value of Qty / License Amt Already Utilized - Qty / License Amt Already Reinstated will be posted as Qty / License Amt Reinstated for the respective goods codes and Available Qty / Available License Amt values will be re-computed.
If an import licenses linked to an Islamic import LC contract is not completely availed i.e. sum total of availments are less than the liability amount of Islamic import LC, then at the time of closure of Islamic LC contract, the system will give an alert to reinstate un-utilized quantity / license amount of linked import licenses. If auto closure is enabled for such Islamic import LC contracts, then system will not perform the auto-closure.Note:
If the good is classified either as Licensed or as Prohibited and the import licence details are not entered in the LC or BC contract screens, then the system displays an override message as “Import license details are not entered for the contract.”For import LC contract, the effective date should be between the effective date and expiry date of the linked import license.
- On the Letters of Credit Contract Detailed screen, click the Remarks button. The History of Remarks screen is displayed.
Note:
You can view the remarks entered at different stages of the contract.Table 4-28 History of Remarks Upload- Field Description
Field Description Contract Reference Number The system displays the contract reference number. Serial Number The system displays the serial number. Event The system displays the event code of the event. Date The system displays the date on which the instructions were captured. User Identification The system displays the user ID of the user who created the notes. Remarks The system displays the instructions that the user captures. - On the Letters of Credit Contract Detailed screen, click the Common Group Message button.The Common Group Message screen is displayed.
Note:
You can open the common group message call form.For field descriptions of the above screen refer the topic Common Group Message Maintenance in chapter titled Defining Free Format Messages in Messaging System User Guide.Figure 4-37 Common Group Message Maintenance
You can enter the details of the message and the message is saved when the contract is saved. The saved messages can be viewed in the message preview subsystem before authorization. On authorization of the contract, the message is generated. After authorization, the messages can be viewed from All Messages subsystem and ‘Events’ subsystem. The messages are linked with the relevant event in which the common group message is generated. The common group messages which are supported are listed below:
Table 4-29 Common Group Message Maintenance - Field Description
MT MT Name n90 Advice of Charges, Interest and Other Adjustments n91 Request for Payment of Charges, Interest and Other Expenses n92 Request for Cancellation n95 Queries n96 Answers n98 Proprietary Message n99 Free Format MT759 - Ancillary Trade Structured Message – Common group Maintenance Screen (MSDCOMPM)MT759 – Ancillary Trade Structured Message has been added to the existing list of SWIFT Message Types.
Figure 4-38 Common Group Message Maintenance
- Introduced fields to capture the Function of Message and Narrative details in Common Group Maintenance Screen.
System has been enabled to generate MT759 message from Common group Message maintenance screen by providing the Message type (as MT759) and the mandatory values of the corresponding message as per the SR2018 standard
Note:
Click on Common Group Message subsystem. Added 759 in Swift Message when selected with appropriate LOV, will display MT 759 fields.
MT759 - Ancillary Trade Structured Message – Common group Maintenance Subsystem (LCDTRONL)You can enter details of ancillary trade structured message using the Common Group Maintenance LCDTRONL
sub system screen. Click on Common Group Message to open this screen.MT759 – Ancillary Trade Structured Message has been added to the existing list of SWIFT Message Types.Figure 4-39 Common Group Message Maintenance
- Introduced fields to capture the Function of Message and Narrative details in Common Group Maintenance Screen.
- System has been enabled to generate MT759 message from LCDTRONL subsystem Common group Message maintenance screen by providing the Message type (as MT759) and the mandatory values of the corresponding message as per the SR2018 standard.
- System is enhanced to enable the support of message MT759 - Ancillary Trade Structured Message from Common Group Message Maintenance and from Common Group Message of LC contract input screen.
- Multiple MT759’s (upto 8 messages) are supported.
- As per the existing system, generation of multiple MT759 is supported only from LC or BC contract input screen based on the flag ‘Ancillary Message’, whereas generation MT759 or Multiple MT759 from Common group Maintenance Screen and Common group Message subsystem of LC or BC contract input screen are not available.
- LCDTRONL: Introduced fields 23H – Function of Message and 45D Narrative as mandatory fields for generation of message MT759 as per SR2018 standard.
- 23H Function of Message specifies the type of request or function of the message, list of possible function codes as per SR2018 standard are
- CLSVCLOS
- CLSVOPEN
- FRAUDMSG
- GENINFAD
- ISSAMEND
- ISSUANCE
- OTHERFNC
- REIMBURS
- REQAMEND
- REQFINAN
- REQISSUE
- TRANSFER
- 45D Narrative is a text box to capture narrative details corresponding to the message. Three fields has been introduced to capture the narrative details, in total the detail can be upto 72,800 characters(9600*8 – 9600 is number of character and 8 is a number of message).
- Multiple MT759 messages can be generated based on the provided ‘Narrative’ details, when narrative details exceeds 9600 characters (9600 characters and 150 considering as enter line – in total 9750 characters), the second MT759 will be generated. Similarly when the second message exceeds the allowed limit, third message will be generated and it continues upto 8 messages.
- Introduced fields to capture the Function of Message and Narrative details in Common Group Maintenance Screen.
- On Query from contract input screen, click UDE to launch the Trade Finance User Defined Events Triggering screen (UDDTFEVT) and perform additional accounting entries for active and authorized contracts.The UDE screen is displayed.
Figure 4-40 Trade Finance User Defined Events Triggering
Click ‘Default’ to default the following details:Table 4-30 Trade Finance User Defined Events Triggering - Field Description
Field Description Contract Reference Number On click of New the contract reference number defaults. Counterparty On click of New the counterparty defaults. Status On click of New the status defaults. Currency On click of New the currency defaults. Liquidation Event Select the event from the adjoining option list. Description Description defaults on select of event from the field liquidation event. Payment Remarks Specify remarks pertaining to the payment on the account. Value Date If the value date derivation rule has been maintained for the event code, the system will calculate the value date and display it here. However, you can change it. Amount Details: The system displays the following amount details
Component
Description
Currency
Amount
- On the Letters of Credit Contract Detailed screen, click the FX Linkage tab.The FX Linkage screen is displayed.
This link invokes a screen in which you can link a LC involving a specific counterparty with FX deals involving the same counterparty. You can link one or more FX deals to a bill. The value of an FX deal should not exceed the value of the bill it hedges. If you link several FX deals to a bill, the total value of all the deals should not exceed the bill amount.
Table 4-31 FX Linkage - Field Description
Field Description Sequence No System generates the ‘Sequence No’ for linked FX contracts sequentially. FX Reference no Indicates FX deal reference no. from treasury system. Date Indicates FX deal value date. FX Value date should be greater or equal to LC Expiry Date. BOT/SOLD Currency LC contract currency should be BOT currency of the FX transaction in case of an export LC or the SOLD currency in case of an Import LC.
Bought Currency: Presents FX Deal Bought Currency. Incase of export contract, LC contract currency should be same FX Bought Currency.
Sold Currency: Presents FX Deal Bought Currency. Incase of import contract, LC contract currency should be same FX Sold Currency.Rate Presents FX deal Exchange rate. Available Amount Present FX available amount (i.e) FX contract amount minus total linked FX amount. Linked Amount User will capture Linked amount at FX Linkage screen. Sum of Linked amount will not be greater than LC contract amount. Linked amount will not be greater than the available amount for linkage. Current Utilized amount Current Utilized amount will display the current amount utilized of the event. Total Utilized amount Total Utilized amount will display the total amount utilized of the contract. - • OBTF system initiates the link/delink
- During creation of an LC,OBTF system initiates Link request.
- During manual delink of FX at LC,OBTF system initiates delink request.
- • OBTF system initiates the link/delink
- On the Letters of Credit Contract Detailed screen, click the Customer Instructions tab.The Customer Instructions screen is displayed.
Table 4-32 Customer Instructions - Field Description
Field Description Contract Reference Number System displays the contract reference number. Event Code System displays the Event Code of the contract. Standard Instructions Customer would want to give Standard instructions in advance to the bank that need to be referred by the bank while processing certain type of transactions.
Instruction ID System displays the Instruction ID. Instruction System displays the customer standard instruction. Instruction Date System displays the start date of the customer instruction. Instruction Expiry Date System displays the expiry date of the customer instruction. Transaction Level Instruction Enter the transaction level instructions for the event. - On the Letters of Credit Contract Detailed screen, click Save.On saving the contract after entering all the required details in the system, the system validates the value of the contract amount against the following:
- Product transaction limit
- User Input limit
- Number of levels required for authorizing the transaction
- Transaction amount is in excess of the input limit of the user.
Note:
You have the option to amend all the unauthorized entries made for an LC. However, after authorization, certain fields cannot be amended. - Click Exit or Cancel button. to go back to the Application Browser.It leads you to the application browser.
- On the Letters of Credit Contract Detailed screen, click the Save button.The details are saved.
- On the Letters of Credit Contract Detailed screen, click Hold button.
- It support a New operation during LC Issuance from LCDTRONL.
- User can unlock contracts put on HOLD, modify details if required and Save. In the existing functionality of amendment, Save would continue ‘Deletion of Hold’ and ‘Hold of Hold’ support.
- Similar to Hold of New operation the system will perform only mandatory validations.
- Validations applicable during amendment, will be processed.
The system is enhanced to support Hold during LC amendment.Note:
However, authorization is not supported for Contracts put on Hold.
Parent topic: LC Contract Details
