7.2.1 Maintain the Bills and Collections Registration Details of a Bill
This topic provides the instructions to Maintain the Bills and Collections Registration Details of a Bill
- On the Homepage, type BCDTRGON in the text box, and
click the next arrow.Bills & Collections Registration Input screen is displayed.
Figure 7-1 Bills & Collections Registration Input

Description of "Figure 7-1 Bills & Collections Registration Input" - On the Bills and Collections Registration screen, click New and specify the details as required.
- Click Save to save the details, or
Cancel to exit the screen.
If you are calling a bill that is already registered, double click on the reference number of the bill from the summary screen.
For information on Fields, refer to: Table 7-1Table 7-1 Header Block - Field description
Field Description Acknowledgment Reference Number The system displays the unique acknowledgment reference number generated for the registration on save. Status The system displays the status of the registration. The options are: - Registered
- Processed
- Closed
Registration Type Specify the type of registration from the drop-down list. The options are: - Bills Under LC
- Bills Not Under LC
Contract Reference The system displays the contract reference number - On Bills and Collections Registration screen, click
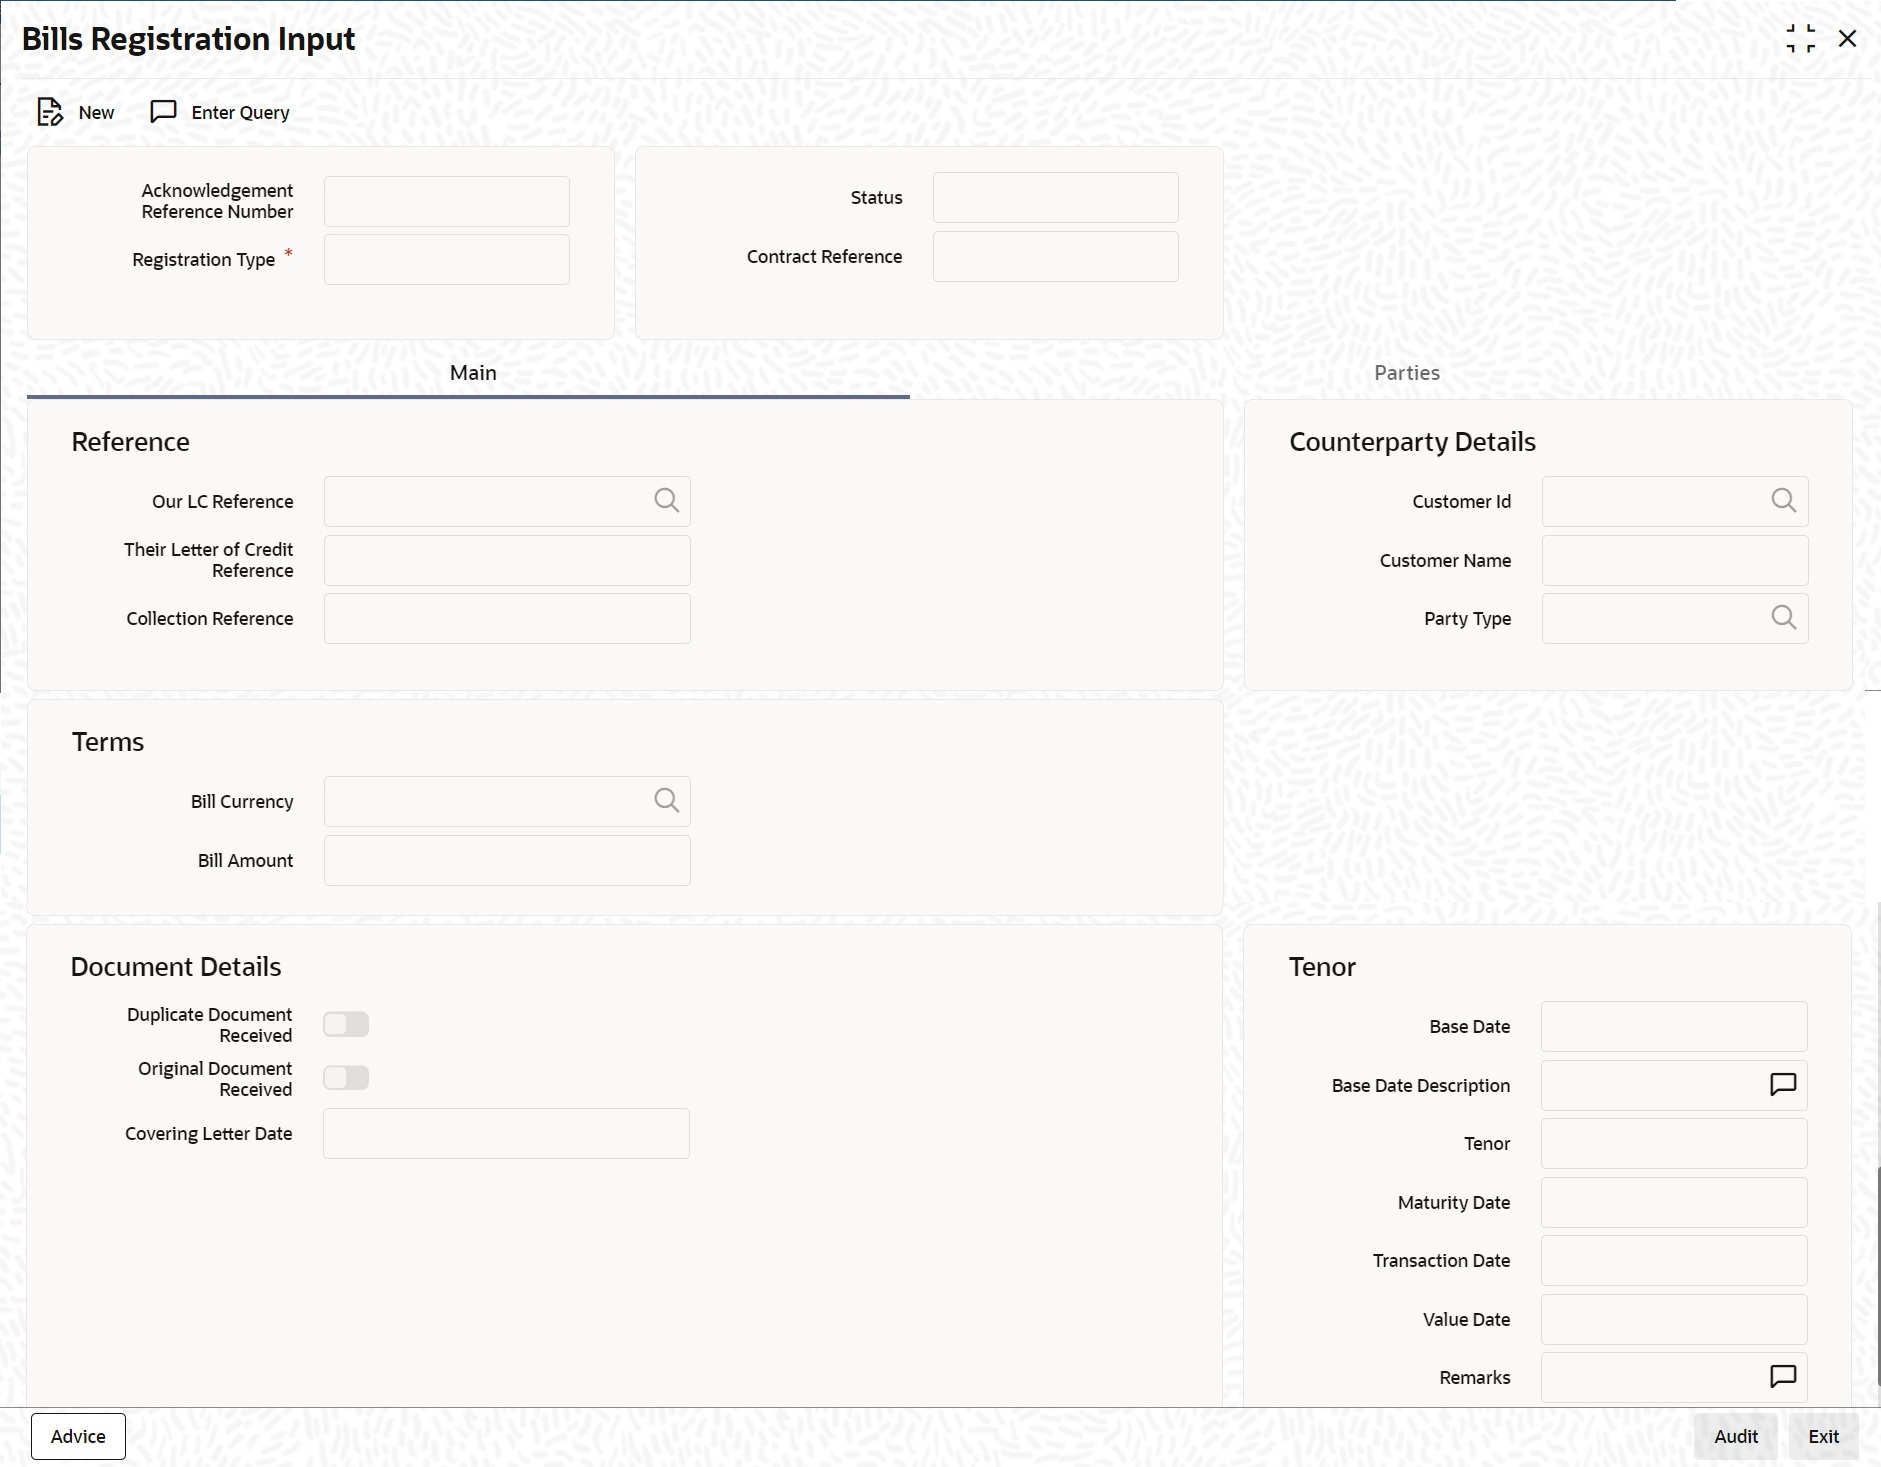
MainBills and Collections Registration screen with the Main tab is displayed.
Figure 7-2 Bills and Collections Registration - Main

Description of "Figure 7-2 Bills and Collections Registration - Main" - Fill in the details as required and click Save, or click
Cancel to exit the screen.For information on fields, refer to: Table 7-2
Table 7-2 Bills and Collections Registration - Main Tab
Field Description Reference The bills that come to your bank raised against an LC drawn at an earlier date by another bank.
Our LC Reference Specify our LC Reference Number. Alternatively, you can select the reference number from the option list. The list displays all the valid reference numbers maintained in the system. Collection Reference Enter a unique reference that will help you identify the bill. In case of an outgoing bill, you can specify an identification of your own. In case of an incoming bill, you can indicate the reference assigned to the bill by your confirming bank. Their Letter of Credit Reference If you are processing an outgoing bill under an LC that was issued by another bank, enter the Reference number assigned to the LC by the other bank. Counterparty Details The following are the counterparty details
Customer ID Specify the Customer Id for which you need to maintain. Alternatively, you can select Customer No from the adjoining option list. Note:
BIC Code appears next to the ‘Customer No’ only if the BIC code is mapped with that customer number. If the BIC Code is not mapped with that Customer Number, then the BIC Code will not appear next to the ‘Customer No’ in the adjoining option list.While processing an Export bill, specify details of the ‘Drawer’ of the bill. If the drawer is a customer of your bank you should specify the CIF Id assigned to the customer, the other details of the bill is automatically picked up.
Customer Name The system displays the name of the customer. Party Type Specify the party type of the customer indicated in the customer field. If you are processing an export bill, it defaults to DRAWER. Document Details The document detail entries are as follows.
Document Duplicate Received This field is applicable only for Documentary bills. Indicate whether the duplicate set of documents required under the bill is received. Note:
If you had indicated negatively in the Document Original Received field, you should indicate positively in this field. This is because the bill contract should be entered based on the first set of documents that are received.Document Original Received This field is applicable only for Documentary bills. Here you can indicate whether the original set of documents required under the bill received. Covering Letter Dated This field is applicable only for Documentary bills. Here you can indicate the date printed on the covering letter based on which the contract entered. This date used to retrieve information on pending documents
Terms The terms defined for a bill, while registering it, will form the basis on which the bill will be processed. Specify the following terms for a bill:
Bill Currency Specify the currency in which the bill is drawn. Bill Amount Specify the amount for which the bill is drawn. While processing a bill that was registered, all the terms that you specify during registration displayed in the respective fields of the Contract Main screen. Tenor Specify the following tenor related details here.
Base Date and Description The base date is the date from which the tenor specified for the bill becomes effective. The base date is used to calculate the maturity date of the bill. In effect, the tenor of the bill will begin from the base date. For example, you indicate the base date of a bill to be 01-Jan-99 and the tenor of a bill as 45 days. The 45 day tenor of the bill will begin from 01-Jan-99.
If you are processing a sight bill, the base date is the lodgment date, and for a Usance bill, it can be the Invoice date or the Shipping Date.
Tenor Usance bills are generally associated with a tenor. The tenor of a bill is expressed in days. The standard tenor defined for the product involved in the bill defaults. Change the default to suit the tenor of the bill you are processing. However, the tenor that you specify for a bill should be within the minimum and maximum tenor specified for the product involved in the bill. The tenor of a sight bill always defaults to zero days. You will not have an option to change it.
Maturity Date The maturity date is the date on which the bill falls due for payment. The maturity date that you specify should be a date later than or equal to the Value date specified for the bill. The maturity date is calculated in the following manner based on the entries you have made to the previous fields: Maturity Date = Base date + Tenor
Change the maturity date of a bill that is arrived at using the above method.
Base Date Description Here you can specify a description of the base date specified in the earlier field. For example, you can indicate that the base date is the lodgment date or the shipment date etc. Transaction Date The transaction date is the date on which the bill was entered into Oracle Banking Trade Finance. The system defaults the transaction, date to the current system date (today’s date). You cannot amend or change the defaulted date. Value Date This is the date from which the bill becomes effective. The accounting entries triggered off by events like input, amendment and liquidation hitting the Nostro and customer accounts will be passed as of the value date. The value date should be earlier than or same as today’s date. If you do not enter a value date for a bill, the system defaults to today’s date. Enter a value date of your choice; however it can be one of the following:- Today’s Date
- A date in the past
- A date in the future (Enter a
date in the future only if future dating has been
allowed for the product)
Note:
The Value date of a bill should not be earlier than the Start Date or later than the End Date specified for the product involved in the bill.
Remarks Enter information for the internal reference of your bank. This information will be made available at the time you retrieve the information on the bill. Specifying the details of the Parties Involved in a Bill. In the Bills and Collections Registration Input screen, you can capture details pertaining to all the parties involved in a bill. You can capture the following details in the bill you are registering:- Party type of customer
- CIF Id assigned to the party
- Name of the party
- Country to which the party belongs
- Language in which tracers and messages should be sent to the party
- Reference to the party involved in the bill
- Party’s mail address
The parties that can be involved in a bill not only depend on the type of bill you are processing but also on the operation that you are performing on the bill.
At the time of processing a bill, which was registered, the documents, tracers, advice and messages applicable to the bill will be sent to the concerned parties, based on the details you specify in this screen.Note:
Use a particular Party Type only once in a bill that you register. - On the Bills & Collections Registration Input
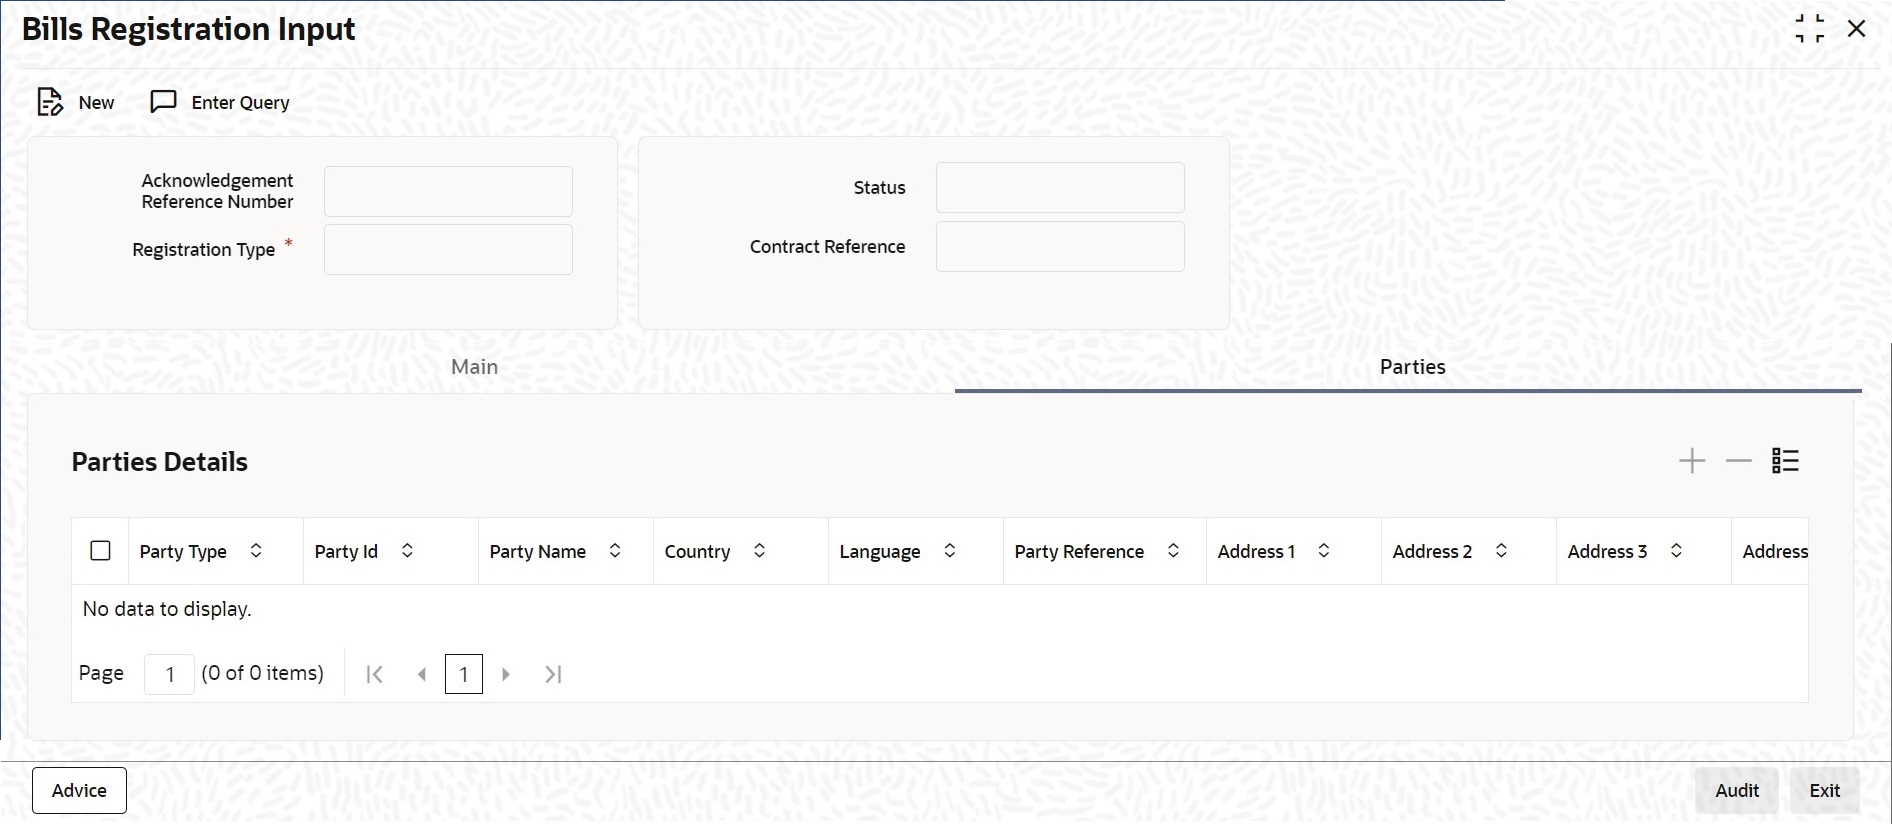
screen, Click Parties.Bills & Collections Registration Input screen with Parties tab details are displayed.
Figure 7-3 Bills & Collections Registration - Click Parties

Description of "Figure 7-3 Bills & Collections Registration - Click Parties" - Specify the details as required; Click Save to save the
details or Cancel to exit the screen.For information on fields, refer to Table 7-3
Table 7-3 Parties - Field Description
Field Description Party Type Specify the party type. Also, select the same from the adjoining option list. The list displays all the valid party types maintained in the system. Party ID Specify the Party ID for which you need to maintain. Alternatively, select the ‘Customer No’ from the adjoining option list also. Note:
BIC Code appears next to the Customer No only if the BIC Code is mapped with that Customer Number. If the BIC code is not mapped with that customer number, then the BIC Code will not appear next to the Customer No in the adjoining option list.The list displays all the valid parties maintained in the system. On selecting the party ID, the following details are displayed:- Party Name
- Country
- Language
- Party Reference
- Address
- On the Bills & Collections Registration Input
screen, click Advices to open the Messages screen OR On
the Homepage, type CSDTFMVW in the text
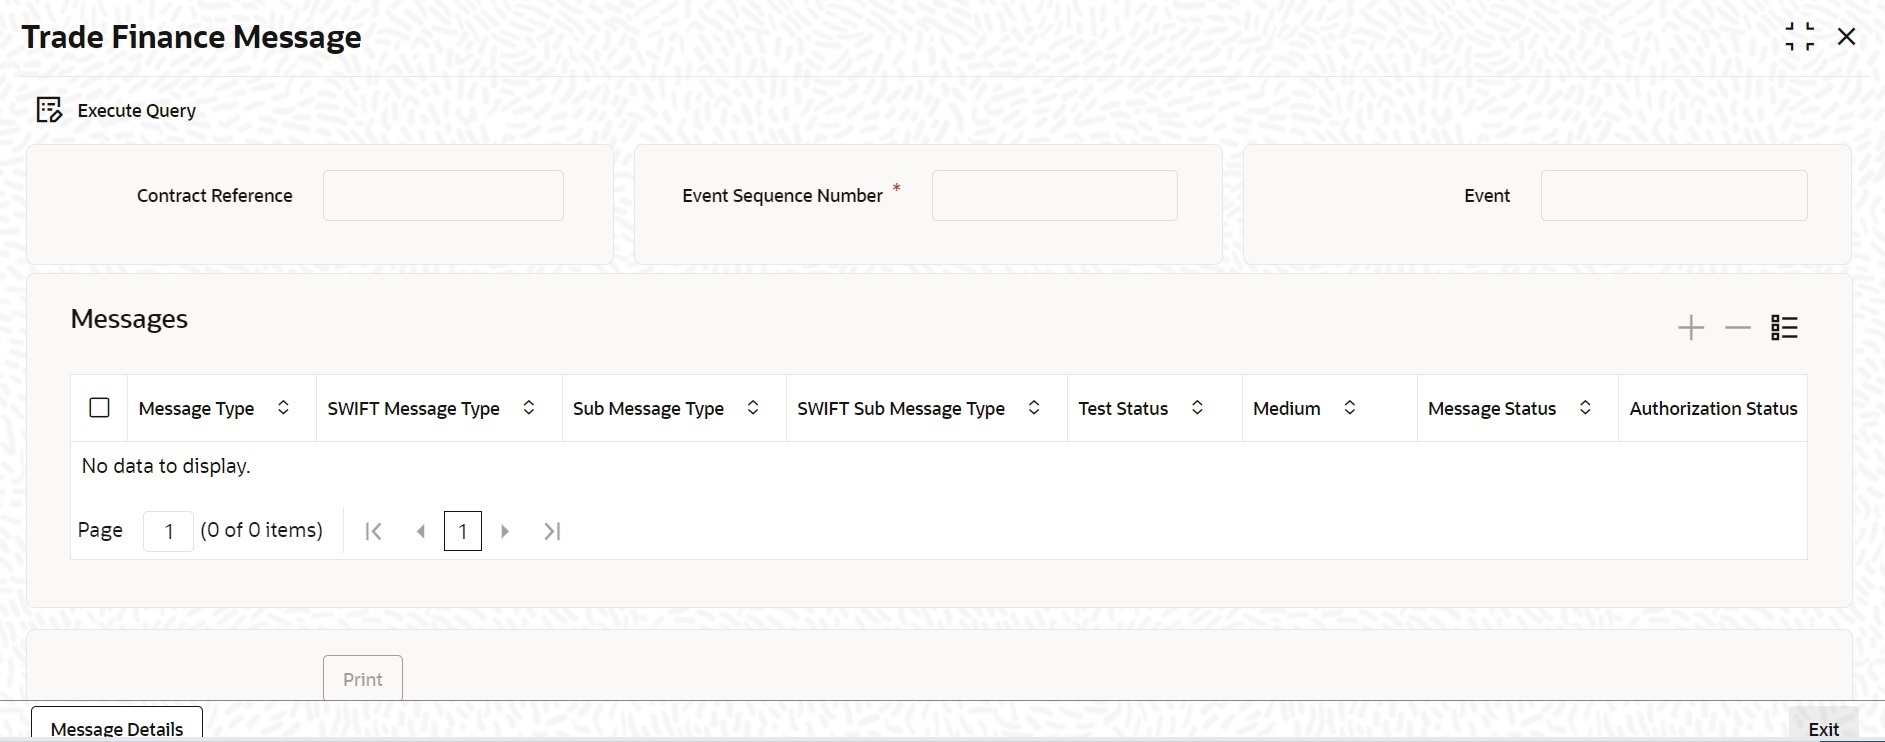
box, and click the next arrow.Trade Finance Message screen is displayed.For information on fields, refer to Table 7-4
Table 7-4 Trade Finance Message - Fields Description
Field Description Contract Reference - Specify the contract reference number. The adjoining list displays a list of reference numbers maintained in the system. Choose the appropriate one.
The system displays the following message details of the contract reference number. - Message Type
- Swift Message Type
- Sub Message Type
- SWIFT Sub Message Type
- Test Status
- Medium
- Message Status
- Authorization Status
- Receiver
- Receiver Name
- DCN
- Click Message Detail to view the message in detail.
- Click Print button to print the acknowledgment advice.
Parent topic: Bills and Collections Registration Input
