7.2.6 JMS Connection Factory Creation
After creating the queues, you need to create the connection factory. To
perform this, follow the steps given below:
- Click ‘New’.
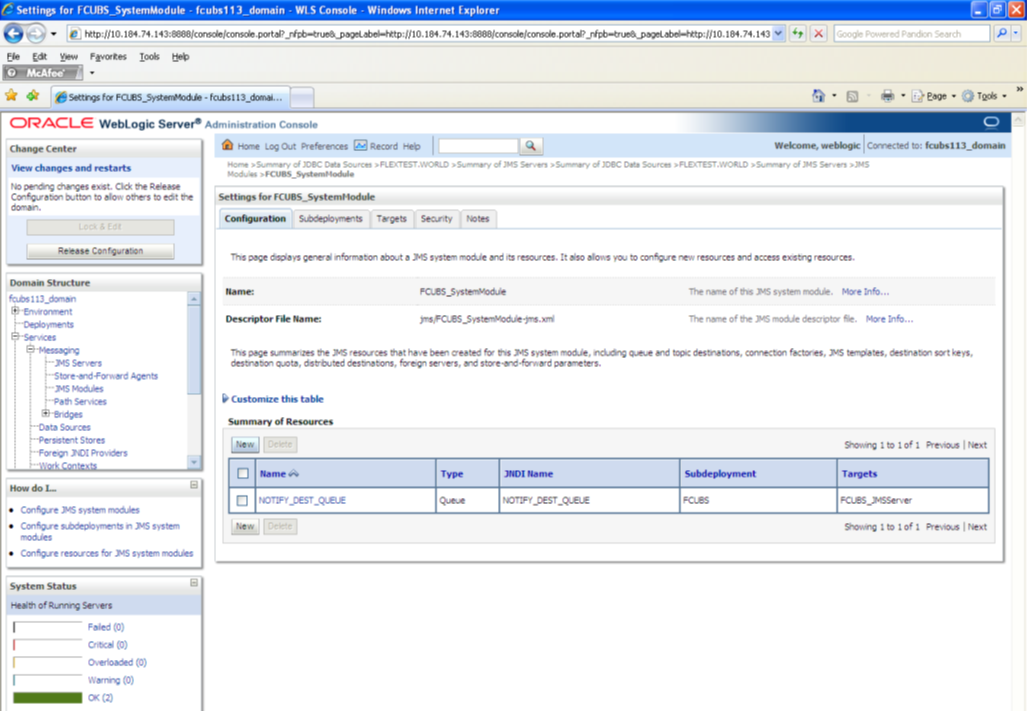
Description of the illustration picture62.pngThe following screen is displayed:
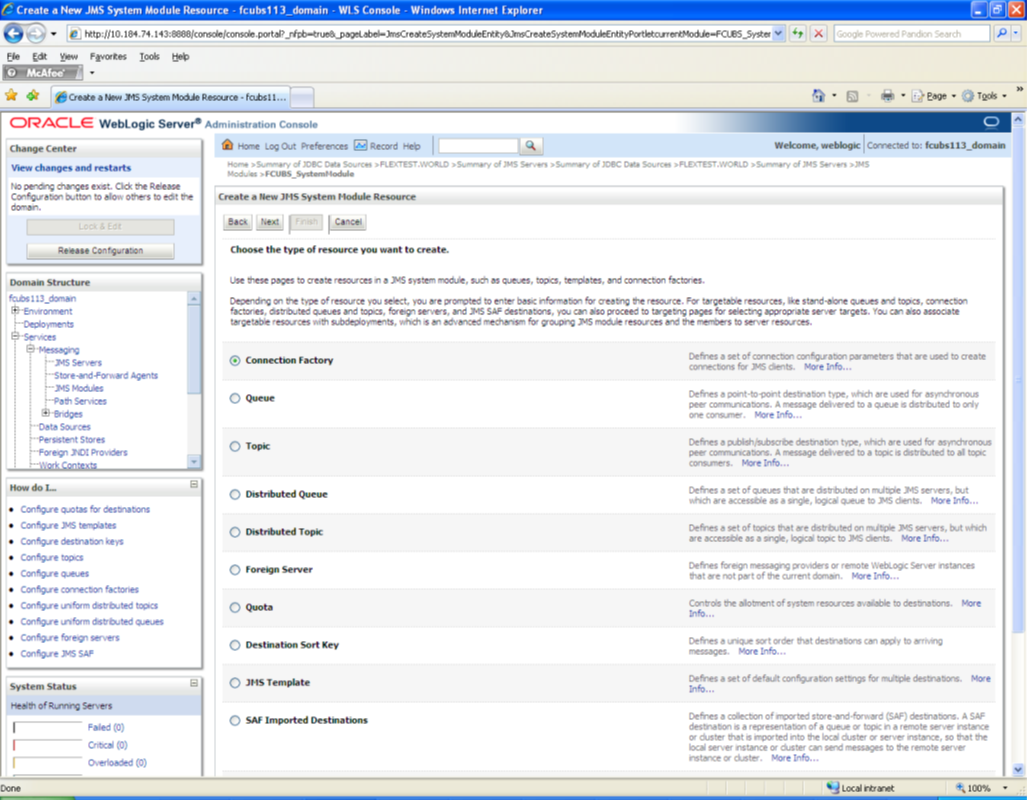
Description of the illustration picture63.png - Select ‘Connection Factory’. Click ‘Next’.
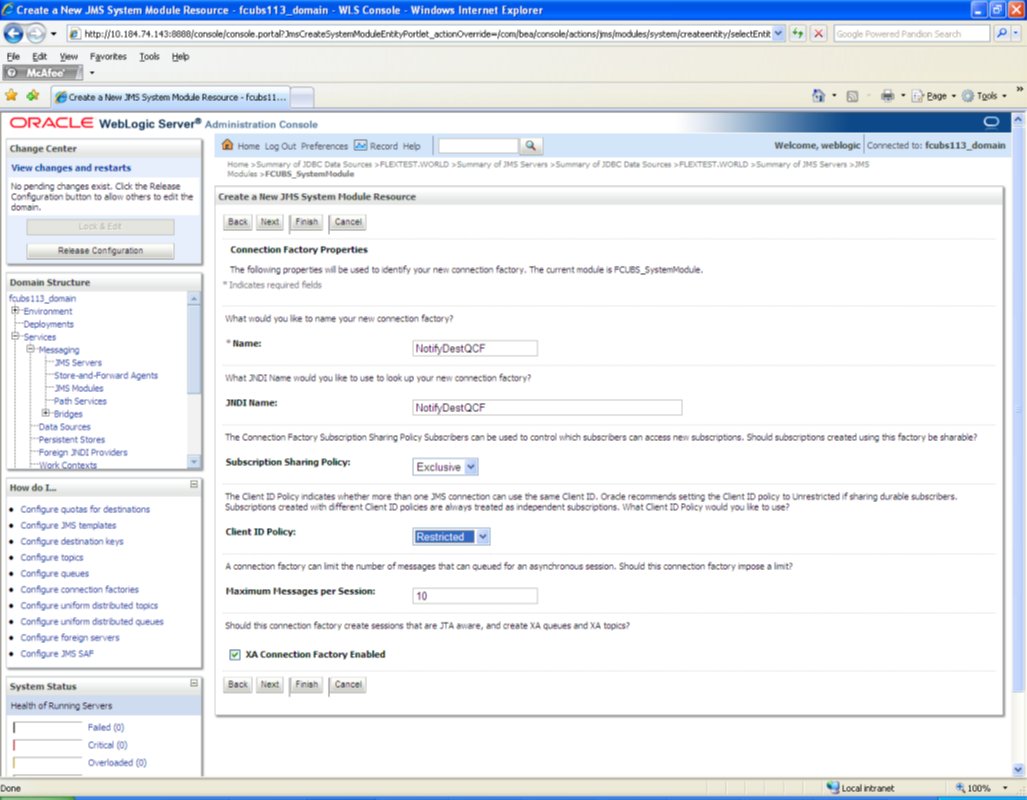
Description of the illustration picture64.png - Enter the Name of the Connection Factory as ‘NotifyDestQCF’.
- Enter the JNDI Name as ‘NotifyDestQCF’.
- Check the box ‘XA Connection Factory Enabled’.
- Click ‘Next’.
The following screen is displayed:
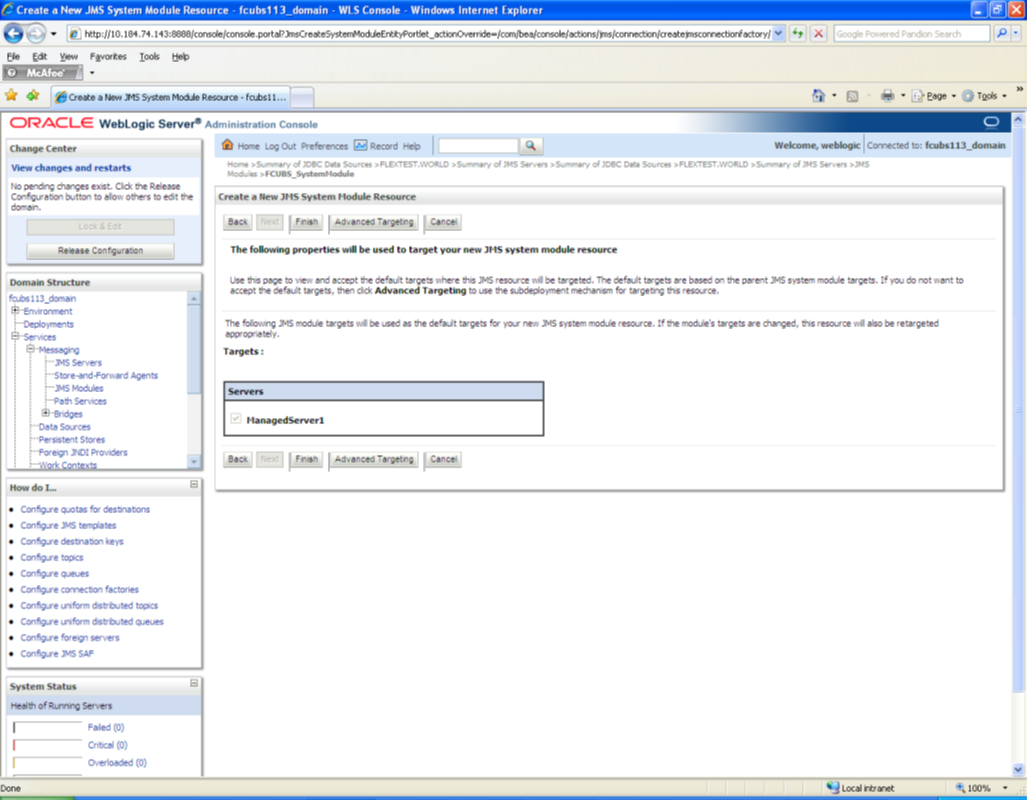
Description of the illustration picture65.png - Click ‘Advanced Targeting’. The following screen is displayed.
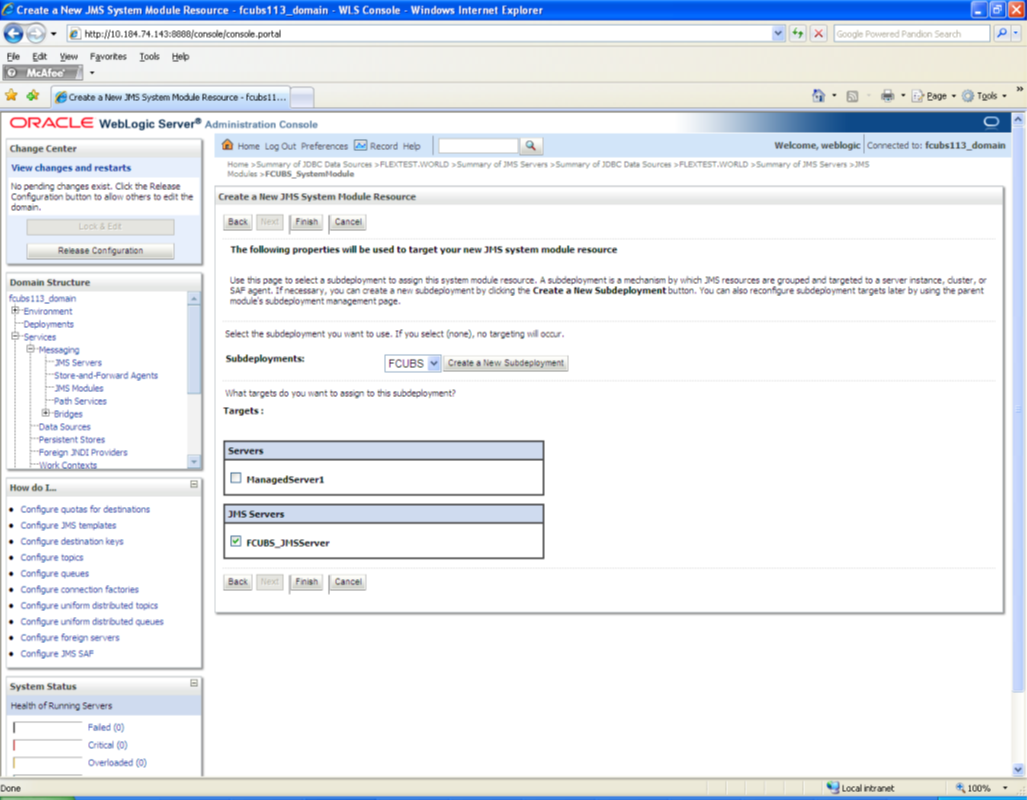
Description of the illustration picture66.png - Select the ‘Subdeployments’ as FCUBS.
- Under JMS Servers, check the box against ‘Managed Server’.
- Click ‘Finish’. The following screen is displayed:
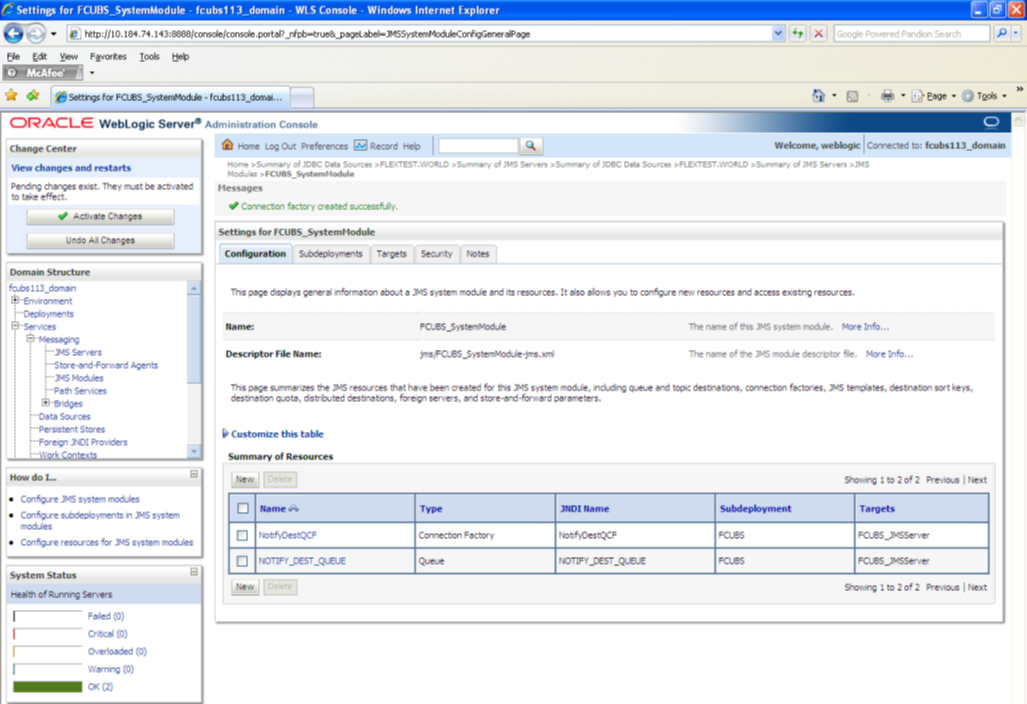
Description of the illustration picture67.png - The message ‘Connection Factory created successfully’ is displayed.
- Click on the Connection Factory ‘NotifyDestQCF’ to have XA Connection Factory
enabled.
The following screen will be displayed.
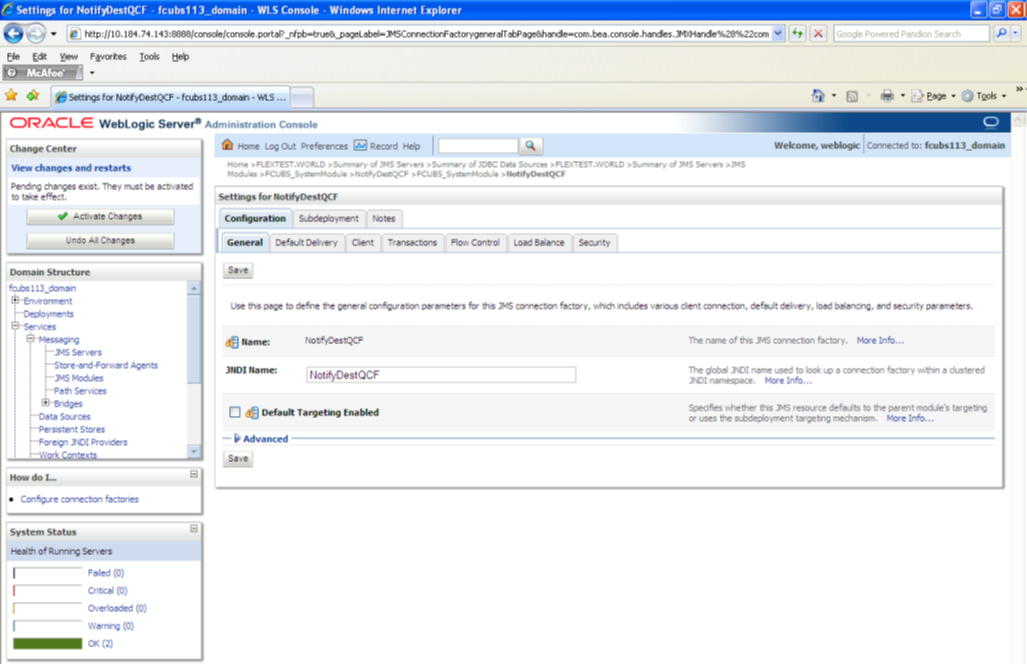
Description of the illustration picture68.png - Click ‘Transactions’ Tab. The following screen is displayed.
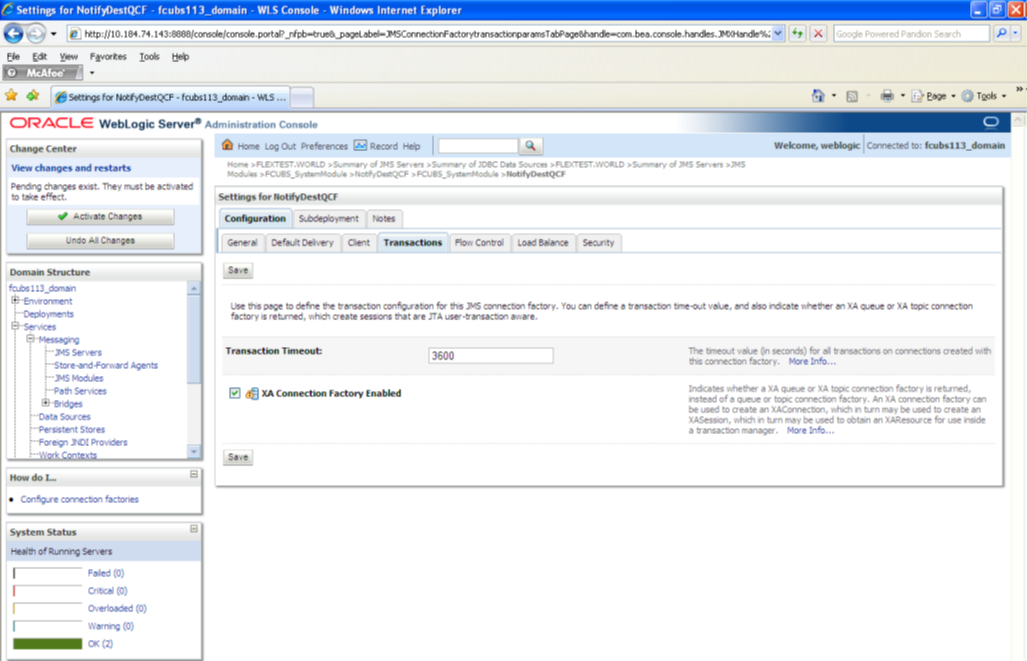
Description of the illustration picture69.png - Check the box ‘XA Connection Factory Enabled’.
- Click ‘Save’. The following screen is displayed.
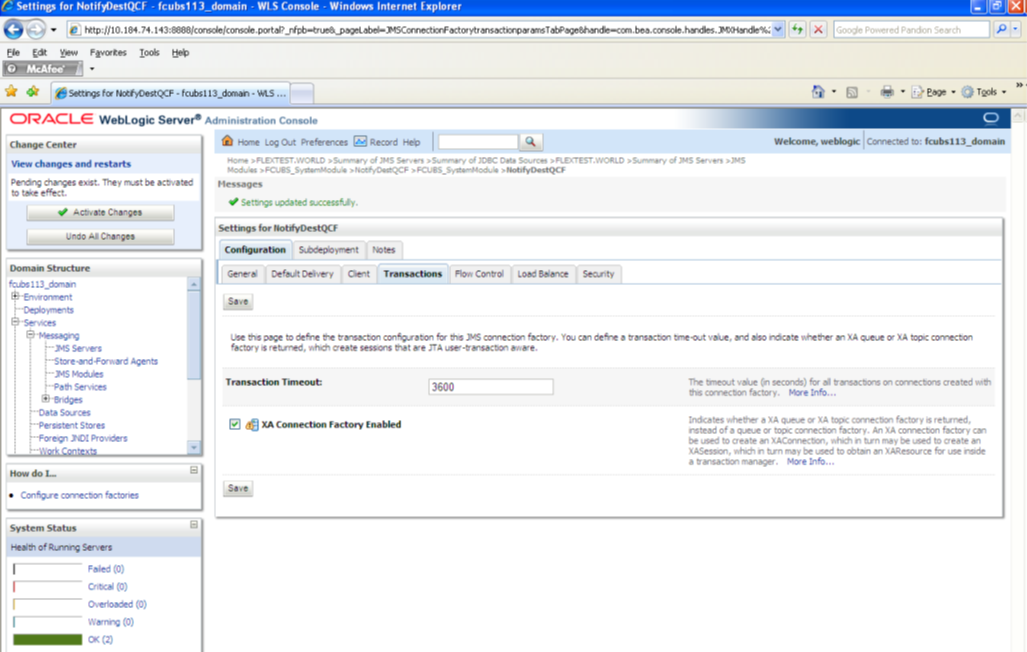
Description of the illustration picture70.png - The message ‘Settings updated successfully’ is displayed.
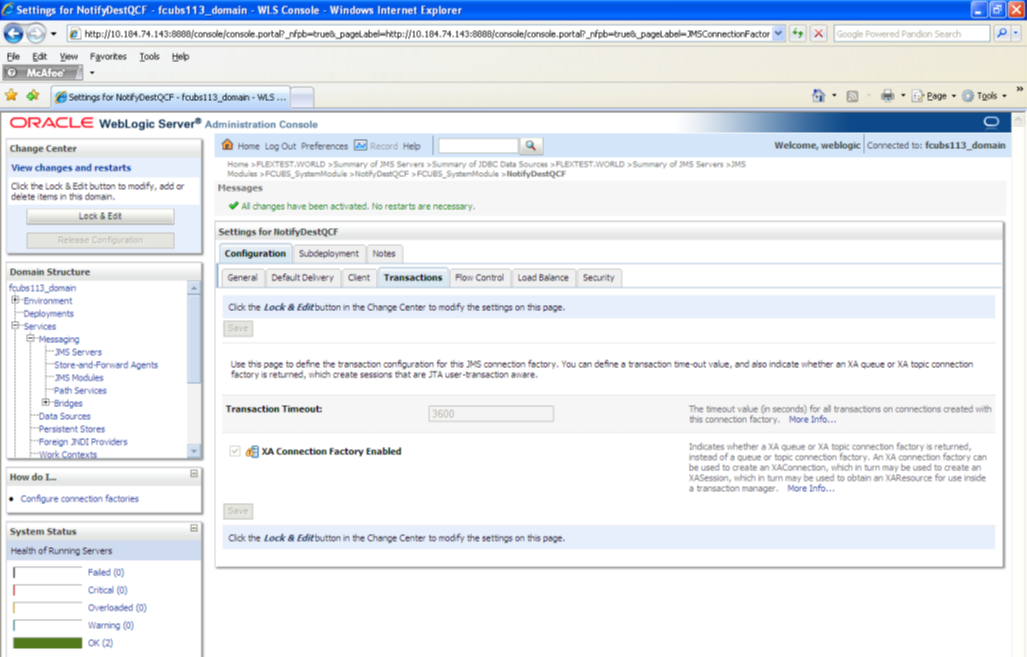
- Click ‘Activate Changes’ button under ‘Change Center’.
The message ‘All the changes have been activated. No restarts are necessary’ is displayed.
Description of the illustration picture71.png
Parent topic: Resource Administration