7.2.1.2 XA Enabled Data Source
Follow the steps given below:
- Start the Administrative Console of Weblogic application server. You can start
this by entering Oracle Weblogic Admin Console URL in the address bar in an
internet browser.
http://10.10.10.10:1001/console
Eg: http://10.10.10.10:1001/console

Description of the illustration picture1.png - Specify the Weblogic administrator user name and password. Click ‘Log In’.
- Navigate to Oracle Weblogic home page.

Description of the illustration picture2.png - Click ‘LOCK & EDIT’.
Following screen is displayed:

Description of the illustration picture3.png - Expand ‘Services’ and then ‘Data Sources’ under it. Click ‘Lock
& Edit’ button

Description of the illustration picture4.png - To create a new data source, click ‘New’ and select ‘Generic Data
Source’. The following screen is displayed.

Description of the illustration picture5.png - Specify the following details:
JDBC Datasource Name Name of the data source JNDI Name JNDI name which will be used for lookup Database Type Type of the database which is Oracle - Click ‘Next’.
The following screen is displayed:

Description of the illustration picture9.pngClick next.
- Select the database driver as shown in the figure. Click
‘Next’.
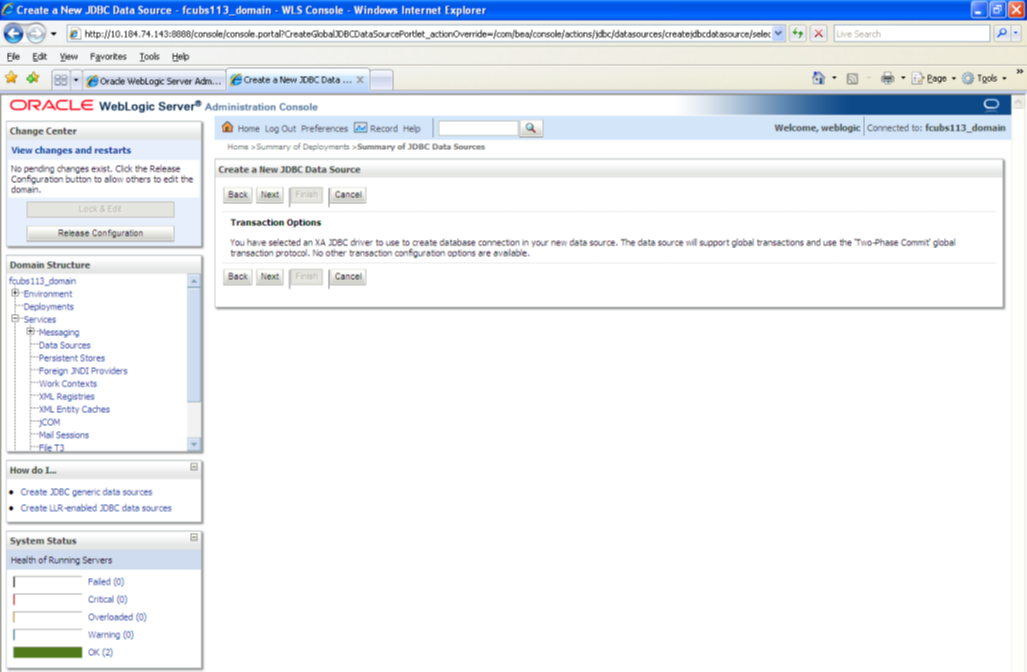
Description of the illustration picture10.png - Specify the Database Name, Host Name, Port of the database server to
connect, Database User Name and Password. Confirm the password.
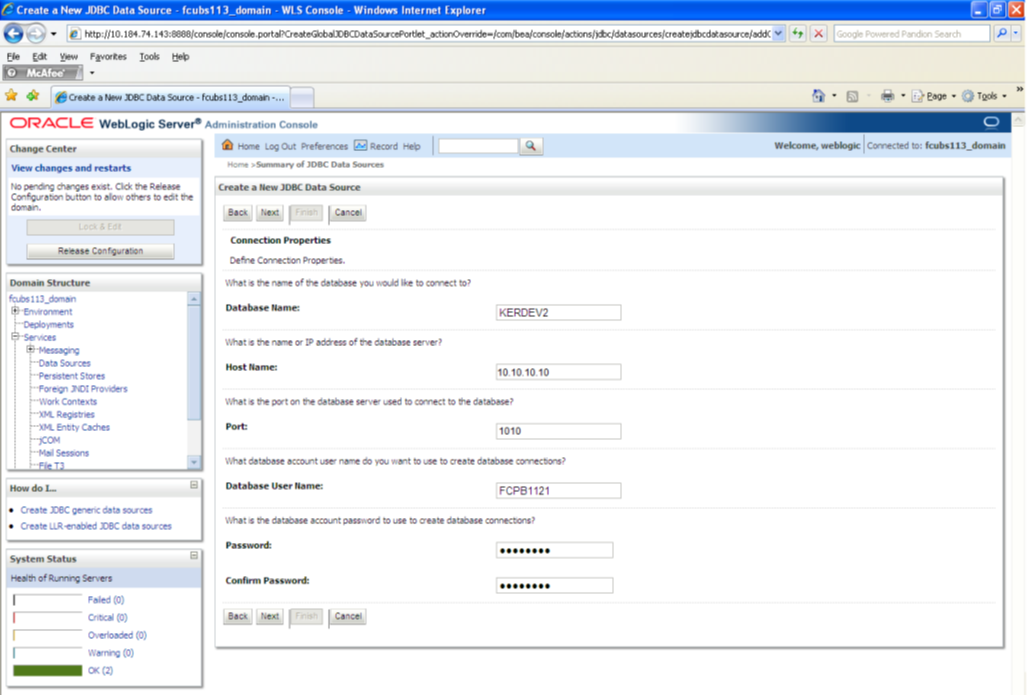
Description of the illustration picture11.png - Click ‘Next’.
The following screen is displayed.
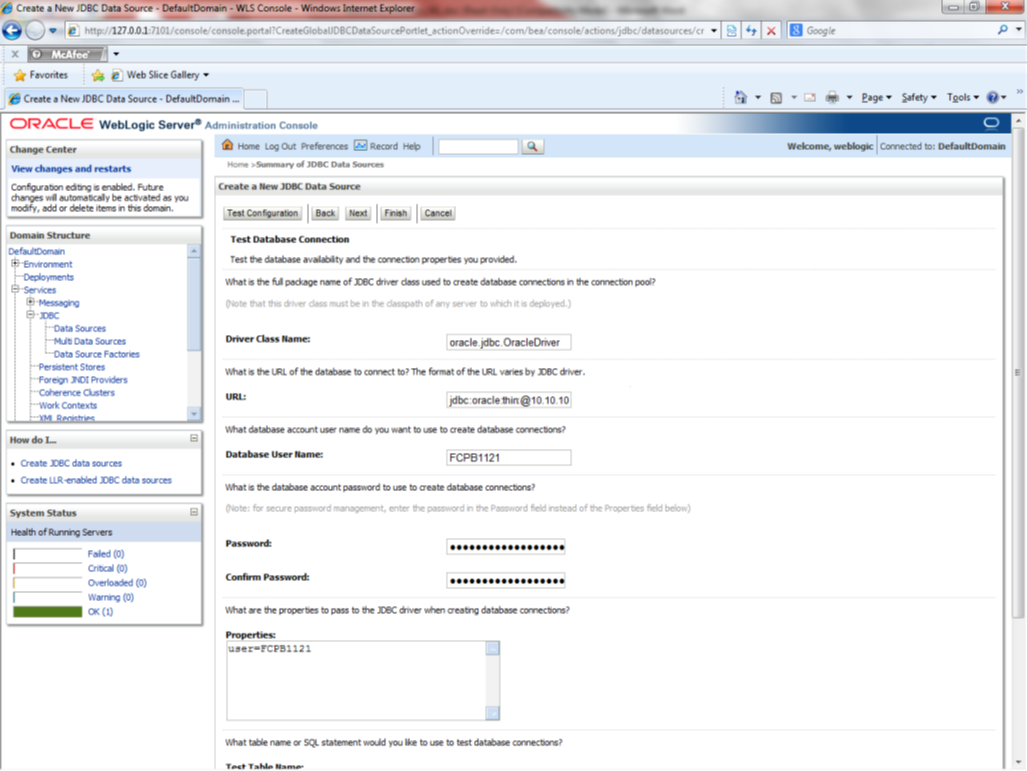
Description of the illustration picture12.png - Specify the Driver Class Name (Eg: oracle.jdbc.OracleDriver).
- Specify the URL.
- jdbc:oracle:thin:@10.10.10.10:1001<INSTANCE_NAME>Specify the Database Username (Eg: FCPB1121) and password.
- Confirm the password.
- Click ‘Test Configuration’ tab.
If the connection is established successfully, the message ‘Connection test succeeded’ is displayed.
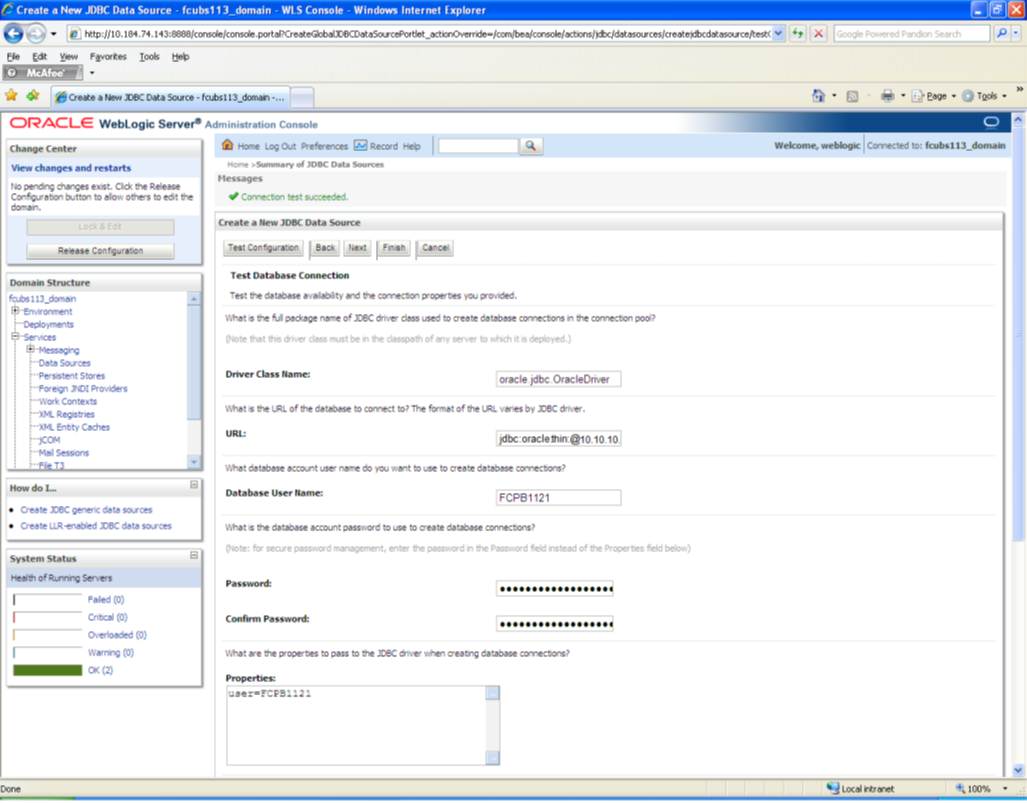
Description of the illustration picture13.png - Click ‘Next’.
The following screen is displayed:
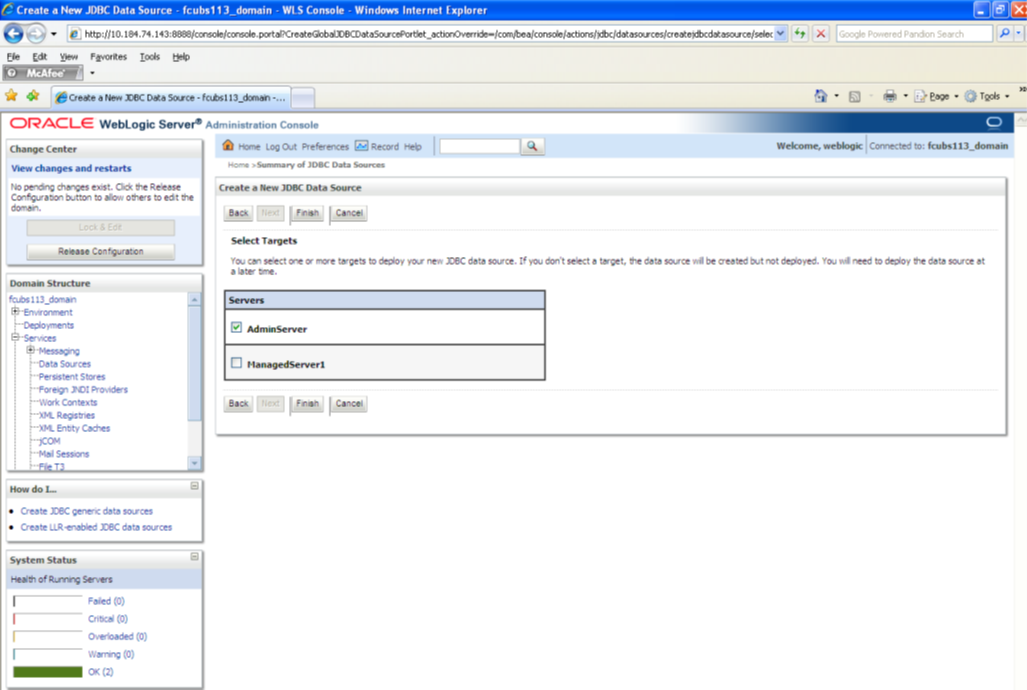
Description of the illustration picture14.png - Check the boxes against the required servers. Click ‘Finish’. The
following screen is displayed:
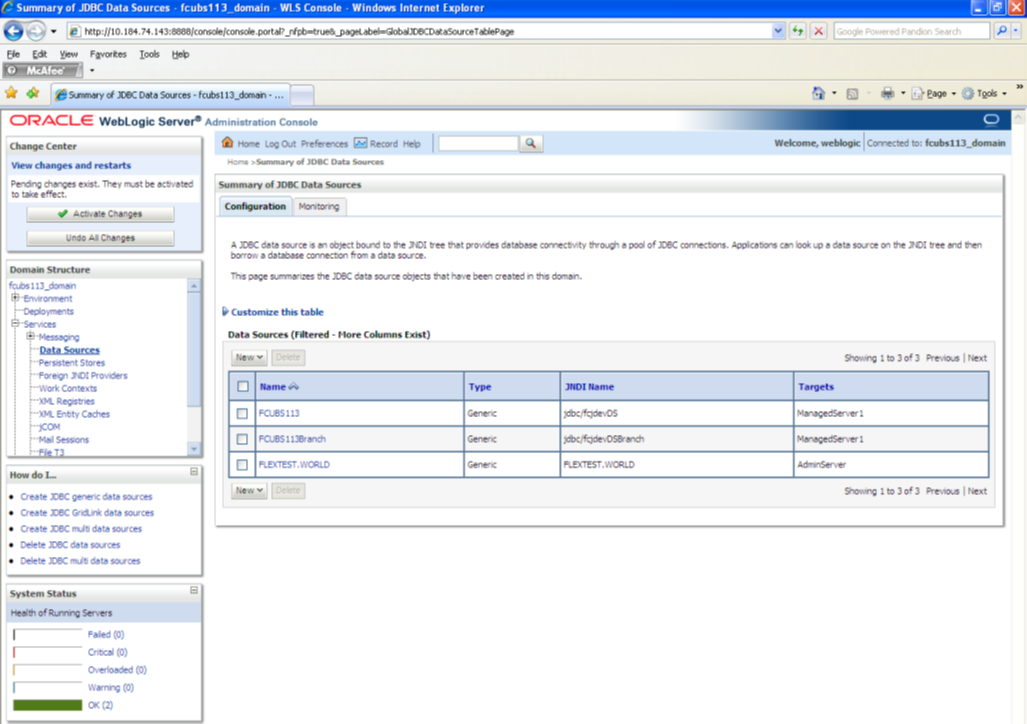
Description of the illustration picture15.png - Click ‘Activate Changes’ button. Click ‘Activate Changes’ button on
the left pane. The message ‘All the changes have been activated. No restarts are
necessary’ is displayed.
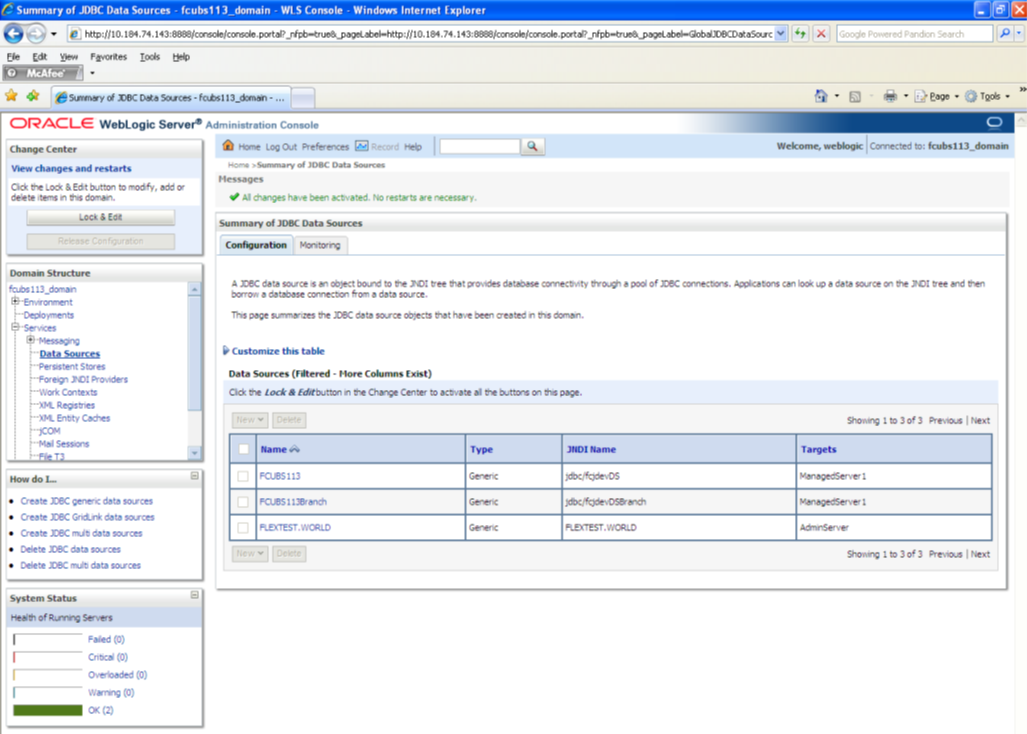
Description of the illustration picture16.png - The datasource has been created.
- Refer to “Resources_To_ Be_Created.doc” for the list of XA datasources to be created.
Parent topic: Creating Data Source