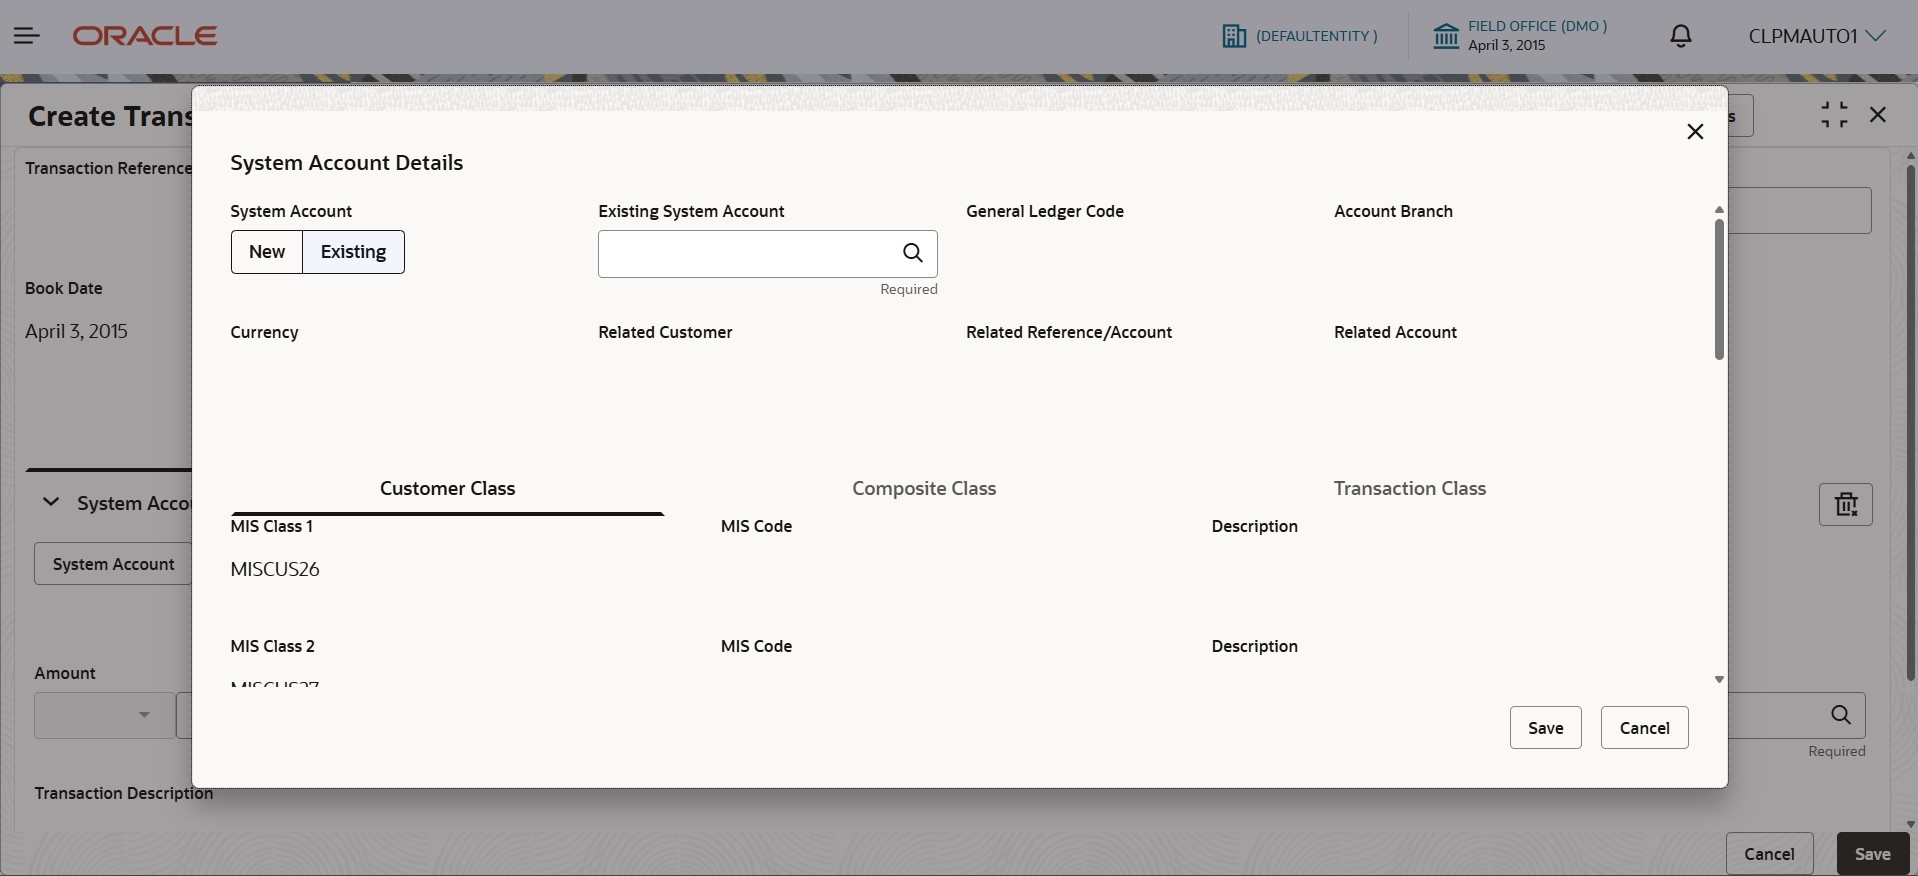
3.7.1 Generate System Accounts
This topic explains the systematic instructions to generate the system account manually.
To generate a system account
- Click the System Account button under the Credit or Debit Entries Tab to create system accounts manually.The System Account Details pop-up window displays.
- Specify the following details, for more information, refer to the fields description table below.
Table 3-9 System Account Details
Field Description System Account There are two options to select: - Click New to generate a new system account.
- Click Existing to use for already created account.
Existing System Account Select the System Account from the option list for posting the adjustment entries. Note: The field which are marked with Required are mandatory.
Copy System Account To create a new system account, select an existing account from the option list, adjust its default setting, and then create a new system account. General Ledger Code If you select an existing system account or a copied system account, the system automatically populates the General Ledger. For a newly created system account, you need to select the General Ledger from the option list.
Note: The field which are marked with Required are mandatory.
Account Branch If you select an existing system account or a copied system account, the system automatically populates the Account Branch. For a newly generated system account, you need to select the Account Branch from the option list.
Currency If you select an existing system account or a copied system account, the system automatically populates the Currency. For a newly generated system account, you need to select the Currency from the option list.
Related Customer If you select an existing system account or a copied system account, the system automatically populates the Related Customer. For a newly generated system account, you need to select the Related Customer from the option list.
Related Reference/Account Based on the selection, you can specify one of the following:- Related Reference
- Related Account
If you select an existing system account or a copied system account, the system automatically populates the Related Reference or Related Account.
For a newly generated system account, you need to select the Related Reference or Related Account from the option list.
Customer Class When you select an existing system account or a copied system account, the system automatically assigns the MIS code based on the Customer Class. For a newly generated system account, you need to select the MIS code from the option list for the specified Customer Class.
Composite Class When you select an existing system account or a copied system account, the system automatically assigns the MIS code based on the Composite Class. For a newly generated system account, you need to select the MIS code from the option list for the specified Composite Class.
Transaction Class When you select an existing system account or a copied system account, the system automatically assigns the MIS code based on the Transaction Class. For a newly generated system account, you need to select the MIS code from the option list for the specified Transaction Class.
- When you click the Save button, the system displays the System Account number for existing accounts. For a new system account, the system generates a System Account number after the adjustment transaction is authorized.
Parent topic: Transaction Adjustment Entry
