2.1.4 Exception Queue Maintenance

This topic describes about the procedure to maintain exception queue record.

Banks would want to track utilization transactions crossing specified amounts and when overall limit amount breaches beyond the configured percentage by treating such transactions as exceptional transactions. Instead of normal authorization, such exceptional transactions are to be routed to authorized users for multi authorization.

Note:

The fields, which are marked with an asterisk, are mandatory.

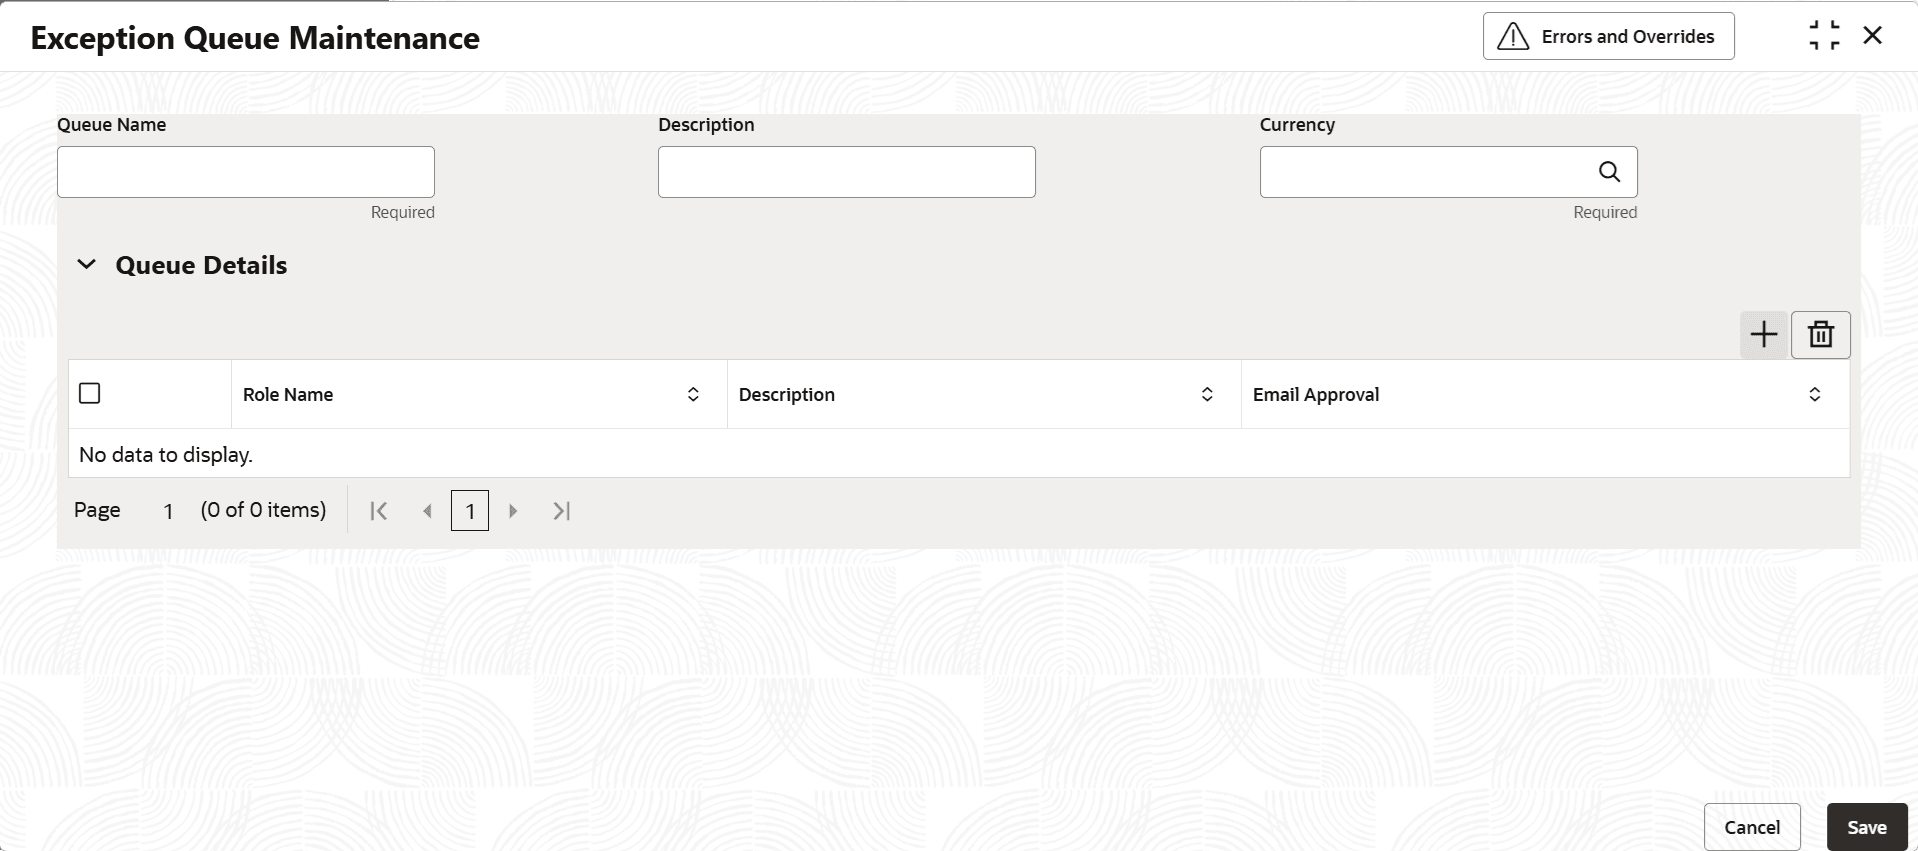
The Exception Queue Maintenance screen allows you to maintain exception queue records with their respective user roles allowed for authorization.

  1. On Home screen, select Limits and Collaterals. Under Limits and Collaterals, select Limits.
  2. Under Limits, select Maintenances. Under Maintenances, select Exception Queue.
  3. Under Exception Queue, select Exception Queue Maintenance.
    The Exception Queue Maintenance screen is displayed.

    Figure 2-55 Exception Queue Maintenance


  4. On Exception Queue Maintenance screen, click Add and specify the fields.
    For more information on fields, refer to the field description table.

    Table 2-56 Exception Queue Maintenance - Field Description

    Field Description
    Queue Name Specify the Queue Name.
    Description Provide a brief description about the queue in this field.
    Currency Click the Search icon and select the currency from the list. You can configure different queues with currency combination. Queue configured with a particular currency when used in Exception Queue Slab Maintenance determines the queue which needs to be considered for routing dual auth transaction for approval based on utilization amount in facility currency.
    Queue Details Specify multiple user roles for a queue name. For each record you must specify the Role Name, that is, the user role allowed for authorization. The system then defaults the description for the role.
    Role Name Click the Search icon and select the role name from the list.
    Description Displays the description of the role name selected.
    Email Approval

    Switch to On to send the mail to the users attached to role.

    Switch to Off to disable this parameter.

    When email approval is enabled, authorization transactions are routed to configured email id of the user.

  5. Click Save and Close to save the added record. Click Next to navigate to the next screen.