8.5 Bill Settlement – Multiple Bill – Detailed Settlement Instruction
This topic provides the systematic instructions to settle multiple Import Bills in the application.
This facility allows the corporate users, to settle multiple Bills so that transaction can be initiated directly from channel.
To settle multiple Bill:
- Navigate to Multiple Bill tab of Bill Settlement screen.
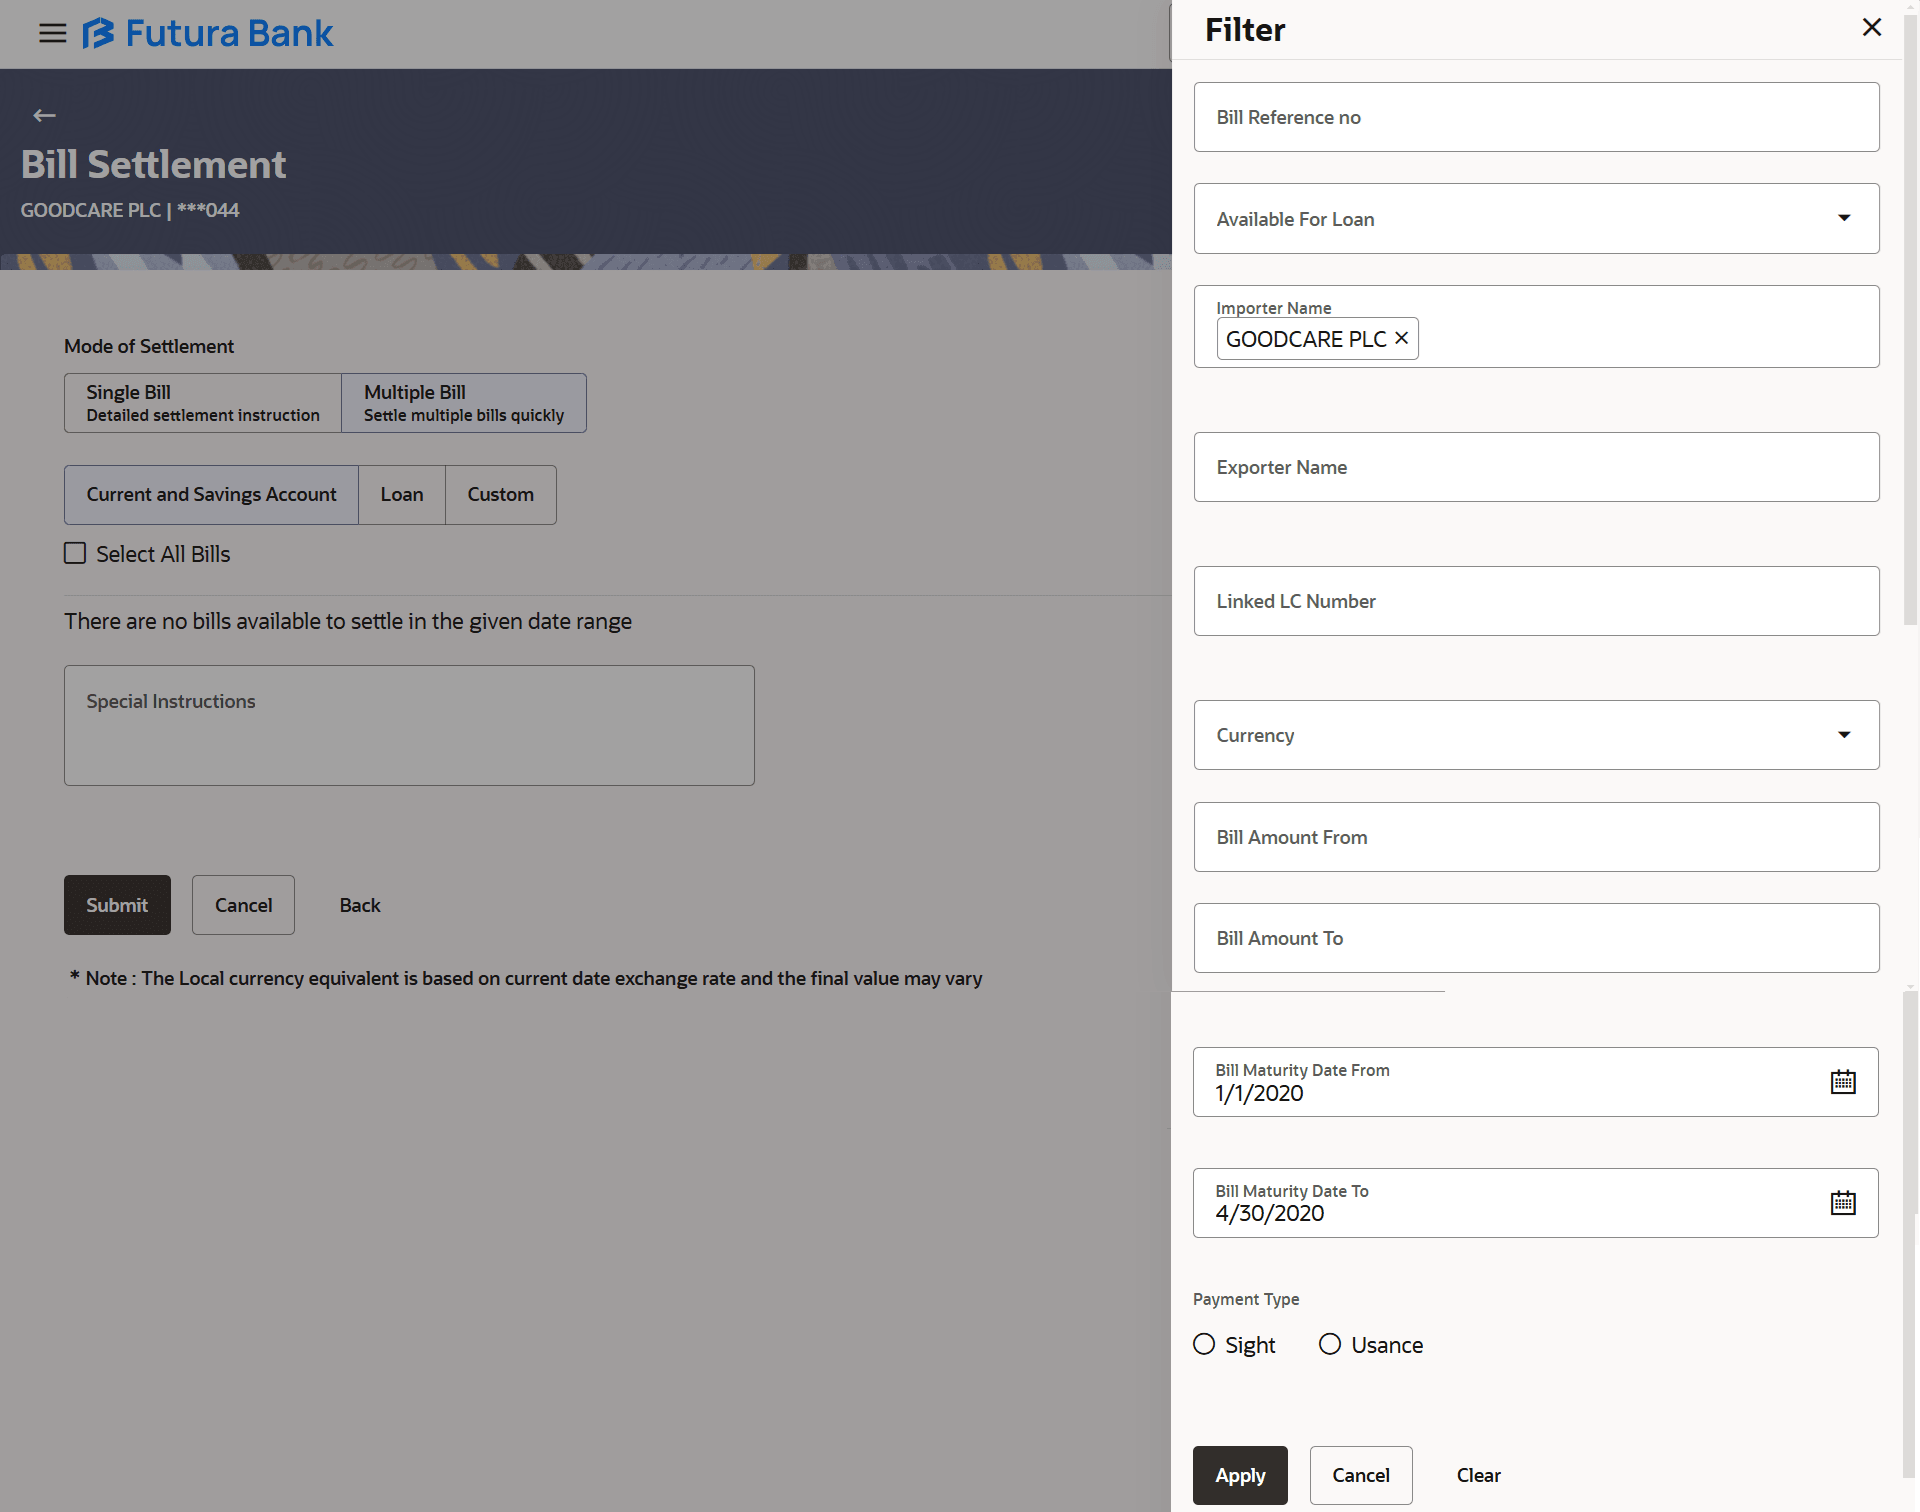
- Click
 to specify the filter criteria. The Filter overlay screen appears. Based on the
defined criteria you can view transactions.
to specify the filter criteria. The Filter overlay screen appears. Based on the
defined criteria you can view transactions.Figure 8-7 Bill Settlement – Multiple Bill – Filter
For more information refer to the field description table below:
Table 8-6 Bill Settlement – Multiple Bill – Filter - Field Description
Field Name Description Bill Reference Number Specify the Bill reference number. Available for Loan Select whether the bill is available for loan or not. Importer Name Specify the name of Importer. Exporter Name Specify the name of Exporter who has uploaded the Bill. Linked LC Number Specify the LC number which is linked to the Bill. Currency Select the currency of the bill. Bill Amount From- Bill Amount To Specify the Bill amount range used for searching the Bill. Bill Date From - Bill Date To Specify the start date and end date of the Bill date range used for searching the Bill. Payment Type Select the type of payment associated with the Bill. The options are:
- Sight
- Usance
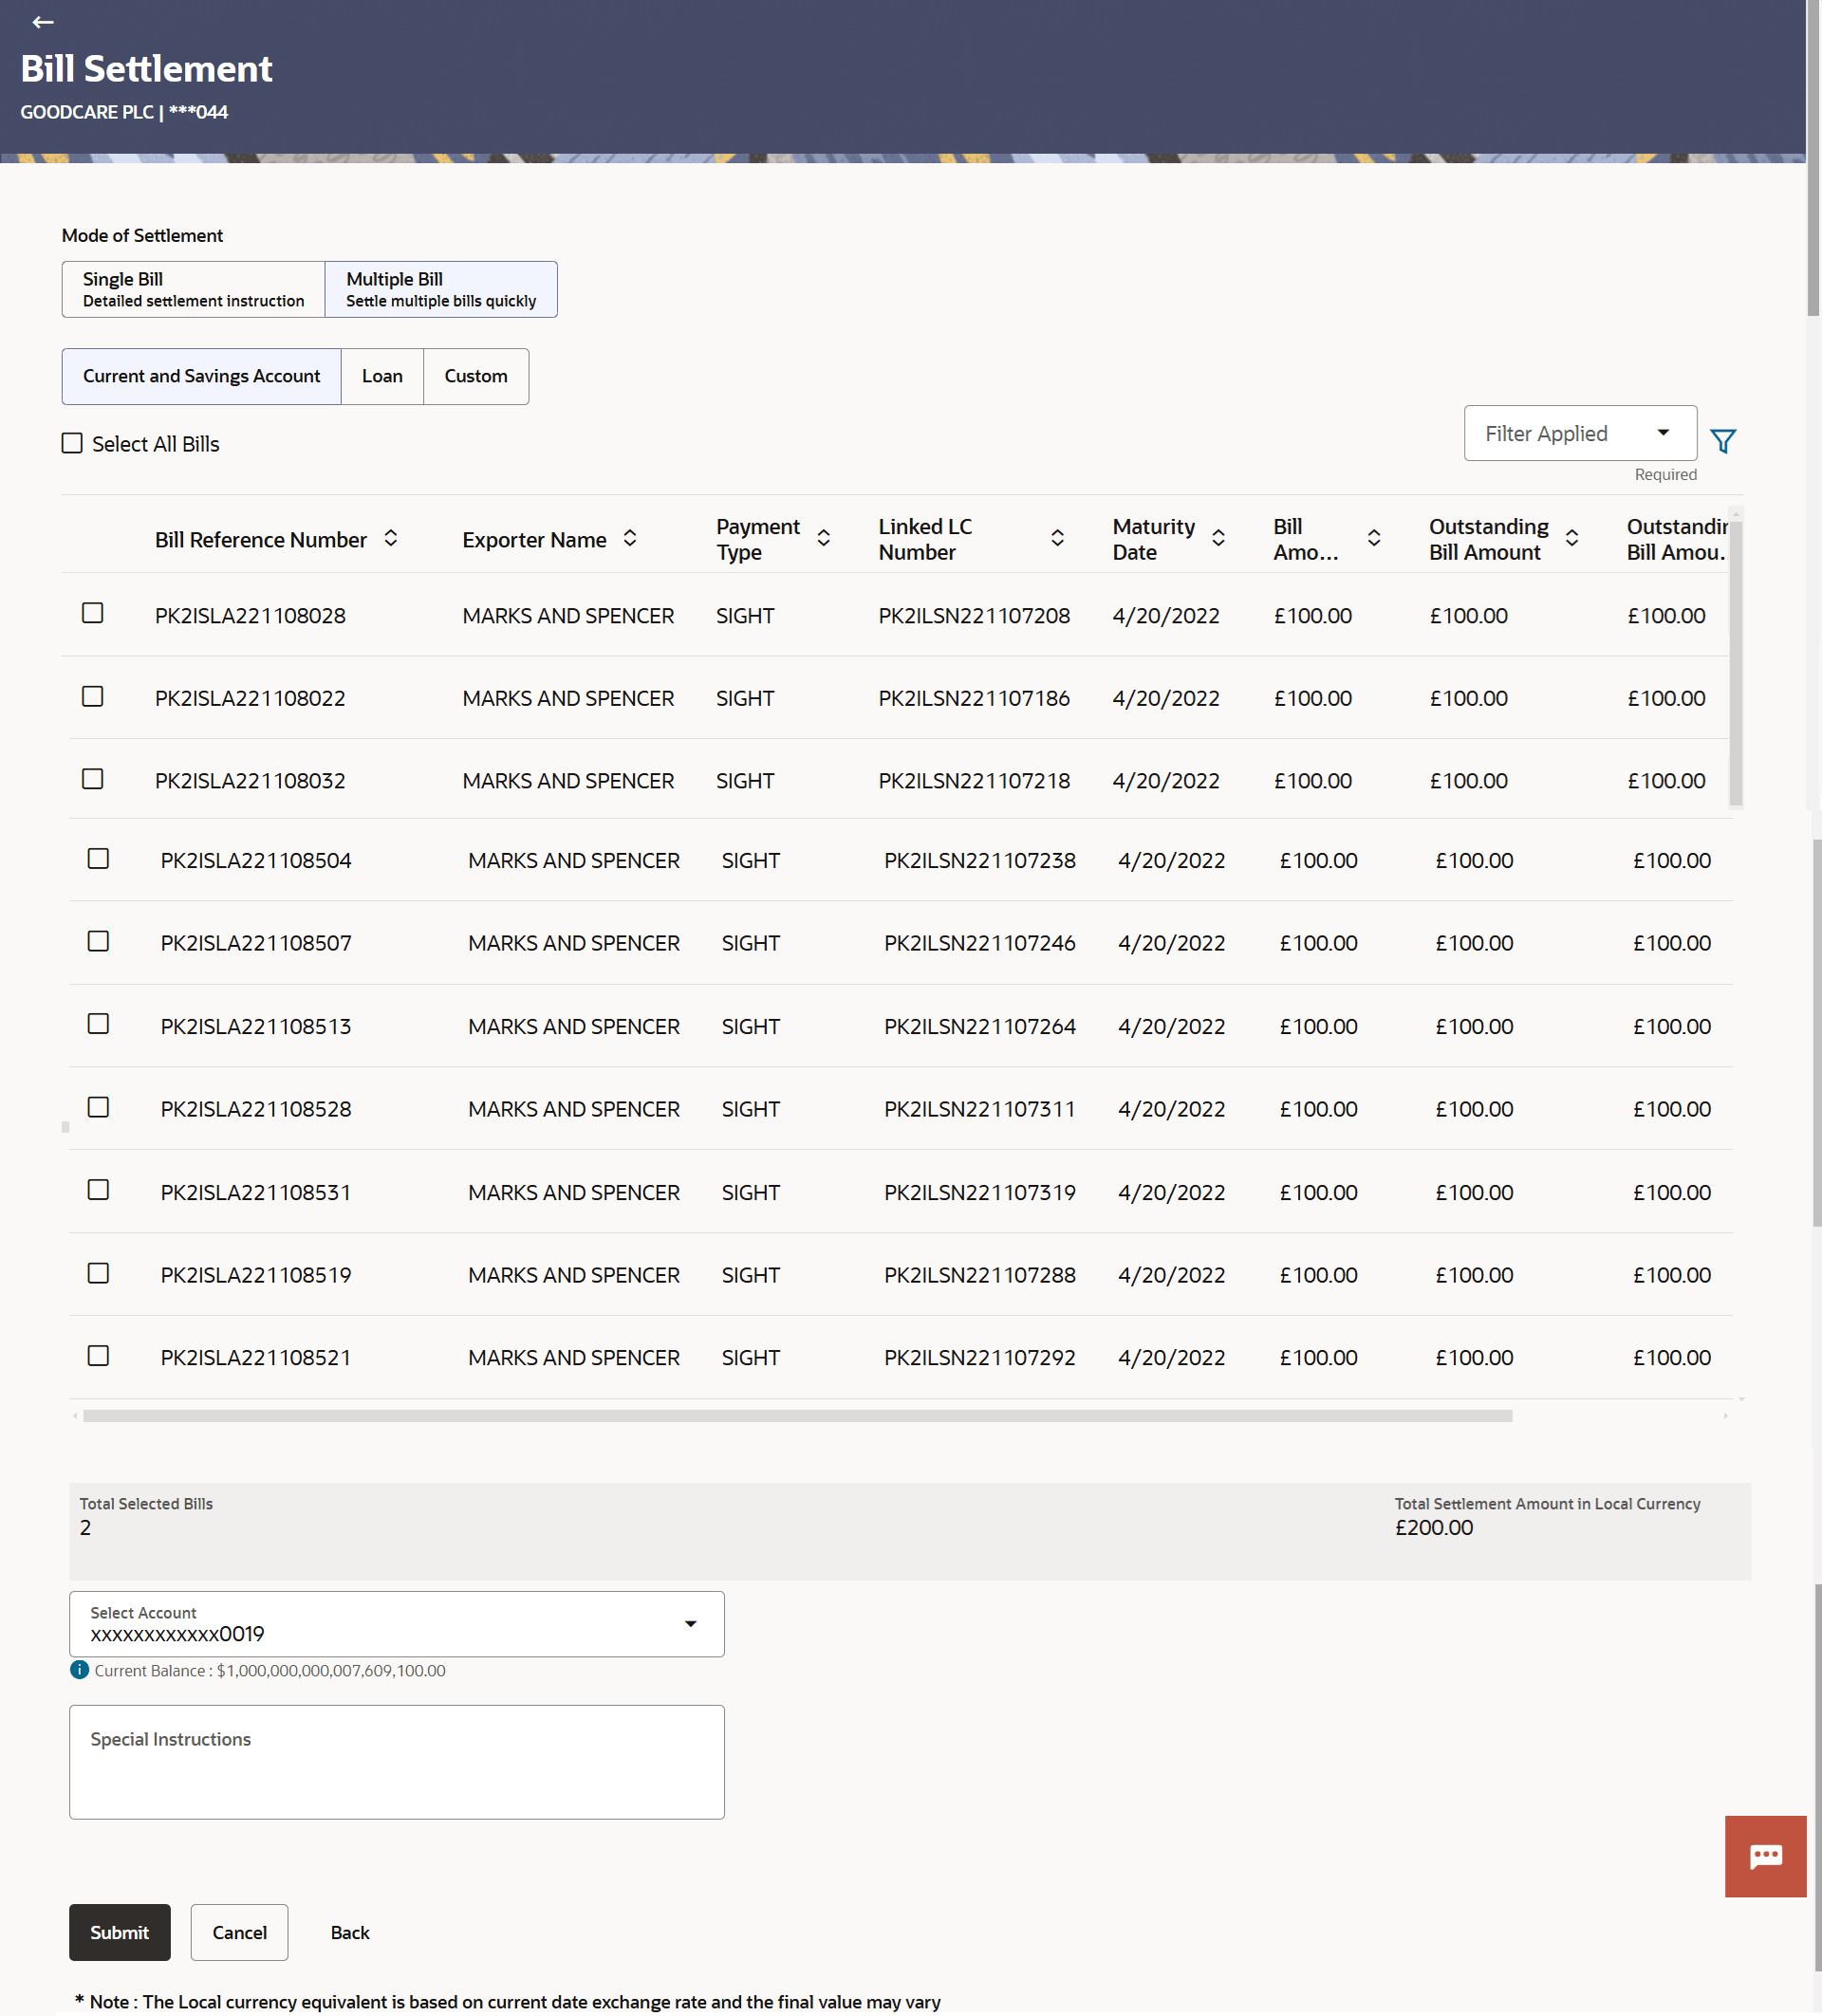
- Click Apply. The searched results are displayed based on the parameters provided
on the Bill Settlement – Multiple Bill – Current and Saving Account screen.
Figure 8-8 Bill Settlement – Multiple Bill – Current and Saving Account
For more information refer to the field description table below:
Table 8-7 Bill Settlement – Multiple Bill – Current and Savings Account - Field Description
Field Name Description Current and Savings / Loan/ Custom Option to select a Current and Savings Account or Loan account for settlement of Bill. - Current and Savings: The user can select the CASA
account, if he wishes to use for settlement of bill.
Note:
The balance in CASA account should be equal or more than the equivalent amount of claim in claim’s currency, which is being settled, in case of single claim being liquidated. - Loan: The user can select this option to apply for a loan directly from the page. Bank would be informed that the corporate user is looking for a loan.
- Custom: The user can select this option to apply for custom loan.
Select All Bills The option to select multiple bills to apply for the settlement. Check Box (Account Selection) The option against each bill, to select a Current and Savings Account which he wishes to use. Bill Reference Number Displays import bill reference number, which is attached to the Bill. Exporter Name Displays the name of the Exporter party. The exporter uploads the Bills.
Payment Type Displays the type of payment associated with the Bill. The options are:
- Sight
- Usance
Linked LC Number Displays the LC number which is linked to the Bill. Maturity Date Displays the maturity date of the export Bill. Bill Amount Displays the amount of Import Bill. Outstanding Bill Amount Displays the outstanding amount for the settlement of Bill. Outstanding Bill Amount in Local Currency Displays the outstanding amount for the settlement of Bill in local currency. Available for Loan Displays whether the bill is available for loan or not. Total Selected Bill Displays the total selected bill. Total Settlement Amount in Local Currency Displays the total settlement amount in local currency. Select Account Select the source account from which the funds are to be transferred for settlement of Bill. Balance Displays the Net balance in the selected source account. Special Instructions Specify the special remarks. - Current and Savings: The user can select the CASA
account, if he wishes to use for settlement of bill.
- Perform any one of the following actions:
- Select the Current and Savings Account option, if he wishes to use it for settlement of bill.
- Select this Loan option to apply for a loan directly from the page.
- Select the account from which the transfer needs to be made for settlement of Bill from the Select Account list.
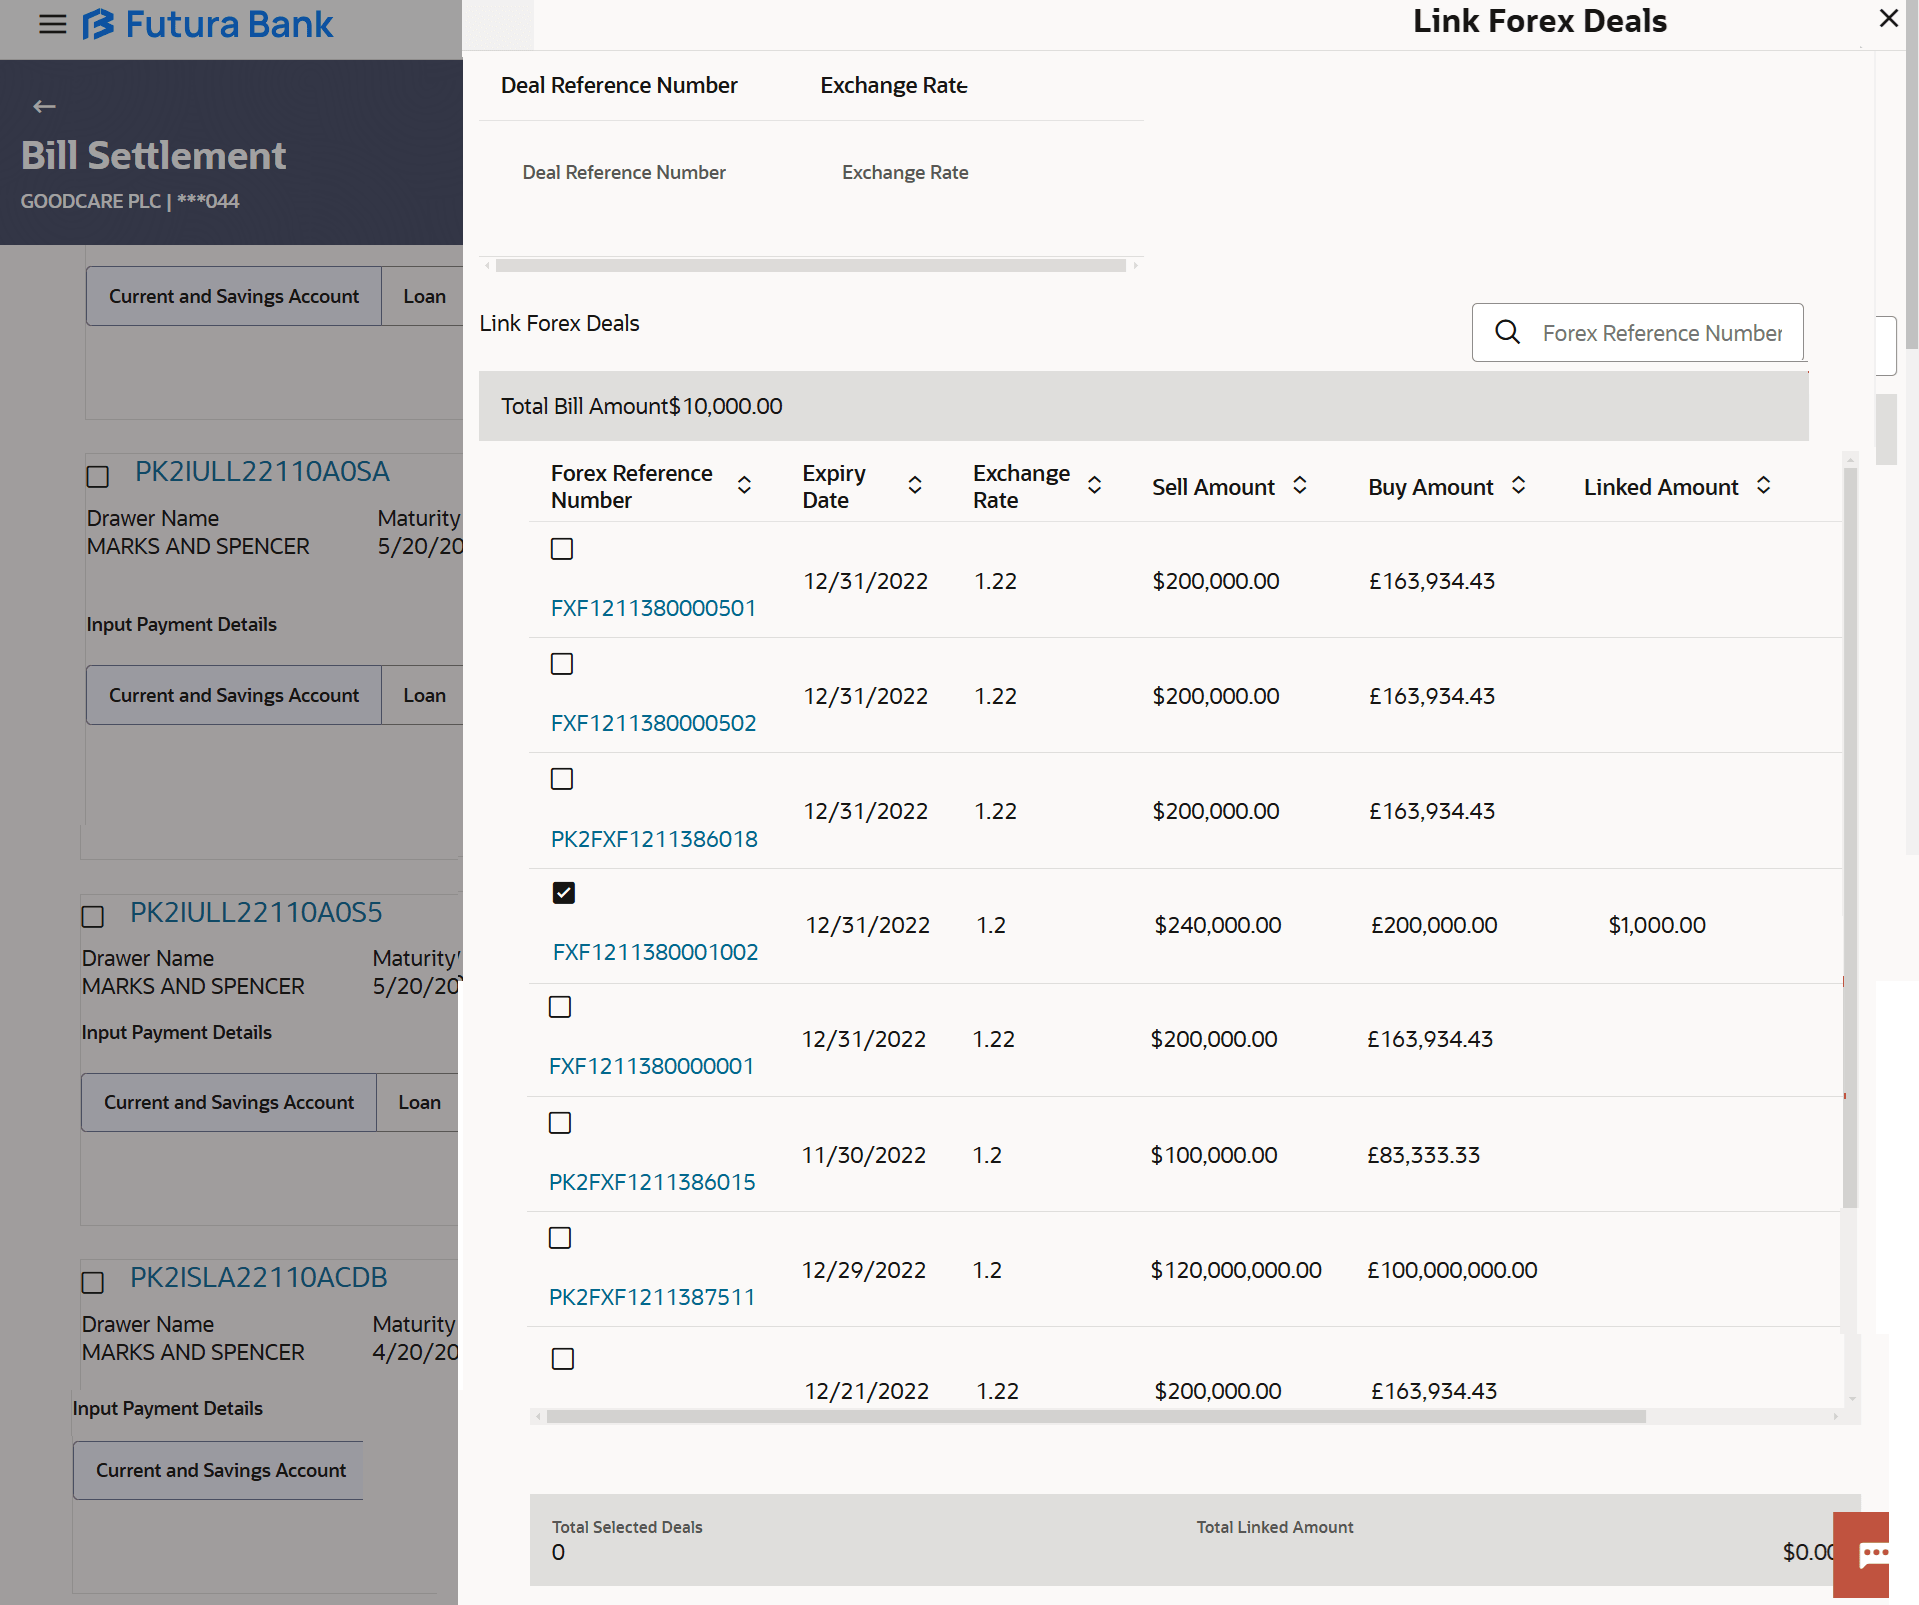
- Select the Custom and click the Link Forex Deal link.The Link Forex
Deal overlay screen appears.
- Specify the Deal Reference Number in the Deal Reference Number field.
- Specify the exchange rate in the Exchange Rate field.
- Specify the Forex Reference Number in the Search field.The searched Deal Reference Number record details appear.
- Click the check box to select the required searched Deal Reference Number record.
- Specify the linked amount, in the Linked Amount field.
- Click Submit to initiate the selected Bills settlement.The Settlement of Bills – Review screen appears.
- Perform any one of the following actions:
- Verify the details, and click
Confirm.
The success message initiation of Bill settlement appears.
- Click Cancel to cancel the transaction, The Dashboard appears.
- Click Back to navigate back to previous screen.
Note:
Corporate user can select multiple Bills for settlement. - Verify the details, and click
Confirm.
Parent topic: Bill Settlement


