2.2 Authenticator Application Workspace Setup
This topic describes the systematic instruction to Authenticator Application Workspace Setup option.
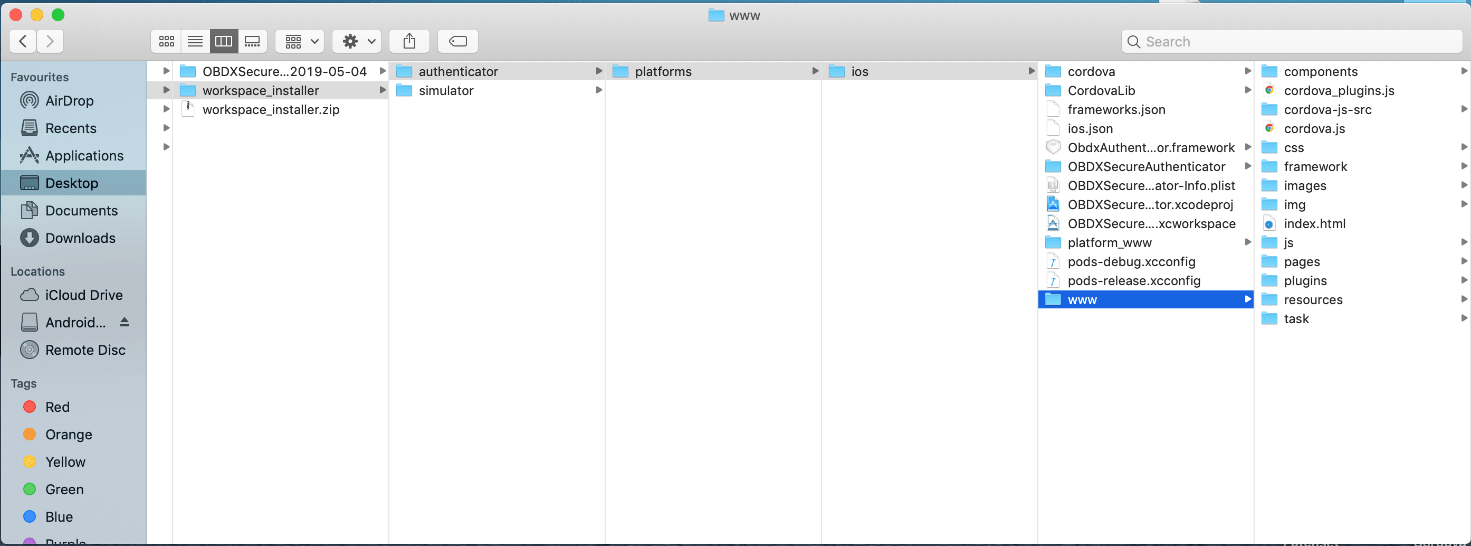
- Unzip and navigate to iOS workspace as shipped in installer.
- Open the workspace as shown below and find and replace the following
generated UI files from “ui/dist” folder :
- components
- css
- framework
- images
- pages
- resources
- Double click on OBDXSecureAuthenticator.xccodeproj to open the
project in Xcode.
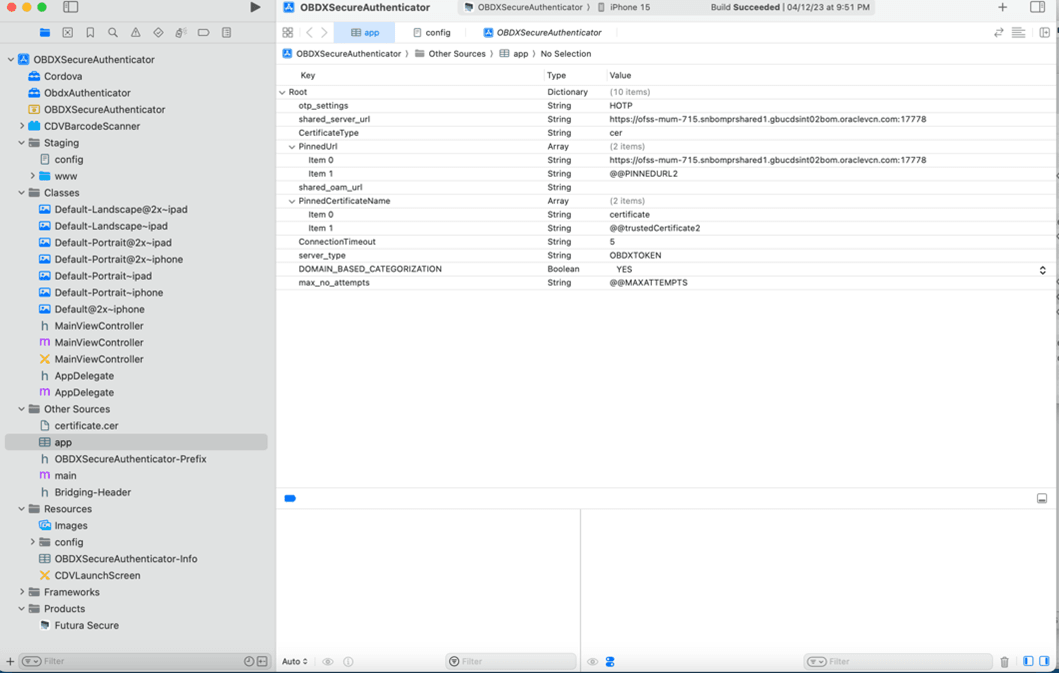
- Update HOTP or TOTP in above screenshots and update the server URL.
- shared_server_url_url = <bank’s https url>
- Set value of max_no_attempts to value greater than 0.
Server_type - OBDXTOKEN
- DOMAIN_BASED_CATEGORIZATION – YES
- Create certificates and profiles on Apple Developer account. Use the bundle identifier in project settings and select appropriate profile in the application
- Bundle identifiers needs to be added in the Info.plist of each the frameworks
- For example, let us assume that the bundle identifier used is
abc.def.ghi.jkl. The steps to be followed are,
- Right click on ObdxAuthenticator.xcframework(in Xcode’s Project Navigator) → Show in Finder
- When the Finder directory click on ios-arm64 folder → ObdxAuthenticator.framework.
- Open Info.plist and set Bundle identifier as abc.def.ghi.jkl.ObdxAuthenticator
- Follow same for Cordova.xcframework and set Bundle identifier for Cordova.framework : abc.def.ghi.jkl.Cordova
- Also, set the identifiers and select appropriate profile in the target → Signing & Capbilities tab as show below:
- The application contains frameworks for devices and simulator both. Run the application directly on simulator without copying any frameworks.
- The application can be archived using steps in section: Archiving
Authenticator Application for running on device.
Parent topic: OBDX Authenticator Application (Futura Secure)


