3.1 File Approval

This topic provides the systematic instructions of the file approval workflow process, wherein, following successful completion of pre-processing checks on an uploaded file, the file status becomes Pending Approval and is placed in the queue of the designated approver.

To approve / reject a file:

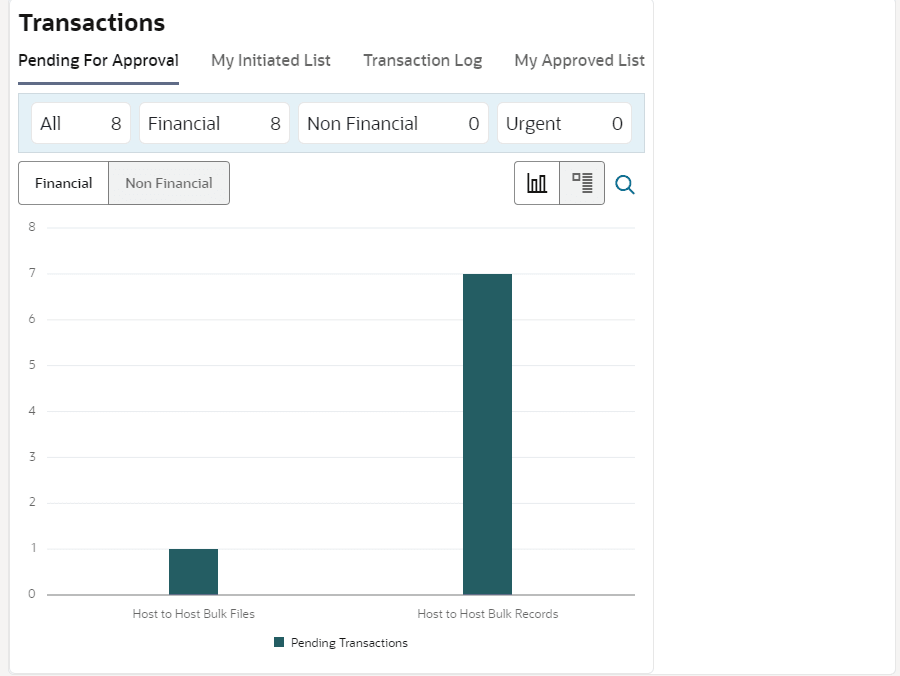
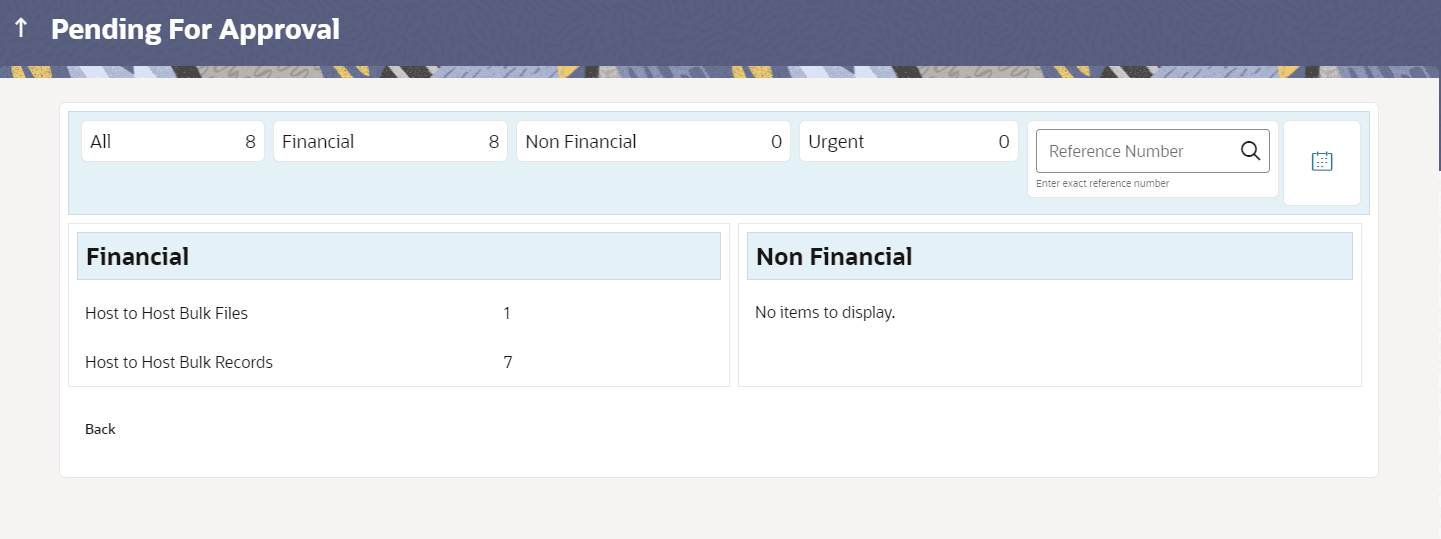
  1. In the Pending for Approval section, select Financial in drop-down list for Payments & select Non Financial for Virtual Account Open, click the Host-to-Host Bulk Files tab.
    All the uploaded files that require approval appears.
  2. Perform one of the following actions:
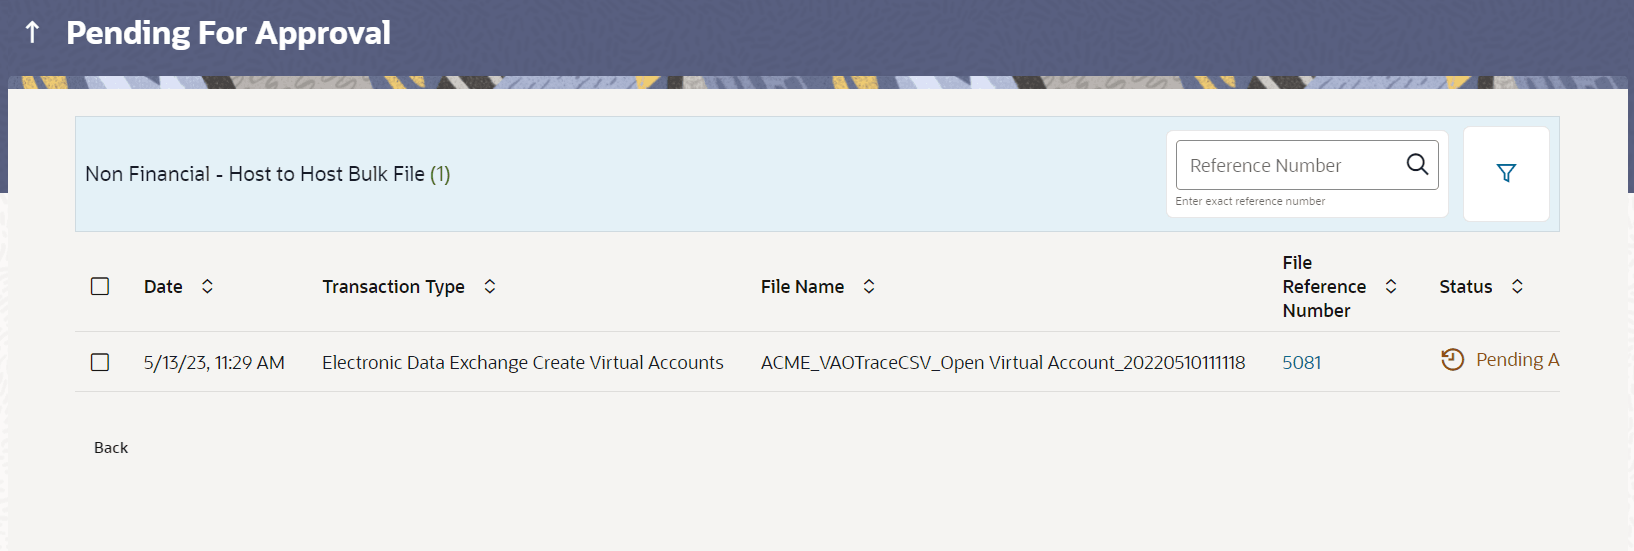
    • Select the multiple files and click Approve to approve the transactions.
    • Click the link under the Reference No column.

      The File Details screen appears.

    Figure 3-1 Pending for Approval Screen


    Figure 3-2 Pending for Approval Screen


    Figure 3-3 Bulk File Approve / Reject (Financial)


    Figure 3-4 Bulk File Approve / Reject (Non-Financial)


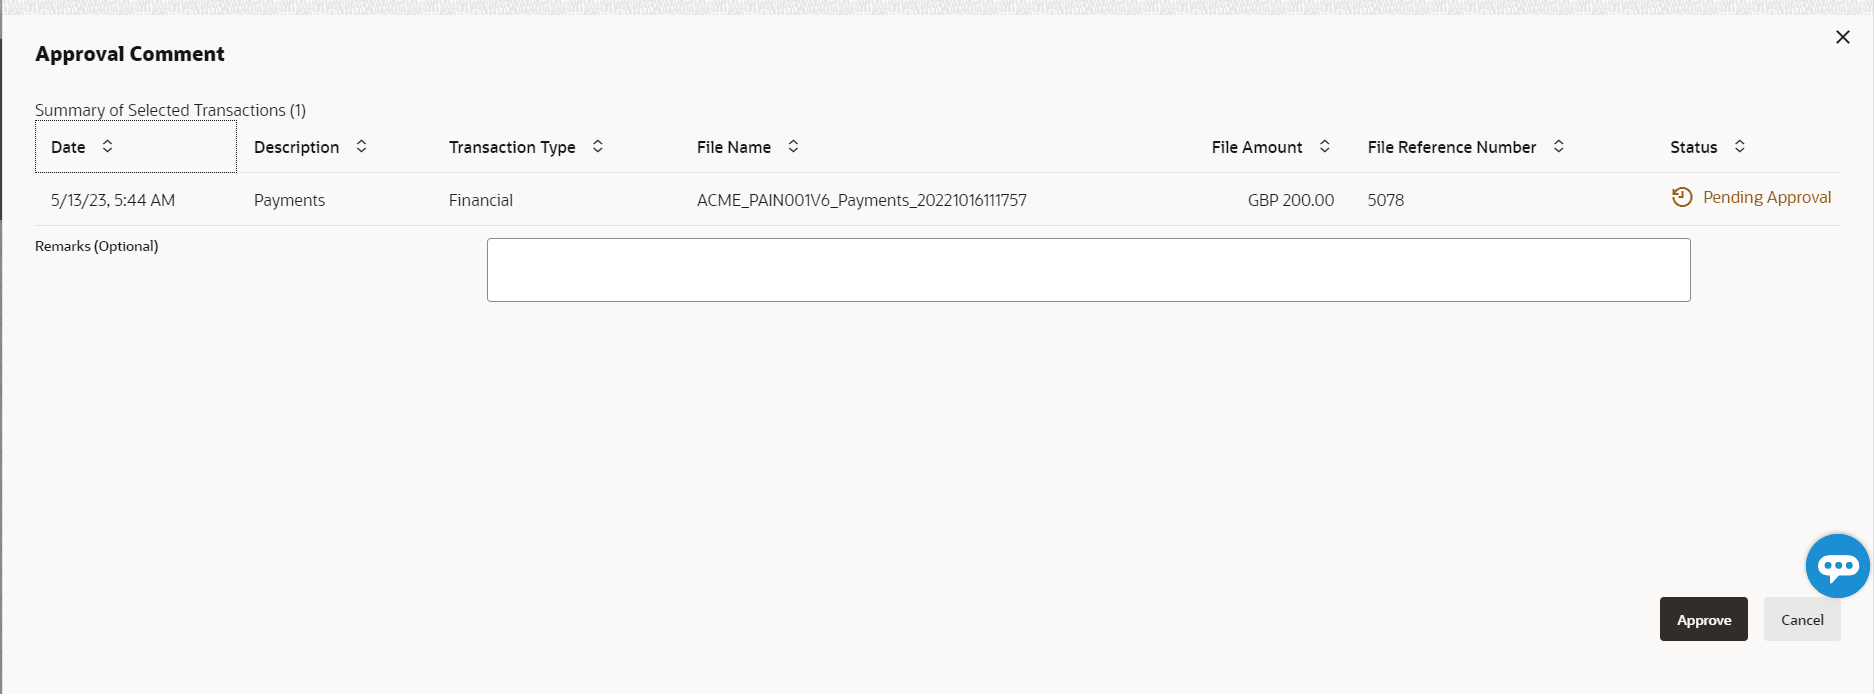
  3. If you click Approve.
    The Approval Comment screen appears.

    Figure 3-5 Bulk File Approve / Reject - Remarks (Approve)


    Perform one of the following actions:

    • Enter the remarks for approval, and click Approve.

      Transaction successfully approved message appears.

    • If you click Reject.

      The Reject Comment screen appears.

      Figure 3-6 Bulk File Approve / Reject - Remarks (Reject)


      1. Enter the remarks for rejection, and click Reject.

        Transaction rejected message appears.