5.1.2 View Lend Limit
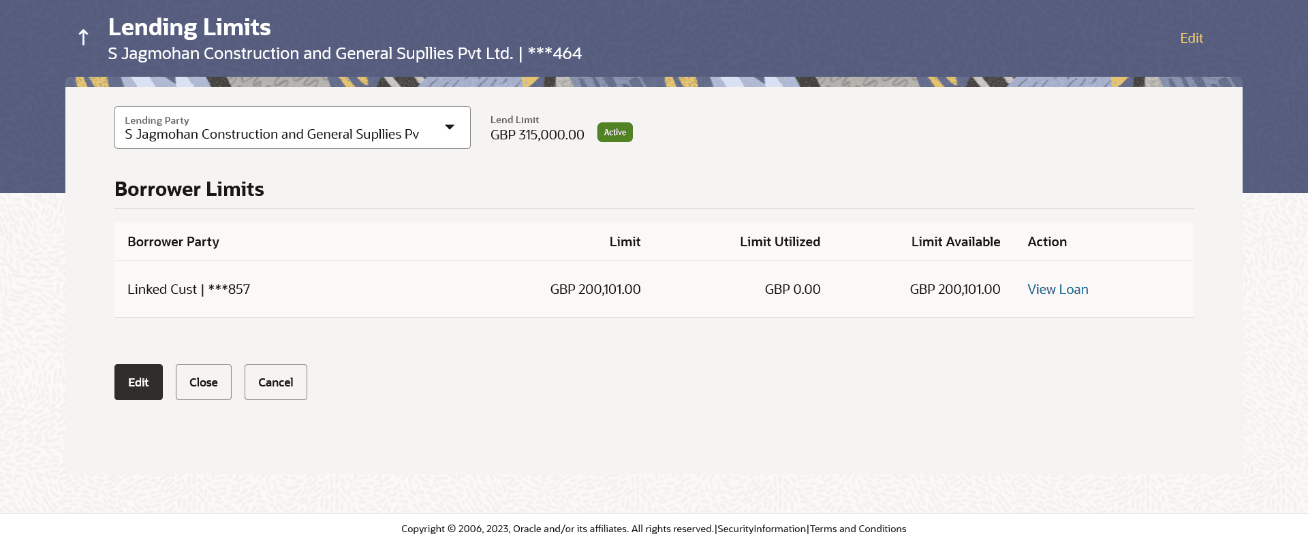
User can view the defined lend limit and associated individual borrowing limits along with the details of the limit utilized, available limit and loan details.
- From Menu, click Liquidity Management, and then click Intercompany Loan. From Intercompany Loan, click Lend Limits, and then click View/Edit Lend Limit screen.The Lending Limits screen displays. For more information on fields, refer to the field description table.
Table 5-2 Lending Limits – Field Description
Field Description Lending Party Select the lending party to view the lend details. Note: Only accessible parties are displayed to the user.
Lend Limit Displays the lend limit defined for the selected party. Status Displays the status of the Lending Party. The available options are:- Active
- Closed
Borrower Limits Information specified in below fields are related to Borrower Limits. Borrower Party Displays the borrower party name and ID defined to the selected lending party. Limit Displays the maximum borrowing limit for the borrowing party. Limit Utilized Displays the lending limit utilized by the borrowing party. Limit Available Displays the available lending limit of the borrowing party. - In the Lending Party field, select the lending party name and ID from the drop-down list.
- Click View Loan to view the loan details of the borrowing party.The Loan Details screen displays. For more information on fields, refer to the field description table.
Table 5-3 Loan Details – Field Description
Field Description Intercompany Loan Reference Displays the reference number for the intercompany loan. Loan Date Displays the loan booking date. From Account Displays the account number from which the loan amount is debited. To Account Displays the account number to which the loan amount is credited. Loan Amount Displays the loan amount. Exchange Rate Displays the exchange rate between the lender and borrower currency. Loan Amount in Limit Currency Displays the loan amount post the currency conversion in Limit currency. Maturity Date Displays the date when the loan tenure gets completed. This field left blank for the open ended loan.
- Click
 to filter the loan details with the various criteria. The Loans Details – Filter pop-up screen displays. For more information on fields, refer to the field description table.
Table 5-4 Loan Details -Filter – Field Description
Field Description Intercompany Loan Reference Number Specify the intercompany loan reference number to filter the loans. Maturity Date Select the maturity date to filter the loans. Currency Select the currency to filter the loans. Loan Amount Specify the loan amount to filter the loans. From Disbursement Date Select the disbursement date from when the loans must be filtered. To Disbursement Date Select the disbursement date till when the loans must be filtered. From Account Select the account in which the loan amount is debited to filter the loans. To Account Select the account in which the loan amount is credited to filter the loans. - Perform any one of the following actions:
- Click Apply. The search result displaying the loan details based on the filter parameters appear.
- Click Reset to clear the filter criteria.
- On Action column, click
 to perform the following actions.
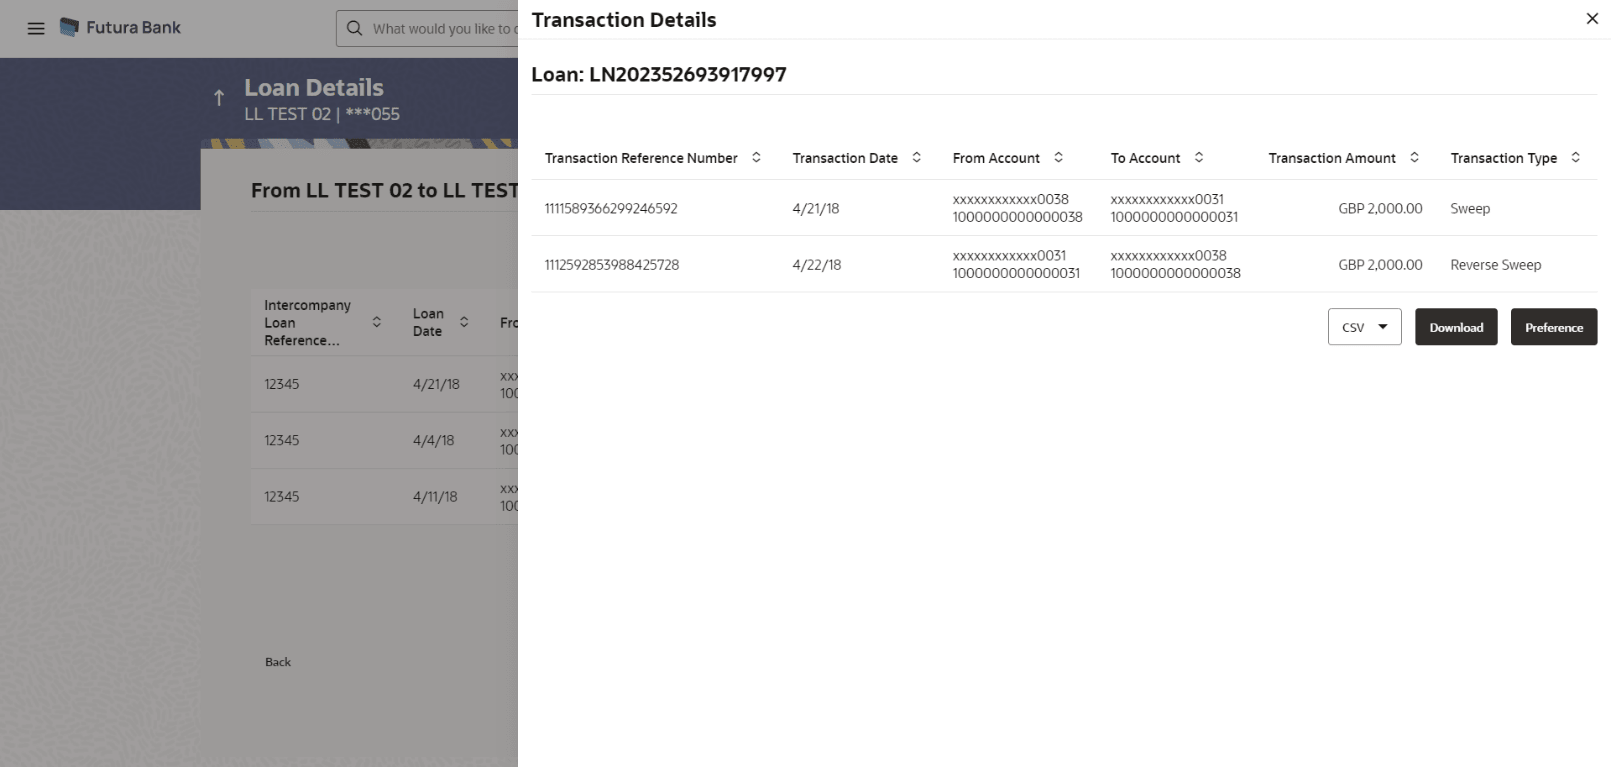
- Click View Transaction to view the transaction details for the intercompany loan.
The Loan Details - View Transaction pop-up screen displays.
Figure 5-5 Loan Details - View Transaction
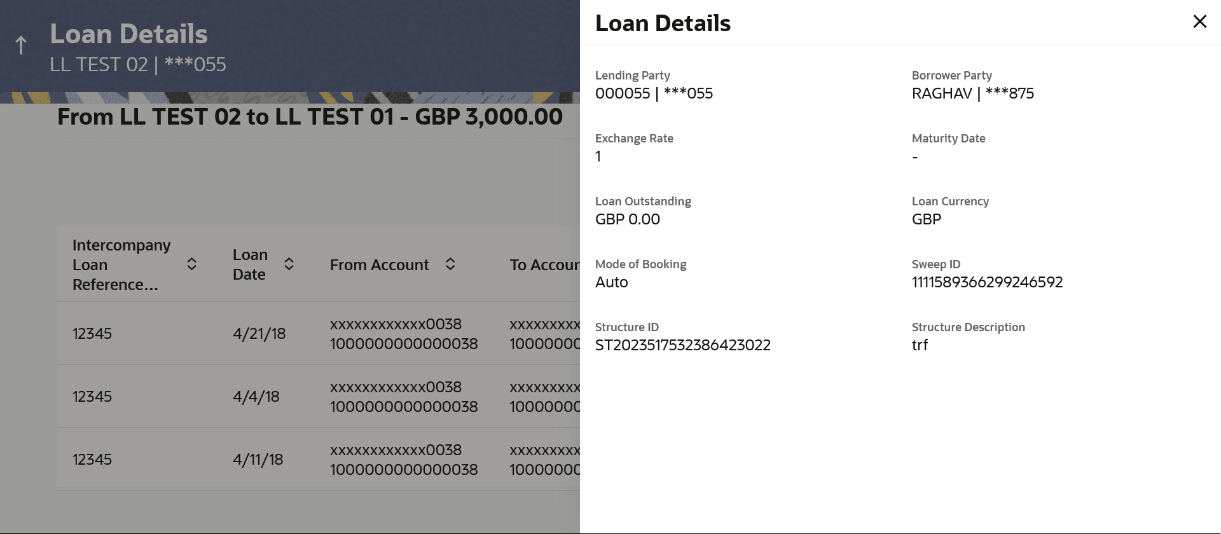
- Click View Loan to view the details of the intercompany loan.
The Loan Details - View Loan pop-up screen displays.
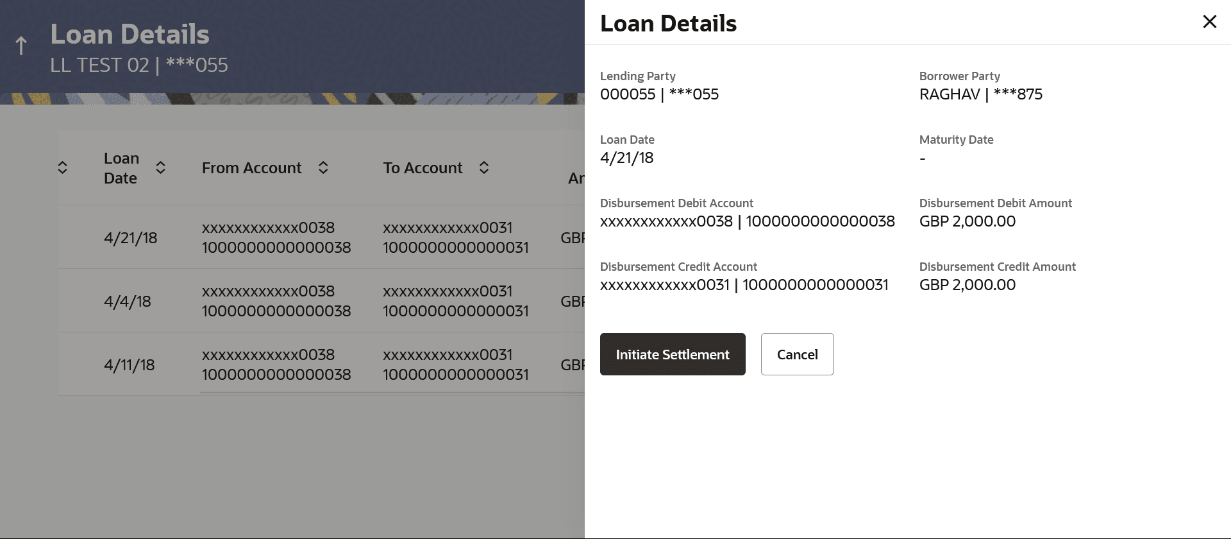
- Click Settle to initiate the settlement request for the
intercompany loan on the booking date.
Note:
If the user does not have access to the account, an error message displaying "Access Denied" appears.The Loan Details - Settlement pop-up screen displays. - On Settlement pop-up screen, click Initiate Settlement to settle/close the loan.
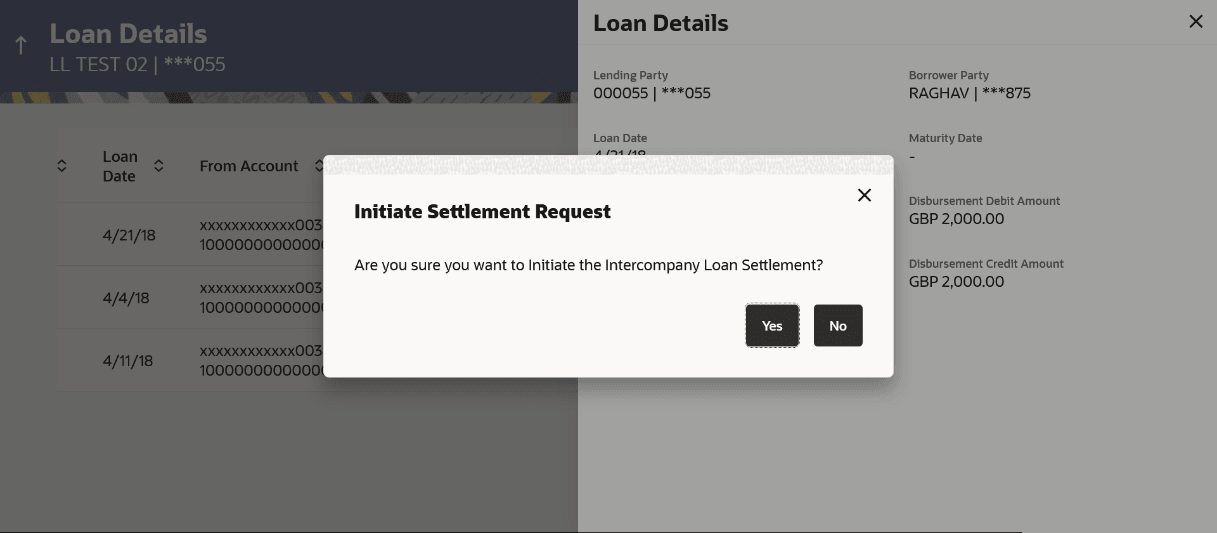
The Loan Settlement pop-up screen displays.
- Click Yes to initiate the loan settlement.
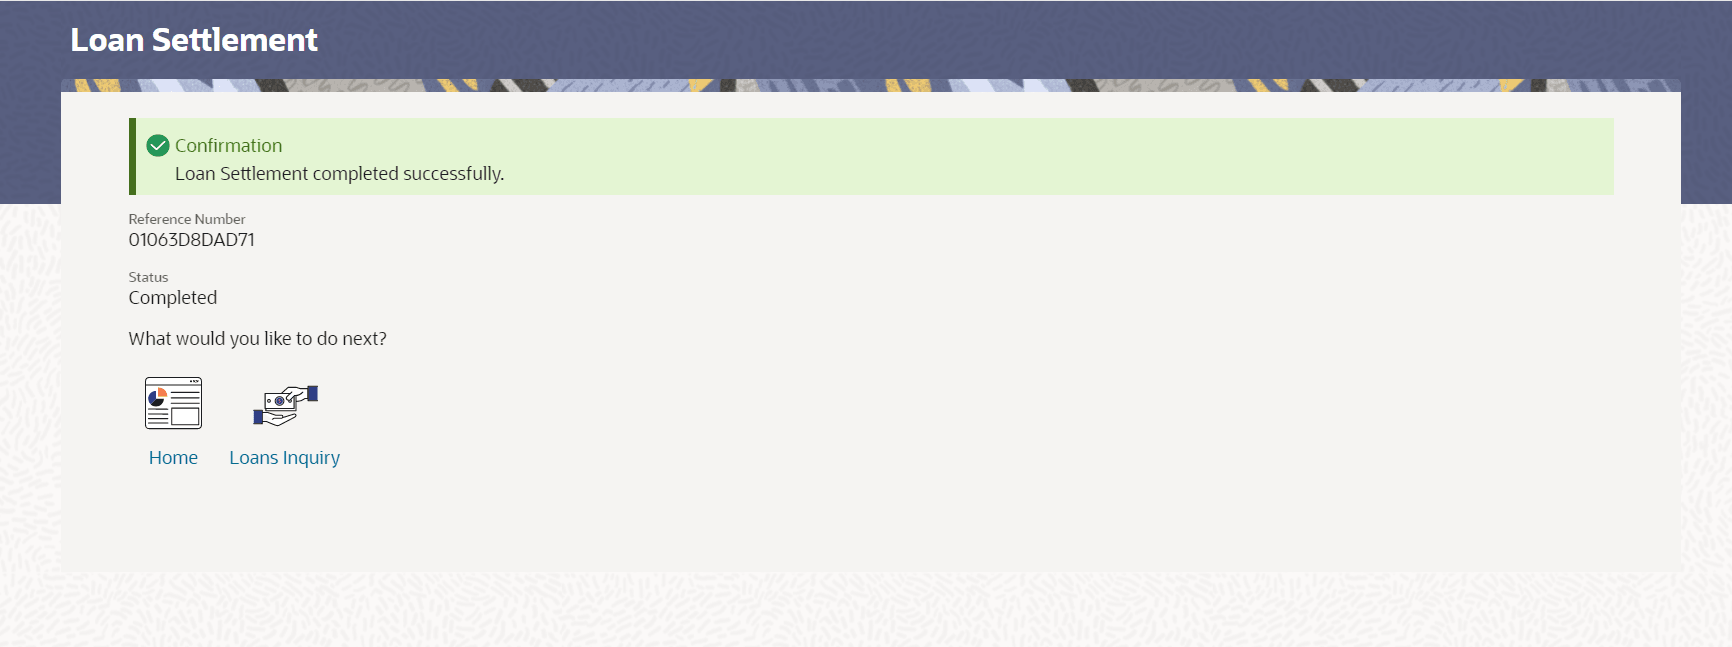
- The Loan Settlement confirmation screen displays.
- Click No to discard the settlement.
- Click View Transaction to view the transaction details for the intercompany loan.
- Select the file type from the drop-down list and click Download to download the loan details in the selected file type.
- Click Preference to rearrange the column sequence in the table.
Parent topic: Lend Limits
