4.1.1.1 Creating Single/Recurring Cash Flow Records
This topic describes about the Creating Single/Recurring Cash Flow Records (manual entry) in Oracle Banking Digital Experience.
- Perform the following navigation to access the Creating Single/Recurring
Cash Flow Records (manual entry) screen.From the Dashboard, click Toggle Menu. Under Toggle Menu, click Cash Management . Under Cash Management , click Cash Flow. Under Cash Flow, click Create Expected Cash Flow.
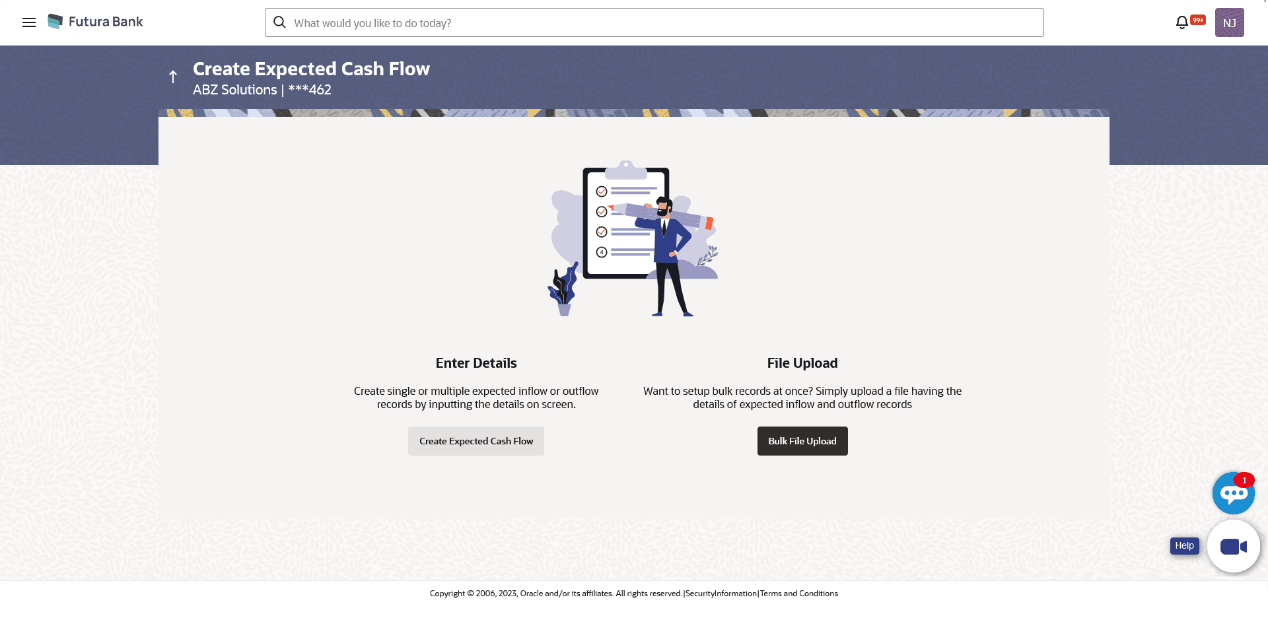
The Create Expected Cash Flow screen displays.
For more information on fields, refer to field description table below:
Table 4-1 Create Expected Cash Flow - Field and Description
Field Description Party Name Displays the name of the logged-in corporate party. Enter Details Indicates the option to create single or recurring expected cash flow records by manual entry of cash flow details. File Upload Indicates the option to create bulk expected cash flow records through file upload. The file formats supported are .xls, .xlsx, .csv, and .xml. - In the Create Expected Cash Flow screen, click Create Expected Cash
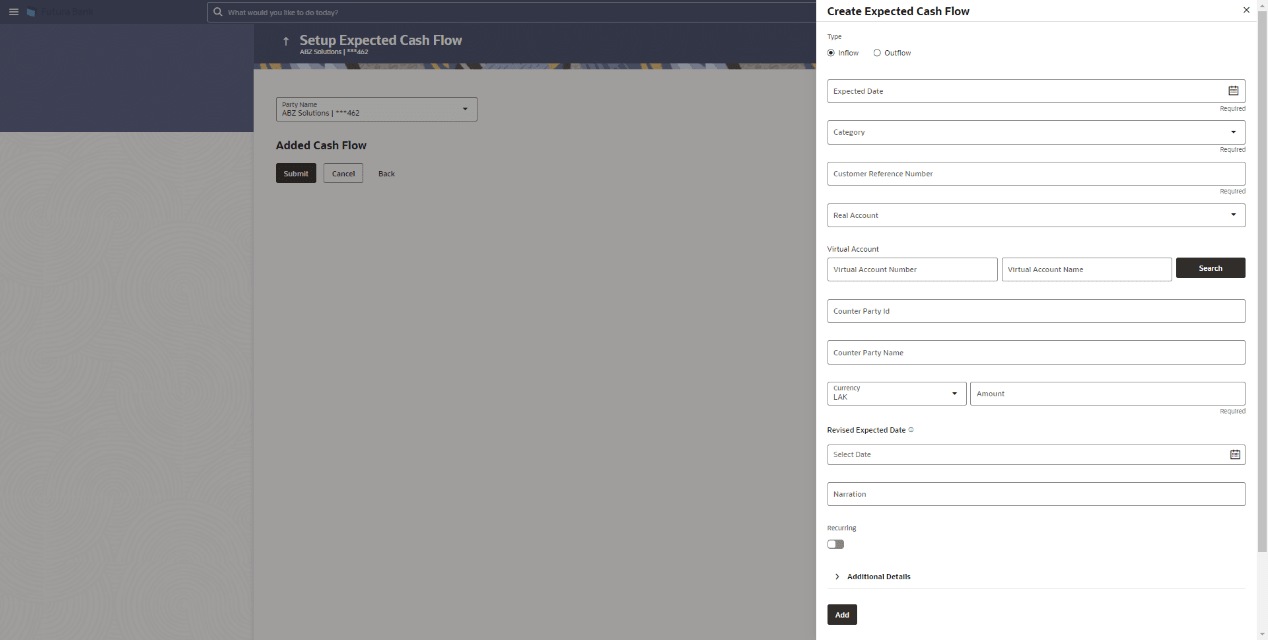
Flow. The overlay window appears.
For more information on fields, refer to field description table below:
Table 4-2 Create Expected Cash Flow - Field and Description
Field Description Type Select whether the cash flow is an inflow or an outflow. Expected Date Enter the expected date of expected cash flow transaction. Category Select the category of the cash flow transaction. The values in this list depend on the option selected in the Type field (inflow or outflow). Category Code Enter the code for the category. This field appears when you select the Others option from the Category list. Category Name Enter a description for the category. This field appears when you select the Others option from the Category list. Customer Reference Number Enter the customer’s own reference number for the cash flow. Real Account Select the account number of the corporate party for the expected cash flow transaction. The dropdown list either displays the real account numbers or the International Bank Account Number (IBAN), based on the configuration set by the bank. Virtual Account Number Enter the virtual account number of the corporate party for the expected cash flow transaction.
Note:
This field will be disabled if the Real Account is selected for expected cash flow transaction.
Virtual Account Name Enter the virtual account name of the corportate party for the expected cash flow transaction.
Note:
This field will be disabled if the Real Account is selected for expected cash flow transaction.
Search Click Search to search the virtual account with the account number, and account name specified. Counter Party ID Enter the ID of the counter party. Counter Party Name Enter the name of the counter party. Currency Select the currency for the expected cash flow transaction. Amount Enter the amount of the expected cash flow transaction. Revised Expected Date Enter the revised date when the cash flow is expected to take place, if required. Narration Enter the narration of the expected cash flow transaction. Recurring Switch the toggle on, if the expected cash flow transaction must recur. Note:
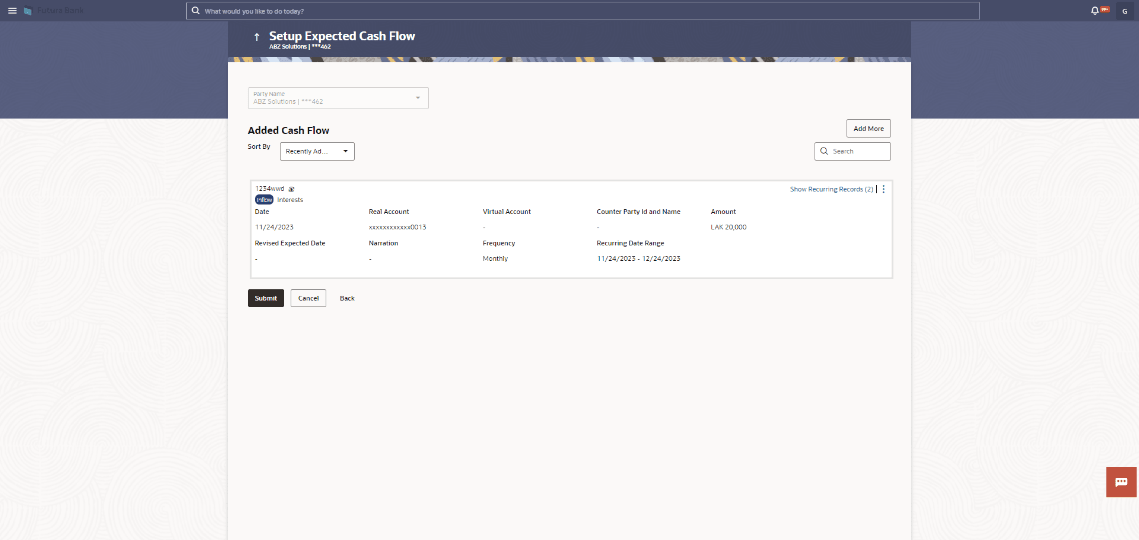
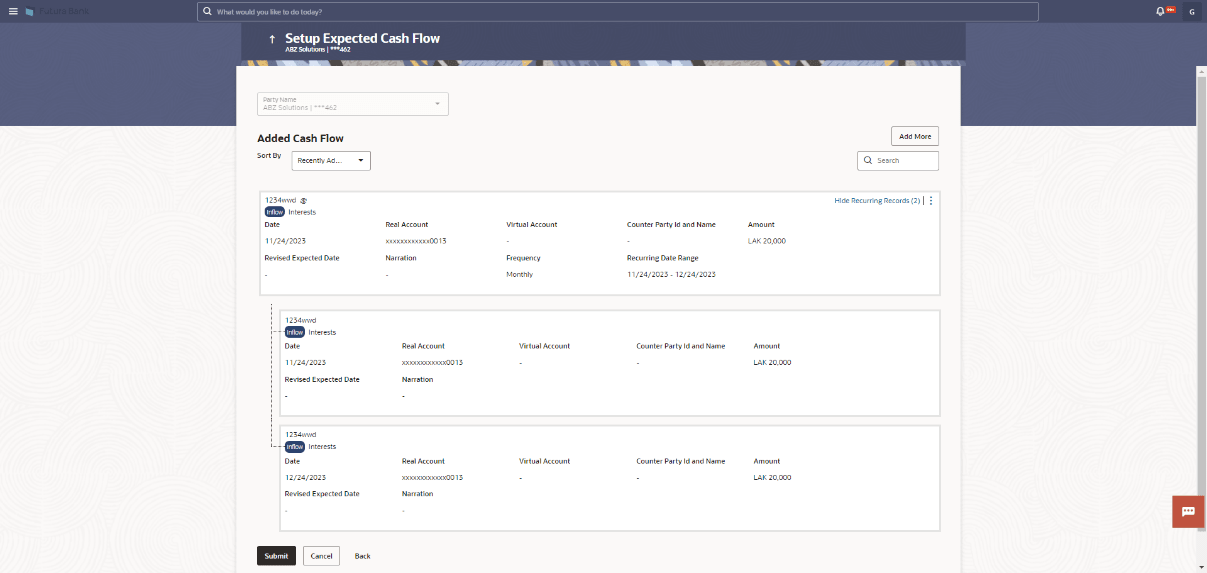
On selecting a recurring transaction, when the user submits the cash flow set up, n number of cash flow records are automatically created, depending on the frequency, start date and end date. Refer the Added Cash Flow – Recurring Cash Flow Record screenshot below.
Frequency Select the frequency of recurrence of the expected cash flow transaction. This field appears if the Recurring toggle is switched on. From Date / To Date Enter the date range within which the expected cash flow transaction must recur. These fields appear if the Recurring toggle is switched on. Once you save a recurring transaction, those many records are created as are applicable between the From Date and To Date. - Once you add the required details, click Add. The cash
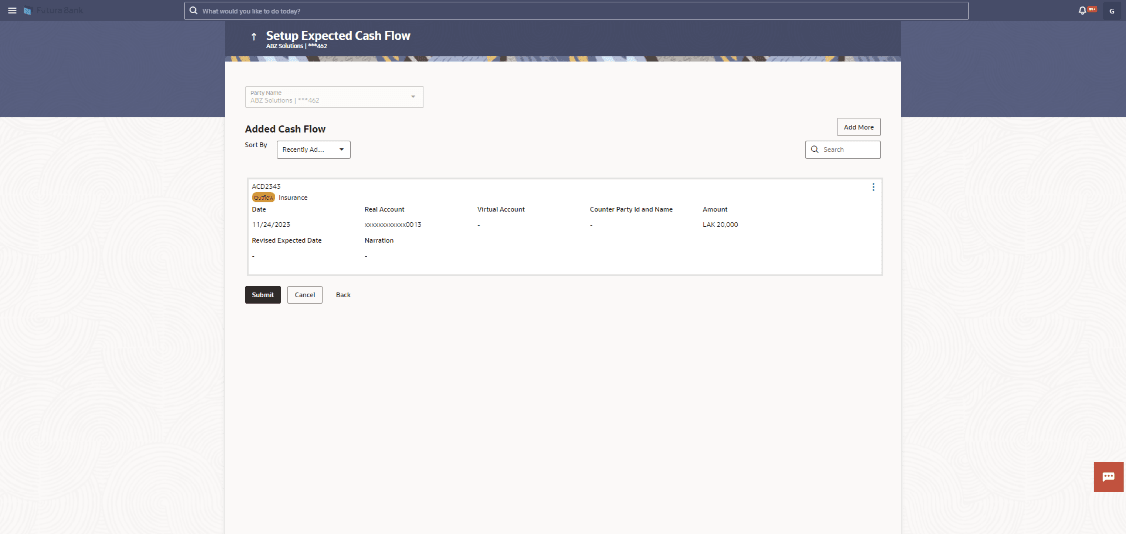
flow transaction record is added to the Added Cash Flow list.
- To edit or delete the added entry, click
 beside the record, and select Edit or
Delete.
 - To add further cash flow transaction records, click Add More.
Figure 4-3 Added Cash Flow – One-time Cash Flow Record
Figure 4-4 Added Cash Flow – Recurring Cash Flow Record
Figure 4-5 On Clicking Show Recurring Records
For more information on fields, refer to field description table below:
Table 4-3 Added Cash Flow – Recurring Cash Flow Record - Field and Description
Field Description Party Name & ID Displays the name and ID of the logged-in corporate party. Sort By Indicates a list of options to sort the cash flow entries. Search Indicates an option to search for a specific cash flow transaction record based on the search text entered. Customer Reference Number, Type, Category Displays the customer’s reference number for the expected cash flow record, the type of cash flow (Inflow or Outflow), and the category of the cash flow transaction.
In case of a recurring cash flow record, the
 indicator appears beside the customer reference
number.
Date Displays the date on which the cash flow transaction is expected to occur. Frequency Displays the frequency of recurrence of the cash flow record. This field appears only for recurring cash flow records. Recurring Date Range Displays the date range within which the cash flow recurrence will happen. This field appears only for recurring cash flow records. Account Displays the real account number of the corporate party that has been selected for the transaction. This can be either the real account number or the International Bank Account Number (IBAN), based on the configuration set by the bank. Virtual Account Displays the virtual account number and name selected for the transaction. Counterparty Id and Name Displays the ID and name of the counter party associated with the expected cash flow transaction. Amount Displays the currency and amount of the cash flow transaction. Revised Expected Date Displays the revised date when the transaction is expected to occur. Narration Displays the narration associated with the cash flow transaction. 
Click this icon to edit or delete the added expected cash flow entry. Show/Hide Recurring Records (number) Click this link to show/hide all the recurring cash flow transactions for that particular cash flow record. - To edit or delete the added entry, click
- Perform one of the following actions: Click Submit to
submit the record. The Review screen appears. Or,
- Click Submit to submit the record.
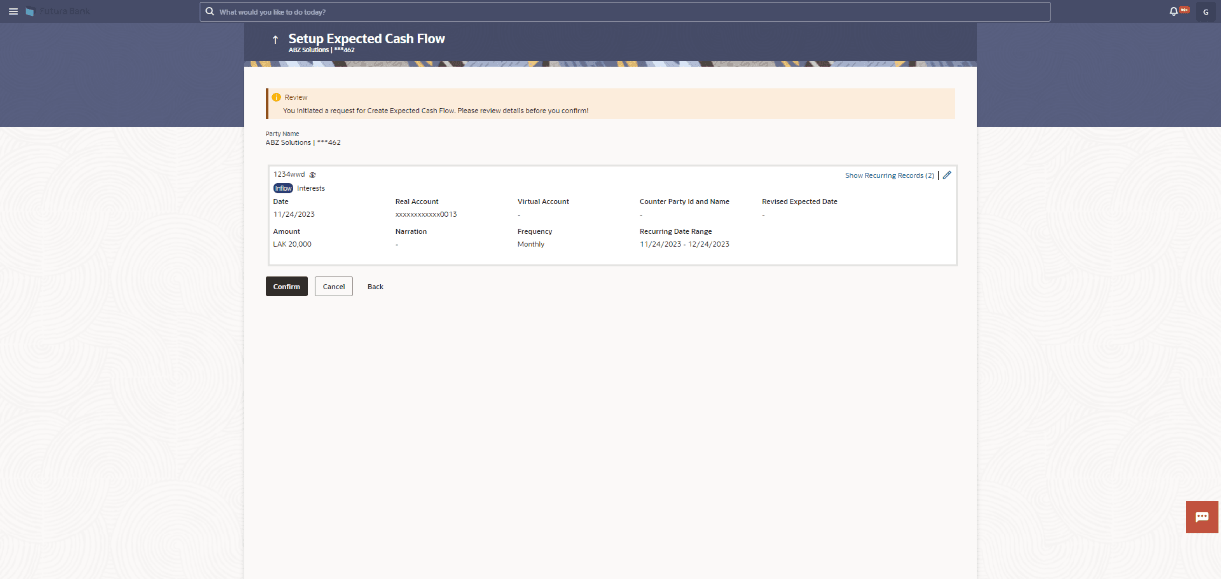
The Review screen appears.
Figure 4-6 Setup Expected Cash Flow – Review Screen
- Click Add More to add further expected cash flow transactions.
- Click Cancel to cancel the adding of the record.
- Click Back to go to the previous screen.
- Click Submit to submit the record.
- In the Review screen, verify the details and click
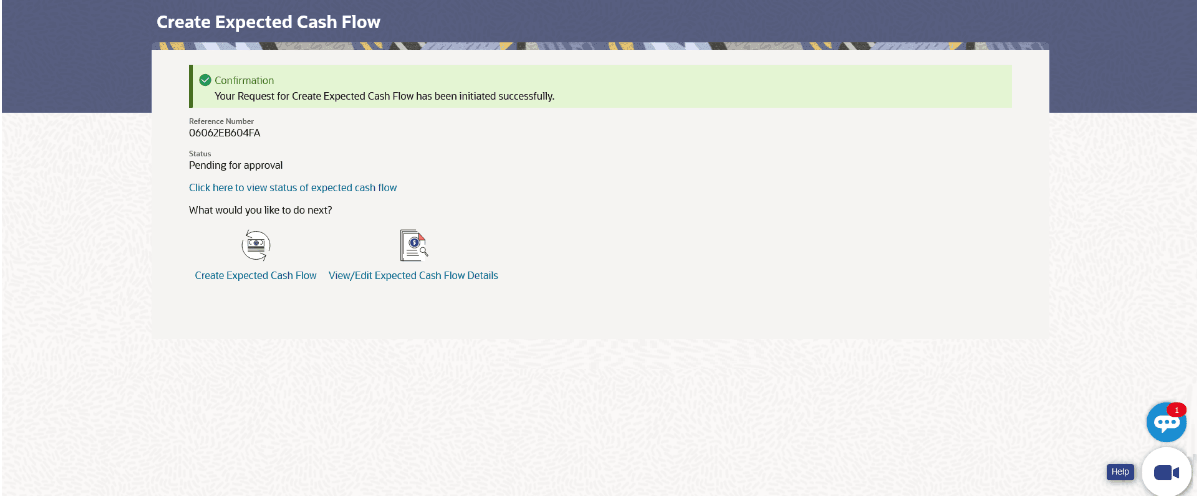
Confirm to confirm adding the record. A Confirmation
message appears with the reference number and status of the transaction.
- Click
 to edit the record.
- Click Cancel to cancel the submission.
- Click Back to go to the previous screen.
Figure 4-7 Create Expected Cash Flow - Confirmation
- Click
- Click the link provided to view the status of the added expected cash flow
records. All expected cash flow records that have been added, appear with their
current status in the Cash Flow Details overlay window. Perform one of
the following actions:
- Click Create Expected Cash Flow to create another cash flow transaction record.
- Click View/Edit Expected Cash Flow Details to view a list of expected cash flow transaction records that have been created.
