12.2 List Positive Pay
This topic provides the systematic instructions to user for listing all the Positive Pay requests.
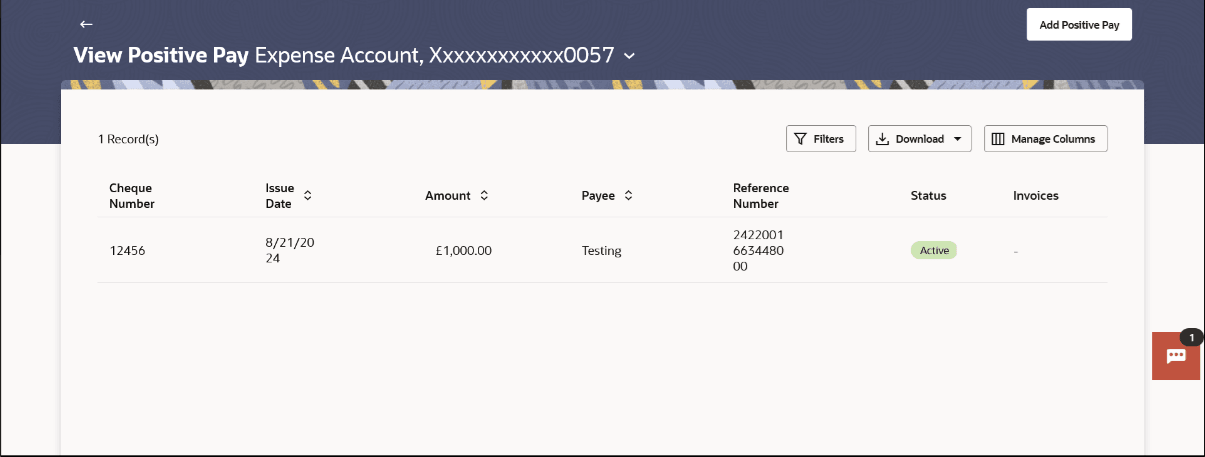
It gives summarize details of the request which includes Debit account number, cheque number, beneficiary number, issue date, cheque amount, status, and action etc.
To list the positive pay requests:
- Perform anyone of the following navigation to access the View Positive Pay
screen.
- From the Dashboard, click Toggle menu, click Menu, then click Payments . Under Payments , then click More Actions, and then click Positive Pay, and then click View Positive Pay .
- From the Search bar, type Positive Pay – View Positive Payand press Enter
The list of all the positive pay appears on the View Positive Pay screen.
- From the Debit Account Number list, select a CASA (Current
select a CASA (Current Account and Savings Account) account from which payments is to be
debited.
Note:
The fields which are marked as Required are mandatory.For more information on fields, refer to the field description table.
Table 12-3 View Positive Pay – Summary - Field Description
Field Name Description Debit Account Number A CASA (Current Account and Savings Account) account from which payments is to be debited and by which you searched the record. Total Count of records Displays the total count of records. Cheque Number The cheque number by which you searched the record. Issue Date The cheque issuance date. Amount The cheque amount. Payee The name of the payee to whom transfer is to be made. Reference Number The reference number of the record. Status The status of the cheque. It could be:
- Active- Cheque issued, but not yet cleared or expired
- Paid- Cheque cleared successfully
- Cancelled- Cheque cancelled by the bank.
- Stale - Expired Cheque
- Payment Stopped- Cheque stopped explicitly by the issuer
Invoices Displays the count of invoiced raised against the cheque. - Perform one of the following actions:
- Click Search.
Based on the search criteria the records appears on the List Positive Pay screen.
- Click Reset to clear the data entered.
- Click Search.
- Perform one of the following actions:
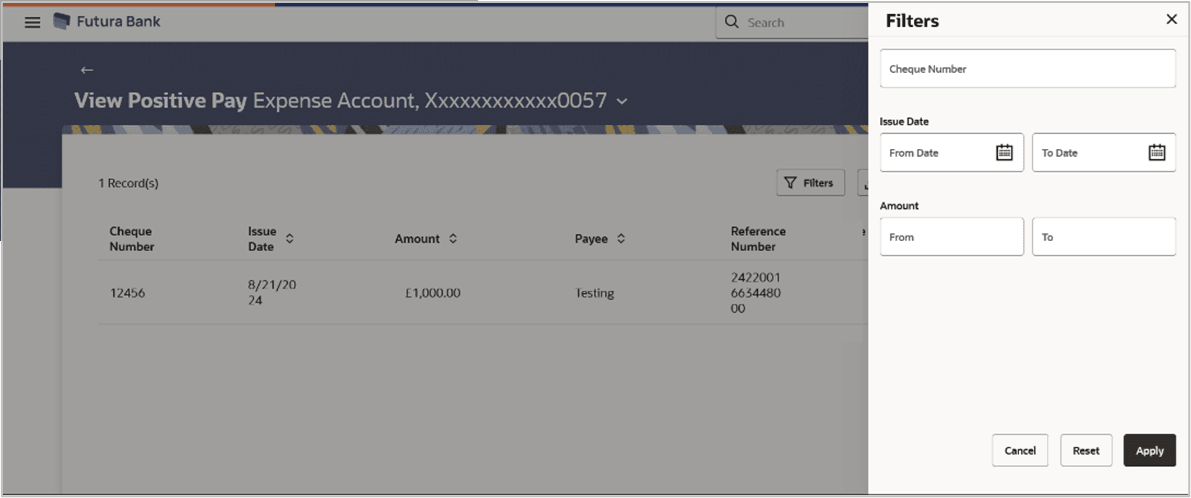
- Click the
 to change filter criteria.
The Filter overlay screen appears.
Figure 12-5 View Positive Pay- Filter Criteria
Perform one of the following actions:
- Enter the filter criteria.
- Click Apply to search the records.
Transaction records appears based on the updated criteria.
- Click the
 icon to download the records in CSV & PDF format.
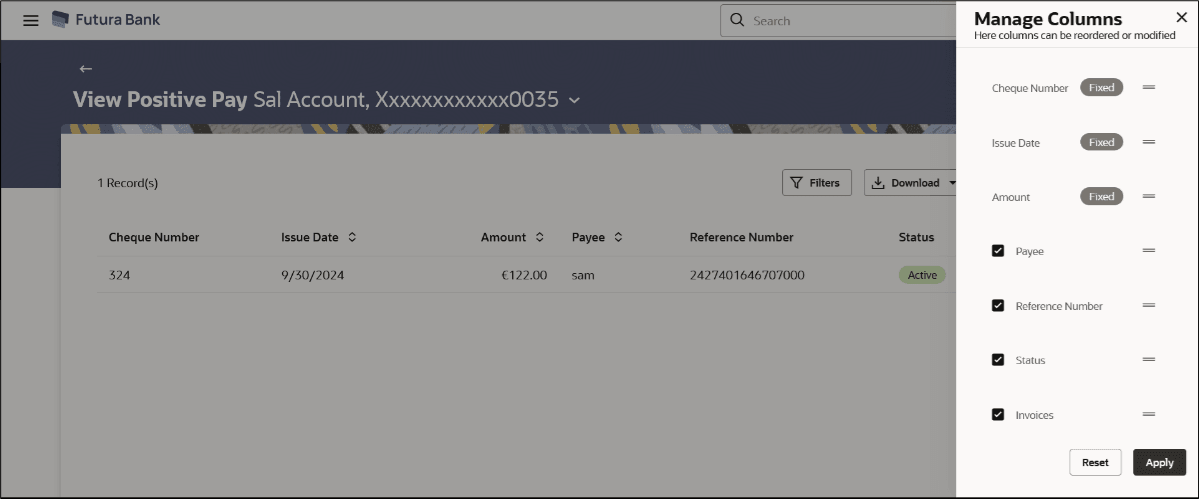
- Click the
 icon to setup a column preference by rearranging or removing
columns.
Figure 12-6 View Positive Pay - Manage Column setup
- Click the
Parent topic: Positive Pay


