1.2.6 Configure JMS Adapter
This topic explains to configure JMS Adapter.
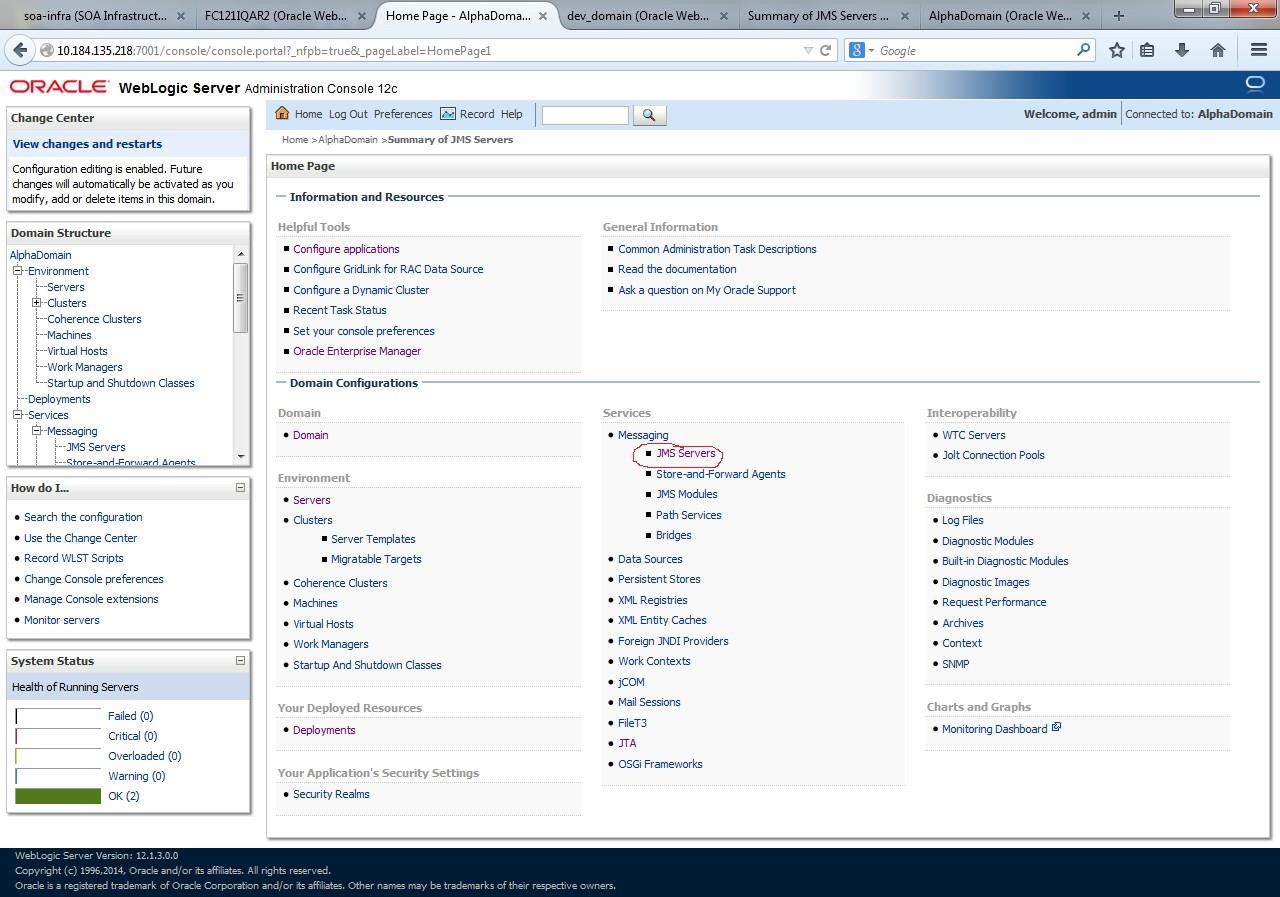
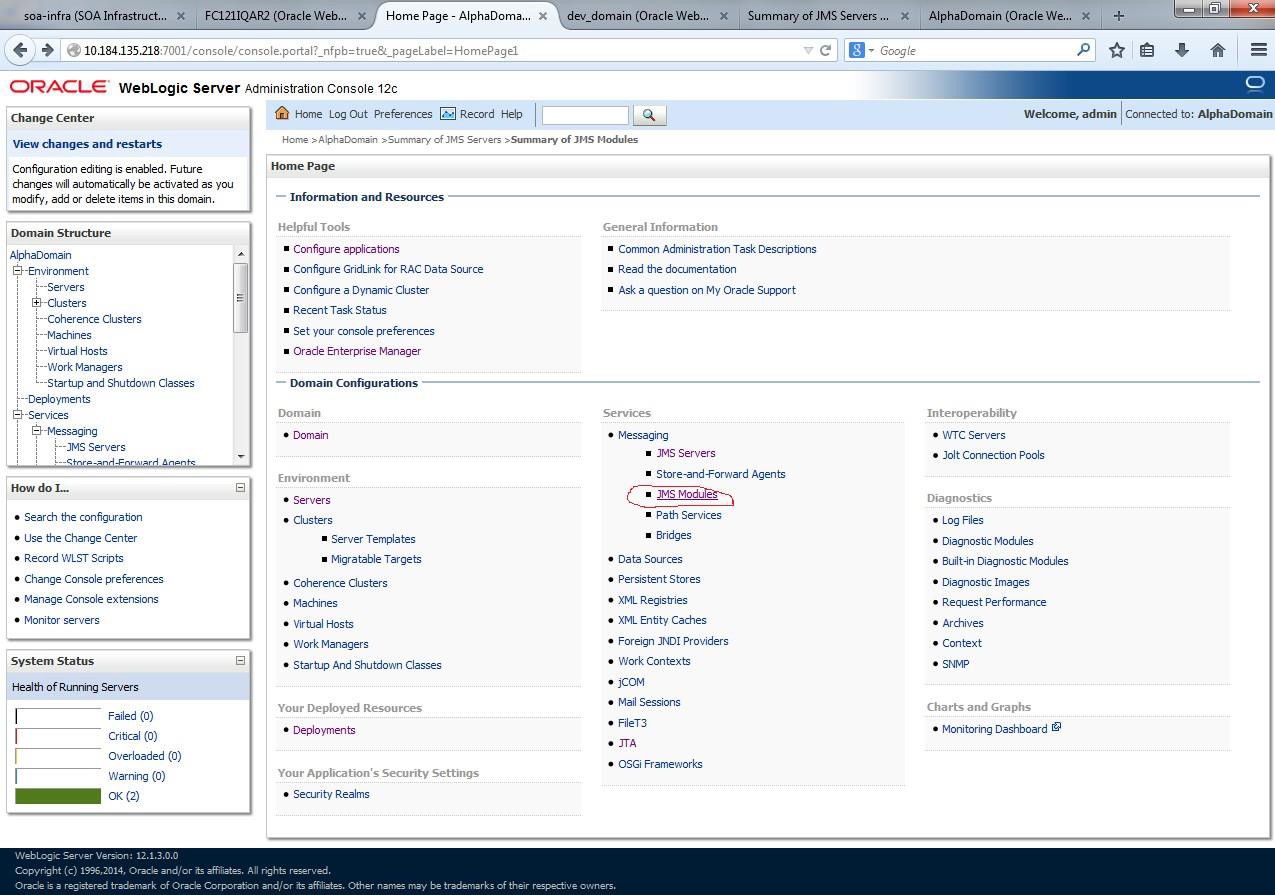
- Log in to Weblogic Console and click on JMS Servers under Domain Configurations - Services.The Weblogic Console Home Page displays.
Figure 1-22 Oracle Weblogic Console Home Page
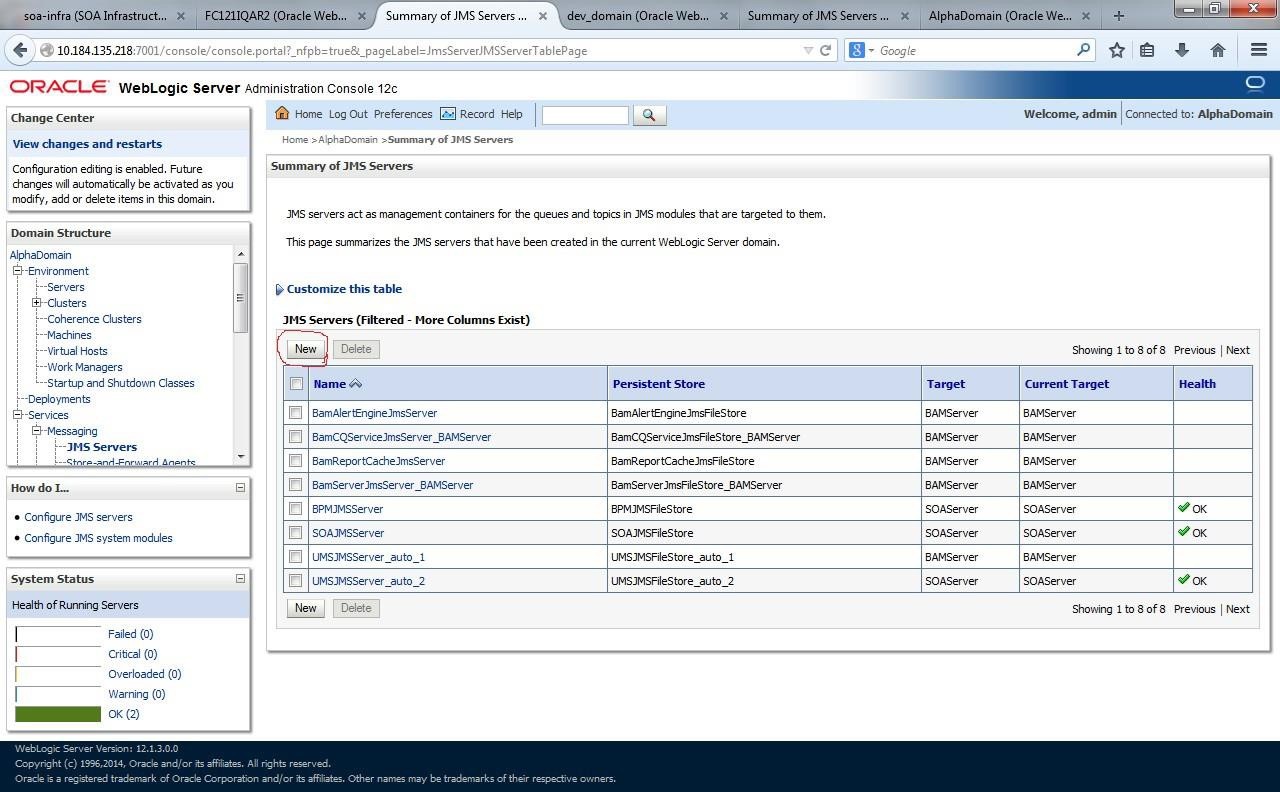
- Click New.The Summary of JMS Servers screen displays.
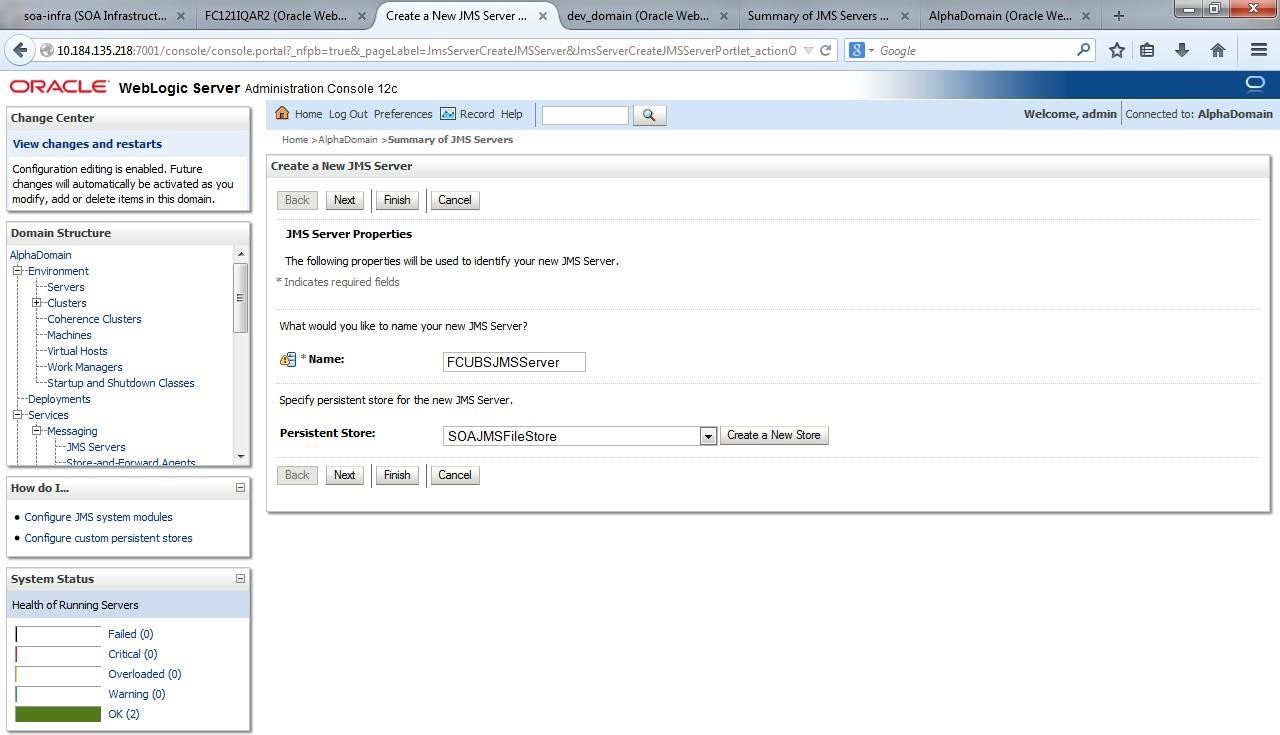
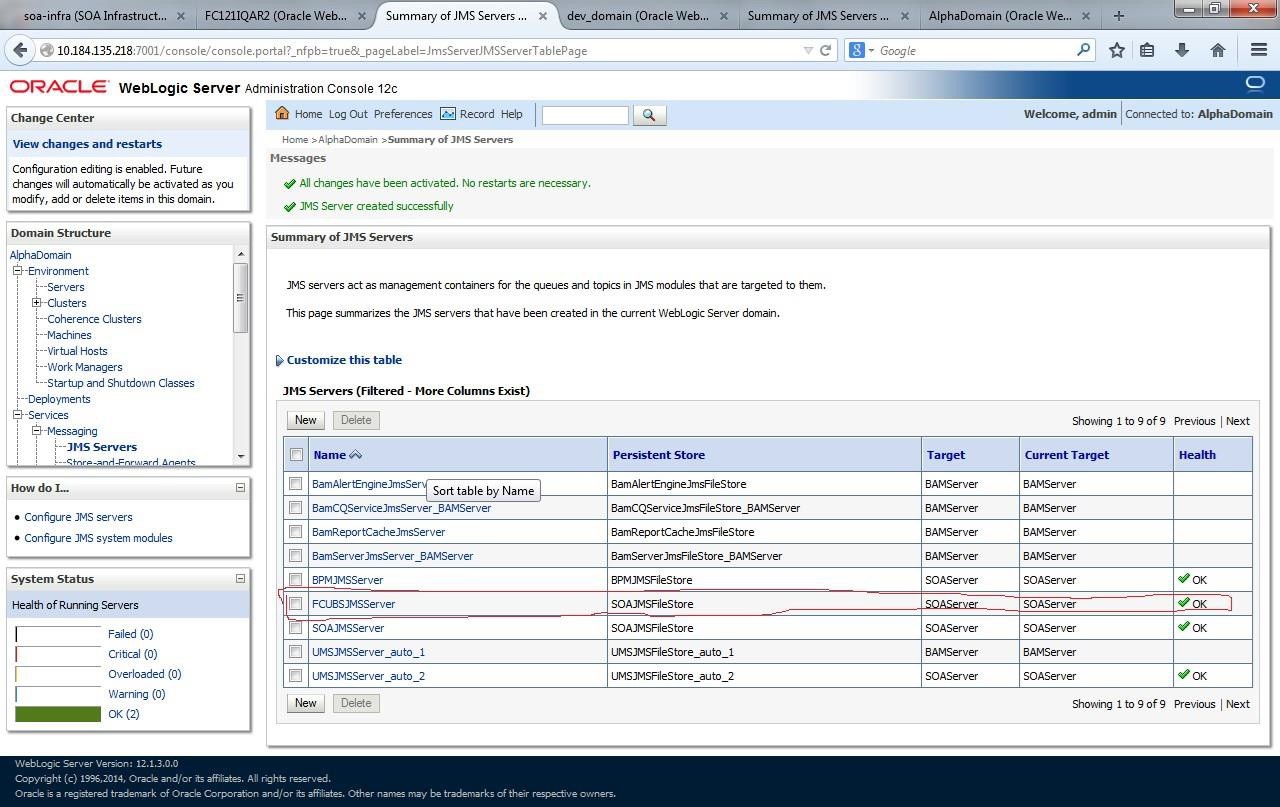
- Specify the Name as FCUBSJMSServer for JMS Server, select the Persistent Store as SOAJMSFileStore from the dropdown list and click Next.The Create a New JMS Server screen displays.
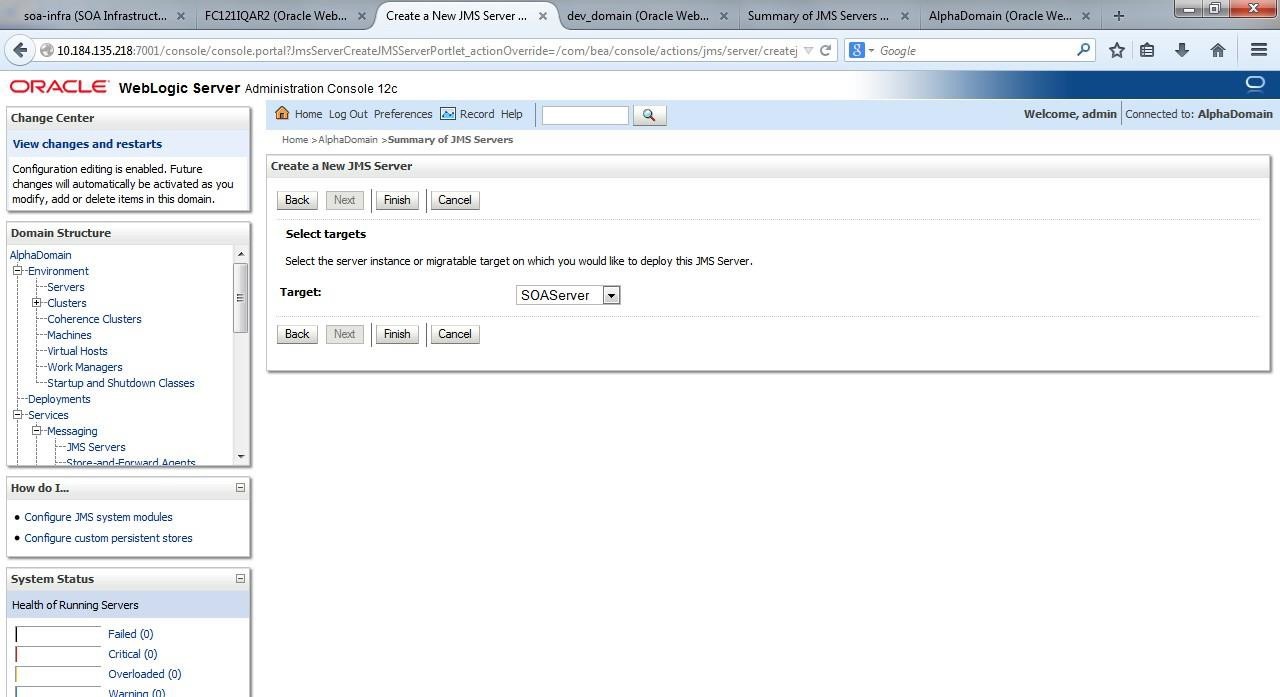
- Select the Target as SOAServer from the dropdown list.The Create a New JMS Server - Target screen displays.
Figure 1-25 Create a New JMS Server - Target
- Click Finish.Two messages displays on the Summary of JMS Servers screen.
Figure 1-26 Summary of JMS server - Messages
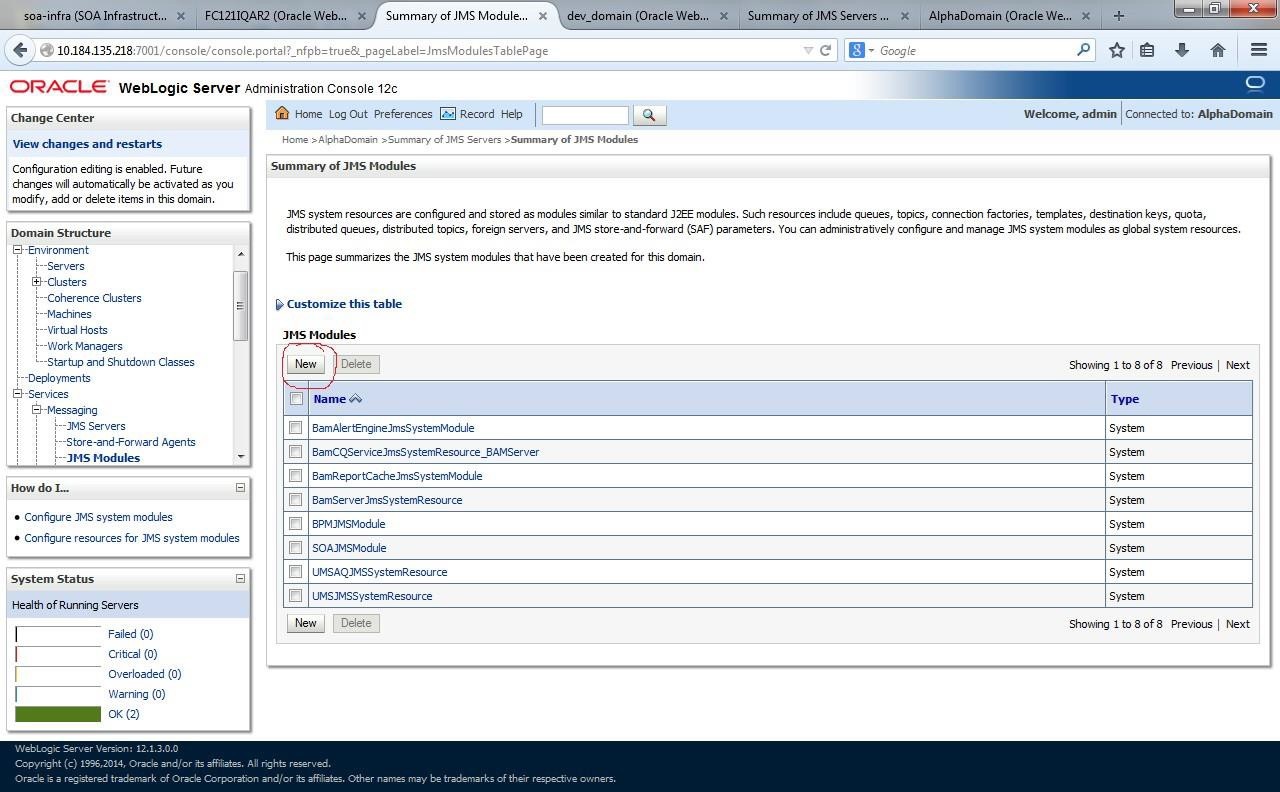
- Go back to Weblogic Console and click JMS Modules under Domain Configurations - Services.The Weblogic Console - JMS Module screen displays.The Summary of JMS Modules screen displays.
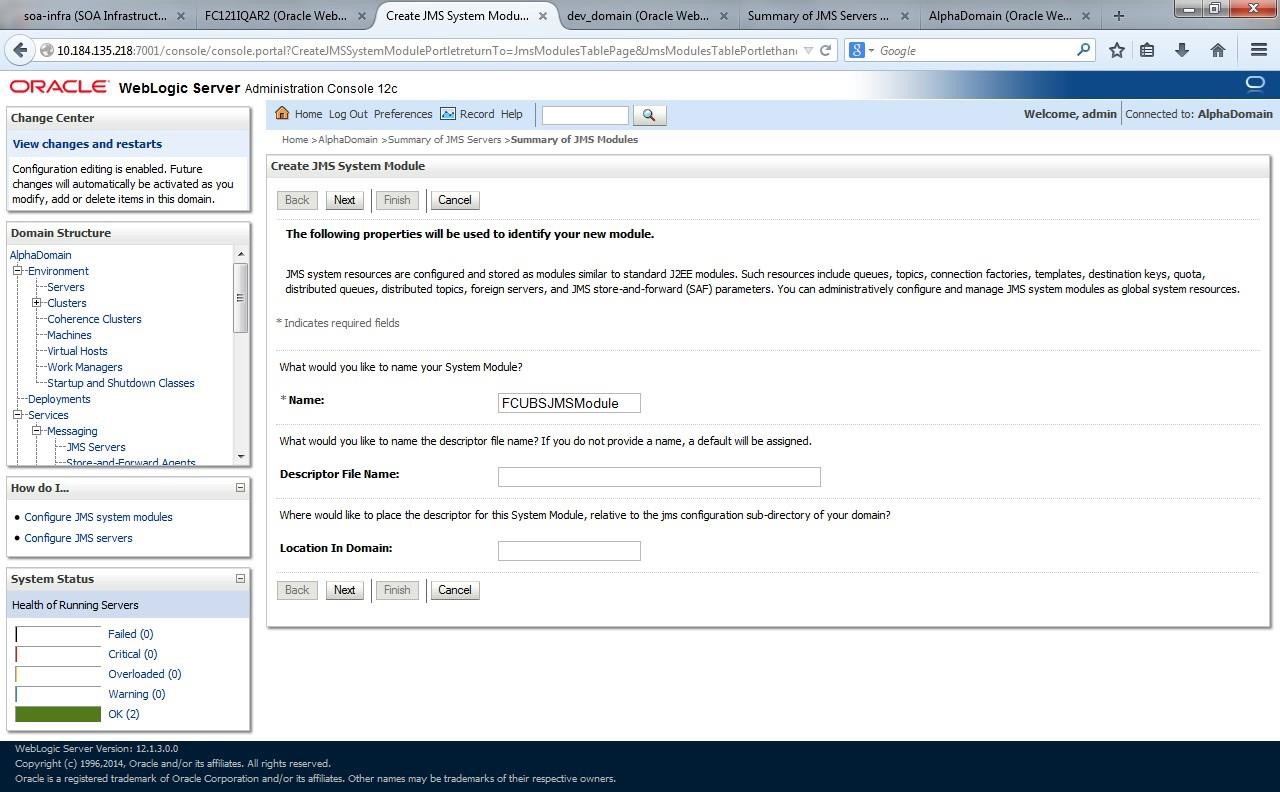
- On the Summary of JMS Modules screen, click New.The Create JMS System Module screen displays.
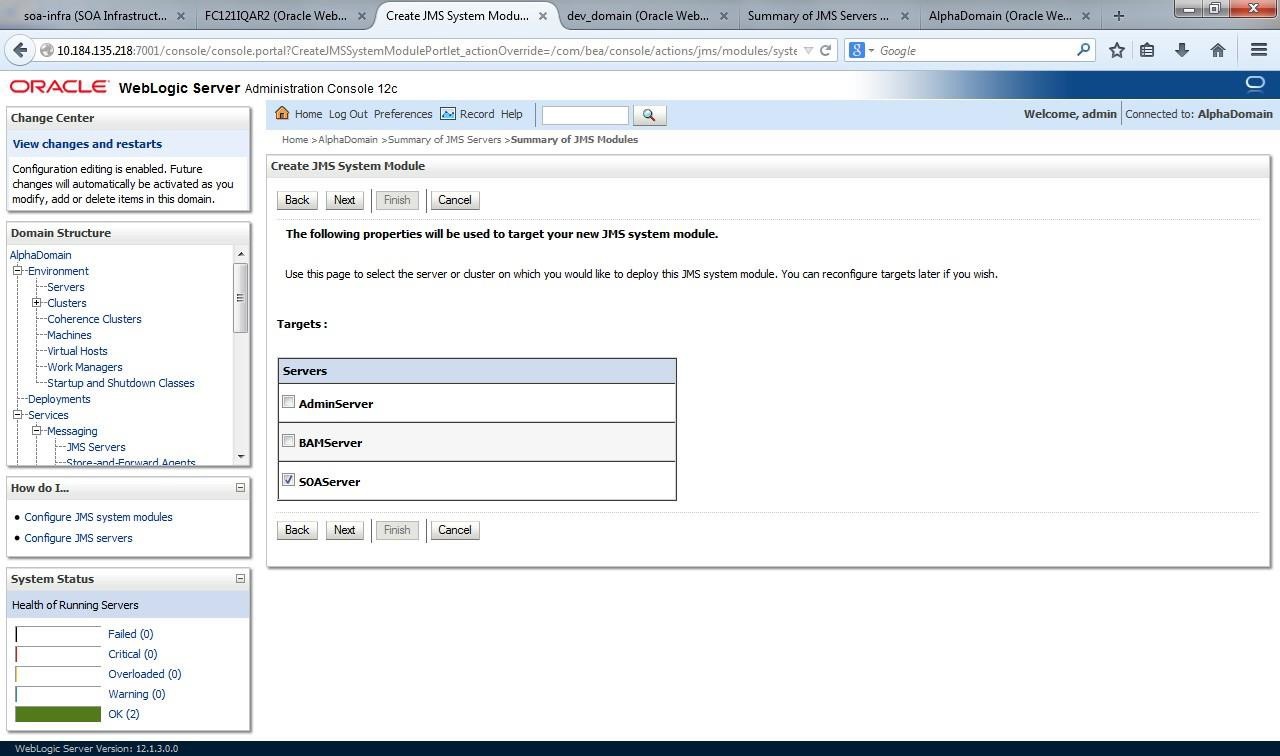
- Specify the Name as FCUBSJMSModule. The Create JMS System Module - Select Target screen displays.
Figure 1-30 Create JMS System Module - Select Target
- Click Next.
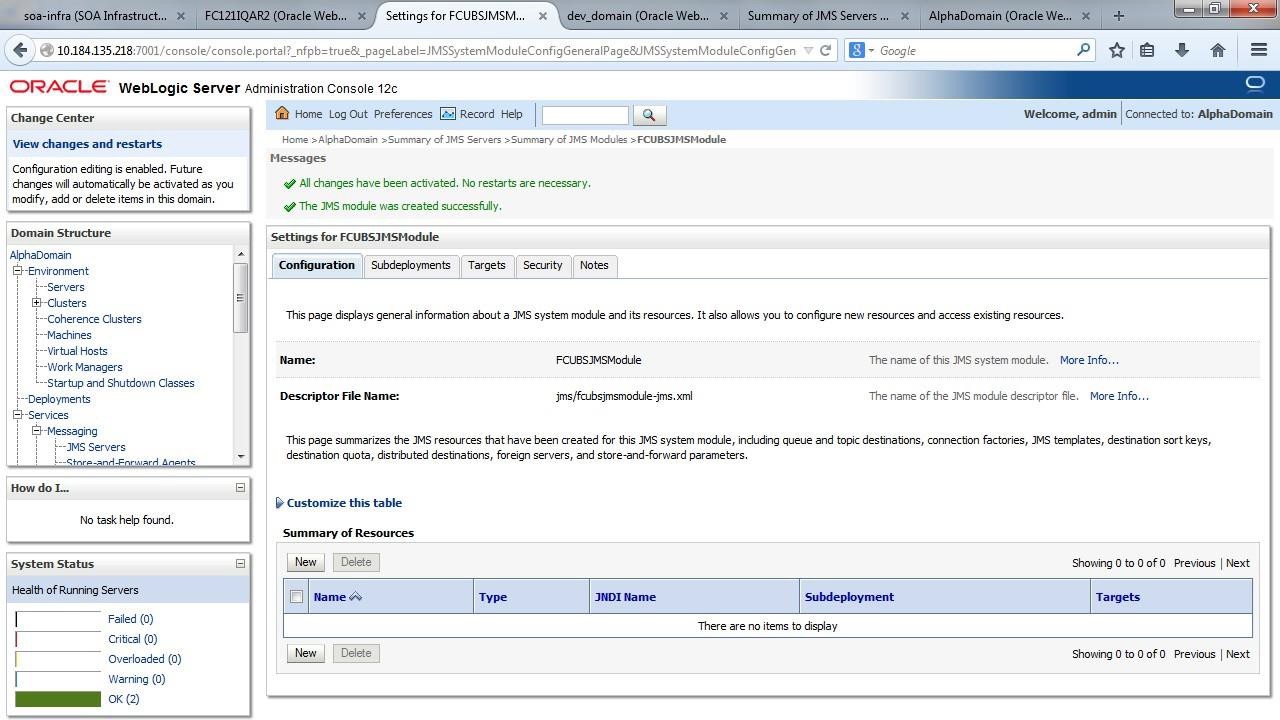
- Select the Target as SOAServer and click Finish.Two messages displays on the Summary of JMS Modules screen.
Figure 1-31 Summary of JMS Modules - Messages
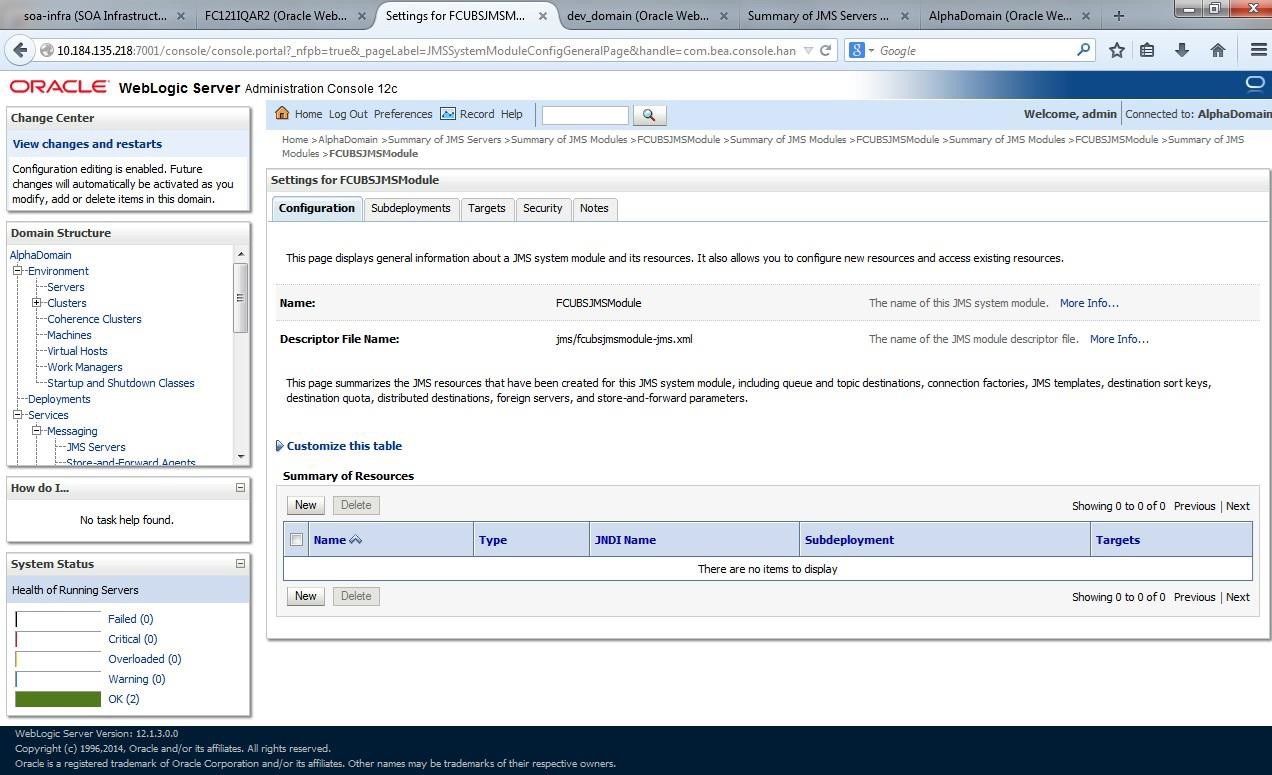
- Go back to JMS Modules, click on FCUBSJMSModule.The Settings for FCUBSJMSModule screen displays.
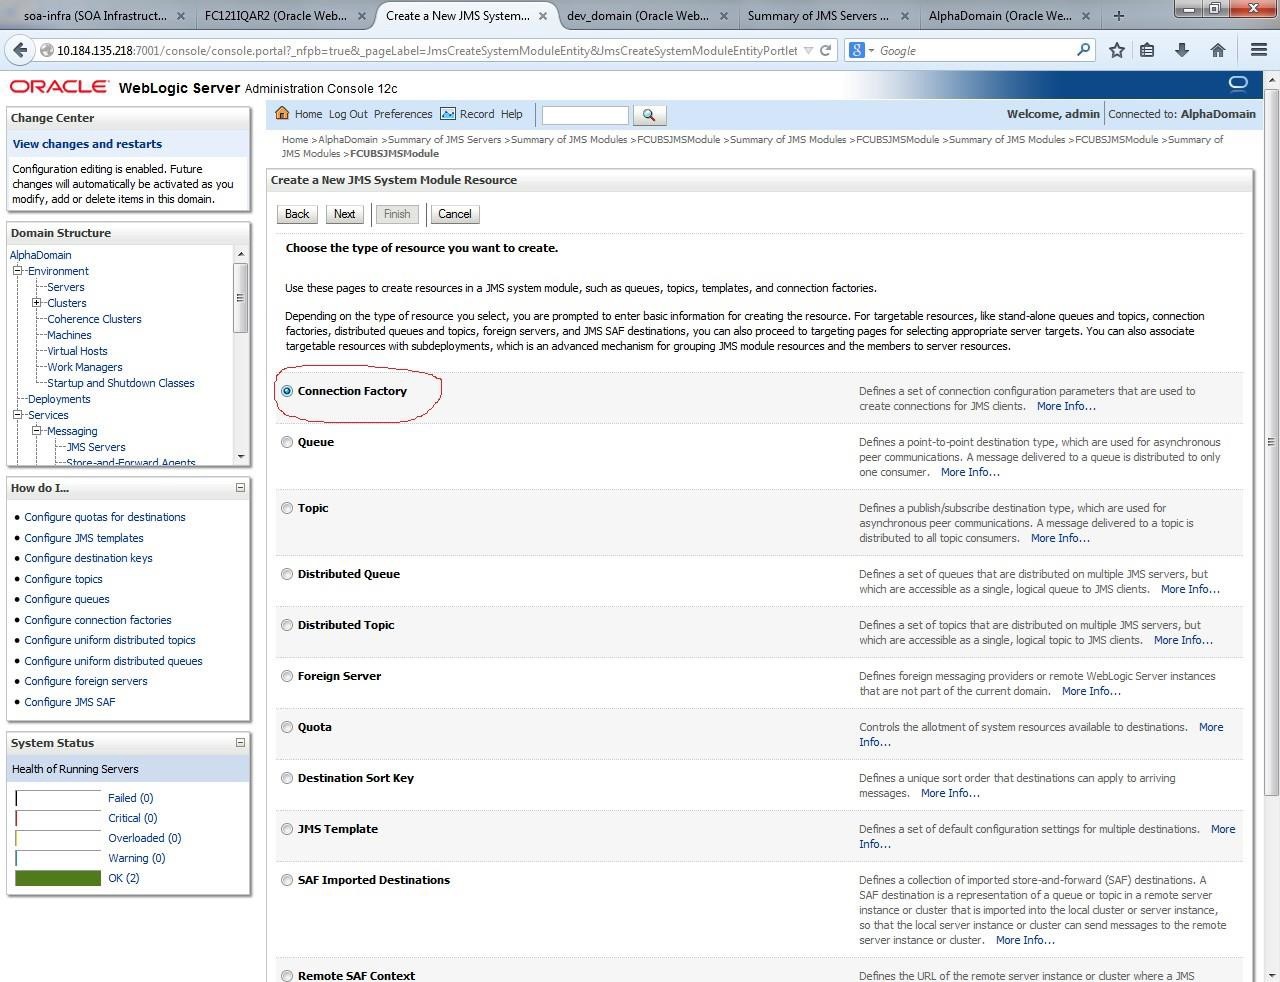
- Click New.The Create a New JMS System Module Resource screen displays.
Figure 1-33 Create a New JMS System Module Resource
- On the Create a New JMS System Module Resource screen, select Connection Factory and click Next.The Create a New JMS System Module Resource - Connection Factory Properties screen displays.
Figure 1-34 Create a New JMS System Module Resource - Connection Factory Properties
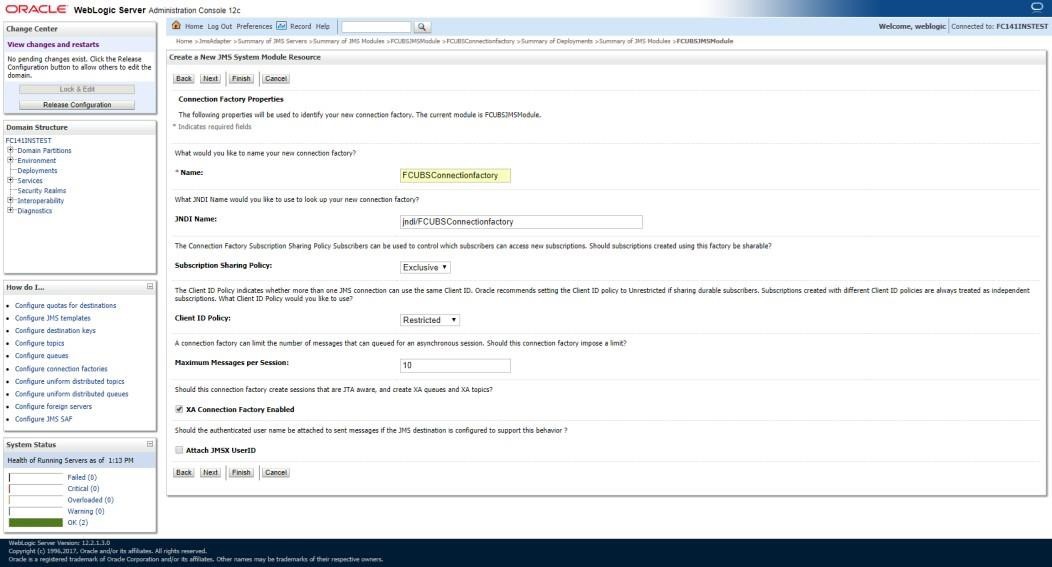
Description of "Figure 1-34 Create a New JMS System Module Resource - Connection Factory Properties" - Specify Name as FCUBSConnectionfactory and click Next.The Create a New JMS System Module Resource - Advanced Targeting screen displays.
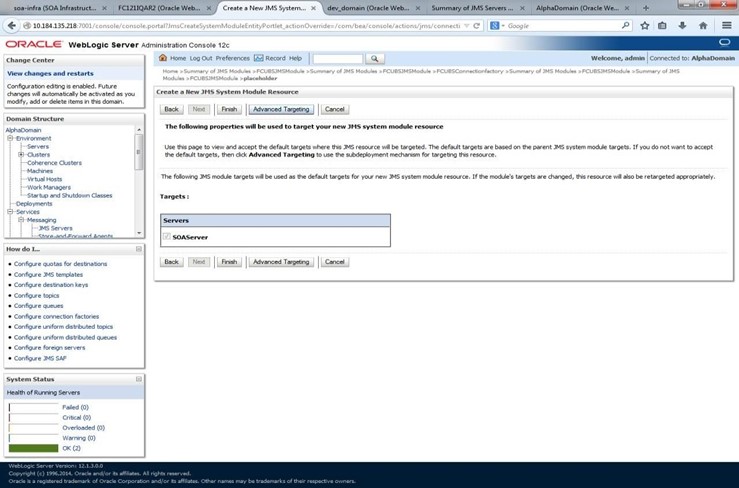
Figure 1-35 Create a New JMS System Module Resource - Advanced Targeting
- Click the Advanced Targeting button.The Create a New JMS System Module Resource - Subdeployments screen displays.
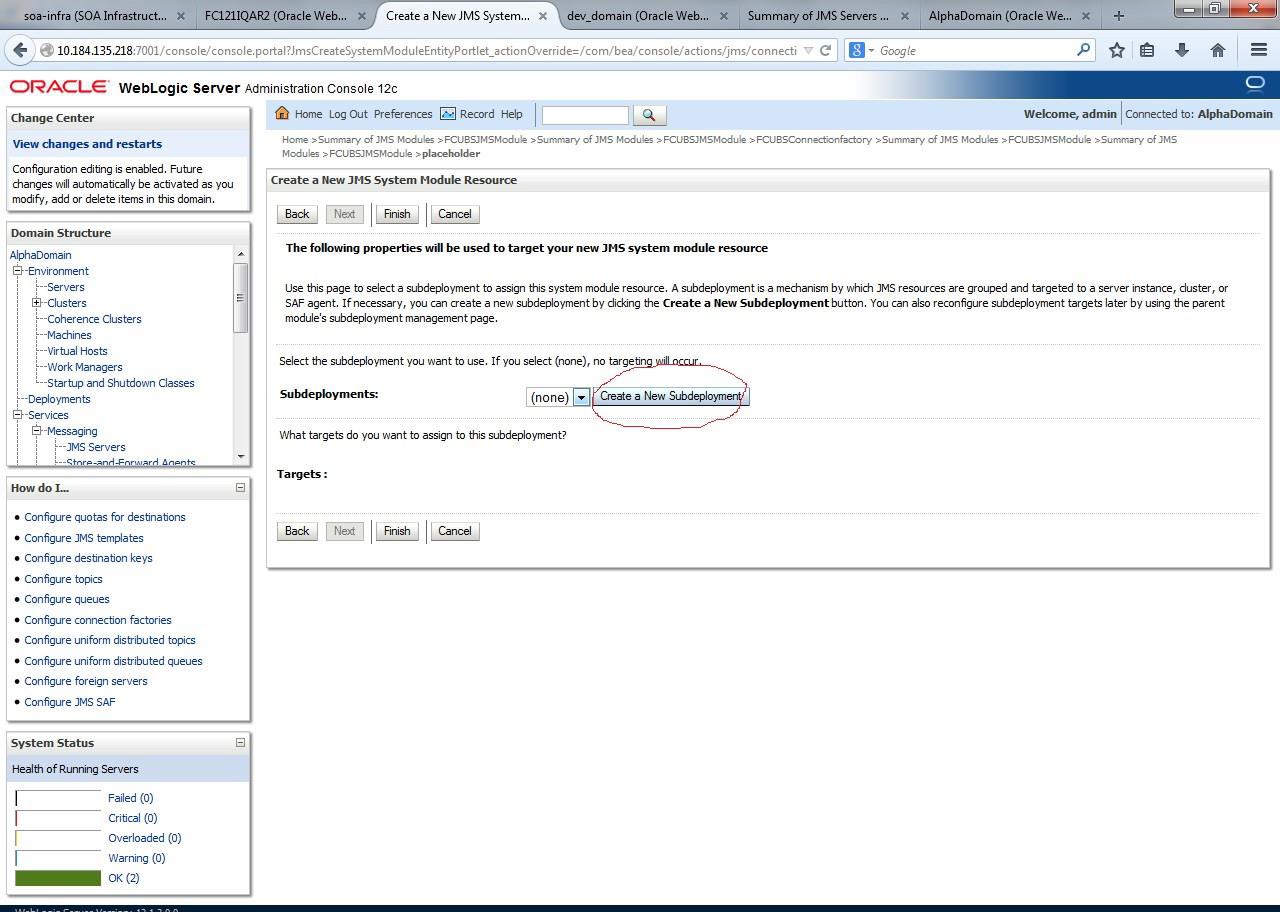
Figure 1-36 The Create a New JMS System Module Resource - Subdeployments
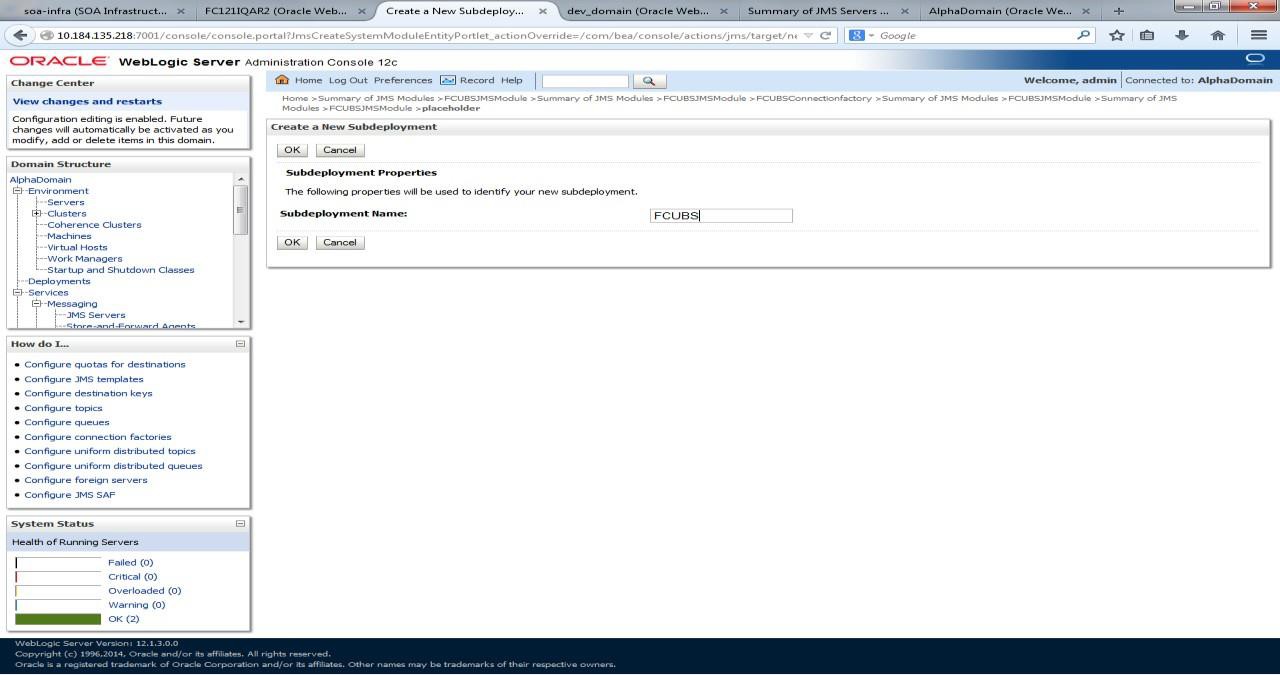
- Click Create New Sub Deployment with the below name, and click OK.
- Click Next and select the subdeployment you want to use.
- If you not yet created a subdeployment, click Create a New Subdeployment and specify the Subdeployment Name and click OK.The Create a New Subdeployments screen displays.
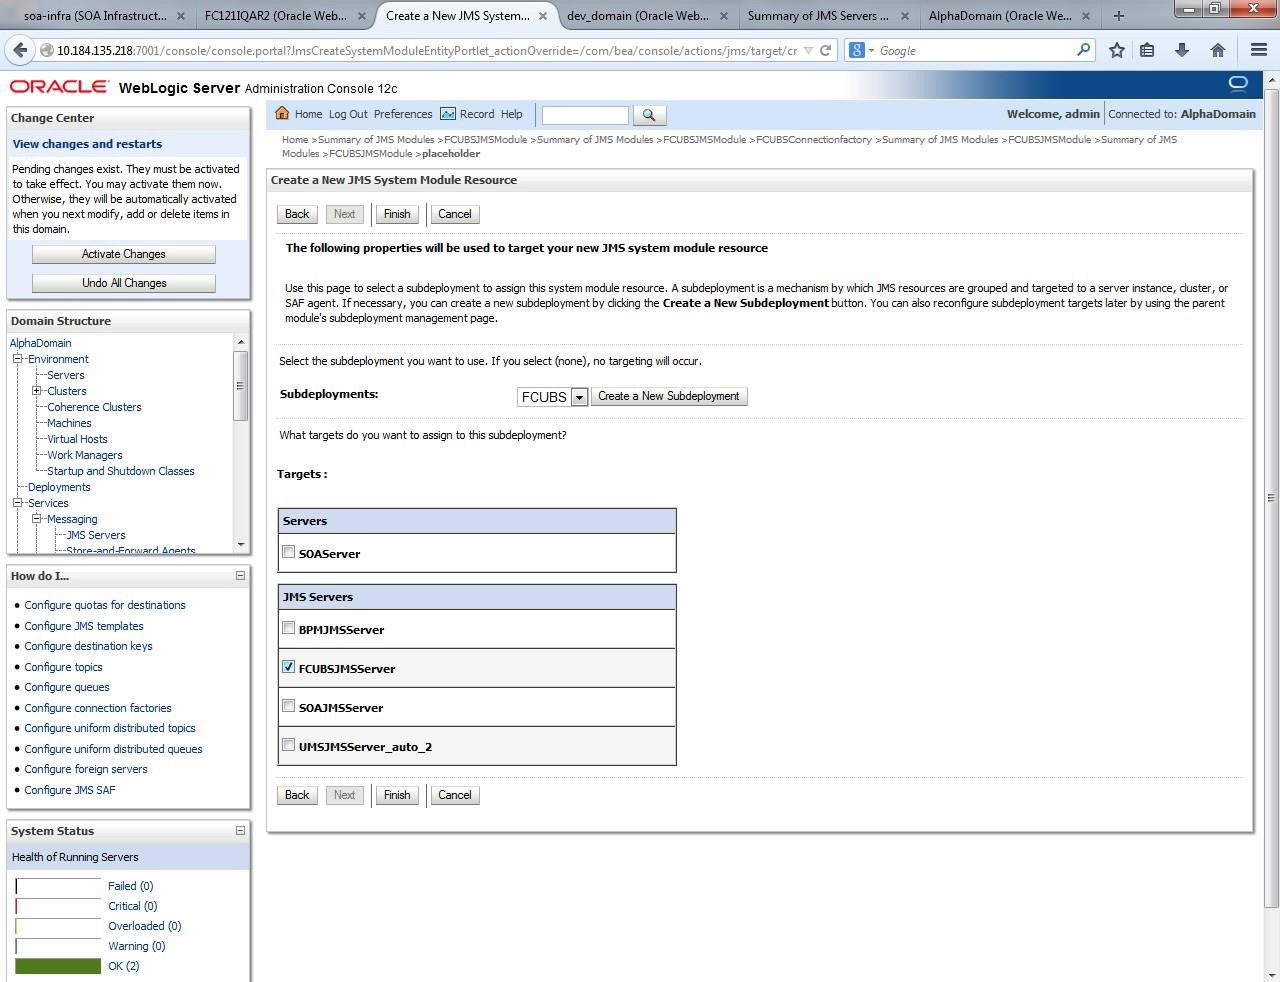
- Click Next and select Targets as FCUBSJMS Servers.The Create a New JMS System Module Resource - Select Target screen displays.
Figure 1-38 Create a New JMS System Module Resource - Select Target
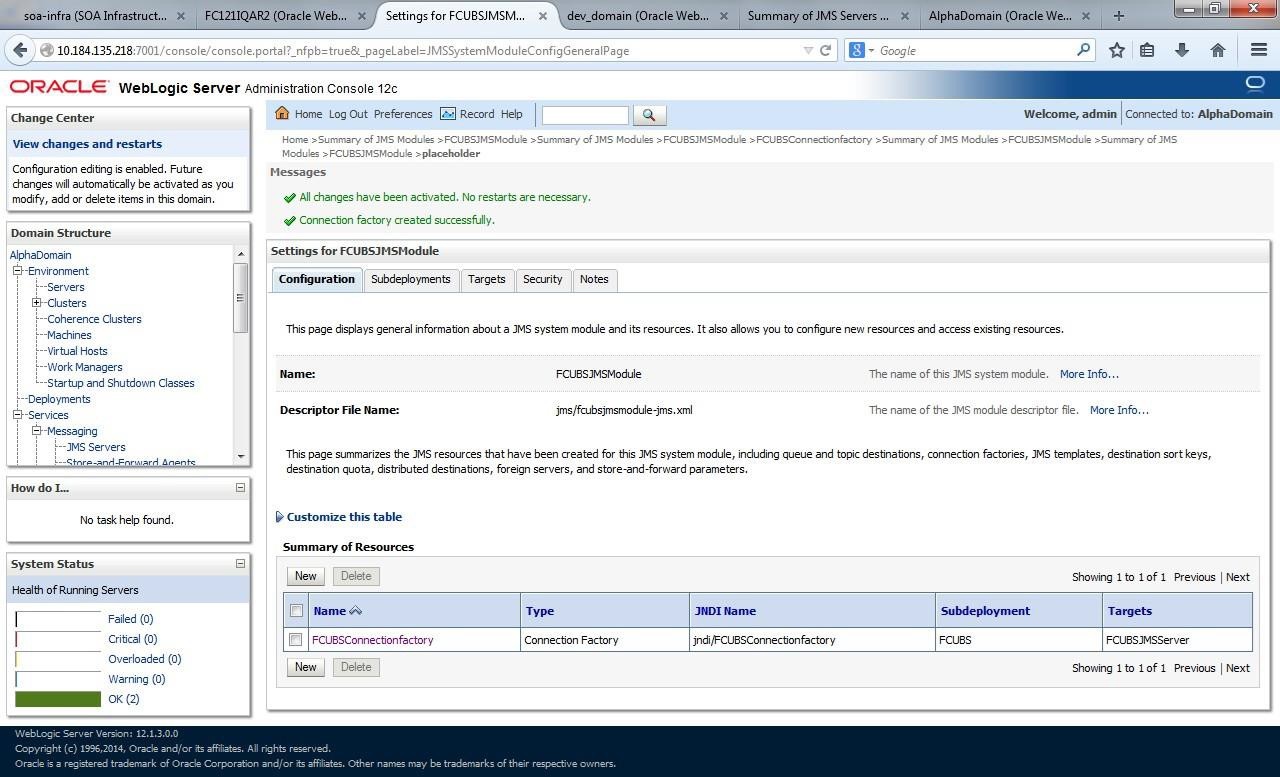
- Click Finish.Two messages displays on the Settings for FCUBSJMSModule screen.
Figure 1-39 Settings for FCUBSJMSModule - Messages
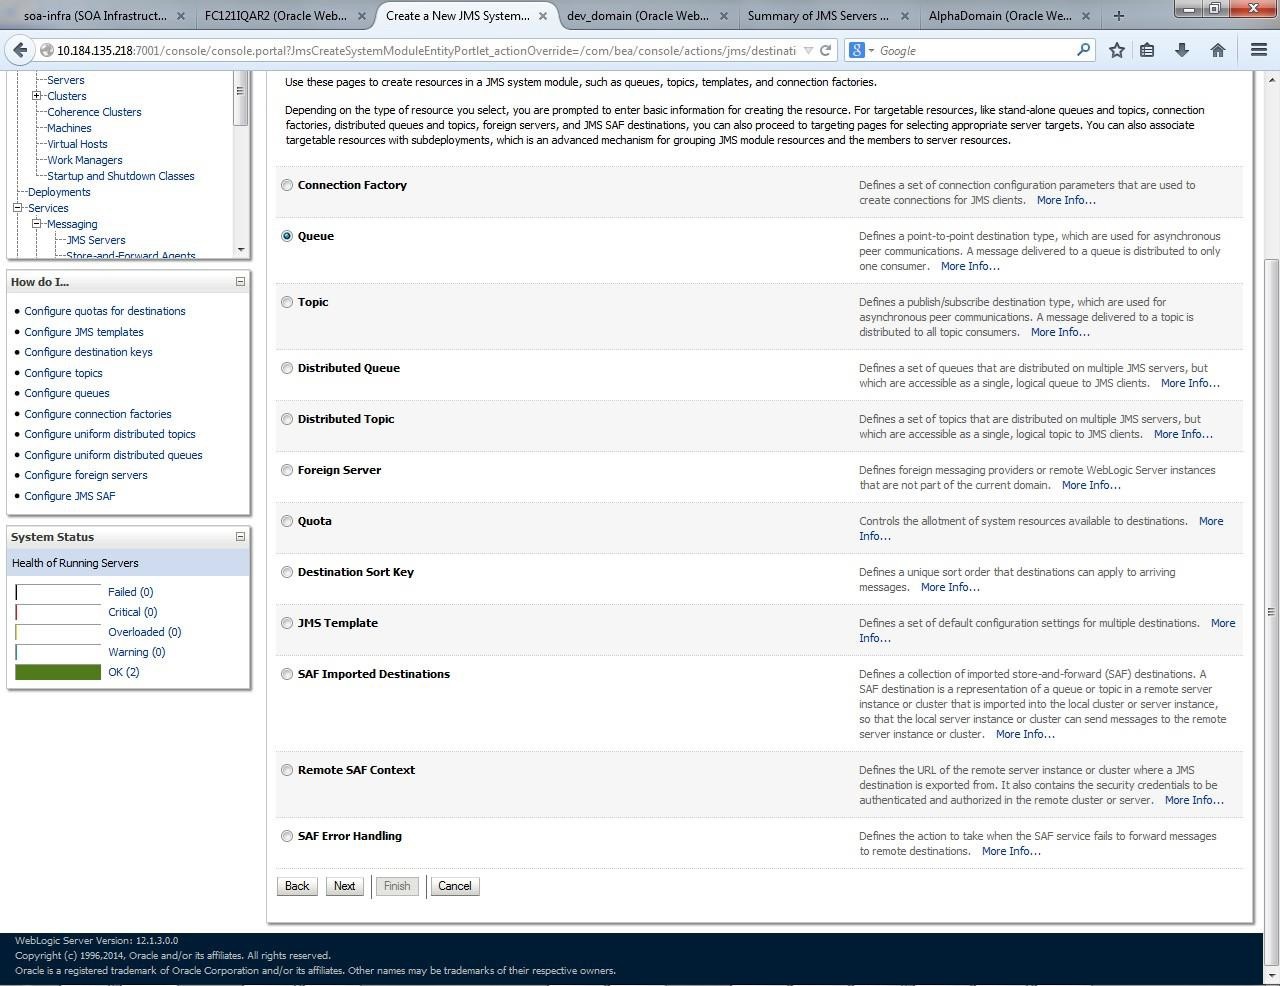
- Go back to Weblogic Console, click on JMS Modules, click New, select Queue, and click on Next.The Create a New JMS System - Queue screen displays.
Figure 1-40 Create a New JMS System - Queue
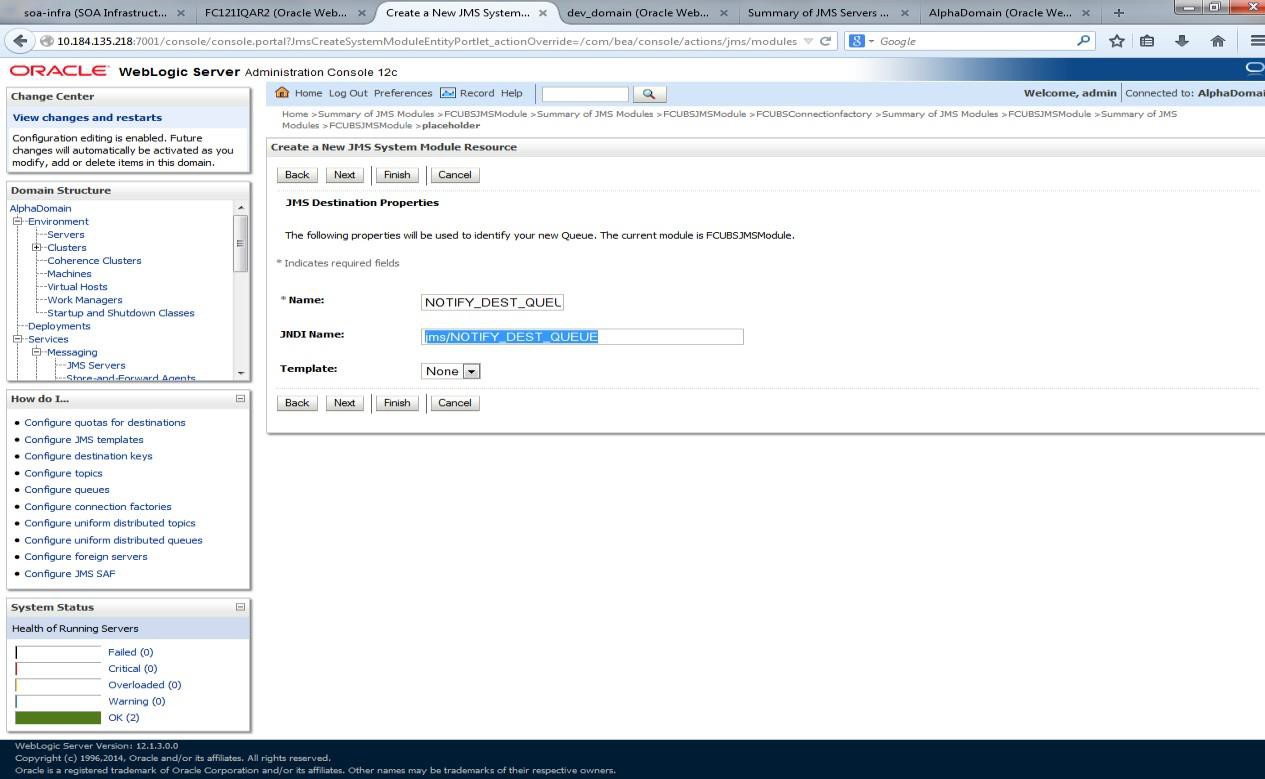
- Specify Name as NOTIFY_DEST_QUEUE and JNDI Name as jms/NOTIFY_DEST_QUEUE and click Next.The JMS Destination Properties screen displays.
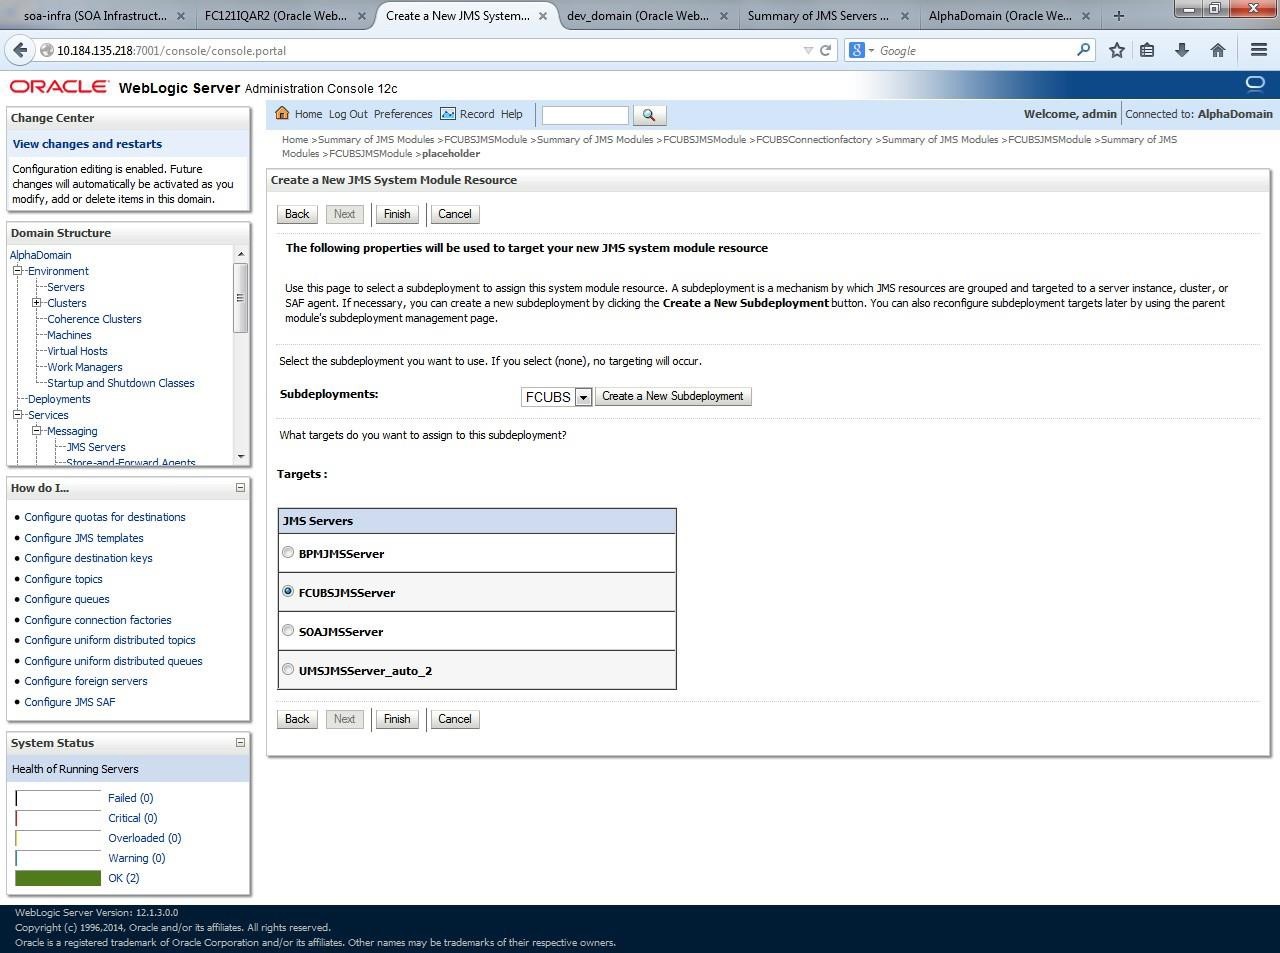
- Select the Subdeployments from the drop-down list that you created earlier, select the Targets as JMS Servers.The Create a New JMS System Module Resource - Subdeployments and Select Targets screen displays.
Figure 1-42 Create a New JMS System Module Resource - Subdeployments and Targets
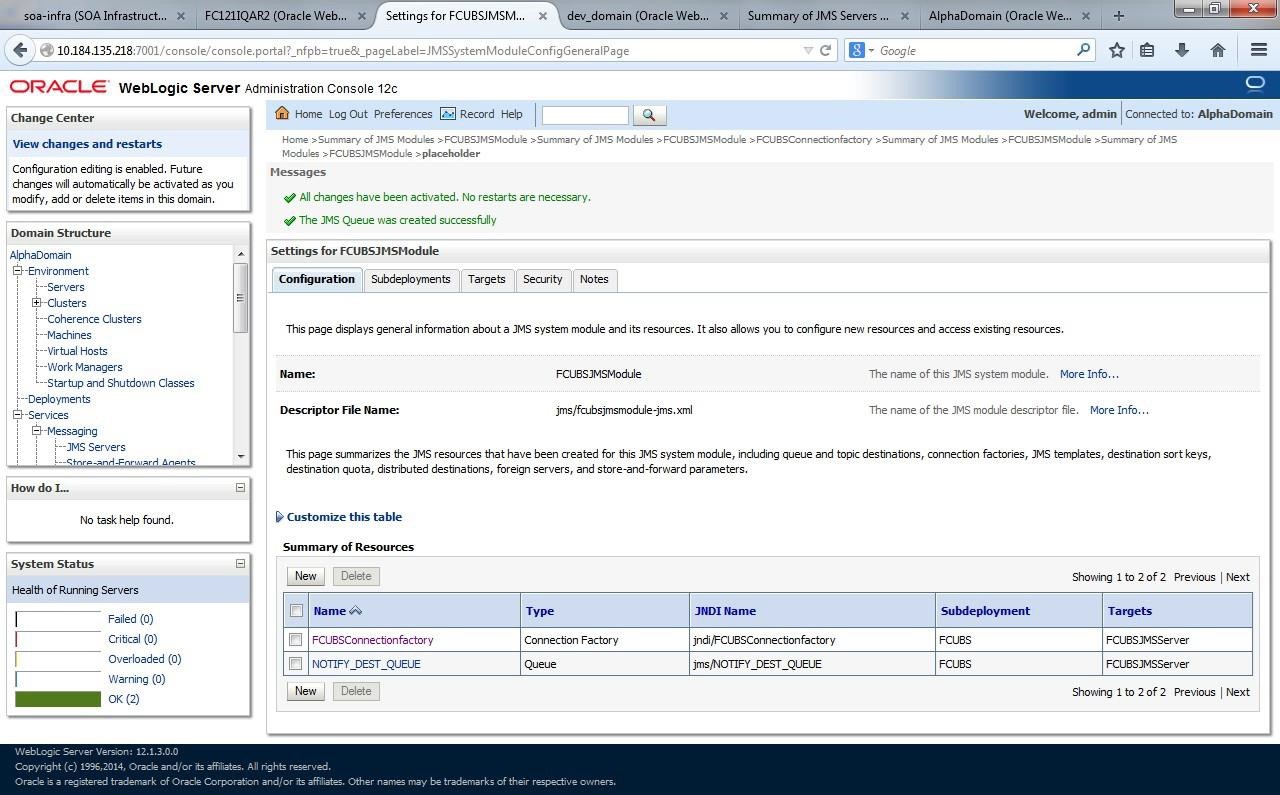
- Click on Finish.Two messages displays the Settings for FCUBSJMSModule screen.
Figure 1-43 Settings for FCUBSJMSModule - Messages
- Create queue MDB_QUEUE_RESPONSE with JNDI name as jms/MDB_QUEUE_RESPONSE, queue eis/jms/ORGateway with JNDI name as eis/jms/ORGateway, and queue FAULT_QUEUE_RESPONSE with JNDI name as jms/FAULT_QUEUE_RESPONSE as above in console within FCUBSJMSModule. (Repeat the steps from 14 to 21).
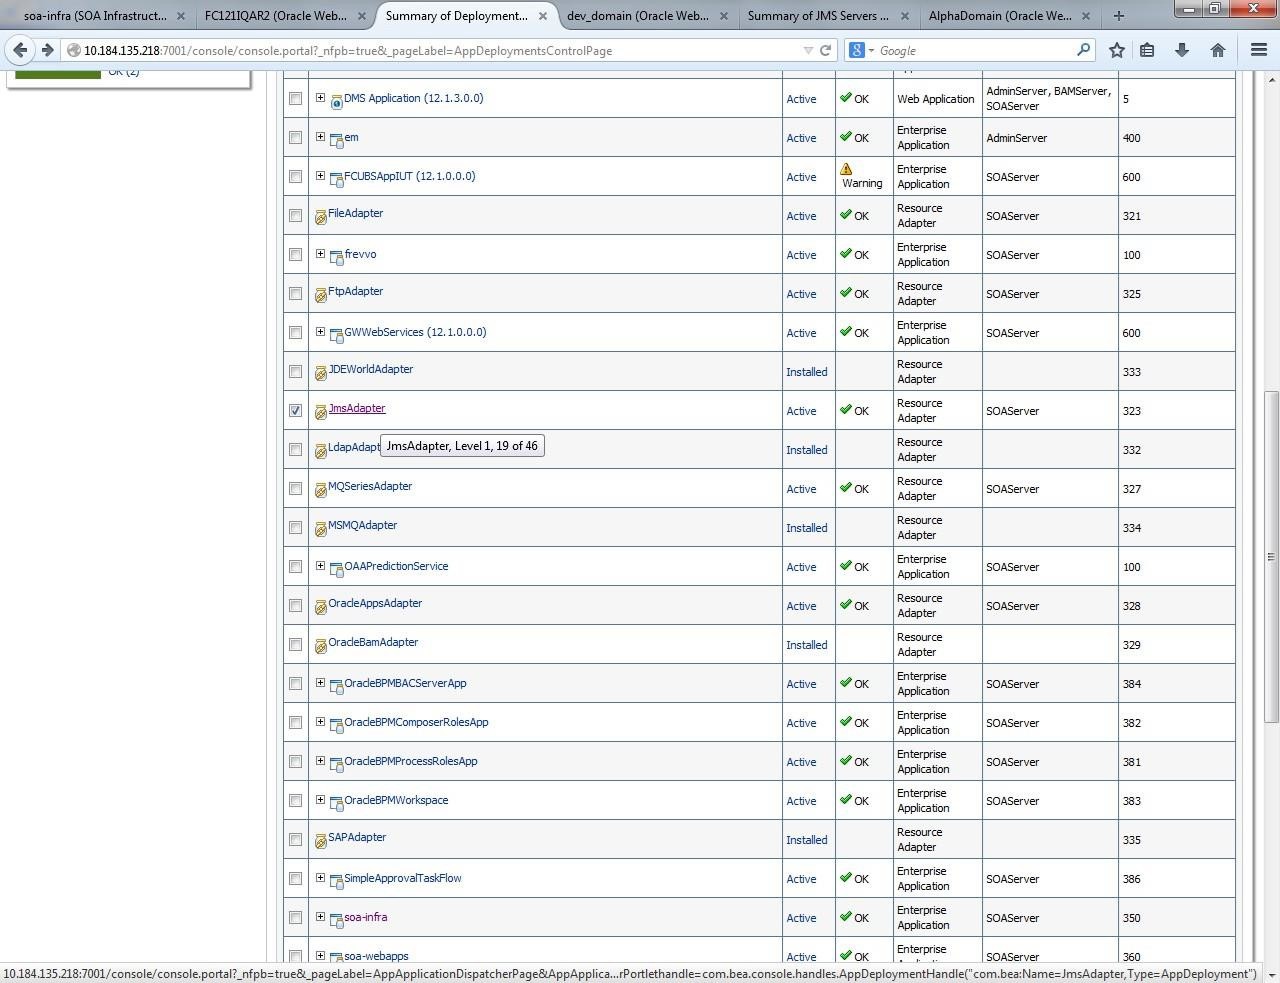
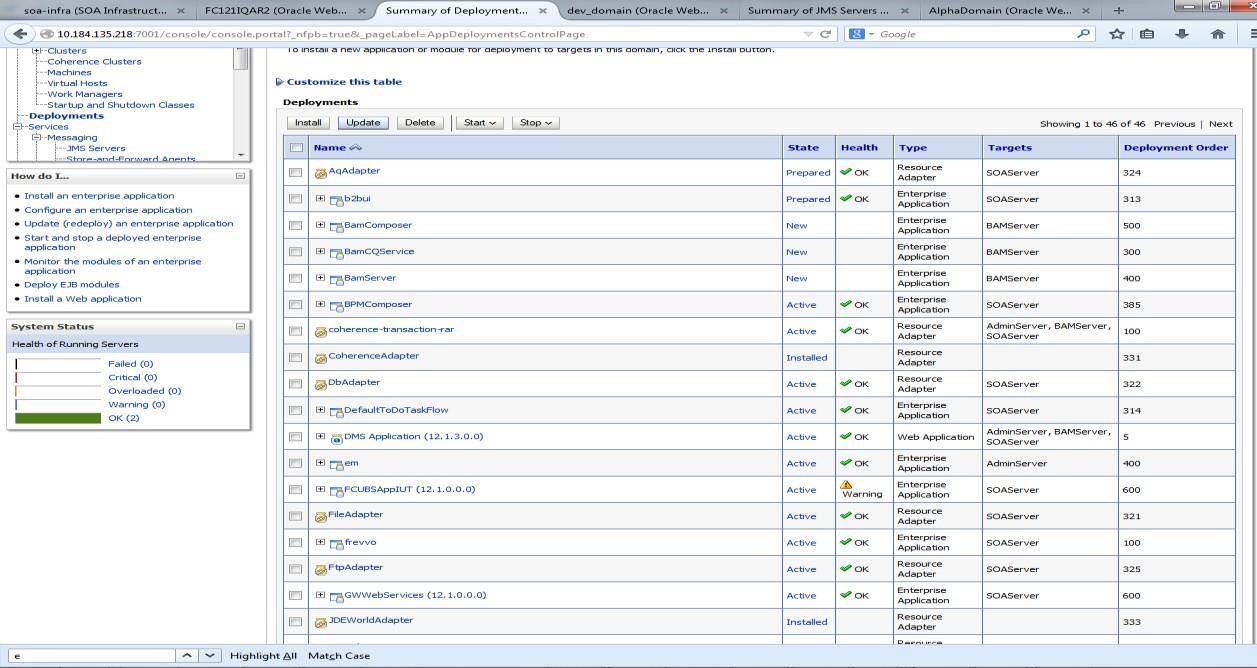
- Go to Weblogic Console, click Deployment.The Summary of Deployment screen displays.
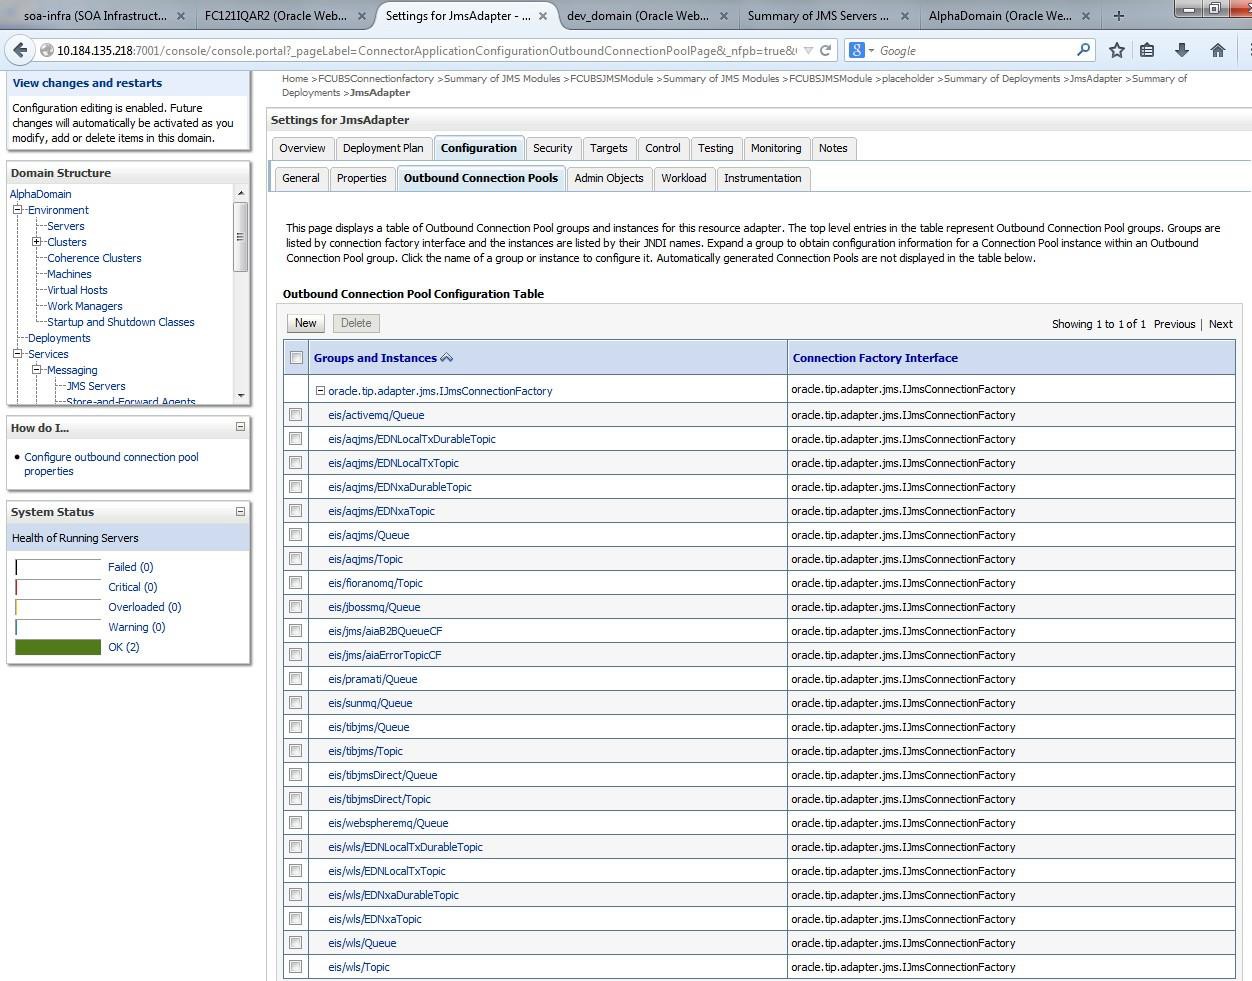
- Select JMS Adapter.The Settings for JMSAdapter - Configuration - Outbound Connection Pools screen displays.
Figure 1-45 Settings for JMSAdapter - Outbound Connection Pools Configuration
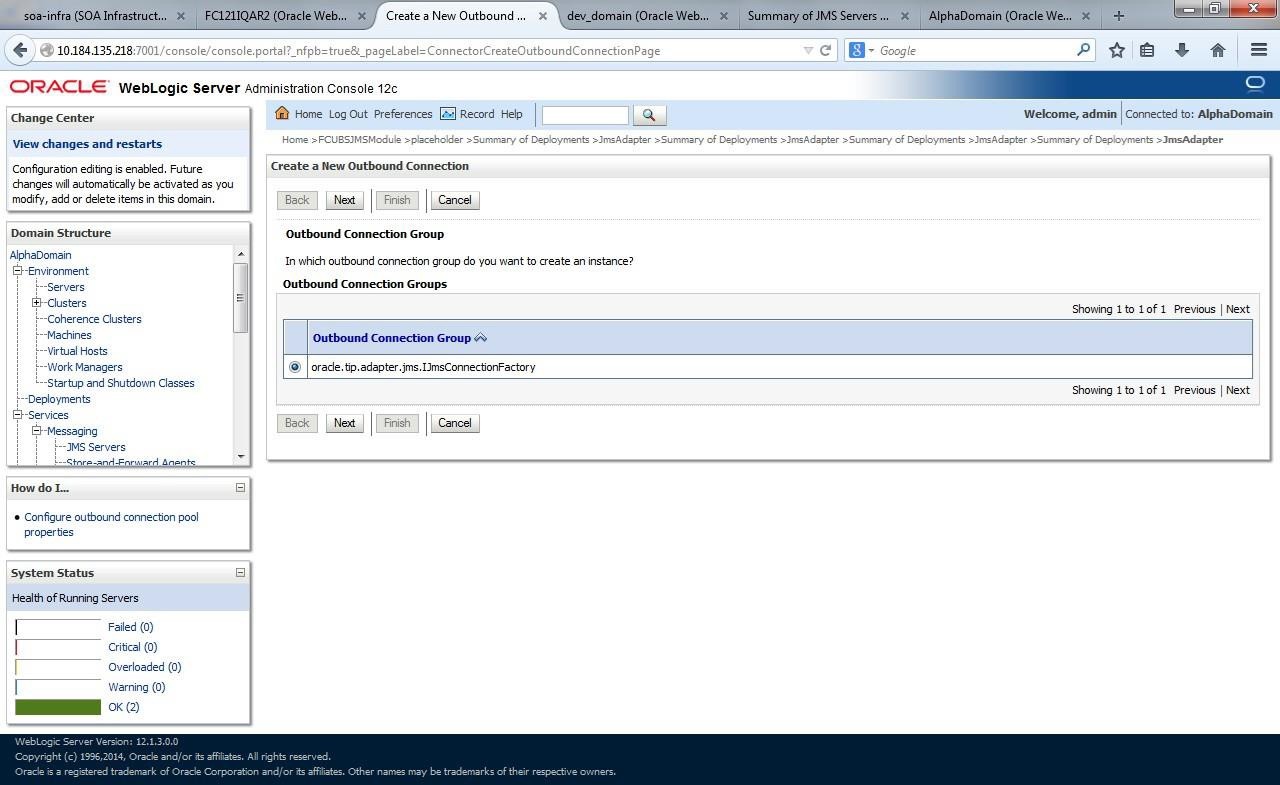
- Click Configuration tab, select Outbound Connection Pools and expand oracle.tip.adapter.jms.IJmsConnectionFactory.The Create a New Outbound Connection screen displays.
Figure 1-46 Create a New Outbound Connection
- Click New.
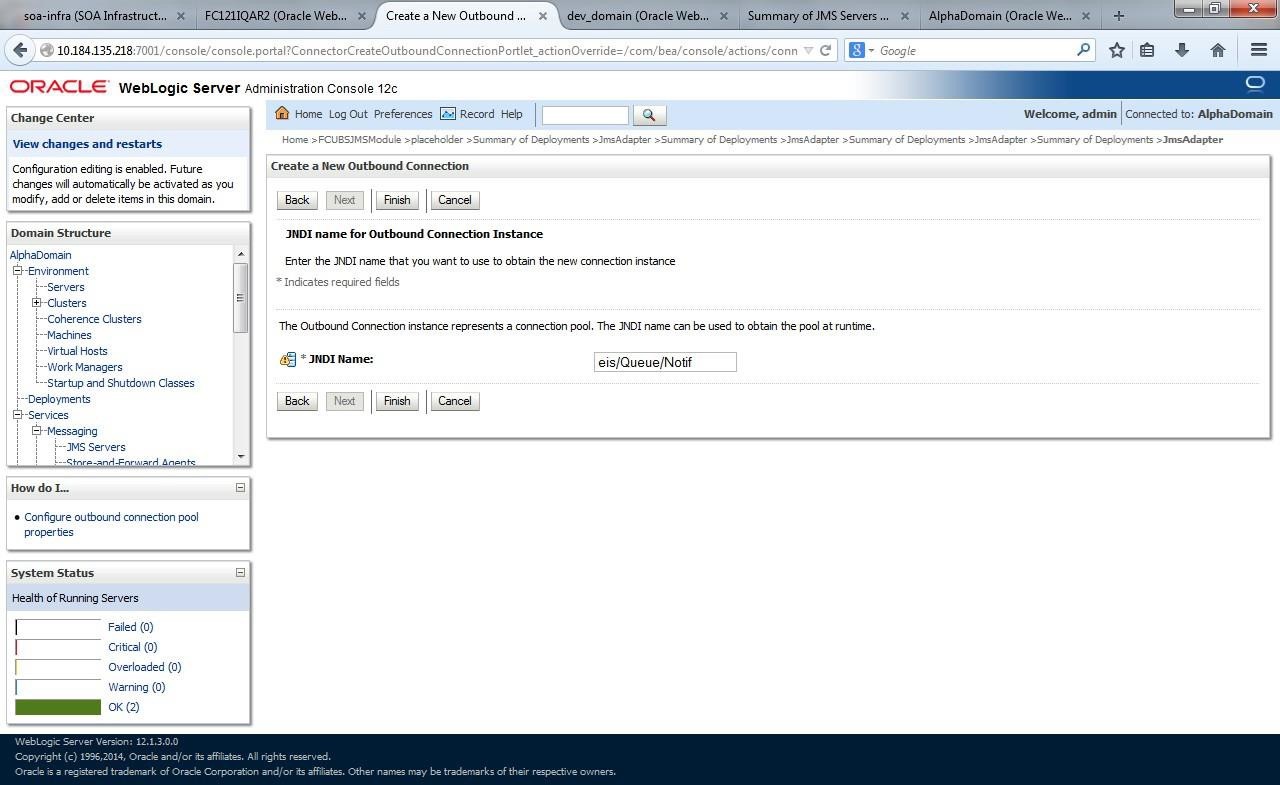
- Select the Outbound Connection Group and click Next.The Create a New Outbound Connection - JNDI Name for Outbound Connection Instance screen displays.
Figure 1-47 Create a New Outbound Connection - JNDI Name for Outbound Connection Instance
- Specify the JNDI Name as eis/Queue/Notif and click Finish.
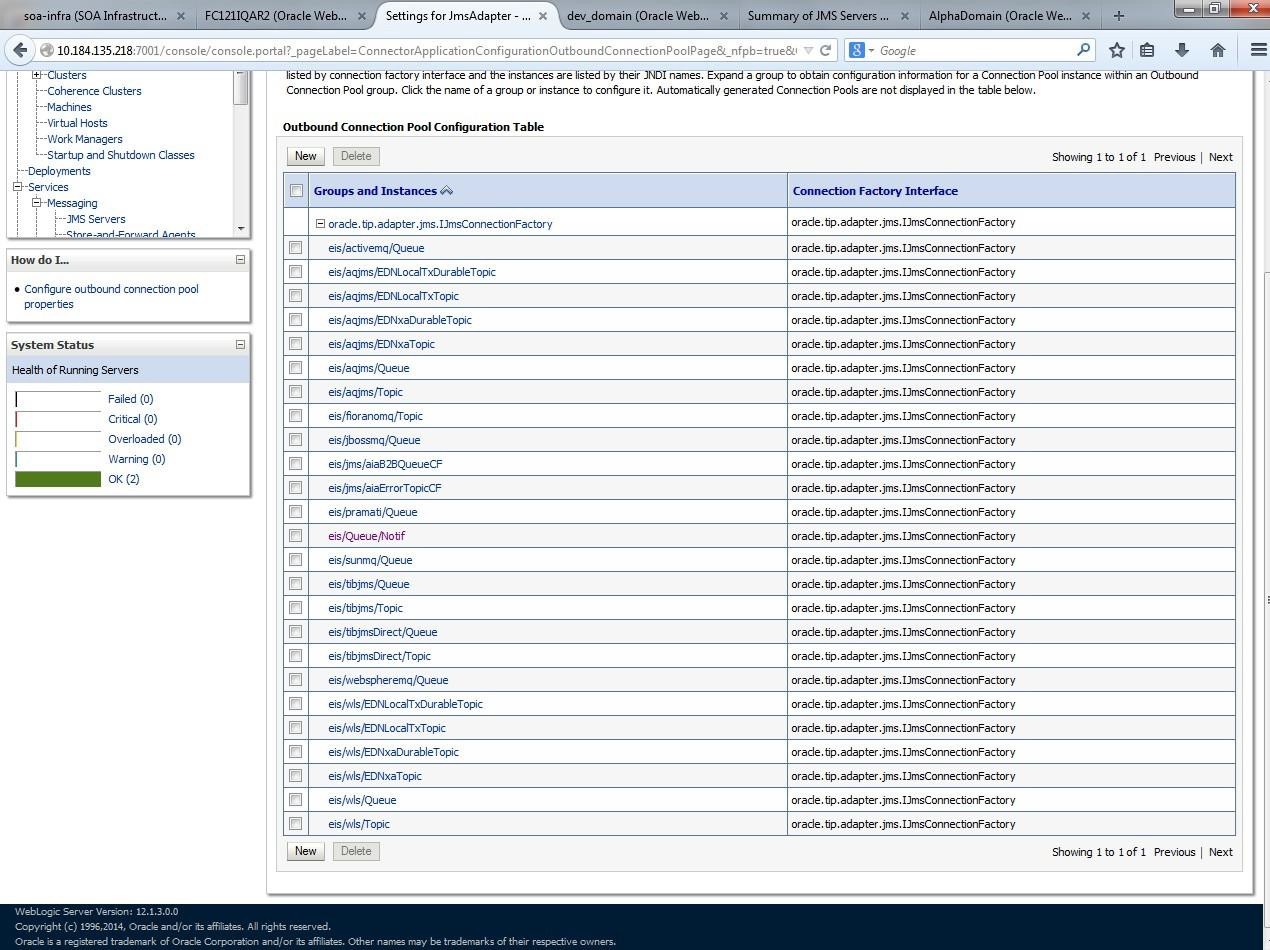
- The eis/Queue/Notif is listed in the Outbound Connection Pool Configuration Table on the Settings for JMSAdapter screen.The Settings for JMSAdapter - Table screen displays.
Figure 1-48 Settings for JMSAdapter - Outbound Connection Pool Configuration Table
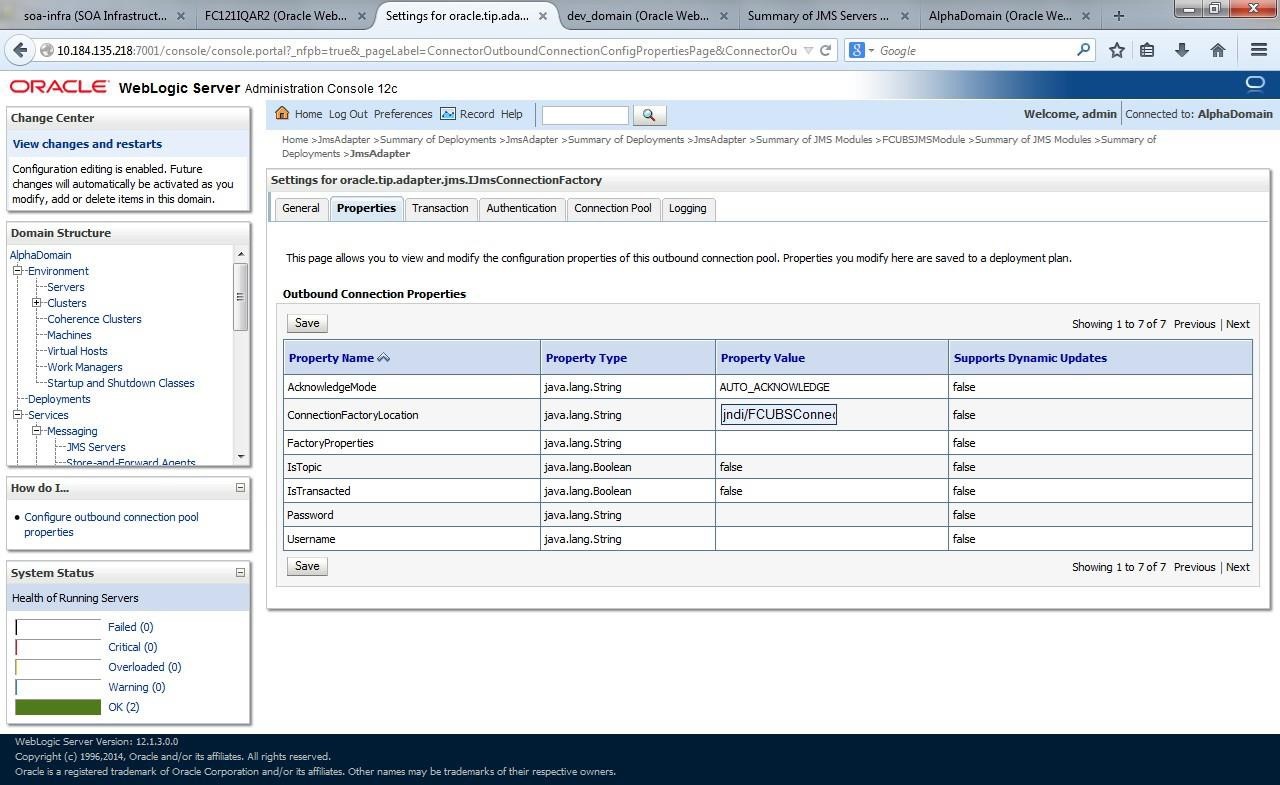
- Click on the Outbound connection pool with eis/Queue/Notif and specify the connection factory location as jndi/FCUBSConnectionfactory, and press enter.The Settings for oracle.tip.adapter.jms.IJmsConnectionFactory screen displays.
Figure 1-49 Settings for oracle.tip.adapter.jms.IJmsConnectionFactory
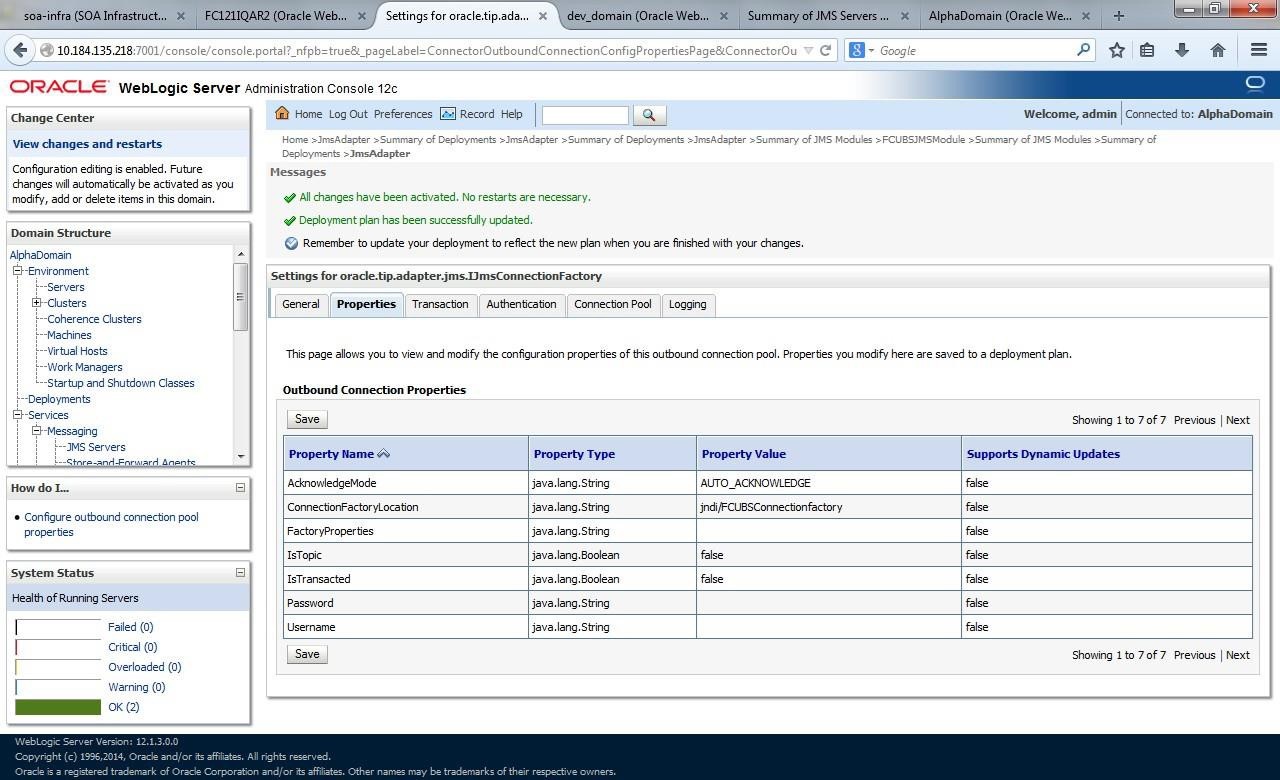
- Click on Save.Two messages displays on the Settings for oracle.tip.adapter.jms.IJmsConnectionFactory screen.
Figure 1-50 Settings for oracle.tip.adapter.jms.IJmsConnectionFactory - Messages
- Go to Weblogic Console, click Deployment, and select JMS Adapter.The Summary of Deployments screen displays.
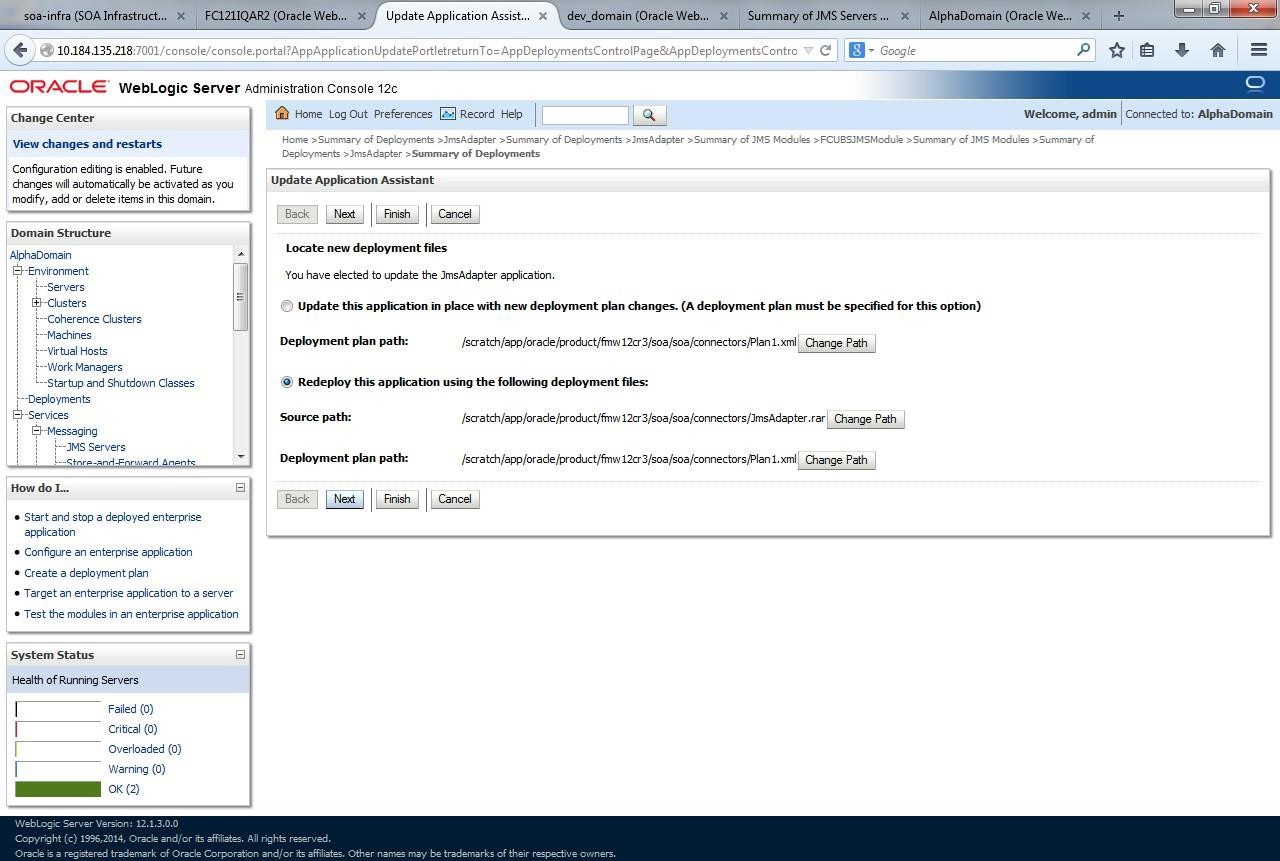
- Click Update.The Update Application Assistant screen displays.
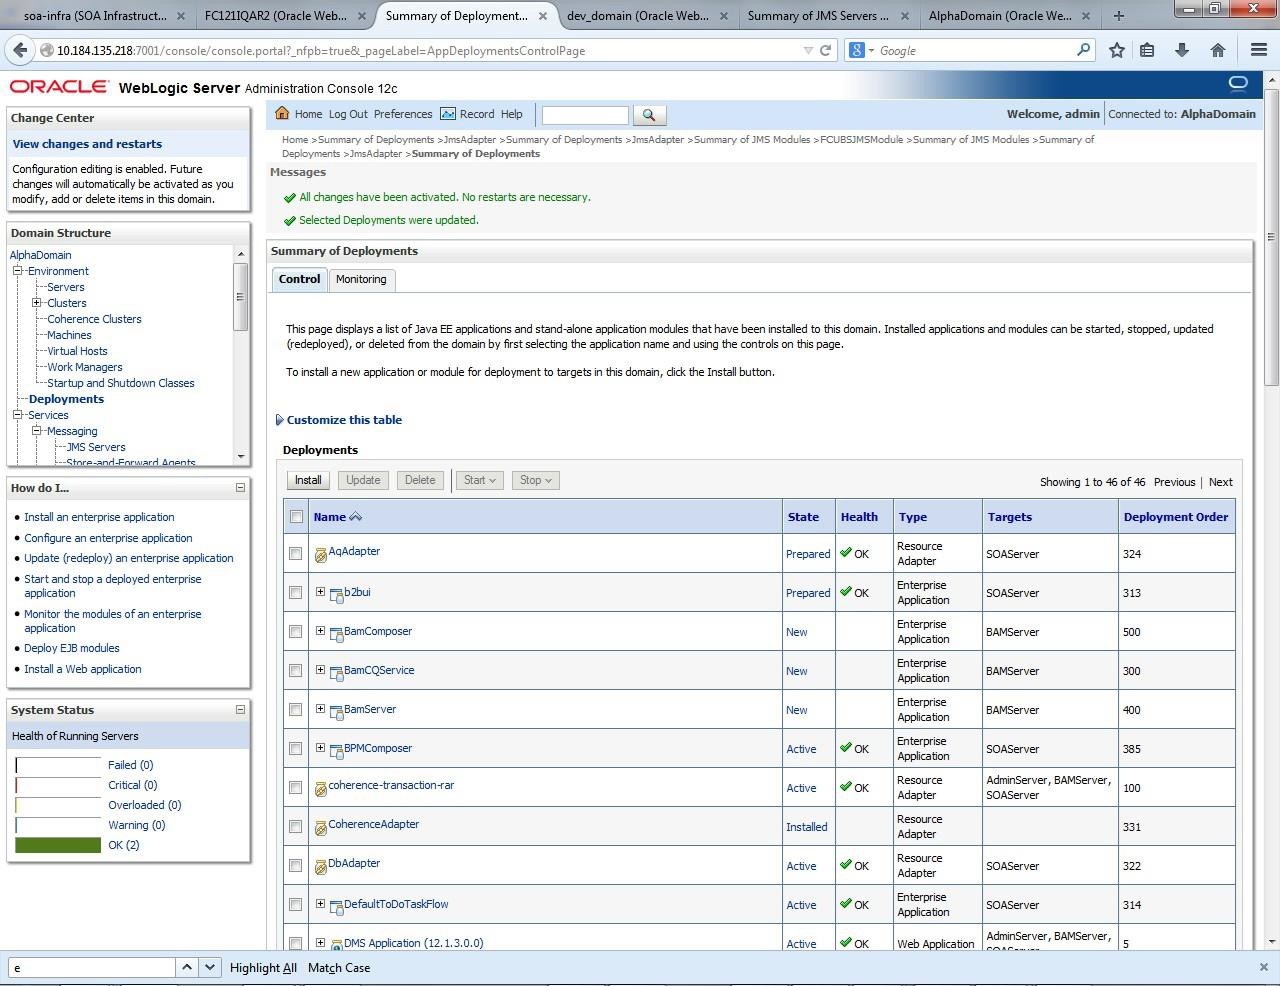
- Click Next and then click Finish.The two messages displays on the Summary of Deployments screen.
Figure 1-53 Summary of Deployments - Messages
- Create the Outbound Connection Pool with the eis/wls/Queue name in the Deployments using Connection Factory jndi/FCUBSConnectionfactory.
Parent topic: Integrate Oracle FLEXCUBE UBS and BPEL
