6.2 Create Data Source for XA
This topic provides systematic instructions to create data source for XA.
- Navigate to FCUBSDomain left panel.
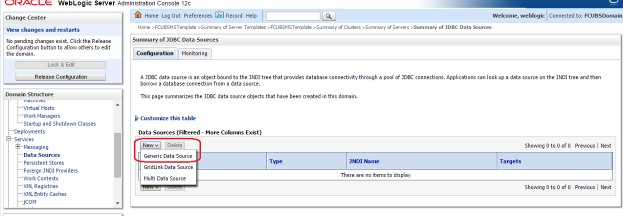
- Click the Services drop-down option and then click the Data Sources.The Summary of JDBC Data Sources screen displays.
- Click the New drop down button and select Generic Data Source option.The Create a New JDBC Data Source- JDBC Data Source Properties screen displays.
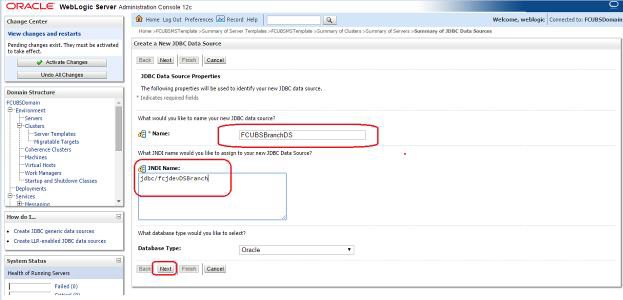
Figure 6-9 Create a New JDBC Data Source- JDBC Data Source Properties
- Specify the Name and JNDI Name fields and click the Next button.The Create a New JDBC Data Source- JDBC Data Source Properties screen displays.
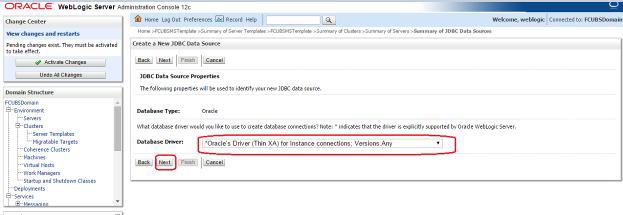
Figure 6-10 Create a New JDBC Data Source- JDBC Data Source Properties
- Select the Database Driver as Oracle’s Driver (Thin XA) for Instance connections: Versions: Any and click the Next button.The Create a New JDBC Data Source- Transaction Options screen displays.
Figure 6-11 Create a New JDBC Data Source- Transaction Options
- Click the Next button.The Create a New JDBC Data Source- Connection Properties screen displays.
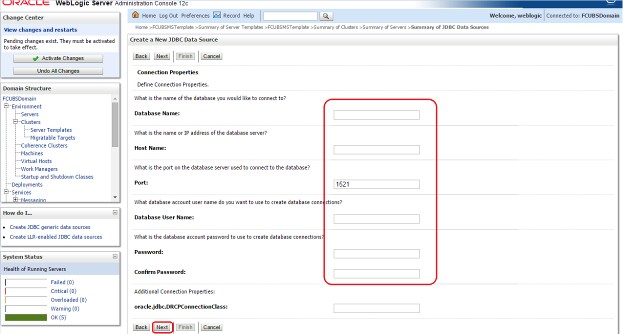
Figure 6-12 Create a New JDBC Data Source- Connection Properties
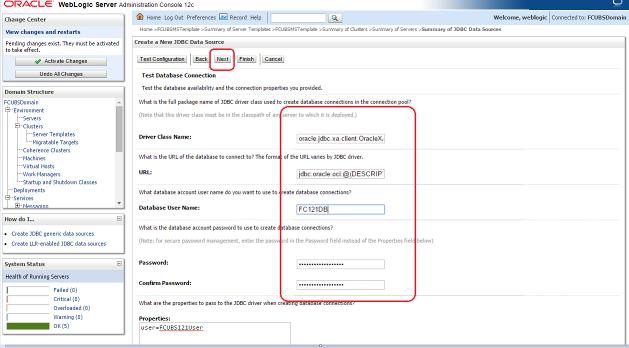
- Specify the Database Name, Host Name, Port, Database User Name, Password, and Confirm Password fields and then click the Next button.The Create a New JDBC Data Source- Test Database Connection screen displays.
Figure 6-13 Create a New JDBC Data Source- Test Database Connection
- Replace the JDBC URL field in the below format and click the Next button.Default URL: jdbc:oracle:thin:@<IP_Adress>:<Port>:<INSTANCE_NAME>.Change the default URL to: jdbc:oracle:thin:@(DESCRIPTION=(ADDRESS_LIST=(ADDRESS=(PROTOCOL=TCP)(HOST=xxxxxx.com)(PORT=1521)))(CONNECT_DATA=(SERVICE_NAME=fcubs))Where,
- Scan IP = xxxxxx.com
- Service Name = fcubs
- Port = 1521
The user should make the necessary changes to the URL. - Click the Test Configuration.The connection test should be successful.The Create a New JDBC Data Source- Targets screen displays.
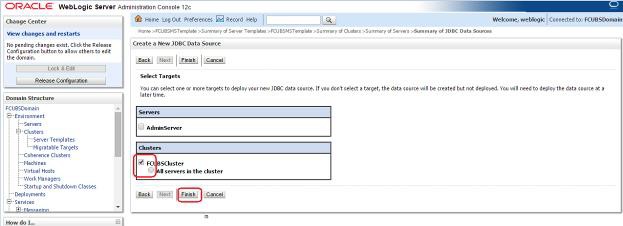
Figure 6-14 Create a New JDBC Data Source- Targets
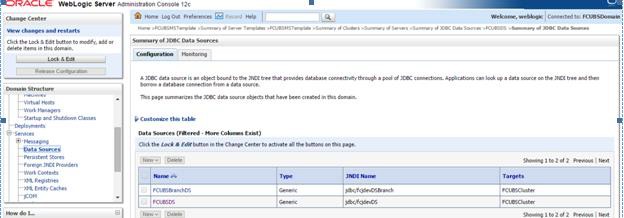
- Select Target as FCUBSCluster and click the Finish button.The newly created XA Data source is displayed in the Summary of JDBC Data Sources screen.
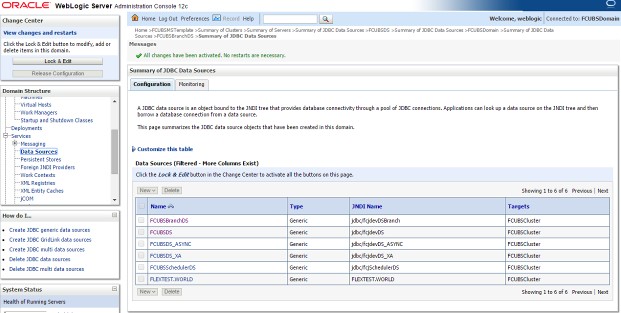
- Navigate to the Change Center left panel and click the Activate Changes.A message displays on Summary of JDBC Data Sources screen stating that All changes have been activated. No restarts are necessary.
Figure 6-16 Summary of JDBC Data Sources - Activate Changes
- Similarly, create all the other Data Sources required for the FCUBS Application and Gateway Deployments.
Parent topic: Data Source Creation and JDBC Configuration
