1.1 Create Property File

This topic explains systematic instructions to create the property file using Oracle Universal Banking Installer.

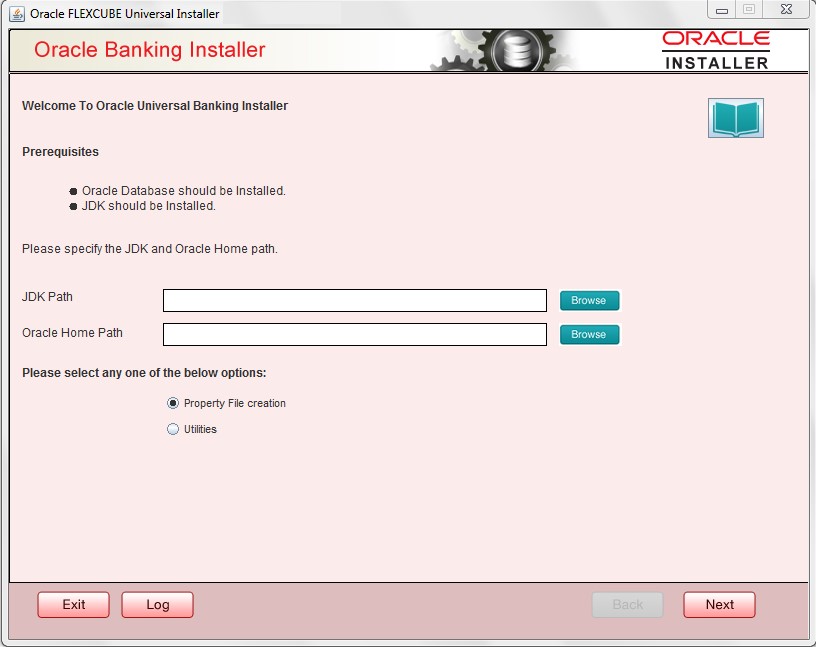
  1. Launch Oracle Universal Banking Installer.
    The Welcome To Oracle Universal Banking Installer screen displays.

    Figure 1-1 Welcome To Oracle Universal Banking Installer


  2. Specify JDK path and Oracle Home path, select the Property File Creation option and click Next.
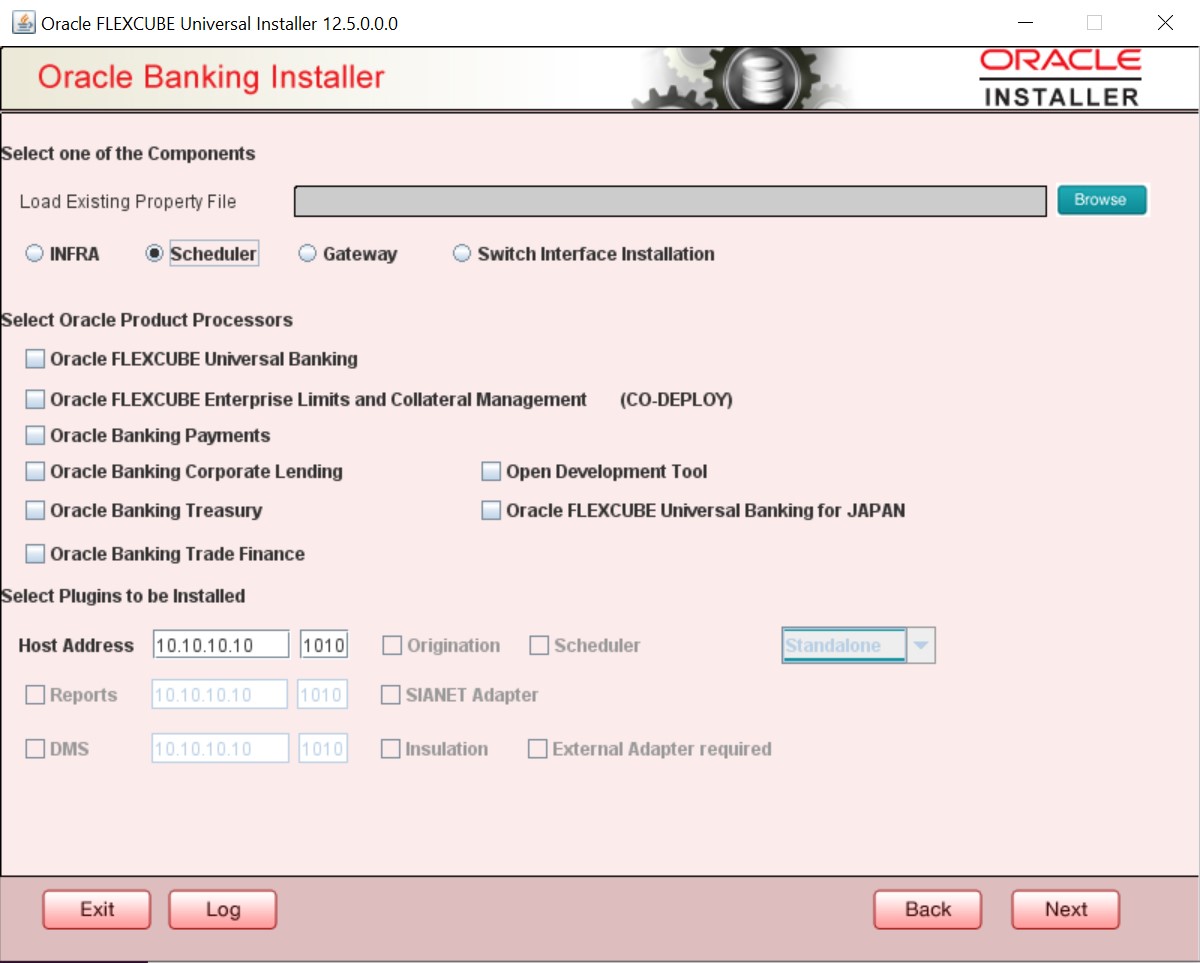
    The Select One of the Components screen displays.

    Figure 1-2 Select One of the Components


  3. Select the Scheduler component, and appropriate plugin if required, and then click Next.
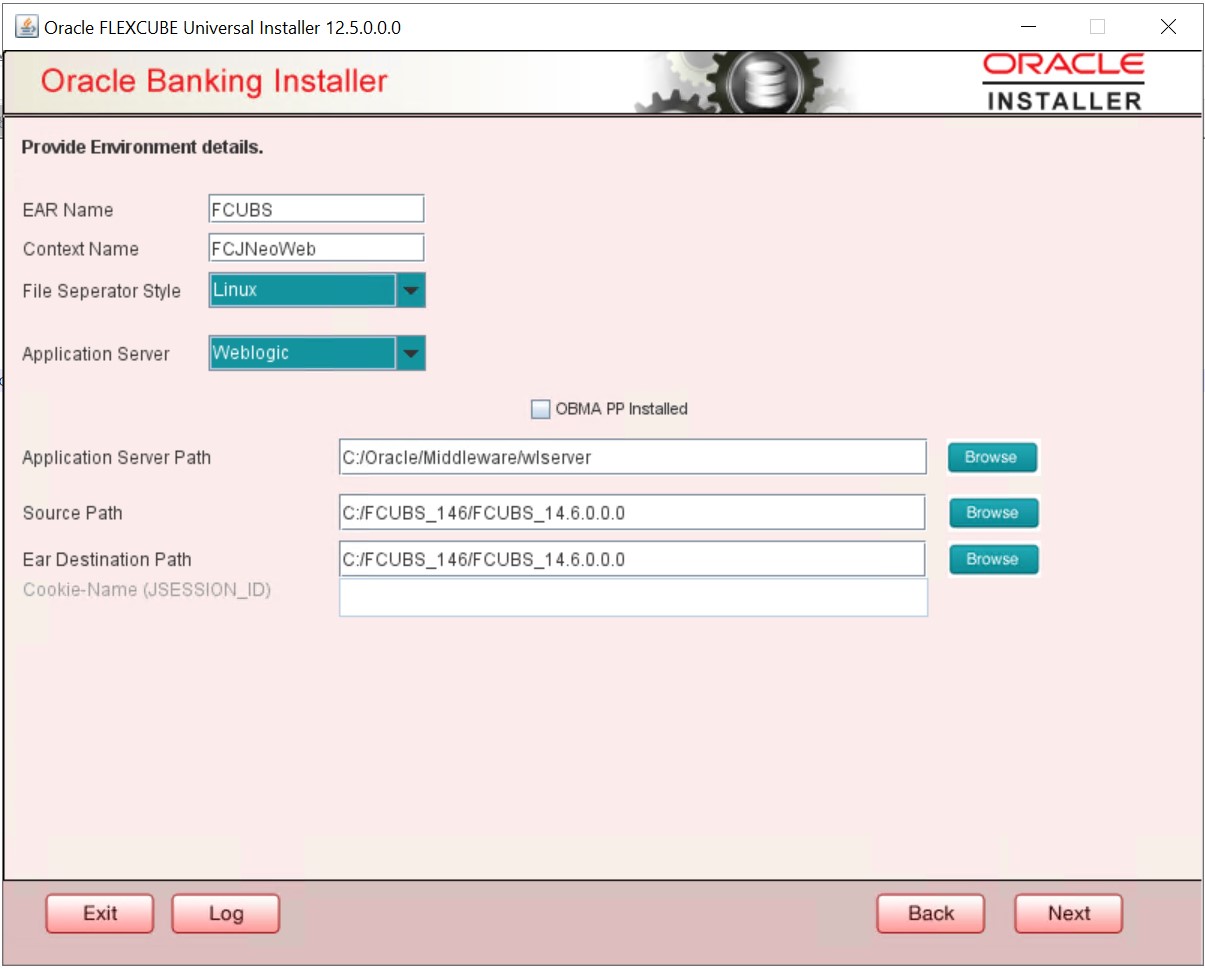
    The Provide Environment Details screen displays.

    Figure 1-3 Provide Environment Details


    For more information on fields, refer to the field description table.

    Table 1-1 Environment details - Field Description

    Field Description
    EAR Name Specify the EAR Name.
    Context Name Specify Context Name.
    File Separator Style Select File Separator Style from the drop-down list.
    The options are:
    • Windows
    • Linux
    Application Server Select Application Server from the drop-down list.

    Example: Weblogic

    Application Server Path Browse the folder for Application Server.
    Source Path Browse the folder for Source Path.
    EAR Destination path Browse the folder for EAR Destination path.
  4. Click Next.
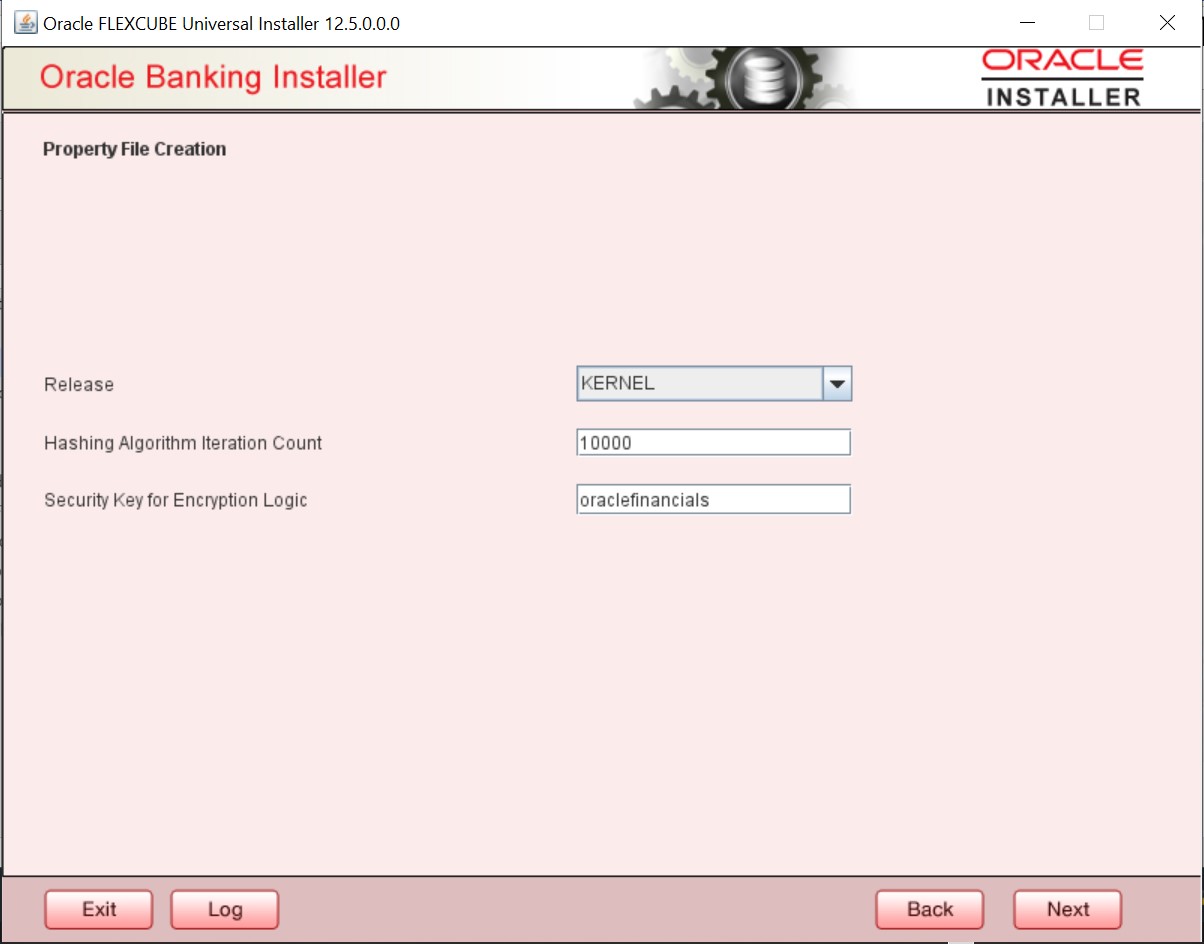
    The Property File Creation screen displays.

    Figure 1-4 Property File Creation


    For more information on fields, refer to the field description table below:

    Table 1-2 Property File Creation - Field Description

    Field Description
    Release Select the release from the drop-down list.
    Hashing Algorithm Iteration Count This should be specified which will be used for encryption.
    Security Key for Encryption Logic This should be specified which will be used for encryption.
  5. Click Next.
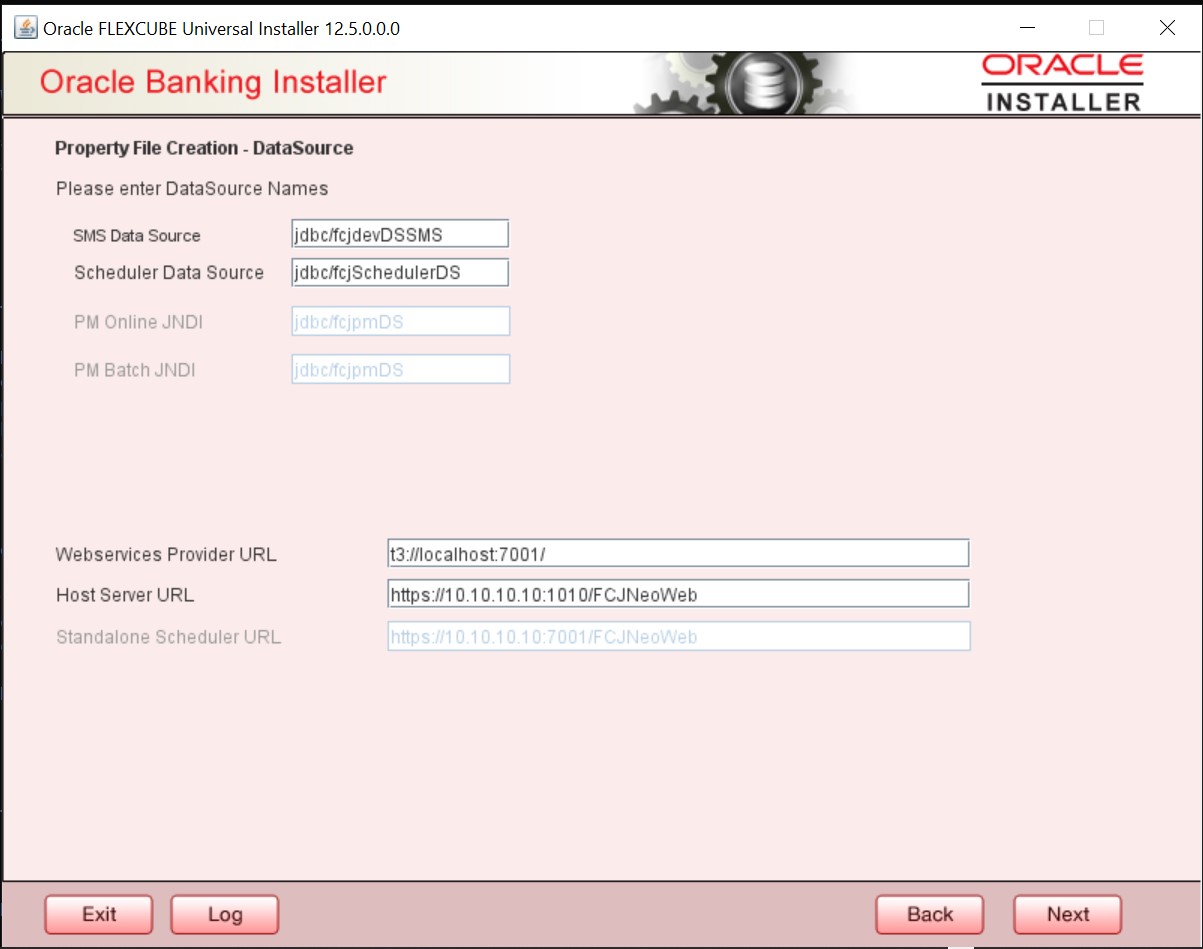
    The Property File Creation - DataSource screen displays.

    Figure 1-5 Property File Creation - DataSource


  6. Specify JNDI value for the Data sources enabled and click Next.
    This topic contains the following sub-topics: