1 Installer Prerequisite Setup
This topic explains the systematic instructions on how the Installer is designed.
- During the setup of the environment, two installer modes are to be used:
- GUI Installer
- Silent Installer
- The GUI Installer is located under
\INSTALLER\SOFT\GUI.The GUI installer is required for the below activities- Property File Creation
- Basic Setup
- Environment Property File Configuration
- The Silent installer is located under
\INSTALLER\SOFT. The Silent installer is required for below activities,- Database Setup
- EAR Build
- Source Structure
This topic explains the different ways of installation and the source structure. - Environment Setup Steps
This topic explains the systematic instructions to setup the environment. - Environment Property File Configuration
This topic explains the Environment Property File Configuration.
1.1 Source Structure
This topic explains the different ways of installation and the source structure.
The installation can be done in different ways, and Source Structure should be maintained as below:
Table 1-1 Source Structure
| Source Structure | Description |
|---|---|
| ROFC without OBCL | The ROFC_OSDC.zip can be used without any modifications. |
| ROFC with OBCL | The OBCL folder from OBCL_OSDC.zip should be copied parallel to the INFRA folder of ROFC_OSDC.zip. In addition, copy the following class folders from \INFRA of OBCL_ OSDC.zip file to ROFC_OSDC extracted sources \INFRA folder.
In addition, copy the following class folders from
\ADAPTERS\FCExternal of OBCL OSDC.zip file to ROFC_OSDC extracted sources \ADAPTERS\FCExternal folder.
|
| ROFC with ELCM | The ELCM and POJO folders from ELCM_OSDC.zipshould be copied parallel to the INFRA folder of ROFC_OSDC.zip. In addition, copy the following class folders from \INFRA of ELCM OSDC.zip file to ROFC_OSDC extracted sources \INFRA folder.
|
| ROFC without ELCM | The ROFC_OSDC.zip can be used without any modifications. |
| OBCL without ELCM | The OBCL_OSDC.zip can be used without any modifications. |
| OBCL with ELCM | The ELCM and POJO folders from ELCM_OSDC.zipshould be copied parallel to the INFRA folder of OBCL_OSDC.zip. In addition, copy the following class folders from \INFRA of ELCM OSDC.zip file to ROFC_OSDC extracted sources \INFRA folder.
|
| ELCM | The ELCM_OSDC.zip can be used without any modifications. |
| PM | The PM_OSDC.zip can be used without any modifications. |
| CO-DEPLOY | The OBCL folder from OBCL_OSDC.zip and PM folder from PM_OSDC.zip should be copied parallel to the INFRA folder of ROFC_OSDC.zip. |
Parent topic: Installer Prerequisite Setup
1.2 Environment Setup Steps
This topic explains the systematic instructions to setup the environment.
To setup the environment, refer to the below Environment setup table.
Table 1-2 Environment Setup
| Environment Setup | Description |
|---|---|
| Property File Creation | Two property files are generated:
For more information, refer to Property File Creation Guide |
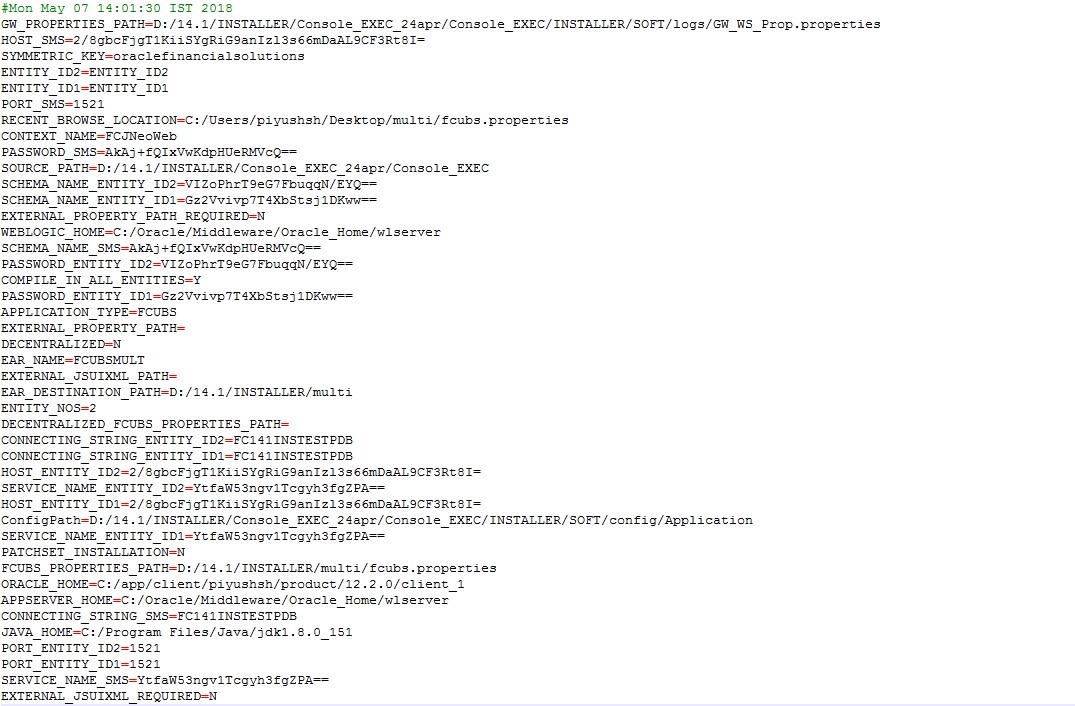
| Populating environment property file | The Database properties are to be populated from the "env.properties" generated during property file creation. The rest of the properties are to be manually updated. |
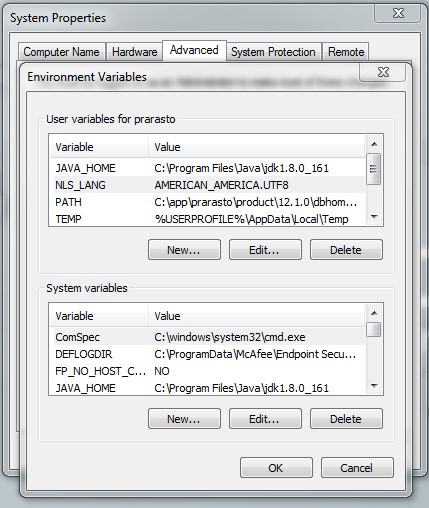
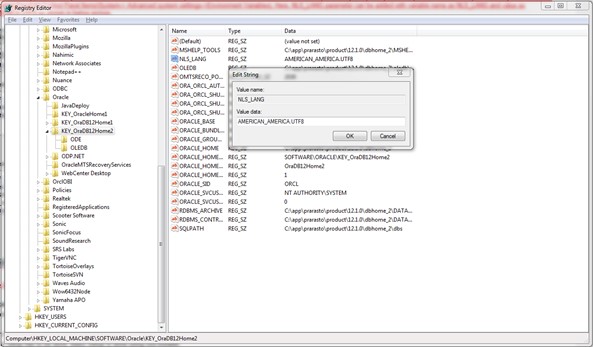
| NLS LANG settings | Before moving to the DB setup, the NLS_LANG parameter has to be added to the local system environment variables. |
| For Windows |
|
| For Linux | This can be done by opening a command bash shell and by setting environment variables in the command prompt export NLS_LANG= AMERICAN_AMERICA.UTF8.
By running the above command in the installer, the location will set the environment variable in the linux shell/terminal. |
| Database Setup | The Database setup involves DDL Load, Object Compilation and Static Data
Compilation.
For more information, refer to DB Setup Guide |
| Basic Setup | Post INC Load, basic setup has to be done. The Basic setup is done using the GUI
Installer.
For more information, refer to DB Setup Guide |
| Application EAR build | The FCUBS Application and Gateway EAR build is done using the Silent Installer.
For more information, refer to EAR Building Guide |
Parent topic: Installer Prerequisite Setup
1.3 Environment Property File Configuration
This topic explains the Environment Property File Configuration.
Note:
A single property file will be used for both DB Compilation and EAR build. Hence all the properties will be located in a single property file. Some properties may not be applicable during a certain setup, and those should not be modified (should be left with default values).Refer the table, to view the properties available in the Environment Property File.
Table 1-3 Environment Property File
| Properties | Description |
|---|---|
| Config Path | Absolute path to the folder containing the config files are to be provided. This is located under \INSTALLER\SOFT\config\Application |
| Java_Home | Provide the home folder path of JDK 1.8. |
| Oracle_Home | Provide the home folder path of Oracle Client or Database. |
| Varedited | This property should not be changed. This is an internal property required by the installer to identify if any changes are required in env.properties. |
| Source and Destination Path | Specify the destination directory. Here the destination path should be the same as the source file path. |
| FCUBS_PROPERTIES_PATH | Path where the fcubs property file is located . |
| GW_PROPERTIES_PATH | Provide the Gateways Properties Path. |
| APPLICATION_TYPE | Application Type is maintained as per the Application Name selected in the GUI Installer. |
| EXTERNAL PROPERTY PATH | If this is selected during installation, the corresponding path will be displayed here, and the value of the parameter EXTERNAL PROPERTY FILE REQUIRED will be ‘Y.’ |
| EXTERNAL JSUIXML PATH | If this is selected during installation, the corresponding path will be displayed here, and the value of the parameter EXTERNAL JSUIXML REQUIRED will be ‘Y’. |
| EAR_NAME | Specify a name for the Application to be created. |
| EAR DESTINATION PATH | This is the local path where the built EAR will be saved. This gets updated automatically as per the path provided during the installation process. |
| CONTEXT_NAME | Specify a name for the Application Context. |
| FCHome | Provide the FCHome Path. This will be the source path for DB setup/EAR build. |
| USER_NAME | Give the Schema Name. |
| PASSWORD | Here Password should be encrypted. As Schema details provided by the GUI Installer, the env.properties file generates with the encrypted Password. |
| Schema | Give the Instance Name.
Note: The path is maintained with ‘\\’ as it is maintained only for WINDOWS. ‘\’ slash will consider as an escape character, so ‘\\’ slash is given in windows. |
On the launch of GUI Installer for creating the property file, the env properties file gets generated, which is present in \INSTALLER\SOFT\GUI\logs path will be copied to \INSTALLER\SOFT\logs path. This method is followed for EAR creation, and Back-end build as it is done by the Silent Installer.
If OBCL needs to install as Co-deployed along with ROFC, then the OBCL folder from OBCL_OSDC.zip should be placed parallel to the ROFC folder in the ROFC_OSDC.zip.
If ELCM needs to install as Co-deployed along with ROFC, then the ELCM folder from ELCM_OSDC.zip should be placed parallel to the ROFC folder in the ROFC_OSDC.zip. INFRA inside ELCM should be moved and merged with CORE INFRA.
If PAYMENTS needs to install as Co-deployed along with ROFC, then the PAYMENTS folder from the PAYMENTS OSDC zip should be placed parallel to the ROFC folder in the ROFC_OSDC.zip.
INFRA inside PAYMENTS should be moved and merged with CORE INFRA.
Parent topic: Installer Prerequisite Setup


