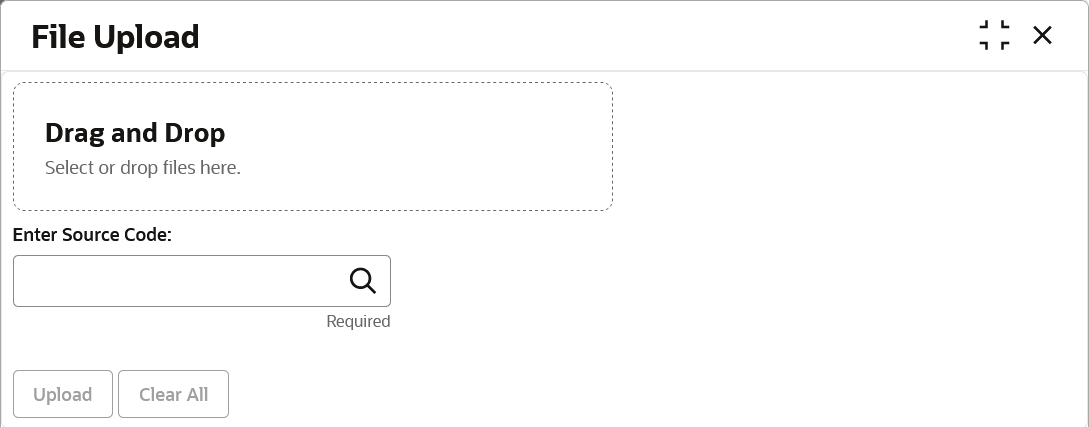
3.1 Upload Files

This topic describes the systematic instruction to upload a file for auto-processing the cashflow code/transaction data into system.

The Upload Files screen enables the user to upload files for auto-processing the cashflow code/transaction data into system. The uploaded files are not processed until it is approved. The file can contain data records of cashflow codes and cashflow transactions etc. The file format accepted by the system includes “.csv” files.

Note:

All transactions which are marked as Deleted ('D') will be purged at a pre defined frequency thus reducing volume in Cashflow transaction table. These transactions are available in Deleted status for over a month.

Table 3-1 Supported Files and Fields

File Fields
Cashflow Code file
  • CASHFLOW_TYPE
  • SOURCE_APPLICATION
  • CODE
  • CHANNEL
  • DESCRIPTION
  • CORPORATE_ID
  • PARENT_ID
Cashflow Transaction file
  • EXTERNAL_REFERENCE_NO
  • CASHFLOW_INDICATOR
  • CORPORATE_ID
  • CODE
  • DESCRIPTION
  • BANK_ACCOUNT_NUMBER
  • VIRTUAL_ACCOUNT_NUMBER
  • AMOUNT
  • ACTUAL_AMOUNT
  • CCY
  • EXPECTED_DATE
  • REVISED_EXPECTED_DATE
  • ACTUAL_DATE
  • CHANNEL
  • APPLICATION_NAME
  • PARTY_NAME
  • PARTY_ID
  • STATUS
  • NARRATION
  • T_UDF_TXT_1
  • T_UDF_TXT_2
  • T_UDF_TXT_3
  • T_UDF_TXT_4
  • T_UDF_TXT_5
  • T_UDF_TXT_6
  • T_UDF_TXT_7
  • T_UDF_TXT_8
  • T_UDF_TXT_9
  • T_UDF_TXT_10
  • CUSTOMER_REF_NO
  • EXCLUDE_RECON
  • CORPORATE_REF_NO
  • SOURCE
  • DUMMY_BIC_CODE
  • DUMMY_ACC_NO.
  1. On Home screen, click File Management. Under File Management, click File Upload.
    The File Upload screen displays.
  2. Specify the fields on File Upload screen.

    Note:

    The fields marked as Required are mandatory.
    For more information on fields, refer to the field description table.

    Table 3-2 File Upload - Field Description

    Field Description
    Drag and Drop Click to browse and select the file to be uploaded or drag and drop the file to be uploaded.
    Enter Source Code Specify the source code or click the Search icon to select a specific source code of the application to upload the file.
  3. Drag and drop the file to be uploaded in the highlighted box. or, Click inside the highlighted box to select the file to be uploaded.
  4. In the Enter Source Code field, specify the source code of the application to associate the file records to.
  5. Click Upload to upload the records from the file. Once the file is uploaded, it cannot be deleted.
    A message appears stating that the file has been uploaded successfully.