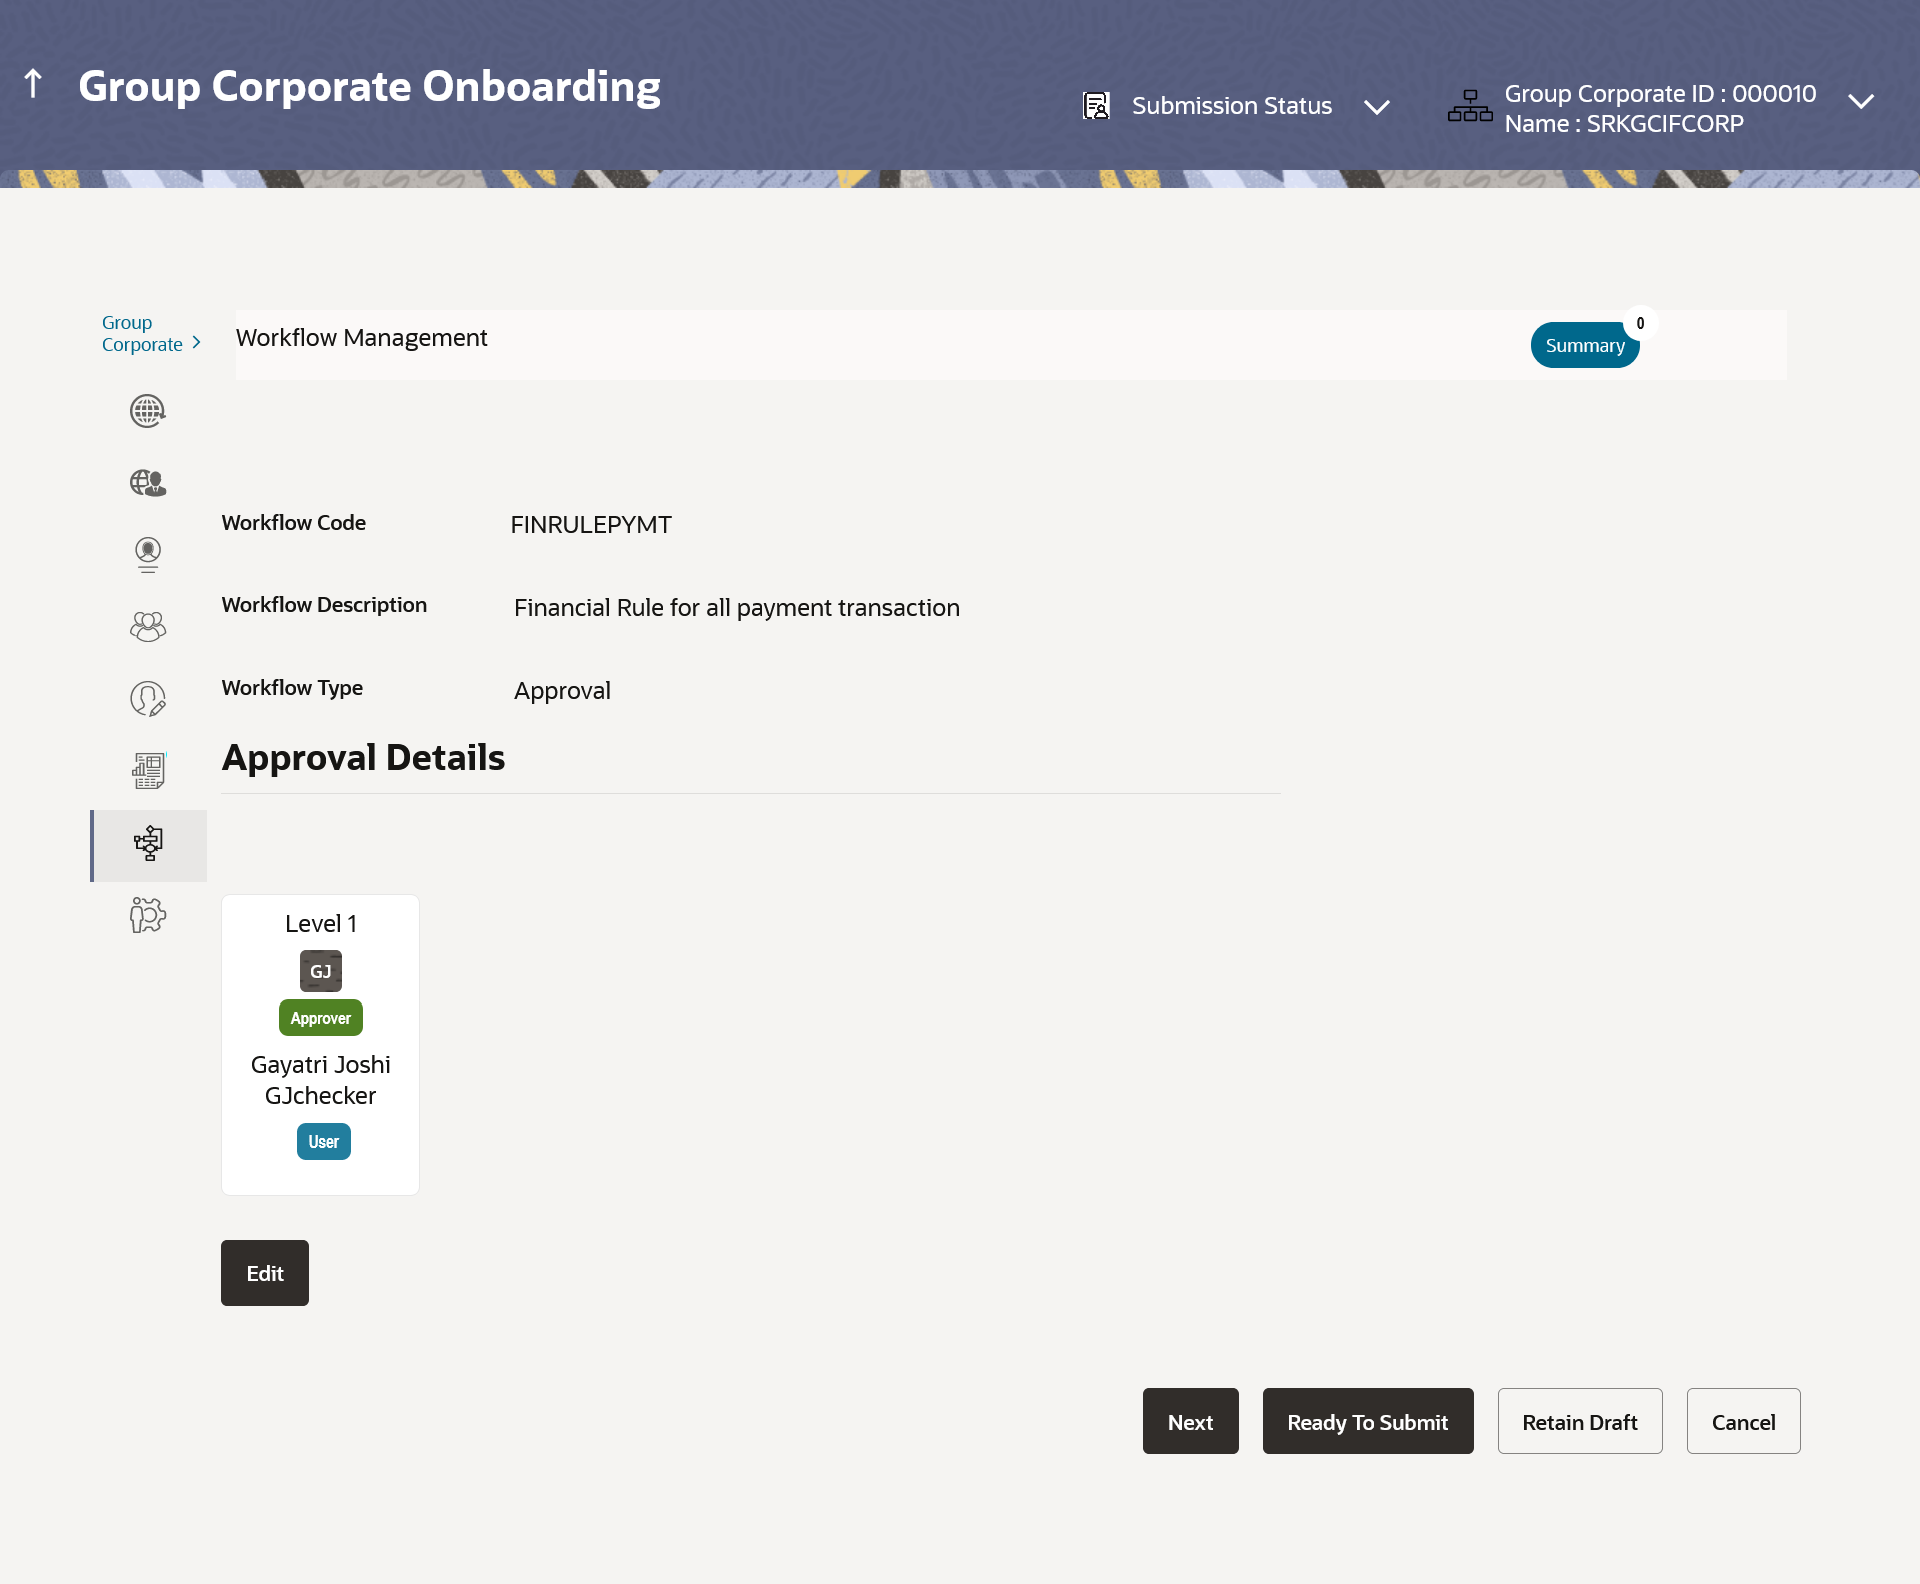
15.8.2 Workflow Management – View

This topic describes the systematic instruction to Workflow Management – View. User can view the details pf the workflow with this screen.

Further drill down is provided on each workflow to view the details of the users/ user groups who are a part of the workflow.

To view the approval workflow for corporate users:

  1. Navigate to one of the above paths.
    The Workflow Management screen appears.
  2. In the Workflow Management screen, enter the search parameters and click Search.
    The Workflow Management screen with search results appears based on the searched criteria.
  3. Click the Workflow Code link to view details of the selected Approval Workflow.
    The Workflow Management - View screen appears.

    Figure 15-71 Workflow Management – View


    Note:

    The fields which are marked as Required are mandatory.

    For more information on fields, refer to the field description table.

    Table 15-40 Workflow Management – View - Field Description

    Field Name Description
    View Information specified in below fields are related to view field.
    Workflow Code Workflow code is displayed.
    Workflow Description Workflow description is displayed.
    Workflow Type The type of workflow i.e. whether it is for approval or release.
    Approval Details Information specified in below fields are related to approval details.
    Approval Level User / user group maintained at each approval level.
    User / User Group User or a user group maintained at each level of approval.

    On Approval -Workflow screen, Admin User can click on the Name of the user group that is part of the workflow to see the list of users which are part of that Group.

    User can search specific user name, by using the search window on Group Details overlay.

    Release Details Information specified in below fields are related to release details.
    User / User Group Displays the user or a user group maintained to release the transaction.
  4. Click Edit to edit the workflow.
    The Workflow Management - Edit screen with values in editable form appears.
    • Click Cancel to cancel the transaction.
    • Click Back to navigate to the previous screen.
    • Click Next to proceed to the next logical step.
    • Click Submit to submit the steps performed so far for approval.
    • Click Retain Draft to save the details entered as draft.
    • Click Cancel to cancel the transaction.