- Core User Manual
- Merchant Management
- Merchant Management – Collect Funds
- Merchant Management – Collect Funds – Create Merchant
5.3.2 Merchant Management – Collect Funds – Create Merchant
To create a merchant:
- Navigate to one of the above paths.The Merchant Management screen appears.
- Click Create.The Merchant Management – Create screen appears.
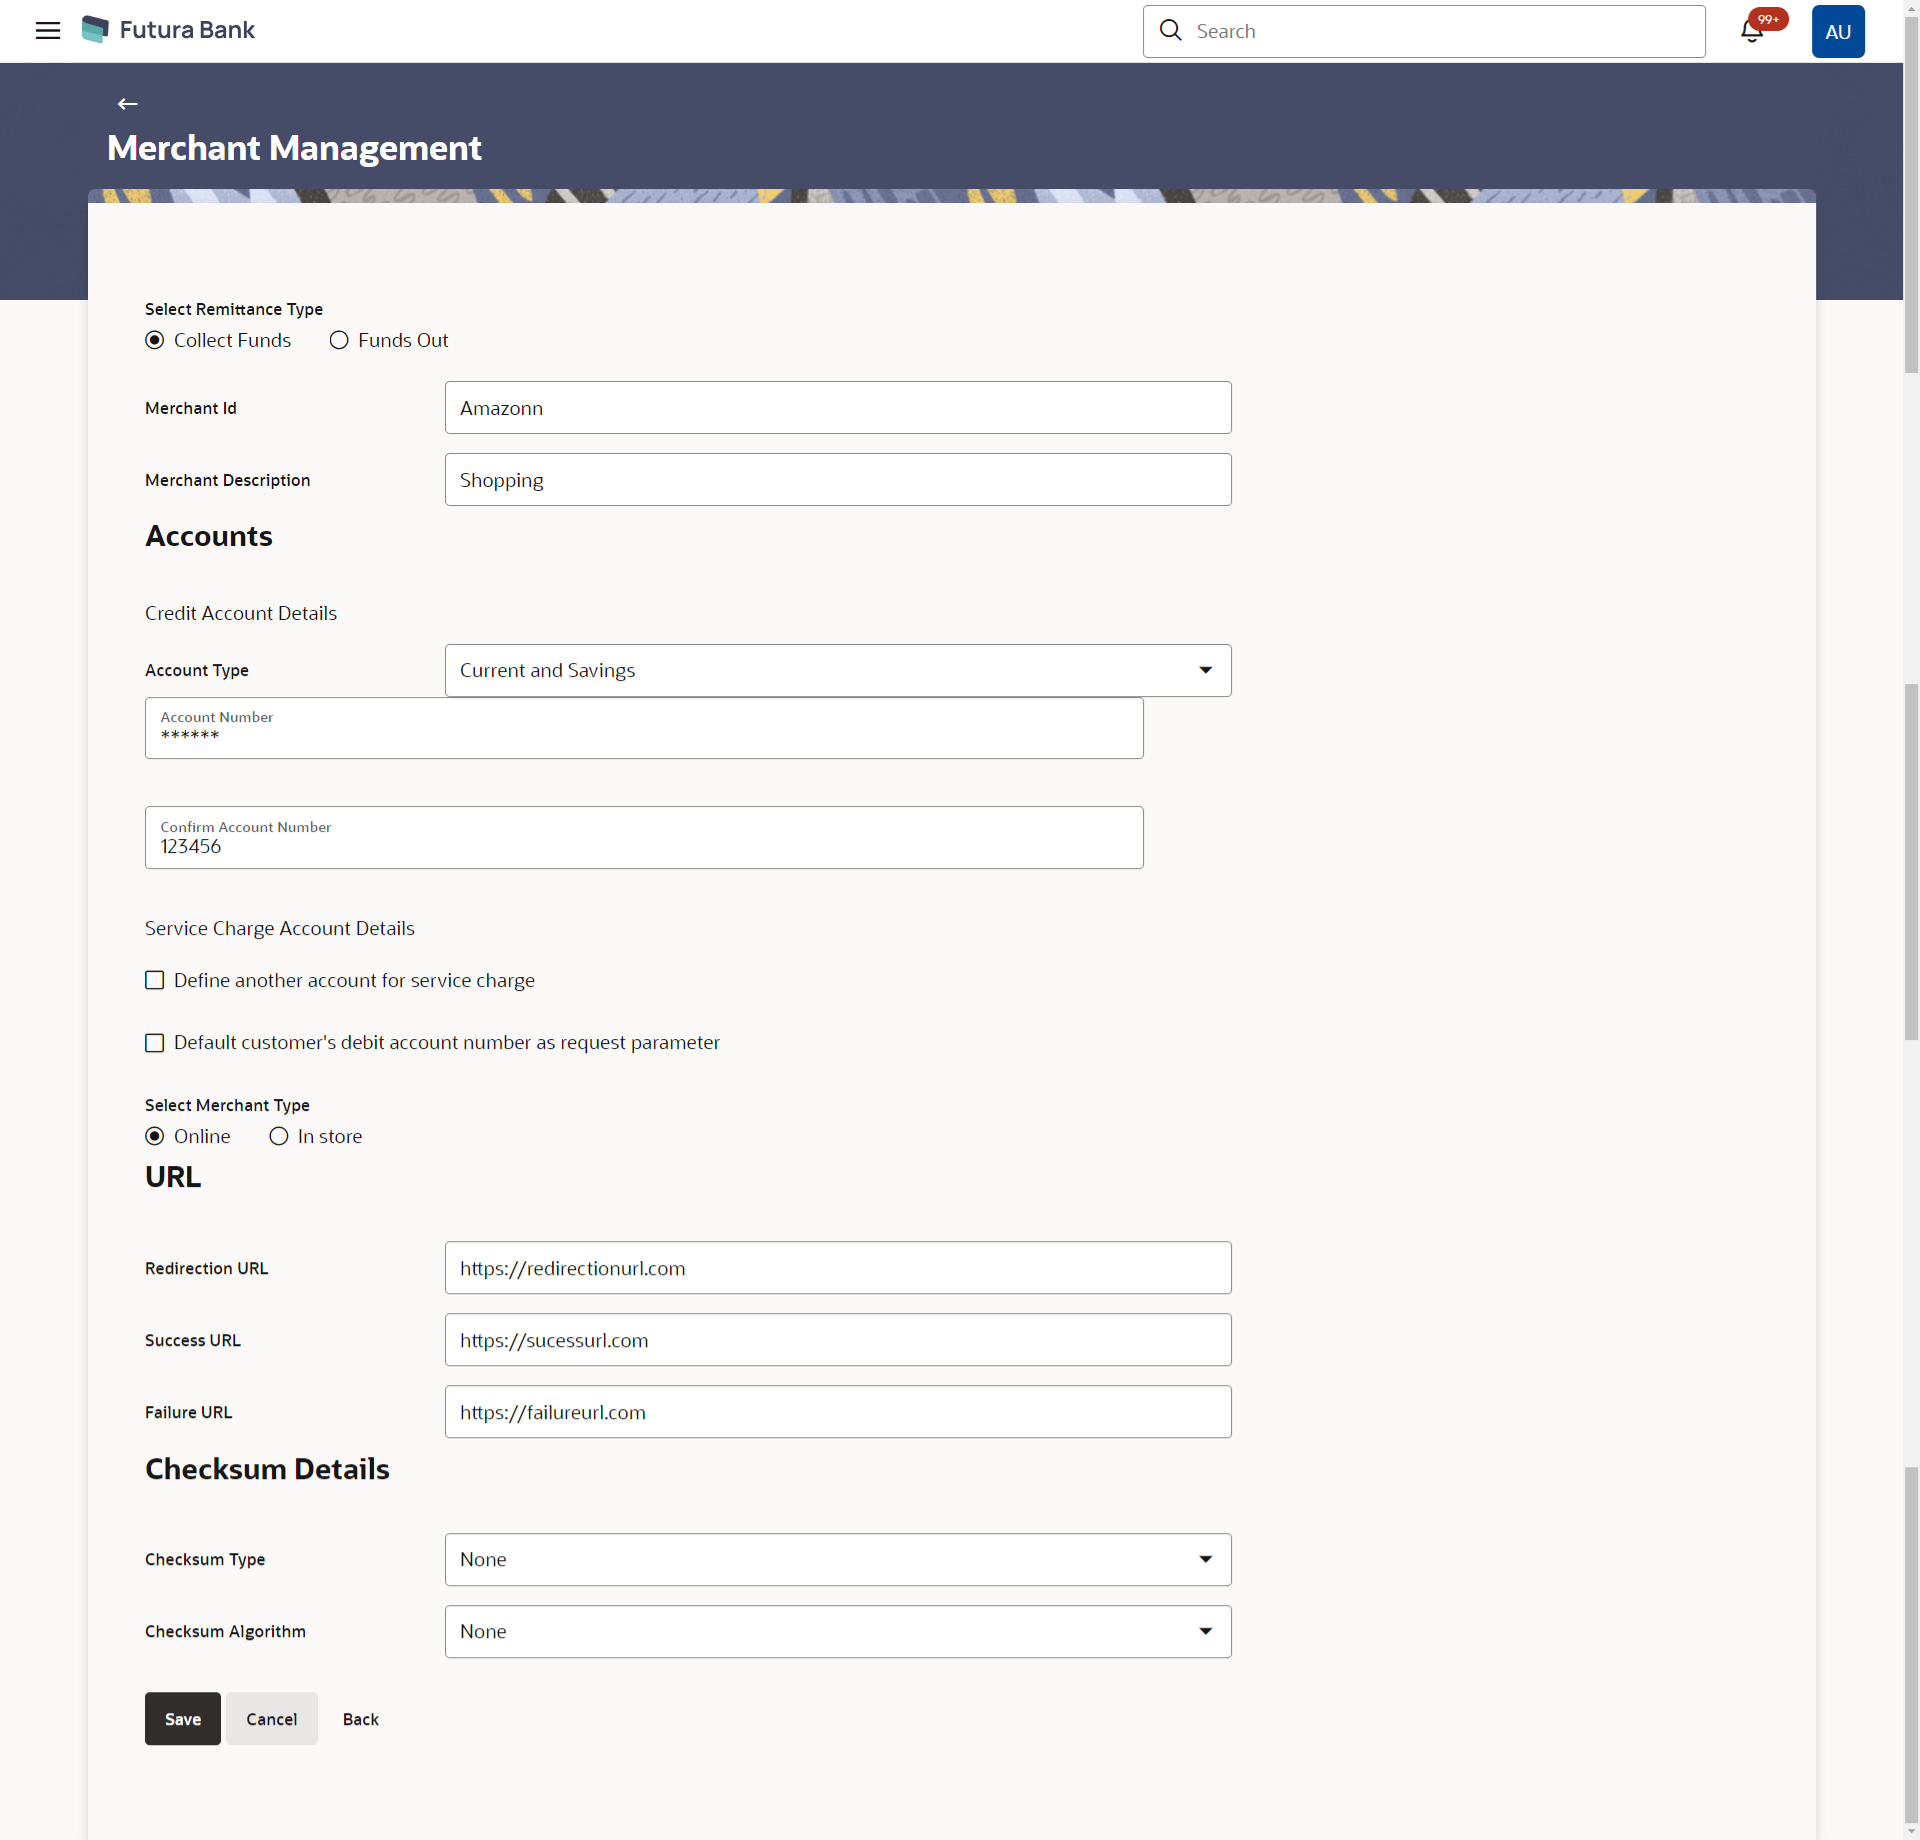
Figure 5-10 Merchant Management – Collect Funds – Create Merchant
Table 5-7 Field Description
Field Name Description Select Remittance Type The type or remittance to be mapped to the merchant. The remittance type can be:- Funds Out
- Collect Funds
Merchant Id Specify a unique ID by which the merchant will be identified. Merchant Description Enter a description of the merchant. Accounts Credit Account Details Account Type Specify the type of account associated with the merchant, Only CASA type of accounts are supported. Account Number Specify the merchant’s credit account number. Confirm Account Number Re-enter the merchant’s account number to confirm the same if the account number has been changed. Service Charge Account Details Define another account for service charge This checkbox is selected if the merchant has another account defined for service charge. Account Type The service charge account type associated with the merchant e.g. CASA account. This field appears if Define Account number for service charge check box is selected.
Account Number The merchant’s account number. This field appears if Define Account number for service charge check box is selected.
Confirm Account Number Re-enter the merchant’s account number to confirm the same if the account number has been changed. Default customer’s debit account number as request parameter This check box is selected if the customer’s debit account number is defaulted as request parameter. Select Merchant Type Specify the merchant type. The options are:
- Online
- In store
Generated QR code can be downloaded from view merchant, if the Merchant Type is selected as In Store. URL This section is displayed only for the Online type of merchant.
Redirection URL Specify the URL for sending the response of the transaction for redirection. Success URL Specify the URL for sending the response of the transaction if it is a successful transaction. Failure URL Specify the URL for sending the response of the transaction if it is a failed transaction. Checksum Details This section is displayed only for the Online type of merchant.
Checksum Type Specify the checksum type. Checksum Algorithm Specify the checksum algorithm. Security Key Enter the security key. This field appears if a value is selected in Checksum Algorithm drop-down list.
- In the Merchant Id field, enter the ID of the merchant.
- In the Merchant Description field, enter the description of the merchant.
- Under the section Credit Account Details from the Account Type list, select the appropriate account type.
- In the Account Number field, enter the account number of the merchant corresponding to the account type selected.
- In the Confirm Account Number field, re-enter the merchant’s account number.
- Under the Response Redirections section,
- In the Success URL field, enter the valid URL.
- In the Failure URL field, enter the valid URL.
- Under the Checksum Details section,
- From the Checksum Type drop-down list, select the checksum type.
- From the Checksum Algorithm drop-down list,
select the checksum algorithm.
- In the Security Key field, enter the security key
- Under the Service Charge Details section,
- Select the checkbox next to Define another account for service
charge if the merchant has a different account specified for
service charges.
- From the Account Type list, select the appropriate account type.
- In the Account Number field, enter the account number of the merchant corresponding to the account type selected.
- In the Confirm Account Number field, re-enter the merchant’s account number.
- Select the checkbox next to Define another account for service
charge if the merchant has a different account specified for
service charges.
- Select the checkbox against the Default customer's debit account number as request parameter if the customer’s debit account number is defaulted as request parameter.
- If the Merchant Type is selected as
Online in the Select Merchant
Type field, enter the details below in the
URL section.
- In the Redirection URL field, enter the valid URL.
- In the Success URL field, enter the valid URL.
- In the Failure URL field, enter the valid URL.
- If the Merchant Type is selected as
Online in the Select Merchant Type
field, enter the details below in the Checksum
Details section.
- From the Checksum Type drop-down list, select the checksum type.
- From the Checksum Algorithm drop-down list,
select the checksum algorithm.
- In the Security Key field, enter the security key.
- Click Save to save the Merchant details.OR
Click Cancel to cancel the transaction.
OR
Click Back to navigate to the previous screen.
- The Review screen appears.Verify the details and click Confirm to confirm the details.
OR
Click Edit to make changes if any.
The administrator is directed to Merchant Management – Create screen with values in editable form.
OR
Click Cancel to cancel the operation.
- The success message appears along with the status of the transaction.
- Click OK.
Parent topic: Merchant Management – Collect Funds
